
Fig. 21 Peach Flower Grove
Dimensions: 50 by 50 centimeters
The whole work consists of many red curved lines that outline a large grove of peach flowers. The pink flowers are dotted here and there to enhance the visual impact.
CHAPTER II
Preparation
This chapter introduces the preparatory work for creating a paper quilling piece, including the materials, tools, techniques and basic elements. Paper is the carrier of the paper quilling art and the most important material. And the quality, color and width of the paper slips are key to a work’s success. Although paper quilling does not rely on specific tools for creation, we can still use some simple tools to achieve maximum results with little effort. “The 10 techniques of Chinese-style paper quilling,” which are based on our own paper quilling experience, can help readers grasp this art as quickly as possible. The introduction of the basic elements will enable them to learn the making of the basic elements systematically, as well as these elements’ variations.

Fig. 22 Paper scrolls.
1. Materials
With the popularization of the paper quilling art, people can buy paper slips specifically designed for paper quilling from stores more conveniently. Of course, they can also choose the paper they like and cut it into slips. It’s important to choose paper that is flexible, elastic and appropriately thick; otherwise, it may reduce the power of artistic expression of the work.
Different works require paper slips of different widths. Most of the works in this book use paper slips 5 millimeters wide, which are adequate for most Chinese-style paper quilling works. In addition, some works use paper slips 1.5 and 3 millimeters wide to make smaller elements and present details. In larger works, we may choose paper slips 1 centimeter wide or even thicker to match a work’s size and give it momentum.
Chinese-style paper quilling does not have a specific requirement for background paper. People can make their own choice based on their own preferences. Most of the works in this book use white watercolor paper and embossed paper of different colors.
2. Tools
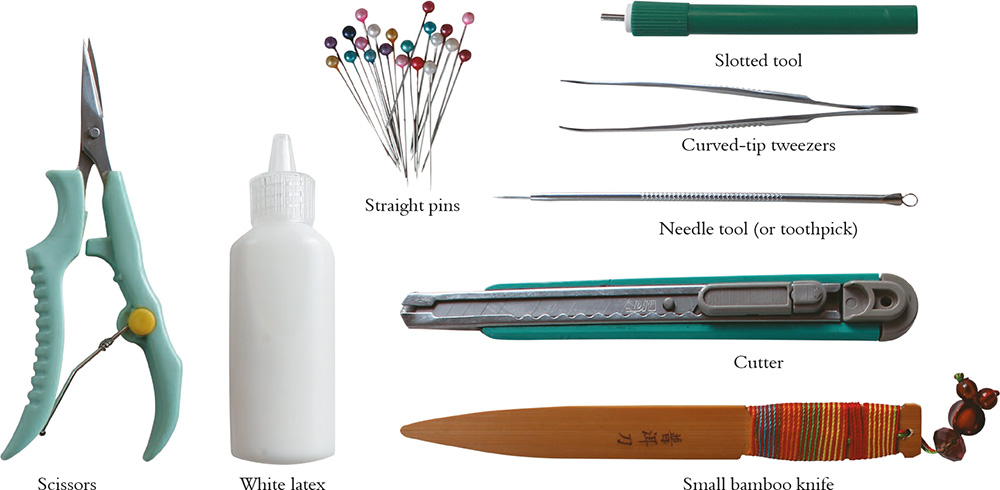
Chinese-style paper quilling requires simple tools. Apart from those we introduce here, learners can also give full play to their imaginations and discover tools in everyday life to help creation.
Slotted tool: This is the most common tool in traditional Western paper quilling, used specifically to roll paper slips. You can simply put the paper slip into the slot on its front end and then roll it. In addition, you can also use the thicker tail end for this purpose.
Small bamboo knife: The knife used frequently in this book is actually a tea knife that was originally used to loosen the Pu’er tea cake. Small, light and safe, it is ideal for stroking and scraping paper slips. You can also find a similar tool at home for this purpose.
Straight pins: These are used to stabilize paper slips and other elements at the initial stage of production. They are not needed at all after you have familiarized yourself with the techniques of Chinese-style paper quilling.
White latex: This is used to paste the paper slips and elements onto the background.
Curved-tip tweezers: These are used to pick up, arrange and fix smaller elements accurately.
Needle tool (or toothpick): This is used to dip white latex and apply it accurately onto the paper slips to make the work cleaner.
Scissors: These are used to trim the redundant part of a paper slip.
Cutter: This is for cutting paper and paper slips.
You can either use the above tools or other tools. After you are familiar with the techniques, you can try to use fewer tools and more of your hands for creation. In addition, in Chinese-style paper quilling, we do not advocate the use of paper templates. They can indeed make the production of elements easier, but at the same time they reduce the possibility of a freer and more flexible work.
White latex

Fig. 23 A Summer Day
Dimensions: 54 by 39 centimeters
Summer is the season when grapes become ripe. The author imitates grapevines with many blue crescents and strings of grapes with purple loose coils. The whole work is elegant and graceful, making viewers feel cool in the scorching summer.
3. Ten Techniques of Chinese-Style Paper Quilling
The 10 techniques are based on our experience of many years. Learners can take them as the starting point and explore unique techniques themselves. An excellent paper quilling work often results from creativity and imagination.
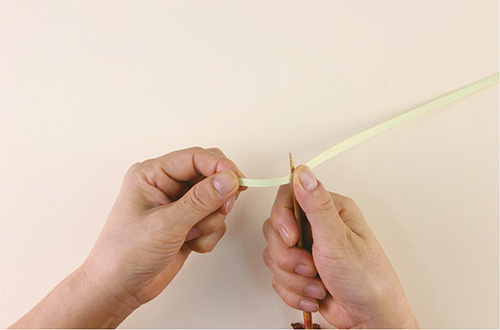
Smoothing: Hold one end of a paper slip with the thumb and forefinger of your left hand, and put a small bamboo knife against the back side of the paper slip with your right hand. Put your right thumb on the front side of the paper slip and stroke the paper slip from head to tail. This can produce gently curved lines on the paper slip and increase its plasticity.
You may also not use the knife, but stroke the paper slip with your forefinger and thumb several times to achieve the same effect.
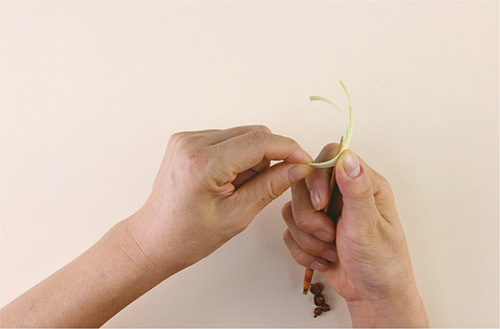
Scraping: This is basically the same as smoothing. If you use a small bamboo knife, then you need to press your thumb on the other side of the paper slip against the knife more closely. If the knife is not used, then you need to stroke with your thumb and forefinger more forcibly. This will produce strong and natural curves on the paper slip.
There are two differences between scraping and smoothing. First, the force applied is different. Second, smoothing is done in the initial stage for preparation, while scraping can be directly used to shape the paper slip.
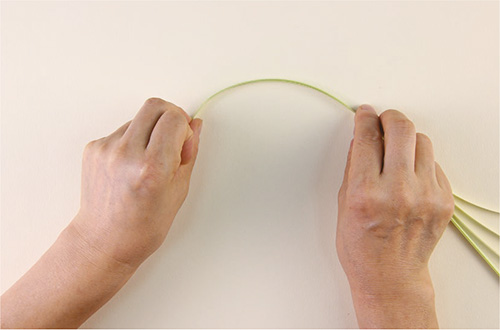
Bending: Bend the paper slip into any curved lines with both of your hands for shaping.
Smoothing
Bending
Scraping
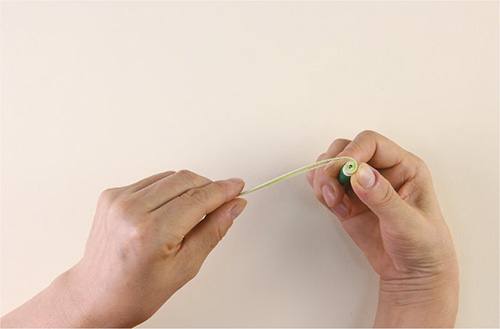
Scrolling
Scrolling: Make the paper slip into a roll with a slotted tool or a cylinder. After familiarizing yourself with the technique, you can simply roll the paper slip with your fingers.
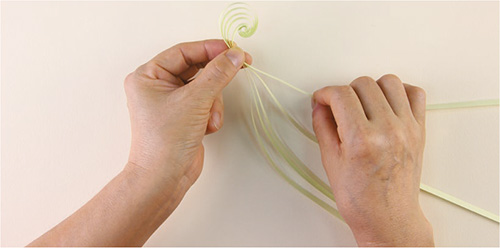
Pulling
Pulling: Paste the beginning ends of several paper slips together, hold the middle sections of the slips loosely with one hand, and pull out different lengths with another hand until they form the shape you want.
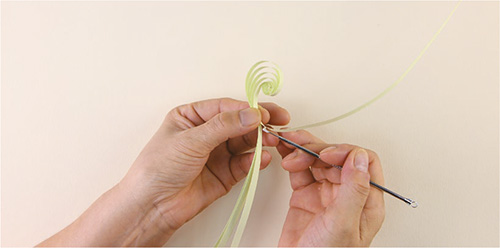
Pasting
Pasting: White latex is needed to paste the treated paper slips together for basic elements and to fix the basic elements onto the background. The amount of white latex used and the technique of pasting determine the beauty of the basic elements, while whether the elements are pasted in the right places determines the overall effect of the work.
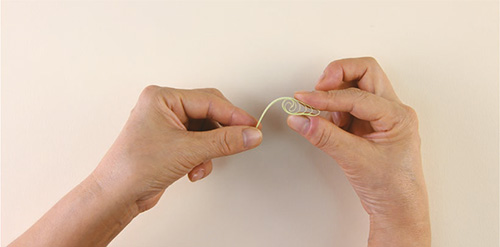
Pinching
Pinching: After the paper slips are made into basic elements, use your thumb and forefinger to pinch them to produce some sharp angles. This can enrich the shapes of the basic elements.
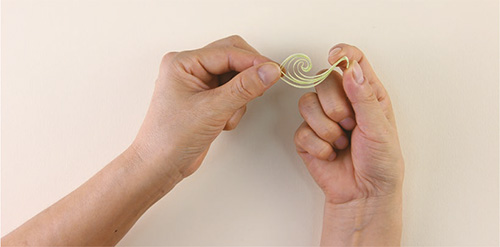
Pressing
Pressing: Press the paper slips into different shapes you need with your thumb and forefinger.
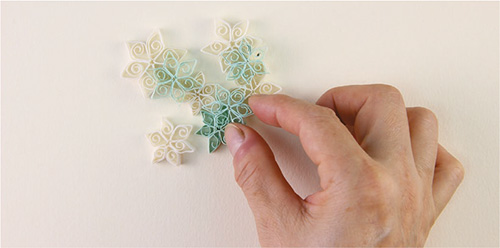
Stacking
Stacking: Stack multiple basic elements to create the second or even the third layer to make the picture more hierarchical and three-dimensional.
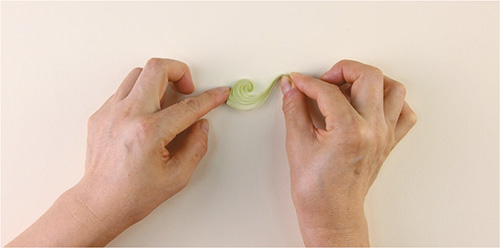
Adjusting
Adjusting: Adjust the basic elements, lines, shapes and composition of the work to meet the artist’s requirement. Adjusting
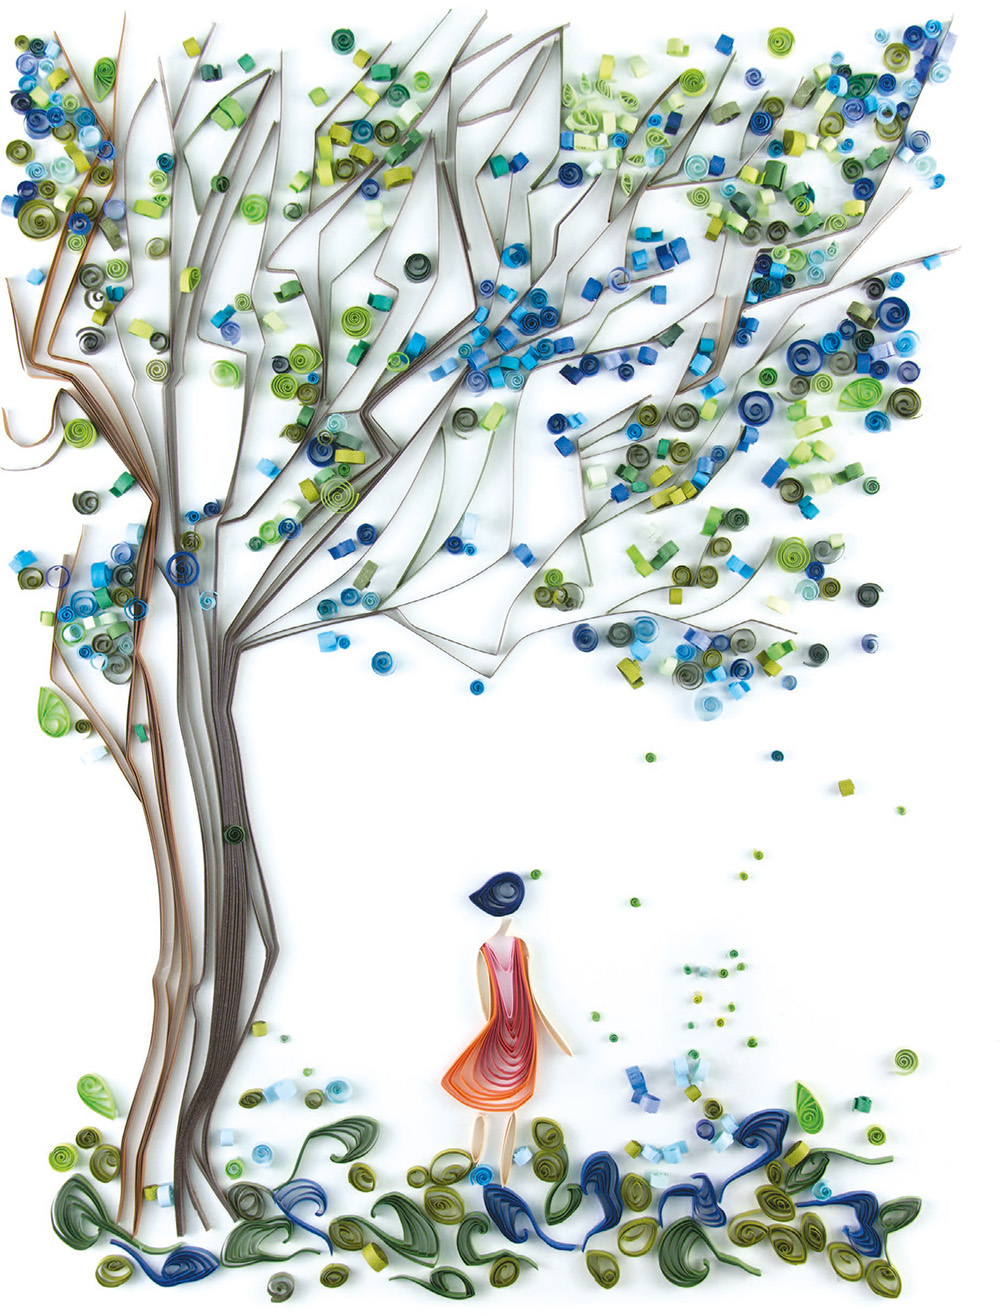
Fig. 24 Waiting
Dimensions: 39 by 54 centimeters
Beneath a luxuriant tree stands a girl looking into the distance. Is she waiting for her loved one to return from afar, or expecting the coming of destiny? Using various elements, the author has ingeniously created a girl in waiting.
4. Categories of Basic Elements of Chinese-Style Paper Quilling
Chinese-style paper quilling is free and flexible, which means that its elements also enjoy more freedom and variety. We classify the elements in this book into four categories, which, encompassing various techniques, constitute all our works. Each category consists of one basic element and its variations. Based on the four categories, the various elements made of paper slips, and the unique color schemes, you can often produce works of unparalleled beauty.
Lines and Scrolls
In Chinese-style paper quilling, lines are not only the original state of paper slips, but also one of the most fundamental elements in paper quilling works. Scrolls are the spiral curved lines produced by releasing a paper slip from a slotted tool. Simple as they are, the two elements can produce unexpected visual effects if used flexibly. In this book, you will see many works that reflect the authors’ superb use of the two most basic elements for composition.
Straight line
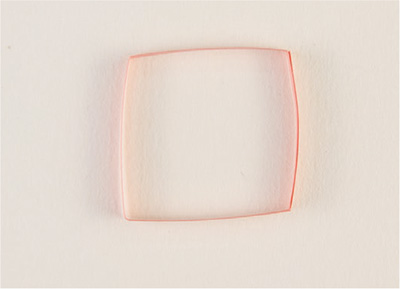
Straight line is the original state of a paper slip.
Curved line
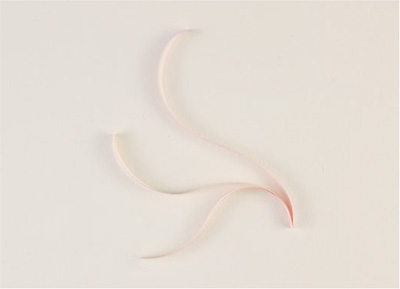
These are formed by scraping straight lines and making them bend naturally.
Broken line
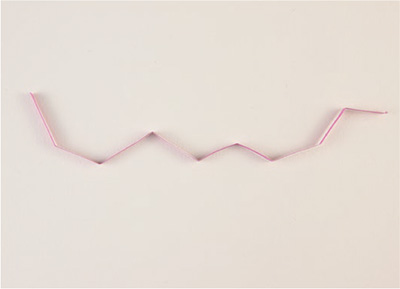
This is formed by pinching angles out of a straight line.
Zigzag line
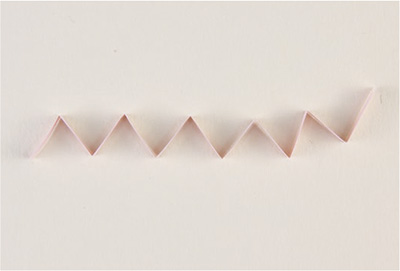
This is the broken line with zigzags.
Basic scroll

Roll the paper slip with a slotted tool and then release it to form a basic scroll.

Long-tail scroll
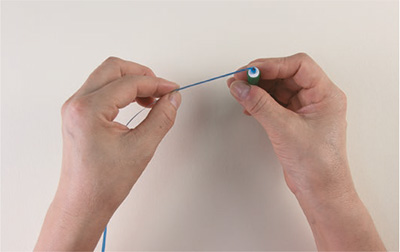
When rolling a paper slip with a slotted tool, you can leave a relatively large section of the paper slip unrolled, thus producing a long-tail scroll.
Coils
In Western paper quilling, most of the elements are based on loose coils, which can be changed into various other shapes through pinching and pressing. Elements in this category are generally known as coils.
Basic coil

1 Take out a paper slip, roll up its beginning end with a slotted tool, and then release it.
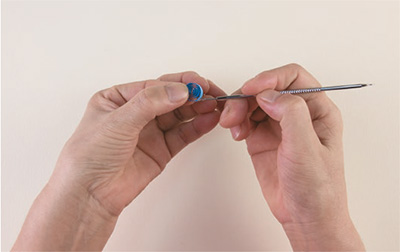
2 Cut the redundant part and paste the tail end with white latex.

3 A loose coil is thus complete.
Tight coil

This is formed when the paper slip is rolled up more tightly.
Ring coil

This is a hollow coil with the external part tightly rolled up, resembling a ring.
Teardrop coil
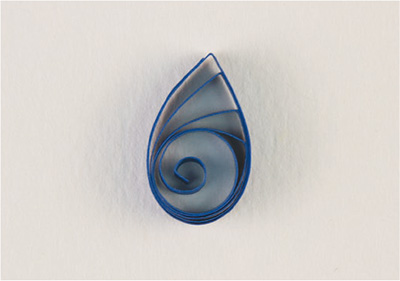
This is formed by pinching one end of a loose coil into a sharp angle.
Curved teardrop coil
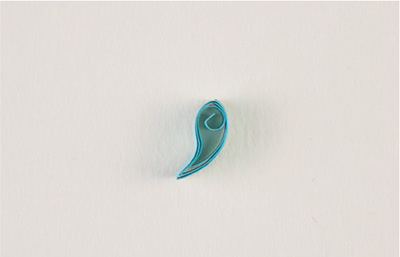
Bend the angle of a teardrop coil to form a curved teardrop coil.
Marquise coil
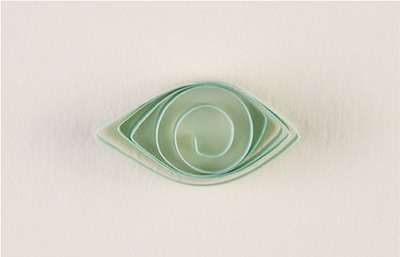
Pinch both ends of a loose coil into sharp angles to form a marquis coil.
Curved marquise coil
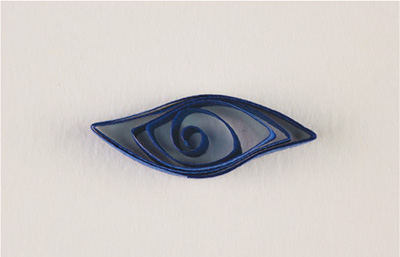
This is formed by bending the two sharp angles of a marquise coil in opposite directions.
Bamboo-leaf coil
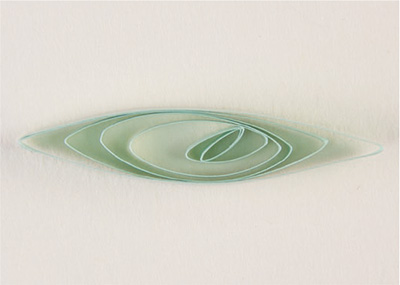
Pinch the middle part of a marquise coil flat to form a bamboo-leaf coil.
Quadrangular coil
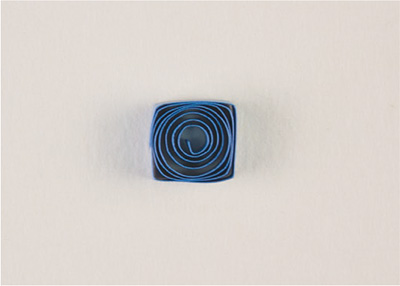
Pinch a loose coil and make four angles to form a quadrangular coil.
Half-circle coil
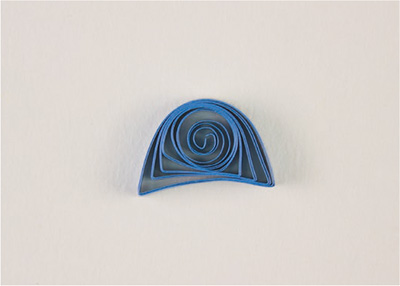
Pinch a loose coil into a half circle to form a half-circle coil.
Triangular coil

Pinch a loose coil and produce a triangle to form a triangular coil.
Tower coil

Produce a long and slim isosceles triangle following the method of making a triangular coil. Slightly indent the hemlines inward to form a tower coil.
Loops
A loop is made by pasting the beginning and tail ends of one or more bent paper slips together. Plump in shape, smooth in expression and rich in variation, it is often used as a structural element.
Basic loop
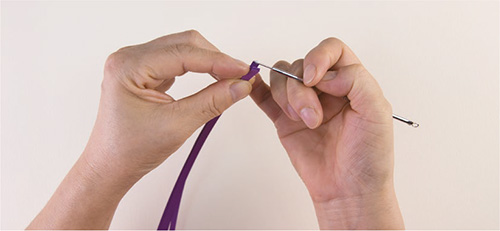
1 Stack several paper slips and paste their beginning ends together.
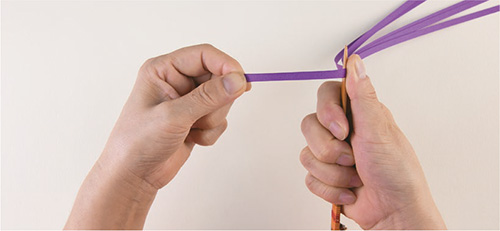
2 Smooth the paper slips with a small bamboo knife.
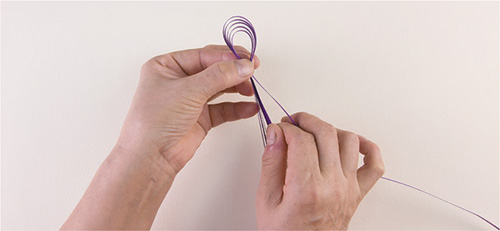
3 Bend the paper slips into a loop and pull them downward into different lengths and hierarchies.
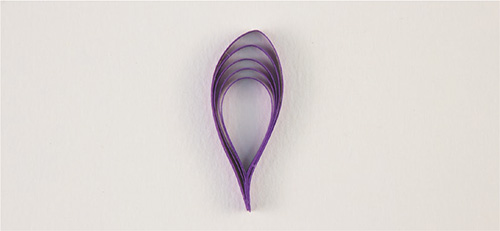
4 Cut the redundant part and paste the beginning and tail ends together with white latex to complete a basic loop.
Raindrop loop

Adjust a basic loop and make it into a plump raindrop loop.
Oval loop
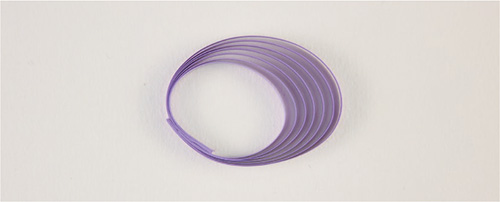
Paste the exterior side of the beginning end of the paper slip and the interior side of the tail end together. Adjust the shape to get an oval loop.
Leaf loop
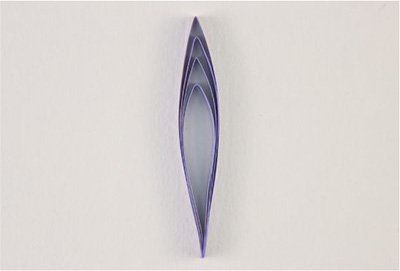
Pinch one end of a basic loop into a sharp angle to form a leaf loop.
Half-circle loop
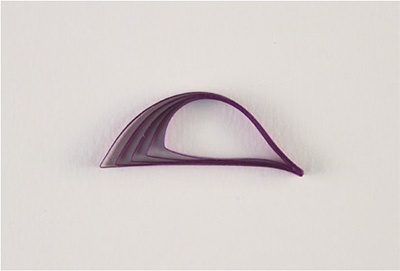
Pinch a basic loop into a half circle to form a half-circle loop.
Heart-shaped loop
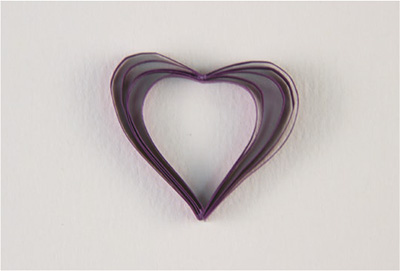
Make a basic loop into a heart-shaped loop using the techniques of pressing, pinching, pasting and adjusting.
Crescents
The crescent is an element unique of Chinese-style paper quilling. In addition, many other forms of crescents have been developed based on the basic crescent using multiple techniques. The crescent is flexible in composition and use and its lines are in good order but not monotonous. Crescents can be used either as an outline or as fillers. They can also be used as supplementary elements to integrate into the work or constitute a complete work all by themselves. The use of crescent elements is a major characteristic of Chinese-style paper quilling.
Basic crescent
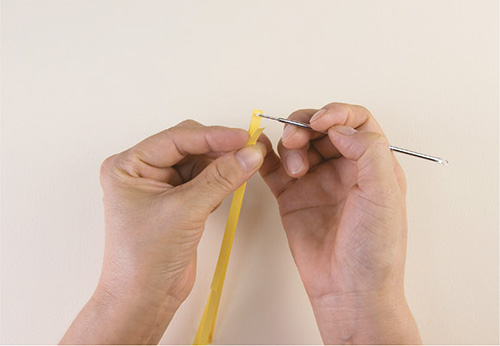
1 Take out several paper slips and paste their beginning ends together.
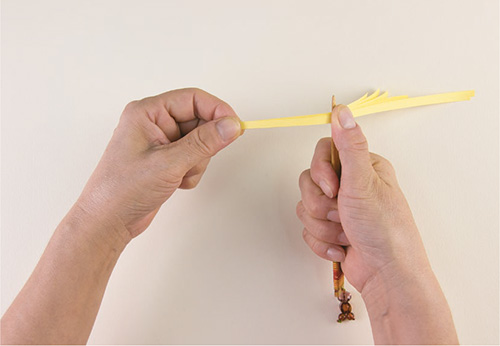
2 Smooth the slips with a small bamboo knife.
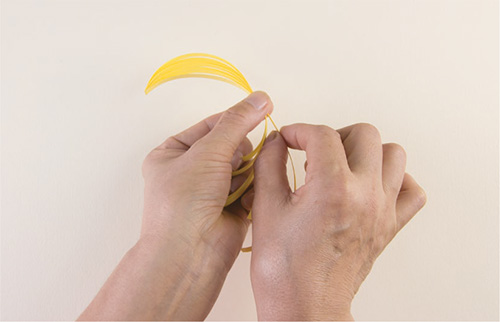
3 Hold the middle part of the paper slip with one hand and pull out different lengths from the tail end with another hand.
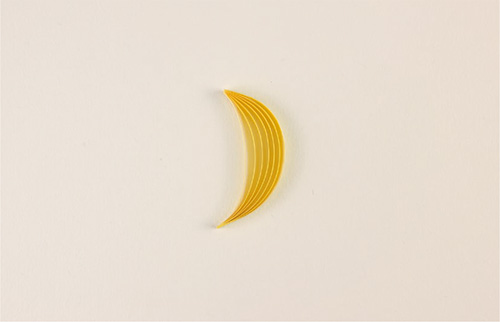
4 Paste the place you held and cut the redundant part of the paper slips to complete a basic crescent.
Wave crescent
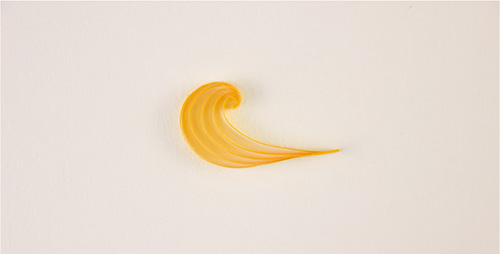
In making a wave crescent, you can roll up the beginning end of the paper slips with a slotted tool so that the slip bends dramatically inward. Thus is completed a wave crescent.
Spiral crescent
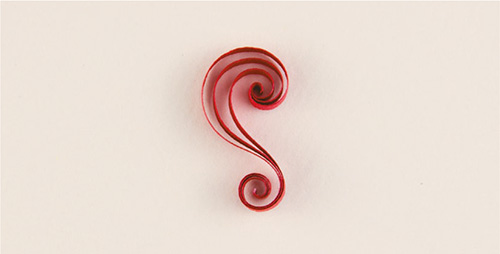
Roll up the tail end of a wave crescent in the opposite direction dramatically to form a spiral crescent.
Ruyi scepter-shaped crescent
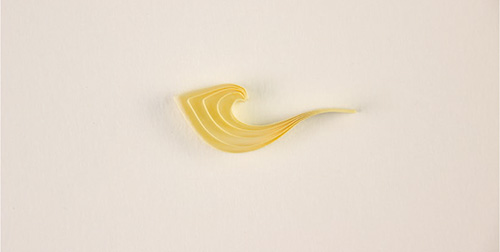
Pinch the wavy end of a wave crescent to form a ruyi scepter-shaped crescent.
S crescent
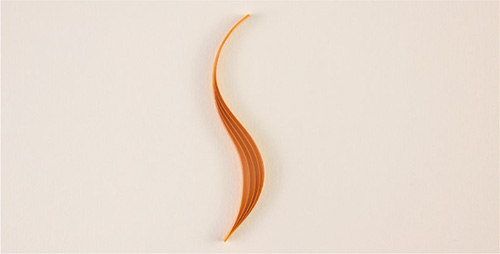
Make a long and slim basic crescent and scrape an arc in the opposite direction out of its tail end with a small bamboo knife to form an S crescent.
Harp crescent
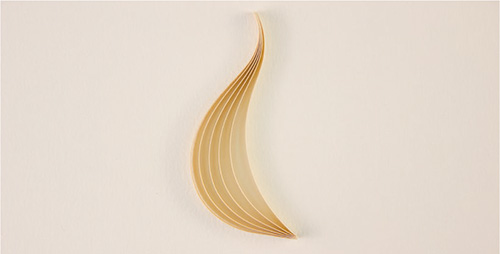
Scrape one end or both ends of a basic crescent with a small bamboo knife toward the opposite direction to form a harp crescent.
Raindrop crescent
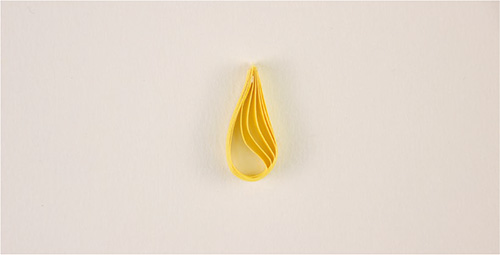
Bend the tail of a basic crescent in the opposite direction and paste it together with the beginning end to form a raindrop crescent.
Cicada-wing crescent
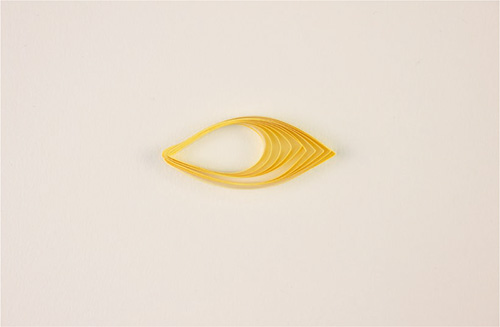
Paste the beginning and tail ends of a basic crescent and then pinch the middle of the crescent to form a sharp angle. Thus is completed a cicada-wing crescent.