 Finished quilt: 26½˝ × 26½˝ (with prairie points)
Cocktail Party
Finished block: 4½˝ × 4½˝ Finished quilt: 26½˝ × 26½˝ (with prairie points)

26½ ˝ × 26½ ˝, designed and made by Tricia Maloney
Most of the time, I design the quilt first and then add just the right fabrics to make the design come alive. At other times, like in this fun quilt, I discover an awesome and inspiring fabric collection and design a quilt to showcase it. These triangle squares are sew easy and versatile in this design.
Construction
Seam allowances are ¼˝ unless otherwise noted. Press after each step, following the pressing suggestions.
Making the Triangle Squares
Press the seams toward the darker fabric.
1. With right sides together, layer a red print 5⅜˝ × 5⅜˝ square with a green print 5⅜˝ × 5⅜˝ square. On the back of the top square, draw a diagonal line from one corner to the opposite corner. Sew a line ¼˝ from each side of the drawn line. Make 2.
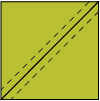
Sew a line ¼˝ away from each side of the drawn line.
2. Cut on the drawn lines. Open and press to yield 4 triangle squares.
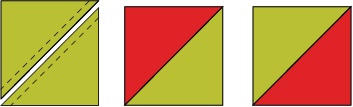
Cut on line to yield 2 triangle squares from each unit.
3. Repeat Steps 1 and 2 using 6 white print 5⅜˝ × 5⅜˝ squares and 6 black small print 5⅜˝ × 5⅜˝ squares to make 12 triangle squares.
Making the Quilt
1. Referring to the quilt assembly diagram, arrange 4 rows with 4 blocks in each row as shown. Sew the 4 blocks into rows. Press rows 1 and 3 to the right and rows 2 and 4 to the left. Then sew the rows together. Press.
2. Sew the red print 2½ ˝ × 18½ ˝ strips to the sides of the quilt. Press the seams toward the border.
3. Sew the black small print 2½ ˝ × 2½ ˝ squares to the ends of the remaining red print 2½ ˝ × 18½ ˝ strips. Press the seams toward the red print strip.
Shopping List
Yardage is based on 42˝-wide fabric, unless otherwise noted.
FAT QUARTERS: 7 (1 red print, 1 green print, 2 white print, 2 black small print, 1 black large print)
BACKING: ⅞ yard
BATTING: 31˝ × 31˝
BODKIN OR OTHER BLUNT-TIPPED TOOL
Cutting
RED PRINT FAT QUARTER
• Cut 1 strip 5⅜˝ × 21˝; subcut 2 squares 5⅜˝ × 5⅜˝.
• Cut 4 strips 2½ ˝ × 21˝; subcut 4 strips 2½ ˝ × 18½ ˝.
GREEN PRINT FAT QUARTER
• Cut 1 strip 5⅜˝ × 21˝; subcut 2 squares 5⅜˝ × 5⅜˝.
• Cut 1 strip 5˝ × 21˝; subcut 4 squares 5˝ × 5˝.
WHITE PRINT FAT QUARTERS
• Cut 2 strips 5⅜˝ × 21˝; subcut 6 squares 5⅜˝ × 5⅜˝.
• Cut 2 strips 5˝ × 21˝; subcut 8 squares 5˝ × 5˝.
BLACK SMALL PRINT FAT QUARTERS
• Cut 2 strips 5⅜˝ × 21˝; subcut 6 squares 5⅜˝ × 5⅜˝.
• Cut 1 strip 5˝ × 21˝; subcut 4 squares 5˝ × 5˝.
• Cut 1 strip 2½ ˝ × 21˝; subcut 4 squares 2½ ˝ × 2½ ˝.
BLACK LARGE PRINT FAT QUARTER
• Cut 1 strip 5˝ × 21˝; subcut 4 squares 5˝ × 5˝.
BACKING
• Cut 1 square 31˝ × 31˝.
4. Sew the pieced strips to the top and bottom of the quilt. Press the seams toward the border.

Quilt assembly
Making Prairie Points
1. Fold all 20 of the 5˝ × 5˝ squares diagonally in half with wrong sides together. Press.
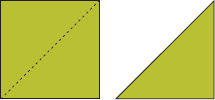
Fold diagonally and press.
2. Fold all of the units from Step 1 in half again, as shown. Press. This is a prairie point.
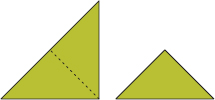
Fold again and press to make a prairie point.
Finishing
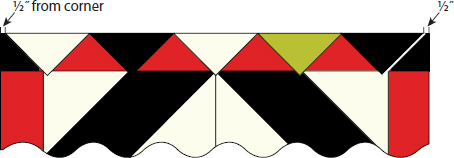
1. With the quilt right side up, align the raw edges of 5 random prairie points with the raw edge on one side of the quilt. Leave a ½ ˝ seam allowance from each corner so that the prairie points do not get caught in the corner seams. Each prairie point should tuck about ¼˝ into the open folded edge of the previous prairie point. Pin in place.
Prairie point border
2. Baste the prairie points to the quilt top, using an ⅛˝ seam allowance and removing pins as you sew. Repeat for each side of the quilt. Keep the prairie points pointing toward the quilt center.
3. Place the batting on a flat surface and smooth it out. Layer the backing fabric on top of the batting, right side up, making sure that it is smooth and without wrinkles. Then place the quilt top right side down (being careful not to disturb the prairie points), centered on top of the backing and batting. Pin the layers together.
4. Sew ¼˝ all the way around the quilt, pivoting at the corners and leaving an 8˝ opening on one side. Trim the backing and batting even with the quilt center.
5. Turn the quilt right side out. Smooth out the quilt and the prairie points. Push out the corners with a bodkin or other blunt-tipped tool. Carefully press the quilt smooth.
6. Slipstitch the opening closed.
7. Quilt as desired.
Simplifying A QUILT DESIGN
Sometimes you like the look of a quilt project but regretfully pass on making it because you don’t have the time. Did you know you can sometimes get the overall look of a project yet save time by making some simple modifications?
Cocktail Party can be simplified easily by replacing the pieced blocks with a single fabric cut the same size as the overall dimensions (18½ ˝ × 18½ ˝).
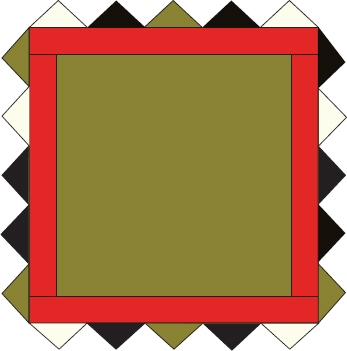
A simplified version of Cocktail Party
Here are some other suggestions for simplifying or personalizing a quilt design:
• Turn the blocks in a new direction or rearrange the blocks.
• Replace the quilt blocks with a similar yet simpler block or blocks.
• Resize blocks to make them “super-sized” and use fewer blocks.
• Alternate pieced blocks with plain squares.
• Like the look of appliqué? Replace traditionally appliquéd blocks with printed “cheater” appliquéd blocks.
• Make the quilt smaller by using fewer blocks or by eliminating the borders.
Of course, not all quilt designs can be simplified and still retain the style of the original quilt, but it’s fun to see what happens if you try.
A Quick Note about Copyright
Please keep in mind that modifying someone else’s design does not mean that you have created a new design that you can put your name on. For a design that is all your own, start with traditional quilt blocks or draft a new design. Want to learn more? There are many articles and websites that can help.