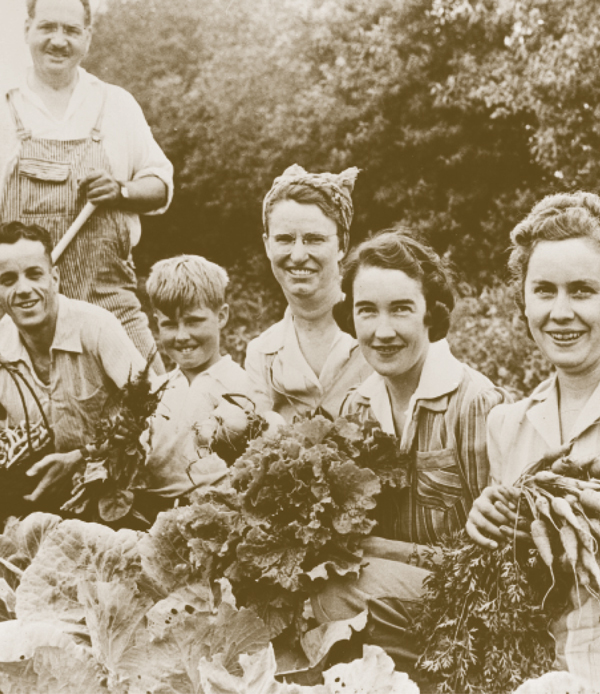
When Eat Your Vegetables Day was established in 1991, it was a declaration of courage and evidence that the nation’s traditional meat-and-potato mentality had begun to falter. Cattlemen roared in protest. Vegetarians exulted. Medical experts heralded the designation as a giant step toward healthful eating. In all the din, the deeper significance of Americans celebrating vegetables by eating them all day—went all but unnoticed.
No robust, work-a-day American quakes in the face of say, spinach, but most would agree with the famous 1928 New Yorker cartoon, with E. B. White’s succinct caption: “I say it’s spinach and I say the Hell with it.” Several years later, in one of the songs that he wrote for Face the Music, Irving Berlin labeled all trouble, disappointment, or inconvenience as “spinach,” and echoed Mr. White in the refrain: “And the Hell with it!”
This history of suspicion and revulsion has simmered beneath the surface of American life for more than three centuries.

One of the first vegetables European settlers were offered in the New World—fresh corn, which they called “maize”—was something they’d been raised to view as animal fodder. So they quickly shifted their attention to propagating the livestock they’d brought from the Old World. Alas, their early attempts floundered. On the other hand, the vegetable seeds they’d brought—carrots, beets, turnips, onions, cabbages, peas, endive, shallots, spinach, chives, cucumbers, lettuce, cresses, and leeks—flourished.
Massachusetts’ Bay Colonists rejoiced that the New World soil produced better “garden fruit” than Europe’s. Conscientious housewives served vegetables year-round by partially cooking and sealing some with fat in crocks, sun-drying others, and packing others in straw and storing them in root cellars. In the fall, the last pickings were turned into winter’s pickles, preserves, sauces, and catsups. But as soon as they had a steady supply of meat, red-blooded Americans pushed fresh and preserved vegetables to the sides of their plates.
Like meat and game, highly durable vegetables such as pumpkins, cabbages, and other root crops were suited to the harshness and constant motion of frontier life. The more delicate vegetables were a lot of work to grow and even more work to keep, and for nearly a century, they were the province of landowners who had both the space—and, until after the Civil War, the free labor—to cultivate and preserve the bounty.

In a culture that proclaims all people to be equal, small distinctions loom large. Fresh vegetables were one of the first foods to carry a social distinction between “us” (the majority who labor) and “them” (the upper class who did not). The latter were disgusted by crude cabbages and roots; the former considered slender asparagus and little peas suspiciously dainty. Even in the late twentieth century, when “real men” did not eat quiche, eating vegetables was mocked as being “unmasculine.”
Overcooking was the nation’s answer (and perhaps another expression of vegetable hatred). One 1895 cookbook called for a three-hour cook time for string beans and two hours for carrots. In the late nineteenth century, Juliet Corson, the famed founder of The New York Cooking School, said that following such instructions yielded brown-green masses of fiber with no taste or nutritional value.
But ambition and starvation are strong currents in American cuisine. By the late nineteenth century, however, the emerging middle class dreamed of even further ascent and mimicked the styles and tastes of those who had already arrived. Grand restaurants opened in large cities, and chefs turned out superb vegetable dishes. Increasingly the public didn’t need to be force-fed peas. “British peas”—or petit pois, thank you very much—became a sign of high class.
The wider market for produce prompted Southern states to grow early- and late-season tomatoes, radishes, cucumbers, cauliflower, onions, and salad greens and to ship them north. By the roaring ‘90s, refrigerated rail cars, along with increased market gardening and truck farming brought fresh vegetables to city dwellers every month. But the demand pushed growers to produce greater quantities of sturdier goods, and taste was an early casualty.

When the Great Migration of the 1890s brought thousands of Italians and Greeks with strange varieties of broccoli, eggplant, green beans, tepary beans, tomatoes, greens, garlic, and even parsley, vegetable fear found a new target.

In her 1881 book Fifty Years in a Maryland Kitchen, Jane Grant Gilmore Howard noted “a very general prejudice” against fresh garlic.
As late as 1927 Ida Cogswell Bailey Allen, star of The National Radio Homemaker’s Club, wrote that the United States was the only country where vegetables were more “accessories than real foods,” and were seen as “necessary evils.”
Among upper- and middle-class urbanites, the view on “new” vegetables was that they were “scary and disgusting until proven otherwise by a famous chef.” In the meantime, they clung to their familiar peas and carrots. No such adjustment was needed in rural areas, where vegetable love hadn’t made many inroads. A survey of rural families in Ohio between 1926 to 1928, writes Richard Hooker in Food and Drink in America, showed that of the thousands of varieties of vegetables available in the nation, “only potatoes, cabbages, lettuce, tomatoes, onions, corn, sweet potatoes and string beans” were commonly used. Even more worrying: “A home demonstration agent in South Carolina regretted that farmers felt they were ‘too busy’ to bother with gardens, poultry and dairy products and instead concentrated on cotton and other major crops.”
Large-scale canning and freezing technology arrived just in time. Without a way to mass-market vegetables (and fruit), the United States could have ended up with a big cotton patch.
Both canned and frozen food were sold as early as the 1870s, but neither became big business until after the mechanics of canning improved and Clarence Birdseye, a former field naturalist, invented an industrial flash-freezing method, and began to exercise his genius for product development and marketing.
He called his products “frosted,” and used Eskimos and sled dogs to evoke the wholesome naturalness of the spinach and peas he introduced in 1930. People loved them, but it took fifteen years to convince retailers to buy freezers for his frozen delicacies when they already displayed cans of the same vegetables on their shelves. World War II made the decision for them.

Thornton Dial, 2005.
“Tin went to war; frozen foods stayed home,” wrote E. W. Williams, the president of the Quick Frozen Food Association in his book Frozen Foods.
By the time he died in 1956, the industry that Mr. Birdseye invented was flourishing. Rare was the home without at least a package of frozen peas in the freezer. Mr. Birdseye claimed that his frozen vegetables were better than fresh, and with farmers increasingly developing vegetables to survive long shipping and storage times, his claim was plausible. Early on, the larger frozen food companies established regional processing stations so that vegetables destined to be frozen often traveled far fewer miles than those shipped long distances, held in cold storage, and sold as “fresh.” The convenience of vegetables that required no washing, peeling, slicing, or dicing was indisputable. By creating fancy, freezable vegetable preparations he saved cooks even more time, and gave them panache as well.
The most powerful thing that the former field naturalist supplied, however, was the knowledge and authority of the company that bore his name. There he was, an exacting and protective shield, between the dangerous, bumpkin-tended earth and the vulnerable consumer with his clean white collar. There was nothing to fear in Mr. Birdseye’s vegetables. Flash-freezing was the final answer to vegetable fear.

It was also a great democratizer. It was difficult to meet the demand for cheap vegetables using old-fashioned farming techniques, but quick freezing allowed the geographically remote and the economically challenged to eat nutritionally intact, almost-fresh vegetables 365 days a year. After 1954, when TV dinners were introduced and became an instant sensation, after fast food began to sprawl alongside highways and neighborhoods, more and more fertilizers, pesticides, and soil-distressing farming techniques were required to fill the vegetable compartment in the aluminum trays, the cardboard french fry container, the plastic salad bar boxes, and the tomato center of frozen pizzas.
But in mid-century, frozen vegetables were young and anything seemed possible. Home cooks used an arsenal of convenience foods to prepare creative, economical, all-American family-style dishes such as green bean and mushroom casserole in a jiffy.

Did people learn to love vegetables enough to rise up and defend them against culinary malfeasance? Was it ambition to save the planet or the eternal need of different generations to distinguish themselves that caused the food revolution? Or was it a nutritional imbalance as serious as scurvy on the western frontier that turned these creations, along with frozen, canned, and otherwise processed food, into public health enemy number one.
We do not know. We know that National Eat Your Vegetable Day, which fell in National Candy Month, and shared its date with Watergate Day and National Apple Strudel Day, disappeared. We know that after the San Francisco board of supervisors voted to declare Mondays as Vegetarian Day, the public response was divided. One local citizen criticized the image of a tea leaf salad as “technically . . . not vegetarian—note the dried shrimp flakes . . .” Another citizen said: “Let’s forbid eating tofus once a week in this town. I’m sick of the veggie/vegan hipster holier than thou attitude. Let’s hear it for tofu-free Tuesdays!”
GOFFSTOWN, NEW HAMPSHIRE
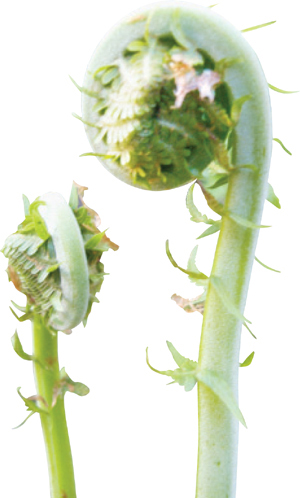
Shelly Bonham’s grandmother learned the lessons of the Great Depression and taught her to forage, can, and freeze. But Ms. Bonham was slow to adopt these traditions. “I am a Gen Xer and I got lost in the good life for a while. But now that I have children of my own, I want to teach them the same self-sustaining values that were instilled in me . . . that wonderful and delicious things do not have to be expensive, that acting resourcefully pays dividends, and that sometimes, trudging through the mud takes you to the greatest treasures.” Fiddleheads, the young coiled sprout of the ostrich fern that grow in the newly warm ground in early spring in northern New England, have become emblematic of her return to the simple life. She named the magazine that she founded and dedicated to sustainable living Fiddlehead Loop. And in addition to gathering, cooking, and preserving this spring delicacy, she has debriefed her grandmother for recipes. This is one of her favorites.
2 tablespoons fresh lemon juice
¾ teaspoon kosher salt
Freshly ground black pepper
2 tablespoons olive oil
4 cups fiddleheads, cleaned and trimmed
1. Bring a medium pot of water to a boil.
2. In a large bowl, combine the lemon juice, salt, and pepper to taste. Whisk in the olive oil.
3. When the water is boiling, add the fiddleheads. Boil until tender, 5 to 7 minutes.
4. Drain, shake dry, and add to the lemon and olive oil dressing. Toss to coat well and serve as you would asparagus, as a first course or side dish.

SERVES 4
NEW YORK, NEW YORK
When he was forty years old, Simpson Wong owned two restaurants in New York City. He was a runner—lean, fit, and health conscious. Then, one morning at the gym, the Malaysian-born chef suffered a heart attack. “There are heart issues in my family, I smoked and probably consumed two cups of butter a night just tasting dishes before they went out to the dining room,” he said. He scaled back to one restaurant and lowered the fat content of his cooking. The result is light, vivid dishes such as these fresh pea greens with a hot, jalapeño bite and a hint of sesame.
Kosher salt
6 quarts fresh pea greens, or watercress (about 16 bunches), heavy stems removed
2 teaspoons canola or vegetable oil
4 garlic cloves, finely chopped
2 jalapeño chiles, seeded and finely chopped
1 teaspoon toasted sesame oil
1 tablespoon soy sauce
1. Bring a large pot of water to a boil. Lightly salt the water, add the pea greens, and boil for 30 seconds. Quickly drain and rinse under cold running water. Pat dry.
2. Heat the oil in a large heavy skillet or wok over medium-high heat. Add the garlic and jalapeños and cook, stirring constantly, until fragrant, about 30 seconds. Add the pea greens and stir for 1 minute.
3. Transfer to a large bowl and add the sesame oil and soy sauce. Toss to combine. Divide among four plates and serve immediately.

SERVES 4
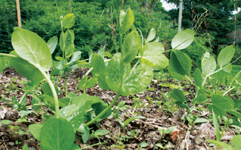
CHICAGO, ILLINOIS
In the twenty-six years that Marge Klindera has been part of Butterball University’s fifty-five-member team that fields about two hundred thousand calls a year for turkey-cooking advice, she has talked thousands of home cooks through their holiday recipes.
This “old-time German recipe for creamed spinach from my mother” remains her favorite holiday dish. Reminiscent of the creamed spinach served in traditional American steakhouses, it can be further enriched by substituting heavy cream for half the milk.
6 slices bacon
3 pounds fresh spinach, stemmed, or two 10-ounce packages of frozen chopped spinach, thawed
2 tablespoons all-purpose flour
2 cups milk
1 tablespoon minced onion
Kosher salt and freshly ground black pepper
1. Bring a large pot of lightly salted water to a boil.
2. Fry the bacon in a large skillet over medium heat until crisp. Using a slotted spoon, transfer the bacon to a paper towel to drain.
3. When the water is boiling, drop in the spinach, working in batches if necessary. Boil until tender. Drain and cool completely under cold running water. Squeeze it dry and coarsely chop. (If using frozen spinach, just drain and squeeze dry.)
4. Return the skillet with the bacon grease to low heat. Add the flour and whisk until smooth. Slowly add the milk, whisking until smooth.
5. Add the onion and season lightly with salt and pepper. Add the spinach. Cook, stirring occasionally, until the sauce thickens, about 10 minutes.
6. Remove from the heat, and taste and adjust with additional salt and pepper if desired. Crumble the reserved bacon on top and serve.

SERVES 6
LENEXA, KANSAS
During the 1930s, Lenexa, Kansas, was known as “the spinach capital of the world” and home to a sizable community of émigrés from Brussels who first introduced the crop. When Jill Wendholt Silva moved to the little town just south of Kansas City, she was eager to attend the annual spinach festival. It boasted an appearance of Popeye and Olive Oyl, as well as the world’s largest spinach salad and Ms. Silva, the food editor of the Kansas City Star, had visions of finding spinach growers and spinach cooks coming home with recipes. Instead, she returned home with a desire to cook spinach, and then more spinach. This dish, a variation on the traditional Italian dish, is probably too simple to enter in the spinach festival cooking contest, but as Popeye can attest, simple is better when it comes to spinach.
1½ pounds fresh spinach
2 tablespoons olive oil, plus more to taste
2 tablespoons pine nuts
Salt to taste
4 garlic cloves, thinly sliced
Freshly ground black pepper to taste
Juice from ½ fresh lemon, about 1 tablespoon
1. Trim away stems from spinach and rinse in two changes of cold water. Drain and dry in a salad spinner and set aside. Warm 1 teaspoon of the olive oil in a skillet over medium-low heat. Add the pine nuts and cook, tossing and stirring constantly until golden, 1 to 2 minutes. Remove the nuts to paper towels, season lightly with salt, and return the skillet to the heat.
2. Add 1 tablespoon of olive oil and when it is warm, add the garlic and cook, stirring frequently, until just golden, about 2 minutes. Add a handful of spinach and toss. Raise the heat to high and, as the spinach wilts and makes room in the pan, add more. When all the spinach is cooking, toss it in the pan, and season lightly with salt and black pepper. Cover the pan, cook for 1 minute, remove from heat and allow to sit for 3 minutes to finish cooking. Add the lemon juice, adjust seasoning with salt, pepper, and olive oil, if desired. Sprinkle with the pine nuts and serve.

SERVES 4 AS A SIDE DISH
JERSEY CITY, NEW JERSEY
Roli Khare, a government attorney and Hindu vegetarian, sees cooking as a meditative practice, an offering for both the diner and the divine. She began cooking while she was an exchange student living in her parents’ native India. The intensity of her experiences there shaped not only her worldview but also her cooking style. “Like navigating the streets of Delhi,” she says, “a little bit of luck and eccentricity is required.” This variation on the saag paneer of north India was an accident. “I grabbed broccolini instead of spinach at the market and my mother, who is a wonderful cook, encouraged me to work with it, adding some collard greens to the mix. The results were a far cry from the heavy saag paneer that many Indian restaurants serve their American customers. To lighten her version further and create a dish that can serve as a main course or a side dish, Ms. Khare uses tofu instead of paneer (a fresh, pressed cheese). Either—or even both—make a fine variation on the classic theme.
Kosher salt
1 bunch fresh broccolini, trimmed
1 bunch fresh collard greens or mustard greens, heavy stems removed
1 tablespoon ghee or vegetable oil
2 teaspoons ground coriander
½ teaspoon ground turmeric
¼ teaspoon cayenne pepper or 1 small fresh chile, finely chopped
1 teaspoon chopped fresh ginger
2 pinches of asafetida
3 tablespoons water
⅓ cup crème fraîche
½ pound firm tofu, cut into 1-inch cubes, or ½ pound paneer or queso fresco, cut into 1-inch cubes
½ teaspoon sugar
1 teaspoon fresh lemon juice
Chapatis or whole-wheat pita bread, for serving
1. Add 2 teaspoons salt to a large pot of water and bring to a boil. Add the broccolini and collard greens and simmer until very tender, about 1 hour.
2. Drain the vegetables, reserving about ⅓ cup of the cooking water. Transfer to a blender or food processor and blend until slightly chopped; do not overblend to a puree.
3. Heat the ghee in a large saucepan over medium heat and fry the coriander, turmeric, cayenne, ginger, and asafetida for 30 seconds. Add the vegetables and the water. Cover and cook over medium-low heat for 10 minutes.
4. Stir in the crème fraîche. Add the tofu, 1 teaspoon salt, and the sugar, stir well, and simmer over low heat for 5 minutes more.
5. Transfer to a serving dish and mix in the lemon juice. Adjust the salt to taste. Serve with chapatis or whole-wheat pita bread.

SERVES 4
SEATTLE, WASHINGTON
Growing up in Dallas, Chris Duval loved helping his dad cook Mexican food. “I still have a scar from cutting lettuce” says the software tester. Mr. Duval’s heritage includes “a little French and Russian”; his wife, Lisa, is Armenian. Cooking is their idea of a good time.
Although collard greens are considered Southern, they grow well in Seattle. Inspired by something he saw on the Food Network, Mr. Duval figured out a way to use some of his favorite things—peppery bacon and the local sweet Walla Walla onions—with the thick-leaved, cold-weather greens.
1 pound collard greens (1 large bunch), stalks trimmed, roughly chopped
¼ pound thick-sliced pepper bacon, cut into ½-inch strips
1 small Walla Walla or other sweet onion, finely chopped (about ¾ cup)
1½ cups homemade chicken broth or low-sodium store-bought chicken broth
Kosher salt and freshly ground black pepper
1. Bring a large pot of salted water to a boil. Add the collards and cook until they are wilted, about 5 minutes. Drain.
2. Cook the bacon in a large skillet over medium-high heat, stirring occasionally, until crisp and brown and the fat is rendered, 3 to 4 minutes. Add the onion and cook until softened, about 4 minutes.
3. Add the greens and turn to coat well. Add the chicken broth to cover the collards. Cook until the liquid is reduced by half and greens are very tender, about 15 minutes. Season to taste with salt and pepper, and serve.

SERVES 4 AS A SIDE DISH

Grading and packing onions, ARTHUR ROTHSTEIN, 1939.
PISCATAWAY, NEW JERSEY
Thoran is a traditional lunch side dish in Kerala, India, where Shaheen Shahnaz grew up. It is served, says Ms. Shahnaz, now an architect, whether the household is “Muslim, Christian, or Hindu, carnivores or vegetarians.” Just about any green vegetable can be used. On the weekends, she loves to serve her husband and two children ghee rice, chicken or lamb stew, a dry lentil curry, and a thoran of spinach, collard greens, or kale. Served with rice, fish or lentil curry, pickles, and pappadam (crisp lentil wafers), thoran makes a quick, tasty weekday meal.
1 bunch collard greens
¼ cup grated fresh coconut
2 shallots, sliced
2 garlic cloves
1 tablespoon vegetable oil
½ teaspoon yellow mustard seeds
2 whole fresh red chiles
¼ teaspoon ground turmeric
¼ teaspoon ground red chile (optional)
Sea salt or kosher salt
Steamed rice (preferably basmati), for serving
1. Soak the greens in lots of water for 5 to 10 minutes to get rid of the sand. Rinse well. Drain thoroughly, then blot dry with paper towels. Remove the thick central stem and slice the leaves into thin ribbons.
2. Pulse the coconut, shallots, and garlic in a food processor until the mixture looks scrambled.
3. Heat the oil in a large skillet or wok over medium heat and add the mustard seeds and whole chiles. Fry until the mustard seeds begin to pop. Add the collard greens, turmeric, and ground chile, if using. Add 2 to 3 tablespoons water, cover, reduce the heat to low, and cook about 5 minutes until leaves are wilted. (They take longer to cook than other greens, so check the pan after 5 minutes, add water by spoonfuls, and cook longer, if needed.)
4. Make a well in the middle of the greens, add the coconut mixture, then cover it with the greens. Cook uncovered over medium heat for 5 to 10 minutes more, until all the water evaporates. Add salt to taste. Serve with rice.

SERVES 4 TO 6
LOS ANGELES, CALIFORNIA

Growing up in Belgium, Bernadette Grosjean took her mother’s creamy gratin of endive-stuffed ham for granted. Now a psychiatrist at the University of California Los Angeles, Dr. Grosjean realizes how rare a dish it is. She spends her days treating the indigent and homeless in L.A. and says, “After a day of giving therapy on the street, in abandoned buildings, the back seat of my car, I’m hungry for the familiar, for something comforting. Nothing does the job as well as this dish, which happens to be one of the few things I can cook. At home we served it as a main course with buttered mashed potatoes. My friends here think that is a little excessive.”
3 tablespoons (⅜ stick) unsalted butter, plus more for the baking dish
8 heads Belgian endive, about 2 pounds
Salt and freshly ground white pepper
2 teaspoons all-purpose flour
½ cup milk
1 cup grated Gruyère cheese
½ cup heavy cream
⅛ teaspoon freshly grated nutmeg
16 thin slices ham
Mashed potatoes, for serving
1. Preheat the oven to 350°F. Lightly butter an 8-inch square flameproof baking dish.
2. Slice the endive crosswise into ¼-inch pieces. Melt 2 tablespoons of the butter in a large skillet over medium heat. Add the endive, season lightly with salt and white pepper, and cook, tossing gently, until it is nearly soft. Pour into a colander and drain while preparing the sauce.
3. To make the sauce, melt the remaining butter in a small saucepan over low heat. Whisk in the flour to make a smooth paste. Whisk in the milk a little at a time and simmer gently until the sauce is beginning to thicken, about 5 minutes. Add half the cheese a little at a time, stirring well between each addition. Season with salt and white pepper and stir. Stir in the cream and season with the nutmeg. Cook for 5 minutes more, stirring constantly. Remove from the heat.
4. Place a ham slice in the baking dish, add a drizzle of cream sauce and a spoonful of endive. Carefully roll the ham into a firm cylinder. Use a toothpick, if necessary, to secure the roll. Continue until all the ham and endive are used. Spread the remaining cream sauce over the endive rolls, sprinkle with the remaining cheese, cover with foil, and bake for 15 minutes.
5. Remove from the oven. Turn on the broiler and place the baking dish under it to brown the cheese. Serve immediately.

SERVES 4 AS A MAIN COURSE, 8 AS A SIDE DISH
LOS ANGELES, CALIFORNIA
The young man who courted Henrietta Cosentino in southern Nigeria, when they were both Peace Corps teachers, was attacked by marauding thieves on his way to their first date. When Donald Cosentino limped into her house, she poured him a shot of fiery gin, surveyed her almost bare larder, and fried up a yam. He broke a tooth.
Los Angeles has provided a polyglot environment for Ms. Cosentino to expand her food knowledge. She finds inspiration at Catalina’s Market on Western Avenue where she picks up Argentinian sardo cheese, crème caramel, and empanadas. When she’s too busy to cook, she often buys the torta, baked in a gigantic pie plate. To make it herself, she picks chard from her vegetable garden and steams it. The torta is a big hit at dinner parties, served warm or cold to accompany Italian cold cuts, grilled sausage, or cold salmon.
1 recipe dough for a double-crust pie (pages 693, 694, 695, 696, or 697)
3 large bunches chard, trimmed
3 red-skinned potatoes
3 hard-boiled eggs, peeled and chopped
½ cup chopped drained pimento-stuffed olives
⅛ teaspoon ground cumin
⅛ teaspoon ground cinnamon
1 teaspoon kosher salt
1 teaspoon freshly ground black pepper
3 large eggs, lightly beaten
1 tablespoon unsalted butter, cut into small pieces and chilled
1. Preheat the oven to 425°F. Divide the pie crust in half and roll each out to 12 inches. Circle a 9-inch pie pan with one. Refrigerate the pan and the other circle.
2. Place the chard in a large stockpot with 1 cup of water, cover, and steam until wilted and the stalks soften.
3. Drain the chard thoroughly, transfer to a large bowl or cutting board, and mince.
4. Prick the potatoes with a fork, place in a small bowl with 2 tablespoons water, and cover with plastic wrap. Microwave for 5 minutes or until just fork-tender.
5. Drain the potatoes, cool slightly, and chop into small pieces.
6. Combine the potatoes, chard, hard-boiled eggs, olives, cumin, cinnamon, salt, and pepper. Stir well. Add the beaten eggs and mix well until thoroughly combined.
7. Scrape the chard mixture into the dough-lined pie pan. Dot the butter pieces on top and lay the top pie crust over the plate. Crimp the crusts together around the rim of the pan and prick the top crust with a fork to create steam vents.
8. Bake the torta for 10 minutes, then turn down the heat to 350°F. Bake for 1 hour more, or until the crust is golden brown.
9. Remove from the oven and cool until just warm before serving.

SERVES 4 TO 6

MCALLEN, TEXAS
Melissa McAllen Guerra, host of the television series The Texas Provincial Kitchen, cookbook author, and owner of a Latin American culinary store in San Antonio, grew up on her family’s cattle ranch in the Rio Grande Valley. Chard, which her Mexican-born husband calls acelgas, makes a delicious filling for crisply fried flauta-style tacos as a snack or as a vegetable main course.
3 pounds fresh tomatoes, peeled and seeded
1 or 2 garlic cloves
4 tablespoons corn oil, plus additional for frying
Kosher salt and freshly ground black pepper
1 pound fresh red or white chard, washed and chopped
½ cup chopped onion
1 teaspoon minced garlic
32 corn tortillas (6-inch size works best)
3 ounces crumbled cotija cheese or shredded Monterey Jack (about ¾ cup)
1. Preheat the oven to 200°F. Line a baking sheet with paper towels. Place a wire rack over another baking sheet.
2. Puree the tomatoes and garlic in a blender or a food processor. If necessary, add up to ½ cup water to facilitate blending.
3. Heat 2 tablespoons oil in a large skillet over medium heat. Add the puree, season with salt and pepper to taste, and bring to a simmer. Cook until thick, about 25 minutes, stirring occasionally.
4. While tomato puree is reducing, fill a large pot with water and bring to a boil. Add the chard and cook for 10 minutes, until tender. Drain thoroughly.
5. Heat 2 tablespoons oil in a medium skillet over medium heat. Add the onion and cook, stirring occasionally, until translucent. Add the chard and minced garlic, and season with salt and pepper. Cook for 10 to 15 minutes, stirring occasionally, until the filling is very dry and well flavored. Remove from the heat.
6. Wrap 8 tortillas at a time in a clean, damp kitchen towel. Heat them in the microwave for 1½ to 2 minutes on high, until they are steamy and pliable. Remove 1 tortilla from the bundle and lay out flat. (Keep the rest well wrapped in the towel.) Fill the tortilla with 1 to 2 tablespoons of the chard and roll up tightly. Place the taco on a baking sheet, with the curved edge of the tortilla underneath. Dampen, warm, fill, and shape the remaining tortillas into tacos in this fashion.
7. Heat ½ inch oil in a large skillet over medium-high heat until hot but not smoking. Place the tacos one by one in the hot oil, with the curved edge still underneath. Fry for 1 to 2 minutes, then gently turn over with tongs and fry the other side about 1 minute, until crisp. Remove from the oil and drain on the paper towel lined sheet pan.
8. Place all the tacos on a serving platter, pour the warm tomato puree over the top, and sprinkle with the cheese.

MAKES 32 TACOS, SERVES 8
BIRMINGHAM, ALABAMA
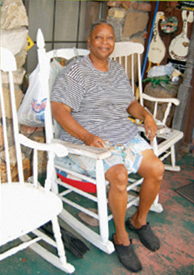
In 1988, Hilda Minter’s husband, Joe Minter, a retired construction worker, received a message from God directing him to create a sculpture park depicting the African American spiritual experience in their backyard in the Woodland Park neighborhood of Birmingham. Their property abuts a historic African American cemetery, and the notion of painting the verse from John 3:16 on the tailgate of a pickup truck or His Word Is Real on a defunct movie theater marquee gave her pause. When her husband paid homage to the American workingman by welding giant rusty wrenches to a cross, Mrs. Minter made her favorite spicy escarole. When Mr. Minter was heralded as a visionary genius, she made bigger pots of the escarole for the busloads who began to make pilgrimages to his sculpture park. “We were put here to make things and give them away,” said Mrs. Minter, a retired nurse’s aid. “People don’t expect escarole to be so sweet and spicy. That’s why I like it; it make me think and I like to watch what it does to people too.”
3 tablespoons bacon grease or olive oil
¼ pound thickly sliced spicy pressed sausage such as pepperoni, chorizo or soppressata, cut into ¼-inch dice
2 garlic cloves, minced
½ teaspoon crushed red pepper
4 heads of escarole (2½ pounds), dark outer leaves removed, inner leaves coarsely chopped
2 cups diced stewed tomatoes, fresh or high quality canned
1 tablespoon minced oregano
1 to 2 teaspoons salt
Black pepper to taste
Cider vinegar or lemon juice to taste
Heat 2 table-spoons of the bacon grease or olive oil in a large soup pot over high heat. Add the spicy sausage and garlic and continue cooking over high heat, stirring constantly, until the garlic is golden, about 2 minutes. Add the red pepper and stir. Add the escarole in batches and cook. Add the tomatoes and oregano; season with salt and pepper and bring to a boil. Cook over low heat until the escarole is tender, 10 to 15 minutes. Remove from heat, cover, and allow to sit for 10 minutes. Season with additional salt, pepper, vinegar, or lemon juice to taste and serve with cornbread or beans or both.

SERVES 4 TO 6
BAR HARBOR, MAINE
“This is one of the most miraculous things. You rub kale with olive oil, you roast it exactly the right amount of time, and it comes out sweet and crisp every time,” says Allison Martin, who with her husband, Elmer Beal, runs a small seasonal restaurant in Maine (see Elmer Beal’s Corned Haddock in Lemon Cream Sauce, page 231). “I love to roast the kale with clams and thin slices of linguiça sausage. Or serve it over steamed or roasted shellfish, but it’s great with chicken or pork. My daughter, who is eleven, makes a meal of roasted curly kale.”
2 pounds curly kale, rinsed and thoroughly dried
2 tablespoons olive oil
2 tablespoons pine nuts (optional)
½ teaspoon kosher salt
¼ teaspoon freshly ground black pepper
1. Preheat the oven to 450°F. Remove the ribs from the kale and tear the leaves into bite-size pieces. This should yield about 4 cups of kale.
2. Toss the kale in a large bowl with the olive oil, pine nuts, if using, and the salt and pepper. Let sit at room temperature for 10 minutes.
3. Spread the mixture on a baking sheet and roast for 2 minutes. Toss, roast for 2 minutes more. Remove from the oven and serve.

SERVES 4
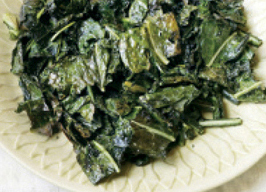
WHITMORE LAKE, MICHIGAN
A rock ‘n’ roller since the age of twelve, Peter Stark is, more than forty-five years later, still “connecting with people and spreading good vibes onstage.” The same spirit that drives him to perform may have been responsible for his crop of eighty varieties of herbs and vegetables that he and his wife, Kristina, grow at their Renaissance Acres Organic Herb Farm. This recipe was a result of a glut of red-skinned potatoes, garlic, corn, tomatoes, beans, fresh herbs, and spinach, and has become a favorite late-summer dinner.
2 teaspoons olive oil
1 pound small red-skinned potatoes, quartered
1 medium onion, chopped
1 garlic clove, minced
1 medium zucchini, coarsely chopped
½ pound green beans, trimmed and cut into 1-inch lengths
½ cup homemade vegetable broth or low-sodium store-bought vegetable broth
½ cup fresh corn kernels
2 medium-size ripe tomatoes, coarsely chopped
1½ teaspoons chopped fresh herbs, such as thyme, oregano, or rosemary
6 ounces spinach leaves, preferably New Zealand spinach
Kosher salt and freshly ground black pepper
2 ounces crumbled feta, goat, or blue cheese, about ½ cup (optional)
1. Heat a large skillet over medium-high heat and add the oil. Add the potatoes and cook, stirring occasionally, until lightly browned, about 5 minutes.
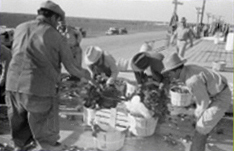
Icing Spinach, RUSSELL LEE, 1939.
2. Add the onion, garlic, zucchini, and green beans; cook, stirring often, 2 minutes. Add the broth and cook, stirring occasionally, 2 minutes. Add the corn, tomatoes, and herbs. Cover and cook over medium heat just until potatoes are tender, about 3 minutes.
3. Add the spinach and cook until just wilted, about 2 minutes.
4. Season with salt and pepper to taste. Just before serving, sprinkle with the cheese, if desired.

SERVES 4
ST. PAUL, MINNESOTA
Teresa Ortiz grew up in Mexico City and married a Minnesotan of Scandinavian descent. Political activists who loved to travel, they raised their three children in St. Paul, Guatemala City, and San Cristobal de Chiapas. Carmen Johnson, their youngest child and only girl, learned to make Danish pastries and Swedish cookies from one grandmother and northern Mexican dishes, like this orange-scented version of meat-stuffed peppers, from the other. Because the chiles can be prepared ahead, they make a marvelous meal for a crowd and are delicious served with rice, black beans, and crisp vegetables or salad.
12 medium poblano chiles
2 cups cooked white rice
½ pound thinly sliced Monterey Jack cheese (about 12 slices)
FOR THE SALSA CASERA
6 Roma (plum) tomatoes
¼ cup finely chopped onion
3 garlic cloves
2 or 3 serrano chiles
2 tablespoons chopped cilantro
2 pinches of kosher salt
FOR THE PICADILLO DULCE
1 pound lean ground beef
2 garlic cloves, chopped
1 small onion
2 tablespoons chopped fresh parsley
¼ cup chopped walnuts
¼ cup salted peanuts
½ cup raisins
2 red apples (such as Cortland), cored and cut in small pieces
2 carrots, cut in small pieces
¾ cup orange juice
2 pinches of kosher salt
1. Preheat the oven to 375°F. Arrange the poblano chiles in a single layer in a baking dish. In another baking dish, arrange the tomatoes, onion, garlic, and serrano chiles for the salsa casera. Roast until all the vegetables are charred, 40 to 50 minutes, turning frequently so the vegetables roast evenly. Remove from the oven and turn the oven down to 350°F. Put the poblano chiles in a resealable plastic bag to let them sweat until cool.
2. To make the salsa casera: Place the roasted tomatoes, onion, garlic, and serrano chiles in a blender or food processor and blend until liquefied. Transfer to a saucepan and simmer over low heat for 30 minutes, until thick.
3. Pour the salsa into a bowl and let cool. Stir in the cilantro and salt.
4. To make the picadillo dulce: Heat a large skillet over medium heat. Add the ground beef, garlic, onion, and parsley, and cook until the beef is no longer pink. Stir in the walnuts, peanuts, raisins, apples, and carrots. Add the orange juice and salt. Lower the heat and simmer about 30 minutes, until the liquid is reduced.
5. After the poblano chiles cool, wearing gloves, carefully remove the skins, keeping the chiles intact. Cut a slit along the length of each chile and carefully remove seeds and veins without removing the stems. Arrange the chiles in a single layer in a baking dish. Fill each one with 2 tablespoons rice, 2 to 3 tablespoons of picadillo dulce, and a slice of cheese.
6. Bake about 10 minutes, until the cheese melts. Serve the chiles topped with salsa casera.

SERVES 4 TO 6
BROOKLYN, NEW YORK
“People don’t think about cooking radishes,” said Jeff Beil, a 30-year-old web producer, “and it’s so good. Sometimes I add some murdered (chopped and caramelized) onions to the radishes. They are also awesome tossed with grilled peaches. But usually I just go pure and straight and serve these as a vegetable with grilled fish or chicken, or on a big salad.”
4 tablespoons unsalted butter
2 bunches radishes, scrubbed, tops removed, except for a few tender decorative stems, cut in half
2 teaspoons black lava salt or kosher salt
12 teaspoons poppy seeds
Melt the butter in a heavy pan over medium-high heat and continue cooking until the foam subsides. Place the radish halves, cut side down, in the pan and cook until they begin to char, about 3 minutes. Turn the radishes and cook until the skins blister, about another minute. Use a slotted spoon to remove the radishes to paper towels to remove excess butter, plate, and sprinkle with the salt and poppy seeds.

SERVES 4
COCONUT CREEK, FLORIDA
Jasmin Evans grew up near Stuttgart, Germany, but when Ms. Evans was twenty, she and her husband moved to the United States. This recipe has been in her collection for so long that she cannot remember its provenance. It is a favorite of her children, who love to eat spoonfuls of the robustly seasoned casserole on toasted French bread. Ms. Evans serves it as a main course or a side dish.
4 medium zucchini, quartered lengthwise and sliced
1 onion, sliced
1 tablespoon olive oil
2 tablespoons plain dry bread crumbs
1 tablespoon grated Parmesan cheese
4 nicoise olives, pitted and chopped
2 to 4 anchovy fillets, rinsed and chopped
2 garlic cloves, minced
½ teaspoon grated lemon zest
1 teaspoon minced fresh thyme
1 teaspoon minced fresh basil
½ teaspoon minced fresh rosemary
Kosher salt and freshly ground black pepper
1. Preheat the oven to 425°F.
2. Mix the zucchini and onions with the oil, spread on a rimmed baking sheet, and roast for 7 to 8 minutes. Stir and roast another 5 to 8 minutes, until golden. Remove from the oven but leave the oven on.
3. Spoon the zucchini mixture into a 9 x 9-inch baking dish. Combine the bread crumbs, cheese, olives, anchovies, garlic, lemon zest, thyme, basil, and rosemary. Add salt and pepper to taste. Spread over zucchini and bake until the topping is golden brown, about 10 minutes.
4. Let cool slightly and serve on French bread or as a side dish.

SERVES 4
HALEIWA, HAWAII
Like most people in the rustic old sugar-mill town on the north shore of O’ahu, Maya Lachlan cannot pinpoint her ancestry. “People came from China, Japan, Korea, Portugal, Norway, Scotland, and the Philippines to work on the sugar plantations. My mother told me we had a little bit of each so we better be nice to everybody.” Ms. Lachlan surfs, gardens, cooks, hikes, and dances a mean hula. “We call ourselves the ‘anti-Waikiki.’ There are wild chickens in the mango trees and more backyard barbecues than restaurants. Our idea of nightlife is sitting on the beach looking at the stars. Some friends and I made salt in pans in the backyard for a while. The iron oxide that is prevalent throughout these islands gives the salt a pink-rusty cast. We also made some black lava salt. This recipe came from those efforts, as well as the fact that one night we didn’t have any olive oil to make a raw vegetable salad. We use the same technique on green papaya and not-quite-ripe mango. The crunch is great with roast pig or just about any barbecue. The trick is to make the dish one second before you serve it. If it sits, it gets watery and limp. You want the crunch.”

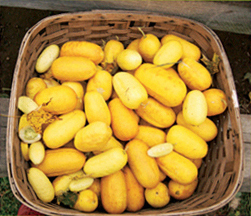
6 small to medium yellow summer squash
2 teaspoons highest quality coarse sea salt (preferably Hawaiian pink or black lava variety, ground very fine)
Cut the squash in half lengthwise, then into ⅛-inch-thick half-moon slices. In a large bowl, toss the squash with the salt. Serve immediately.

SERVES 4
MT. IDA, ARKANSAS
Following a grand cross-country tour of the United States, Maureen Walther met the man she would marry on her flight back home to Johannesburg. One thing led to another, and as the plane flew over Arkansas, her future husband announced that he would retire there. A year later, she was living in the hamlet of Mt. Ida. She found her fellow villagers “warm and accepting,” and the squash casserole, one of the jewels of the American southern kitchen, delicious.
4 tablespoons (½ stick) unsalted butter, plus more for the baking dish
1 small Vidalia or other sweet onion, finely chopped
4 medium yellow summer squash (about 2 pounds), cut into ¼-inch-thick slices
¼ cup grated Parmesan cheese
1 cup grated Cheddar cheese
1 cup fresh bread crumbs
2 large eggs, lightly beaten
1 teaspoon kosher salt
½ teaspoon freshly ground black pepper
1. Preheat the oven to 375°F. Butter an 8-inch square baking dish.
2. Melt 2 tablespoons of the butter in a large skillet over medium-high heat. Add the onion and cook, stirring often, until softened but not browned, approximately 5 minutes. Add the squash and stir well. Cover and cook, stirring often, for 7 to 8 minutes, until the squash is tender but not browned.
3. Transfer the squash and onion to a large bowl, let cool for a few minutes, then stir in the Parmesan, ¾ cup of the Cheddar, and ½ cup of the bread crumbs. Stir in the eggs, salt, and pepper. Transfer the squash mixture to the prepared baking dish.
4. Melt the remaining butter. In a small bowl, combine the remaining Cheddar and bread crumbs. Toss with the melted butter. Scatter over the casserole.
5. Bake for 30 minutes, until the top is crisp and golden brown and a knife inserted into the center comes out clean. Serve hot.

SERVES 4
NEW ORLEANS, LOUISIANA

In the day care center Mary Shaw runs in her home, it is not unusual for several babies to stay for weeks on end. The day before Hurricane Katrina, a group from the Good Food Neighborhood program, which works to make good food accessible to all, helped the neighborhood doyenne plant a kitchen garden in her backyard. A year later the volunteers came back and dug a new garden in the flooded silt. They gave Mrs. Shaw seedlings and seeds—eggplant, mustard greens, spinach, tomatoes, mint, basil, green bell peppers, and green onions. “We eat everything that comes out of the ground,” she says. “I don’t can or preserve. I fed everybody fresh vegetables. Even the babies. I don’t see vacant lots anymore, I see gardens to come.”
12 large Creole tomatoes or other large tomatoes Salt
1 pound medium shrimp
2 pounds ground beef chuck
½ large sweet onion, chopped
1 green bell pepper, stemmed, seeded, and chopped
1 garlic clove, chopped
2 green onions (scallions), chopped
3 cups fresh bread crumbs (preferably from crustless French bread)
Creole seasoning
1. Preheat the oven to 350°F. Cut a thin slice from the stem end of each tomato. Using your fingers and/or a small knife, core the tomatoes, but leave the walls intact. Discard the seeds. Roughly chop the pulp. Lightly salt inside the tomatoes, then invert them onto paper towels until ready to stuff.
2. Bring a medium saucepan of salted water to a boil over high heat. Add the shrimp and cook just until they all turn bright pink. Using a skimmer or slotted spoon, transfer to a plate to cool; reserve the cooking liquid. Peel the shrimp and roughly chop.
3. Brown the beef in a large skillet over medium heat, stirring to break up any clumps. Spoon off any accumulated grease. Return the pan to the heat and stir in the onion, bell pepper, garlic, green onions, and tomato pulp. Cook, stirring occasionally, until the vegetables have softened, about 5 minutes.
4. Remove from the heat and pour into a large bowl. Cool slightly, then stir in the bread crumbs, shrimp, enough of the shrimp cooking liquid to hold the mixture together and keep it moist, and Creole seasoning to taste.
5. Place the tomatoes, hollow side up, in a greased baking dish just large enough to hold them snugly. Spoon the filling into the centers. Bake for 25 to 30 minutes, until the skin begins to shrivel and the tomatoes are tender.

SERVES 12
MOBILE, ALABAMA
After a particularly calamitous early-summer gale, Miss Jeanie Claiborn, a passionate gardener and cook who is, she says, “what was once called ‘a lady’ and today would be termed ‘a professional volunteer,’” reached the end of her green tomato repertoire. This pie was inspired in equal measure by the eggplant Parmesan she had sixty-four years ago when she went to New York City to shop for her trousseau and her love for sharp, fresh feta cheese. It can be served as an appetizer, a luncheon dish, or a main course.
1 tablespoon olive oil
2 cups freshly made fine bread crumbs
2 teaspoons chopped fresh oregano
½ teaspoon kosher salt
1 teaspoon freshly ground black pepper
1 whole egg plus 1 egg white
3 pounds green tomatoes, cut into ¼-inch slices
2 pounds ripe red tomatoes, peeled, cored, seeded, and chopped
1 teaspoon grated orange zest
1 garlic clove, minced
1 bay leaf
½ cup crumbled feta cheese
1. Preheat the oven to 350°F. Lightly coat a baking sheet and a 9-inch fluted tart pan with the olive oil.
2. In a shallow dish, combine the bread crumbs, oregano, salt, and pepper. In another dish, beat together the egg and egg white. Dip the green tomato slices in the beaten eggs then dust with the bread crumb mixture. Lay the slices on the baking sheet. Bake, flipping once, until the bread crumbs are golden, about 15 minutes per side. Remove from the oven but leave the oven on.
3. Meanwhile, combine the red tomatoes, orange zest, garlic, and bay leaf in a nonstick skillet. Cook over medium-low heat, stirring occasionally, until the sauce thickens, about 30 minutes. Remove the bay leaf.
4. Spread a thin layer of tomato sauce on the bottom of the tart pan. Cover with a layer of green tomato slices and another thin layer of sauce. Sprinkle with a small amount of the feta and repeat until all the ingredients are used up. Top with a generous layer of the feta. Cover with foil and bake for 2 hours. Let cool briefly before serving, or cool completely to serve at room temperature.

SERVES 6
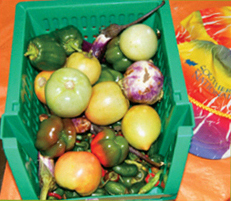
CLARKSBURG, WEST VIRGINIA
In the early 1900s when the Davis family settled there, Salem, West Virginia, was a hardscrabble sort of place. Faced with feeding a family of nine, Edna Davis stretched gifts from the garden into meals like this one, which her granddaughter, Pamela Davis, still prepares when simple comfort is the order of the day. If the tomatoes are acidic, she adds a pinch of sugar to the pot. This is a lovely side dish with grilled (or fried) chicken or fish, or a lunch or vegetable meal when topped with poached eggs.
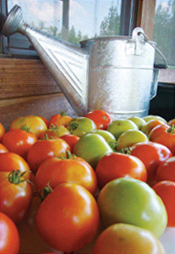
10 to 12 large ripe tomatoes, cored
3 tablespoons all-purpose flour
1½ cups milk
Kosher salt and freshly ground black pepper
4 to 8 hot biscuits, halved and buttered
1. Lightly cut an X in the bottom of the tomatoes. Place the tomatoes in a large pot and cover with water. Bring to a boil and cook 2 to 5 minutes, until the skins come off easily. Remove from the heat. Remove the tomatoes with a skimmer or slotted spoon and slip off the skins. Reserve some of the cooking water for a soupier mixture.
2. Return the tomatoes to the pot. Add the flour and milk and cook over medium-high heat, stirring occasionally and breaking the tomatoes up with a spoon, until tomatoes reach the consistency of a stew. Add salt and pepper to taste.
3. Place the biscuits on plates. Ladle the tomatoes on top and serve.

SERVES 4
DALLAS, TEXAS
Allen Achterberg has been a third-grade teacher for twenty-three years and has attended more than his allotted share of staff meetings, PTA dinners, and potluck suppers. The barrage of congealed salads, layered salads, and pasta salads that reappears each year has inspired his endless search for something unique. One of his newfound recipes is this vegetable charlotte, which he predicts will wow the covered-dish crowd.
Olive oil
6 slices high quality white sandwich bread, crusts removed
3 Black Beauty or other large eggplants (about 1 pound each)
Kosher salt and freshly ground black pepper
½ cup dried apricots, chopped
Boiling water
3 garlic cloves, minced
2 small yellow onions, finely diced
2 small zucchini, cut into ½-inch cubes, to equal 2 cups
1 red bell pepper, stemmed, seeded, and minced
3 tablespoons toasted pine nuts
2 tablespoons honey
1 tablespoon balsamic vinegar
1 large tomato, chopped, to equal 1 cup
2 teaspoons grated lemon zest
1 teaspoon fresh lemon juice
¼ teaspoon saffron threads
2 tablespoons chopped fresh basil
1 tablespoon chopped flat leaf parsley
1. Preheat the oven to 375°F. Lightly oil a 2-quart charlotte mold or soufflé dish and a baking sheet.
2. Cut the bread into rectangles and triangles to cover the bottom, sides, and top of the mold. Once the bottom and sides are in place, brush lightly with oil. Reserve the rest of the bread for the top.
3. Peel 1 eggplant, then cut it lengthwise into ¼-inch-thick slices. Arrange them on the baking sheet, brush lightly with oil, season with salt and pepper, and bake until soft, about 10 minutes. Remove from the oven but leave the oven on. When the slices are cool enough to handle, lay them over the bread all around the sides of the mold, with enough length remaining so the slices can be folded up over the top of the mold, after it is filled.
4. Cut the 2 remaining eggplants into ½-inch cubes, salt lightly, and set in a colander to drain for 15 minutes.
5. Cover the apricots with boiling water. Let sit for 2 minutes to soften. Drain and pat dry.
6. Warm 3 tablespoons oil in a heavy-bottomed skillet over medium-low heat. Add the garlic, stir and cook for 1 minute, until fragrant. Add the onions, season lightly with salt and pepper and cook for 5 minutes, until wilted and translucent.
7. Rinse the eggplant cubes, pat dry, and add to the skillet. Stirring constantly, cook for a few minutes, until soft. Add the zucchini and red pepper, stir, and cook until the zucchini is tender. Remove from the heat. Stir in the apricots, pine nuts, honey, and vinegar.
8. Combine the tomato, lemon zest and juice, and saffron in a food processor and puree to a thick paste. Stir into the cooling vegetable mixture. When it reaches room temperature, stir in the basil and parsley. Taste and adjust seasoning.
9. Using a slotted spoon, ladle out the mixture, knocking it against the side of the pan to remove excess moisture, and spread it into the lined mold. Fold the ends of the eggplant slices up over the vegetables and brush with olive oil. Fit the reserved bread over the top, press down well, brush with olive oil, and place in the oven.
10. Bake until the bread is dark gold, 25 to 30 minutes. Let rest for 20 minutes, then invert the charlotte onto a serving dish. Serve hot or warm.

SERVES 8
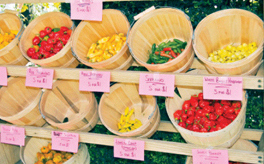
BATH, MAINE

Only a year after Kurt Spiridakis got a degree in economics and statistics at the University of Pennsylvania, he burned out. He moved to Maine to explore what would become a passion: boat building. After a yearlong apprenticeship at The Carpenter’s Boat Shop, he moved to a Virginia farm, where he learned organic gardening. Still, boats beckoned, and several years later he moved to the Greek island of Spetses, exploring his Greek roots and working in a small shipyard. He and his girlfriend cooked in their tiny kitchen on two nonadjustable burners, controlling cooking temperatures by moving the skillet to the sink. The refrigerator top doubled as counter and storage space for their three skillets and a soup pot. When his sister, Nicole, came to visit she reported that their food “was not only presentable, it was better than most of the taverna food I ate.”
¼ cup olive oil
1 medium eggplant, unpeeled, cut into ½-inch cubes
1 garlic clove, minced (optional)
Sea salt
2 teaspoons dried oregano
1 cup diced tomatoes (fresh or canned)
Freshly ground black pepper
4 ounces crumbled feta cheese (about 1 cup)
1. Preheat the oven to 350°F.
2. Heat the olive oil in a skillet over medium-high heat. Add the eggplant and garlic, if using, and cook, stirring occasionally, until browned and beginning to get tender. Season with ½ teaspoon salt and 1 teaspoon of the oregano.
3. Pour into an 8 x 8-inch ceramic or glass baking dish. Cover with the tomatoes, add salt and pepper to taste and the remaining oregano. Sprinkle the feta over the top. Cover with foil and bake for 25 to 30 minutes, until the feta begins to melt.
4. Remove from the oven and let rest for 5 to 10 minutes to allow the flavors to blend, or as they say in Greece, so the eggplant can “drink the liquid.”
5. Serve as a hot salad, side, or part of a vegetarian meal with bread.

SERVES 4
CAMBRIDGE, MASSACHUSETTS
In his guise as “Robert Nadeau, restaurant critic, Boston Phoenix,” Mark Zanger has spent most evenings for the past quarter-century in restaurants. In his kitchen at home he demands as much of himself as he does from chefs. Vegetarian chili, all but an oxymoron, has been one of the greater challenges of his home cooking career. He says:
“I was fortunate to begin making chili with a 1966 book, A Bowl of Red, by Frank X. Tolbert. Tolbert gives conservative Texas recipes and goes into the origins of chili as a cheap dish and chuckwagon favorite using lean, low-grade beef and kidney suet. Tolbert opposed all sweet ingredients such as tomatoes, cooked onions, or bell peppers, leaving a stew with dry spices, featuring cumin. His basic attitude was: ‘My chili is the best in the world; yours or anyone else’s is unfit for donkeys.’
“Over the years I have adapted his recipe to all kinds of meat, including ground turkey and pressure-cooked beef heart. I had many requests for vegetarian chili, and many failures. One problem in making vegetarian chili is that one tends to think of [chili] as a meat dish with beans, and therefore is misled to substitute for the meat. This will not work, because vegetarian meat substitutes will not absorb the flavor of the spices.
“I finally got on the right track by studying a Pakistani-Punjabi chickpea stew called chole. Despite the similar sounding name, there is no connection between chili and chole. But chole has a rich chile-garlic-cumin gravy, even though contemporary recipes often use tomatoes.
“A key point is that it is the beans which must substitute for the meat in vegetarian chili, and therefore we use higher-protein red beans instead of the starchier pinto beans that are bland foils for meat chili. We also cook some of the spices into the beans. Freed of the confusion about meat substitutes, we then turn to silken tofu, which is fattier and tastes better than firm tofu. Along with vegetable oil, the silken tofu supplies the fat that carries the fat-soluble flavors of garlic, cumin, and hot pepper. I think of it as a substitute for cheese, which only became a standard garnish for chili when cooks began routinely to skim off the unhealthful beef fat. Some people go on to add sour cream, avocado, and other fatty garnishes. This detracts from the integrity of the dish.
“Other ingredient pickiness: The green enchilada sauce is currently the only such product in Boston supermarkets that isn’t mostly tomato. There used to be red enchilada sauce made primarily from chiles, but brand by brand it has been tomato-fied. If you want to soak, skin, seed, and make your own chile sauce—and have a level-four biohazard lab in which to do so—that would be even better.
“Powdered cumin loses a lot. Prechopped garlic has everything but the bite. No amount of it will provide that. Oregano, a good friend of beef, is really a substitute for wild herbs of similar flavor in the Southwest, and I have sometimes cooked epazote with the beans instead. The paprika needn’t taste like much; but the chile powder is mission critical.”
4 to 6 dried hot chiles
Sea salt
2 to 4 tablespoons cumin seeds
2 to 4 garlic cloves
¼ cup vegetable oil
4 heaping tablespoons pure ancho chile powder
2 tablespoons paprika
One 14-ounce can green enchilada sauce
1 tablespoon dried oregano
Tomato sauce (optional)
One 12.3-ounce package silken tofu
Masa harina or cornmeal, to thicken (optional)
1 onion, for garnish (optional)
Cheddar cheese, for nonvegan garnish (optional)
1. Place the beans and twice their volume of water in a pot and bring to a boil. After 5 minutes, drain the beans. Cover with fresh water and soak overnight.
2. Drain the beans again, add twice their volume of water with the dried chiles and salt to taste. Cook over medium heat until they’re tender, but not falling apart.
3. Toast the cumin carefully in a toaster oven until you can smell the aroma. Grind the seeds with sea salt in a mortar and pestle or fold into aluminum foil and roll a heavy jar over them. It’s okay if they don’t turn to powder. Chop the garlic.
4. Heat the oil in a large pot and add the cumin and garlic. Cook a minute or two, then add the chile powder and paprika. Cook a little more, letting it stick but not burn.
5. Add the enchilada sauce, beans and their cooking liquid, and the oregano. Remove the whole chiles. Cook until you can’t stand not tasting the mixture, then add more chile powder and/or paprika so it looks red, salt to adjust the flavor, and possibly a few tablespoons of tomato sauce, no more.
6. Cut long slices both ways in the tofu to outline cubes, then run the knife around the inside edge of the package to loosen the tofu. Turn the package upside down so the cubes release onto a cutting board. Don’t worry about some odd pieces. Add the tofu to the pot.
7. Correct the soupiness of loose stew with masa harina.
8. If you must, dice optional onion and/or Cheddar cheese as garnishes.
9. Serve over rice.

SERVES 6 TO 8

CROZET, VIRGINIA
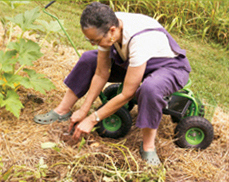
“My mother was ‘Peck’s Bad Girl,’ a young white woman who joined the NAACP and married and divorced my father, a black man from Texas,” said Dr. Leni Sorensen, the head of African American history at Monticello. “Growing up in Riverside, California, I didn’t think of myself as black or white. I was the daughter of a single working woman, reared to be a radical and an atheist with a grandmother and a great-aunt pulling hard in the other direction. I don’t need to tell you who won. Both my great-grandfathers were born in 1870. My grandmother and aunt cooked on this amazing gas and wood combination range. They taught me to make corn pone and to appreciate the theater of black churches. I left home when I was 16 and put together a band, Womenfolk; we performed all over the place from 1963 to 1966. I married and we went back to the earth on a farm in Oklahoma. Later, my husband Kip and I moved here to Crozet, raised our children. I got my doctorate and went to work at Monticello; it’s right down the road. Kip and I make up for missing the farm by our garden. It gets bigger every year. On Wednesdays, I make up a pot of food and bread and sit on the porch from five to eight and talk to anyone who comes by who wants to talk about gardening or cooking or history. My grandmother and aunt made this dish. They were from Boligee, Alabama.hence the name. It’s like having a garden for dinner. I make it for my grandchildren and serve it with corn pone.”
6 slices thick-cut double smoked bacon, chopped
2 yellow onions, peeled and sliced into ½-inch rounds
1 to 2 teaspoons salt
Black pepper to taste
4 ripe tomatoes, sliced in ½-inch slabs
12 new potatoes, unpeeled, sliced in ½-inch slices
4 cups green beans, rinsed, ends snapped and cut in bite-size lengths
In a heavy cast-iron pot over low heat, cook the bacon until it begins to crisp, 5 to 7 minutes. Add the onions in one layer, season lightly with salt and pepper, and cook, stirring occasionally until they are limp and translucent, about 5 minutes. Add the tomatoes in layers and season with salt and pepper. Add the potatoes in layers and season each with salt and pepper. Add the green beans and season with salt and pepper. Cover, reduce the heat to lowest setting, and cook until the potatoes are tender, 40 to 60 minutes.

SERVES 6
BREMERTON, WASHINGTON
Michael Hogue grew up on military bases, an experience that allowed him to see—and taste—the world with no preconceived ideas. During his own tour in the navy, he learned that “kitchen duty was mandatory for newbies” and about “cooking for the masses and making do with what you have.” He first tasted this dish at Al-Fassia in Marrakesh and has modified it only by increasing the lemon and cinnamon. Couscous is the traditional base for a tagine, but Mr. Hogue suggests serving it over rice or fettuccine, or even on its own. A salad of oranges and olives, accompanied by a traditional flatbread, might start the meal, followed by the tagine. Chilled melon balls would be a perfect ending.
1 tablespoon olive oil
2 medium onions, finely chopped
2 cups homemade vegetable broth or low-sodium store-bought vegetable broth
1 cup water
½ cup fresh lemon juice
1 pound carrots, peeled and cut into 1-inch chunks
½ pound turnips, peeled and cut into 1-inch chunks
½ pound Yukon gold potatoes, peeled and cut into 1½-inch chunks
½ pound sweet potatoes, peeled and cut in 1½-inch chunks
1 teaspoon ras-al-hanout spice blend
1 teaspoon ground cinnamon
Kosher salt and freshly ground black pepper
2 Meryam’s Preserved Lemons (page 82), 1 chopped and 1 sliced thin
One 9-ounce package frozen artichoke hearts, thawed
1. Heat the oil in a Dutch oven or tagine over medium heat. Add the onions and cook about 4 minutes, stirring occasionally, until soft.
2. Stir in the broth, water, lemon juice, carrots, turnips, potatoes, sweet potatoes, ras-al-hanout, cinnamon, 1 teaspoon salt, and ½ teaspoon pepper. Bring to a simmer, cover, and cook about 30 minutes, stirring occasionally, until the vegetables are tender.
3. Stir in the chopped preserved lemon and artichokes and simmer for 5 minutes more. Season with salt and pepper to taste. Garnish with the sliced lemon, and serve.

SERVES 6
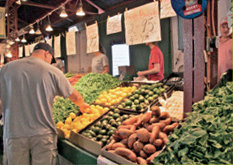
CHICAGO, ILLINOIS
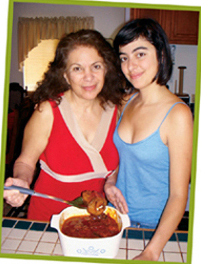
Mitra Stricklen, a graduate student in anthropology at the University of Chicago, a gardener, cook, and local food advocate, adores eggplant, particularly her mother’s Persian-style sweet-and-sour eggplant. Ms. Stricklen says that she carries the recipe for khoresht bademjoon in her head to farmers’ markets and modifies the basic formula to suit what is best in the market that day.
2 large eggplants
Kosher salt
2 tablespoons olive oil
3 yellow onions, sliced
¼ cup vegetable oil
One 14.5-ounce can whole tomatoes or 6 large tomatoes, roasted and peeled
1 tablespoon kosher salt
1 tablespoon ground cinnamon
1 teaspoon freshly ground black pepper
½ teaspoon ground nutmeg
1 cup water or vegetable stock
2 tablespoons fresh lemon juice
Persian Herbed Steamed Rice (page 631), for serving
1. Cut the eggplants into thick slices. Generously salt both sides of each eggplant slice and let drain in a colander for 15 minutes so the salt can pull out the bitterness.
2. Rinse the slices and pat dry.
3. Meanwhile, heat the olive oil in a skillet over low heat and add the onions. Cook until soft and golden brown, stirring occasionally, about 20 minutes.
4. Heat the vegetable oil in a wide, heavy-bottomed skillet over medium-high heat and fry the eggplant slices until golden brown on each side. Remove from the oil and drain on a wire rack set over a baking sheet or paper towels.
5. In a large saucepan, combine the tomatoes, 1 tablespoon salt, the cinnamon, pepper, nutmeg, water, and lemon juice and mix well. Bring to a boil, then reduce the heat and simmer for 15 minutes. Add the eggplant slices and cook for 5 minutes more.
6. Transfer to a serving dish and garnish with the fried onions. Serve with chelo.

SERVES 6
BROOKLYN, NEW YORK
Born in Peshawar, Pakistan, Roohi Choudhry came to the United States in 1999 for graduate school in Texas and “stayed on.” She grew up in a traditional household where her mom, Suboohi, did all the cooking. “Most of my life,” she says, “I could not even make an egg, and I had no interest in cooking.” Once in America, though, she “didn’t have options for good food,” so she began calling her mom for recipes. Her first foray into cooking “was a disaster, a flop,” but slowly and steadily she found a rhythm.
Eggplant pakorey is simple enough to make anytime, but in the Choudhry household it was synonymous with Ramadan. “When you haven’t eaten all day,” she says, “this is the best thing ever.” Although she doesn’t currently observe Ramadan, making her mother’s recipe is a tradition that brings back nice memories.
To create a taste balance, she suggests serving this recipe with a cooling yogurt-based side dish or sauce. You can use this batter with a variety of seasonal vegetables. Partially cooked potato rounds and cauliflower florets are her favorites.
7 heaping tablespoons besan (Indian chickpea flour)
Scant ¼ teaspoon baking soda
1 teaspoon freshly ground cumin seeds
½ teaspoon kosher salt
1 teaspoon grated fresh garlic
1 teaspoon grated fresh ginger
¼ teaspoon red pepper flakes, or to taste
½ cup lukewarm water
1 medium eggplant
Olive oil, for frying
Coriander chutney or tamarind chutney, for serving
1. Sift the flour into a bowl with the baking soda, cumin, and salt and mix with a fork, mashing any lumps in the flour. Add the garlic, ginger, and pepper flakes. Add the water a little at a time, beating gently with the fork as you go until the batter reaches the consistency of a thick cream soup (add more water if necessary). Cover the bowl and refrigerate for at least 1 hour and up to 3 hours.
2. Slice the eggplant into ¼-inch-thick rounds and immerse them in a bowl of lukewarm, lightly salted water (this will prevent them from turning color).
3. Heat about ½ inch of oil in a large nonstick skillet over medium heat. One at a time, remove the eggplant slices from the water, dry, and dip in the batter, coating all sides. Fry them in small batches, flipping once, until golden brown. Using a skimmer or slotted spoon, transfer the slices to a wire rack or paper towels to drain.
4. Serve hot, while they are still crispy, with coriander or tamarind chutney.

SERVES 4
COLUMBIA, SOUTH CAROLINA
Dr. David Shields developed a taste for rice as a child when his father, a CIA agent, was stationed in Japan and rice was the “daily bread.” Now a professor of Southern Letters at the University of South Carolina and a cofounder of the Carolina Gold Research Foundation, Dr. Shields says his interest in repatriating heirloom grains, such as Carolina Gold Rice, was as much a result of his mother’s dedication to fine food as it was to his academic interest. His research into the community identity that formed around the Carolina Rice Kitchen has led him to historic rice bread recipes and to using rice flour in southern classics, such as this fried okra. Rice flour absorbs less oil and, he says, makes a more cohesive batter than, say tempura, which can be shatter-prone. In recipes from the eighteenth century, okra was typically sliced thinner than a quarter and, he says, the diagonal cut makes the perfect flesh-to-interior ratio for deep-frying.
2 pounds young okra, preferably Clemson Spineless variety
1½ cups cold lager beer
1 egg
¼ teaspoon salt
⅛ teaspoon cayenne pepper
1½ cups rice flour, preferably Anson Mills Carolina Gold Rice Flour
1 cup cornstarch
Up to 6 cups sesame oil or vegetable oil, for deep-fat frying, plus more if necessary
1. Wash the okra, pat dry, and slice each piece diagonally into slices no thicker than a quarter and set aside in a large bowl. Place the beer, egg, salt, and cayenne in a large bowl and whisk to combine. Add the rice flour and cornstarch, and whisk to combine well. Pour the batter over the sliced okra and set aside.
2. Heat a countertop deep-fry machine or fill a pot that is equipped with a basket or strainer slightly less than half full of sesame or vegetable oil and place over medium-high heat. Bring the oil to 350°F. To check the temperature, with a slotted spoon or tongs drop one piece of okra in the oil. It should bubble immediately.
3. Remove a handful of okra slices from the batter with a slotted spoon or tongs. Tap to remove excess batter (they won’t separate if you’re clamping them with tongs) and then carefully lower the pieces into the oil. Fry for about 3 minutes until very dark brown and then drain on paper towels. Maintain an oil temperature between 325 and 350°F. Serve as a snack or as a side dish with meat or fish.

SERVES 8
EDGEWOOD, NEW JERSEY
Brought up in Mumbai, Kirti Gupta moved to the United States following an arranged marriage. She was intrigued by her first taste of many ethnic foods and called her parents for help preparing her favorite Indian dishes. Eventually she created her own cultural exchange in her kitchen. Combinations such as adding a little garam masala to pasta have allowed her to venture into new territory, she says, while retaining some of her own identity. Ms. Gupta misses traditional Indian foods, like bhindi (okra) and vada pav, a patty of potatoes, peas, and herbs. “They have it here,” she says, “but it’s not the same. I could make it better at home.”
1 pound okra
1 teaspoon red chile powder, or more to taste
1 teaspoon ground turmeric
1 tablespoon ground coriander
1 tablespoon gram flour or besan (Indian chickpea flour)
1 tablespoon garam masala
Kosher salt
¼ cup olive oil
1 teaspoon yellow mustard seeds
1 teaspoon cumin seeds
1 or 2 green chiles, stemmed and finely chopped
1 teaspoon ginger-garlic paste
2 large onions, diced
4 tomatoes, diced
½ bunch cilantro, leaves only, finely chopped, for garnish
1. Trim off any long stems from the okra, but leave the small cap on. Quarter the okra lengthwise from the tip to the stem end, but do not separate.
2. Thoroughly combine the chile powder, turmeric, coriander, gram flour, garam masala, and salt to taste. Fill each okra pod with this mixture, and press cut quarters together.
3. Heat the oil in a large skillet over medium-high heat. Add the mustard seeds, cumin, green chiles, and ginger-garlic paste. As soon as they begin to splatter, add the onions and cook them until golden brown.
4. Add the tomatoes and cook for few minutes, until they become soft. Stir frequently so the mixture doesn’t stick to the pan.
5. Add the stuffed okra and cook, uncovered, for 8 to 10 minutes. Transfer to a serving dish, sprinkle with the cilantro, and serve hot.

SERVES 4

FAYETTEVILLE, ARKANSAS
By the 1930s, Helena, Arkansas, a busy port city on the Mississippi River, had a large and well-established Lebanese population, and the late Adele Etoch was one of the home cooks whose efforts kept the community close—and vibrant. The child of restaurant owners, she enjoyed an easy grace in the kitchen, whether she was cooking for four or forty, and a half century after her death, her grandchildren still request their MaMaw’s stuffed artichokes as a treat for their July birthdays.
3 globe artichokes, 1 inch trimmed off the top, leaf tips clipped
5 tablespoons fresh lemon juice
4 tablespoons olive oil
Kosher salt
½ cup finely chopped onion
1½ pounds 85% lean ground beef
4 garlic cloves, minced
¼ teaspoon red pepper flakes
½ cup toasted pine nuts
Freshly ground black pepper
One 6-ounce can tomato paste
1 tablespoon minced fresh mint
1. Cut the stem from each artichoke and trim the bottoms so they sit flat. Open the artichokes and scrape out the chokes with a spoon. Arrange the artichokes in a Dutch oven and add just enough cold water to cover them. Add 1 tablespoon of the lemon juice, 1 tablespoon of the olive oil, and 1 teaspoon salt.
2. Cover with a lid that fits down inside the pot and holds the artichokes under the water. Bring to a simmer over medium-low heat and cook for 25 to 35 minutes, until the artichokes are tender and the leaves pull out with a little resistance.
3. Reserving 3 cups of the cooking liquid, transfer the artichokes to a colander and drain upside down.

4. Meanwhile, in a large skillet, heat 1 tablespoon of the oil over medium heat. Add the onion and cook about 4 minutes, until soft. Stir in the beef, garlic, and pepper flakes and cook about 4 minutes, stirring constantly and breaking up the meat, until the meat is no longer pink. Drain off any excess fat, then stir in the pine nuts. Season with salt and pepper to taste and let cool.
5. In a blender or food processor, process the reserved artichoke cooking liquid, remaining ¼ cup lemon juice, tomato paste, and mint for about 30 seconds, until well blended.
6. Pour the remaining 2 tablespoons oil into the Dutch oven. Place the artichokes in the pot on their bases, spreading out the leaves and pushing them open. Fill the artichokes with the meat mixture, then pour the tomato sauce over the top.
7. Bring to a simmer over high heat, then reduce the heat to medium-low, cover, and cook for 20 to 25 minutes, until the sauce has thickened and the artichokes are very tender. Serve.

SERVES 6
MANHASSET, NEW YORK

Grace Brucato never expected to be the family cook. Coming of age in the late 1930s, she was one of the few girls in the Sicilian enclave in Rochester, New York, who was not lured to the kitchen. But years later, her husband, Salvatore’s, enthusiasm for Sicilian cooking proved infectious, and he became her kitchen mentor. When Mr. Brucato died, his special artichoke dish, based on a recipe of his mother’s, became her own. She’s taught her granddaughter and grandson to make it, and hopes to teach her two great-grandchildren someday, too.
The dish is a wonderful accompaniment to roasted meat and hearty pasta dishes. Mrs. Brucato figures on about four baby artichokes per person, and when fresh artichokes are too expensive, she uses frozen artichoke hearts.
FOR THE TOMATO SAUCE
2 tablespoons olive oil
2 garlic cloves, minced
One 28-ounce can crushed Roma (plum) tomatoes, including juice
Kosher salt
¼ cup chopped fresh basil
Freshly ground black pepper
FOR THE ARTICHOKES
½ lemon, if using fresh artichokes
32 to 48 small artichokes, or six 9-ounce packages frozen artichoke hearts
4 large eggs
½ cup all-purpose flour
1 teaspoon kosher salt
1 teaspoon freshly ground black pepper
Olive oil, for frying
½ cup grated Parmesan cheese
1. To make the sauce: Heat the olive oil in a large saucepan over medium heat. When the oil is hot, add the garlic and cook until it begins to brown. Add the tomatoes and 1 teaspoon salt. Bring to a boil, reduce the heat to low, cover, and simmer for 45 minutes, stirring occasionally.
2. Add the basil and pepper to taste. Simmer for 15 minutes. Adjust the seasoning as desired.
3. To make the artichokes: Preheat the oven to 350°F. If using fresh artichokes, prepare an ice water bath and add the lemon juice. Trim away the tough outer leaves, slice the artichokes in half vertically, and use a teaspoon to scrape out the choke. Drop each half in the acidulated water to avoid discoloration while you prepare the remaining artichokes. If using frozen artichoke hearts, place them in a colander under running water until they are mostly thawed. Drain, pat them dry, and slice in half.
4. Beat the eggs in a small bowl. In a separate shallow bowl, combine the flour, salt, and pepper. Heat 2 to 4 tablespoons olive oil in a large skillet over medium-high heat. Dip each artichoke half in the eggs and then the flour, making sure that it is evenly coated. Working in batches if necessary, cook the artichokes, turning until lightly browned. Transfer to a wire rack set over a baking sheet.
5. Spread a bit of the tomato sauce into a large casserole and place artichoke hearts in a single layer over it. Add a bit more sauce, a layer of cheese, and another layer of artichoke hearts. End with a layer of cheese. Bake uncovered about 15 minutes, until the cheese is golden brown.

SERVES 8
HYDE PARK, MASSACHUSETTS
When Maria Latimore was two, her family moved from Wadley, Georgia, to Roxbury, a neighborhood in Boston. By the time she was in her early teens, she cooked the family dinner five nights a week, learning the basics from her mother. But while her mother’s cooking was—and still is—very Southern, Ms. Latimore liked to experiment in the kitchen. “I cook because I like to eat food that tastes good and is healthy for me,” she says. She developed this recipe for green beans as an alternative to cooking them with ham hocks or neck bones, “the way my mother would.”
1 tablespoon olive oil
1 medium onion, finely chopped
2 garlic cloves, minced
½ teaspoon dried thyme
½ teaspoon dried rosemary, crushed
⅛ teaspoon red pepper flakes
2 pounds fresh green beans, trimmed and snapped into 2-inch pieces
Two 14-ounce cans low-sodium chicken broth
3 cups water
2 teaspoons kosher salt
½ teaspoon freshly ground black pepper
1. Heat the oil in a large Dutch oven over medium heat. Add onion and cook until brown, about 10 minutes, stirring a few times. Stir in the garlic, thyme, rosemary, and red pepper flakes and cook for 2 minutes more.
2. Turn up the heat to high and stir in green beans, broth, water, salt, and black pepper. Bring to a boil, then lower heat to medium, and simmer vigorously for 45 minutes, or until beans are completely tender. Serve.

SERVES 8 TO 10
BEREA, KENTUCKY
Bill Best’s family has farmed in Appalachia since before the American Revolution. There was a time, he says, when “everyone was a seed-saver” because it was the only way to grow food. He learned seed-saving from his mother and grandmother and returned to the practice twenty-five years ago, when his customers began complaining about his commercial green beans. Growing traditional regional beans from saved seed has been personally satisfying and today he sells more than four hundred varieties of heirloom beans and forty-one types of seed. “Leather Britches”—unshelled beans that were traditionally threaded together and hung to dry (at which point they look like little britches on a clothesline)—can be cooked slowly and can stay on the stove for several days, he says, and be eaten for lunch, supper, and lunch again the next day. “The dish gets better with each succeeding meal.”
2 pounds green beans
½ pound salt pork, cut into cubes
1 or 2 large onions, sliced
2 large potatoes, peeled and cut into chunks
Kosher salt
Trim and string the beans and break them in half. Put in a large saucepan and add water to cover. Add the pork (more or less, to taste), onions, and potatoes. Add salt to taste. Cover and simmer over low heat on a wood stove for 1 hour.

SERVES 4 TO 6
FINDLAY, OHIO
Cheryl Shafer, who grows corn with her husband, Harold, gives this advice to the steady stream of shoppers who drive to their farm for their corn fix:
“If you grow up near corn, you are moved by acres of straight, leafy rows, reassured by order and predictability. You know the difference between good and bad corn early in life and have the confidence that comes from such discernment. Along with Huck Finn, you know ‘There ain’t nothing in the world so good when it’s cooked right,’ and you know that this means rushed from the field, shucked, and plunged into a pot of boiling water before the sugar in the kernels begin to convert to starch.”
To boil corn on the cob: Bring a big pot of water to a boil. Husk the corn and rub away the silk. Add the corn and boil, uncovered, until tender, 5 to 7 minutes.
To grill corn on the cob: Fill a bucket or big pot with ice water. Leave the husks and silk intact and plunge the corn in the water. Soak for 2 hours and up to 6, weighting down if necessary to keep the ears submerged. Preheat a grill. Place the corn in a single row on the grill, cover and cook, turning often, until the husks are lightly browned on all sides, 15 to 20 minutes. The corn can also be buttered prior to grilling. Pull back the corn husks and remove the silk. Spread the ears with the butter of your choice and re-cover the corn with the husks. Soak in water for 10 minutes. Grill until tender, turning from time to time, 15 to 20 minutes. Remove the husks and season with salt and pepper.
To microwave corn on the cob: Remove the husks and silk from up to 6 ears of corn. Place the corn in gallon-size resealable plastic bags. Seal the bags halfway. Set the timer for 2 minutes per ear and cook on high.

EL CERRITO, CALIFORNIA
Hannah Berman represents the most recent generation of “glorious amateur” home cooks—young people who see cooking and eating as a great adventure they can share in their homes, or in the great electronic village of the Internet. Famous in high school for always bringing great cookies to class, Ms. Berman cooked in her college dorm, mainly to avoid cafeteria food. When she got her own apartment, she formed a monthly dinner party club and served lavish meals to twenty or more friends.
Ms. Berman described her corn pudding’s texture as “almost like a soufflé.” Although she made the dish in college when she was craving comfort food, and still makes it for dinner, she considers it “special food for a special occasion.” The recipe works with frozen corn, but using fresh “makes a big difference,” she says.
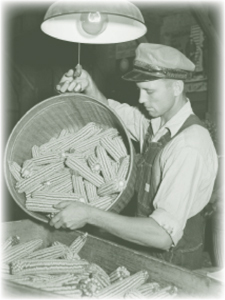
3 tablespoons (⅜ stick) unsalted butter, melted, plus more for the baking dish
2 tablespoons all-purpose flour
1 teaspoon kosher salt
4 large eggs
2 cups corn kernels (preferably fresh)
1⅓ cups half-and-half
1. Preheat the oven to 325°F. Lightly butter an 8 x 8-inch casserole or baking dish.
2. Combine the melted butter, flour, salt, eggs, corn, and half-and-half, beating to blend thoroughly. Pour into the casserole. Bake about 1 hour, stopping after 30 minutes to stir the mixture.
3. The pudding is ready when a knife inserted into the center comes out clean. Serve immediately.

SERVES 4
HOUGHTON, IOWA
“My mother and grandmother used cornmeal and sugar and made these cakes for breakfast,” Leona Chalmers says. “They were usually served with sausage or scrapple or the like.” Ms. Chalmers likes having some texture, so she added the corn kernels. She also took out the sugar and serves them for supper. They are good with pulled pork and grilled meat of any sort. “My granddaughter is now vegetarian,” Ms. Chalmers says, “and she likes these cakes with grilled vegetables, black bean chili, or some pepper Jack cheese melted on top.”
Unsalted butter
2 cups fresh corn kernels, cut from the cob, or 2 cups frozen, thawed and drained
2 cups wild mushrooms such as chanterelles, fresh or rehydrated dried
Kosher salt and freshly ground black pepper
1 cup coarse yellow cornmeal
⅓ cup boiling water, plus more if necessary
2 large eggs, lightly beaten
1 cup buttermilk
1 tablespoon minced scallions, green and white parts, or chives
½ cup vegetable oil or bacon grease
½ cup fresh ricotta or soft fresh goat cheese
1. Melt 1 tablespoon butter in a cast-iron skillet. When it is very hot, add the corn kernels. Cook and stir to toast the corn to a dark gold color, but stand back—those nibs can pop and make the butter splatter. Remove from the heat using a slotted spoon, transfer the corn to paper towels. Pat it dry.
2. Return the skillet to the stovetop, raise the heat to high, add more butter if necessary, then add the mushrooms, season lightly with salt and pepper, and cook just to warm, about 2 minutes, stirring and tossing constantly. Remove from heat. Transfer to the paper towels to drain.
3. Preheat the oven to 350°F. In a medium bowl, stir together the cornmeal, 1 tablespoon salt, and ⅛ teaspoon pepper. Add boiling water to the cornmeal mixture a little at a time, whisking between each addition until you have a thick paste. In another bowl, stir together the eggs and buttermilk. Add this to the cornmeal mixture and stir to combine. Add the toasted corn and minced scallions, and season lightly with additional salt and pepper.
4. Warm 8 tablespoons butter or the vegetable oil or bacon fat in a 12-inch cast-iron skillet over medium-high heat. When hot, pour the corn batter into the pan and reduce the heat to medium. Immediately scatter the mushrooms across the cake. Divide the ricotta into small pieces and dot over the top. Cook for 1 minute more. Transfer to the oven and bake until the top is lightly golden and the cake feels firm to the touch, about 15 minutes.
5. Remove from the oven, cool slightly, and turn out onto a serving plate, cut into wedges and serve.

SERVES 8
BROOKLYN, NEW YORK
The impresario of Tommaso’s restaurant in Bay Ridge, Brooklyn, Tommy Verdillo has been wowing Le Tout Italian New York with his flawless renditions of southern Italian cooking as well as the operatic arias that he belts out in the dining room. Escarole is delicious as a side dish or tossed with pasta when it is chopped, sautéed with garlic, and allowed to simmer slowly in its own juices, he says. “But this dish, ah this dish, is the star, a course that humbles all others, a meal in itself.”
¼ cup golden raisins
1¼ teaspoons olive oil
1 garlic clove, minced
½ cup dry bread crumbs
¼ cup coarsely chopped walnuts
½ teaspoon kosher salt
Freshly ground black pepper
1 anchovy fillet, finely chopped
1 teaspoon capers, drained and chopped
2 cups plus 2 tablespoons homemade chicken broth or low-sodium store-bought chicken broth
1 head escarole
6 garlic cloves, crushed
⅛ teaspoon red pepper flakes
1. Soak the raisins in hot water for 30 minutes. Drain and pat dry.
2. Heat ¼ teaspoon of the oil in a medium nonstick skillet over medium heat. Add the minced garlic and cook, stirring constantly, for 30 seconds. Add the bread crumbs, walnuts, salt, and pepper to taste. Lower the heat and cook, stirring frequently, until the crumbs turn golden brown, about 4 minutes. Transfer to a large bowl and toss in the raisins, anchovy, and capers. Stir in 2 tablespoons of chicken broth.
3. Carefully press open the escarole leaves like flower petals, leaving them attached at the core. Spoon the filling between the leaves. Close up the leaves and tie string around the escarole to secure.
4. Heat the remaining oil in a deep skillet. Add the crushed garlic and pepper flakes and cook, stirring, for 3 minutes. Add the remaining broth and carefully place escarole in skillet. Bring to a simmer, cover, and cook until escarole is tender, about 45 minutes. Remove the string, cut into quarters, and serve.

SERVES 4
MARINGOUIN, LOUISIANA
Long before words such as “organic” and “sustainable” entered the American lexicon, Mary Lee and Anthony “Tadon” Miletello were working the earth. Married for forty-nine years, they plant spring and fall gardens in the fertile Louisiana soil. In mid-January, Mr. Miletello sets the seeds for his summer eggplants and tomatoes. Toward the end of March he plants the seedlings along with row upon row of okra, cucumbers, snap beans, purple hull peas, field peas, corn, and mirliton.
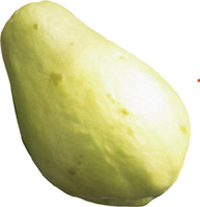
A member of the cucumber family, many Americans know mirliton as chayote squash or mango squash, since it originated in Mexico; in the Louisiana Bayou, Cajuns often use its French name, christophene. Some pronounce mirliton as spelled, while others say “mella-ton.” The vegetable loves the subtropical Louisiana climate, and the Miletellos produce surplus crops every year. What they can’t eat, they jar, freeze, or sell to passersby.
8 to 10 mirliton or chayote squash
1 pound ground beef
1 pound medium shrimp, peeled and deveined
2 medium yellow onions, diced
1 medium green bell pepper, stemmed, seeded, and diced
5 garlic cloves, minced
¼ cup freshly grated Romano or Parmesan cheese
1 cup packaged Italian bread crumbs
1 cup plain dry bread crumbs
Kosher salt and freshly ground black pepper
½ cup shredded Cheddar cheese
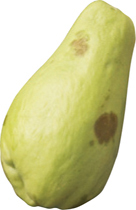
1. Preheat the oven to 350°F. Bring several quarts of water to a boil in a medium stockpot.
2. Cut the mirliton in half lengthwise and boil until tender, about 15 minutes. Drain and set aside to cool.
3. Brown the beef in a skillet over medium-high heat, stirring to break up clumps, about 10 minutes. Add the shrimp and cook 10 minutes more or until shrimp turn pink. Add the onions, bell pepper, and garlic and cook, stirring, until tender, 5 to 7 minutes.
4. Discard the seeds, then scoop the pulp from the mirliton, being careful not to break the skin. Add the pulp and grated cheese to the skillet. Combine the bread crumbs and sprinkle about half into the skillet. Stir well. Season with salt and pepper to taste and cook for 5 minutes, stirring occasionally.
5. Scoop generous portions of the filling into each mirliton shell and place in a 9 x 13-inch baking dish. Sprinkle the remaining bread crumbs and the Cheddar cheese on top.
6. Bake uncovered for 30 minutes or until slightly brown.

SERVES 8 TO 10
COLUMBUS, OHIO
Chiles en nogada may be the most famous dish to come out of the Mexican state of Puebla. The green poblano chiles, the white ground walnut sauce, and the red pomegranate seeds reflect the colors of the Mexican flag. Many Mexicans prepare the dish to celebrate the anniversary of the country’s independence from Spain on September 16, when the three main ingredients are abundant. Mr. Herrera Beristain’s grandmother also prepared it every fall in honor of his grandfather’s saint’s day.
Mr. Herrera Beristain has lived in the United States for ten years. The accountant-turned-translator, whose family has owned a restaurant in Mexico City for more than forty-five years, cooks because he “finds the whole process of converting ingredients into a dish magical.”
FOR THE PEPPERS
12 large poblano chiles
Vegetable oil
FOR THE FILLING
3 tablespoons olive oil
1 large white onion, finely chopped
1 head garlic, cloves separated, peeled, and finely chopped
2 pounds ground beef
2 ripe plantains, peeled and cut in small cubes
4 red apples (such as Cortland), cored and cut in small cubes
1 cup raisins
6 ounces candied citron, cut in small cubes
4 ounces blanched almonds, chopped
1 tablespoon ground cumin
1 tablespoon ground cinnamon
1 teaspoon dried oregano
Kosher salt and freshly ground black pepper
2 tablespoons all-purpose flour
FOR THE BATTER
4 large eggs, separated
½ teaspoon fresh lime juice
3 tablespoons all-purpose flour
3 to 4 cups vegetable oil, for frying
FOR THE WALNUT (NOGADA) SAUCE
9 ounces walnut pieces
1 bolillo (Mexican sandwich roll) or ¼ to ⅓ loaf French bread, cut into small pieces
Milk, as needed
6 ounces queso doble crema or cream cheese
FOR SERVING
Seeds of 1 pomegranate
¼ cup chopped fresh parsley
1. Preheat the oven to 500°F.
2. To prepare the peppers: Lightly brush the skin of the poblanos with oil and place them on a baking sheet. Roast until they are blistered and black on all sides, turning them as needed.
3. When the peppers are done, place them in a clean brown paper bag. Roll the bag closed. (This will steam the peppers and make the skin easier to remove.)
4. After 15 minutes, remove the peppers from the bag and carefully peel away their skins. Wipe the peppers clean with a paper towel. Using a paring knife, carefully slice them open vertically from the stem down, open, and gently cut away and discard the seedbed.
5. To prepare the filling: Heat the olive oil in a Dutch oven over medium heat. Add the onion and garlic and cook, stirring often, until translucent. Add the ground beef and cook, stirring to break up clumps, until browned. Transfer the mixture to a strainer and drain very well.
6. Return the meat to the pot and add the plantains, apples, raisins, citron, almonds, cumin, cinnamon, and oregano. Season with salt and pepper to taste. Cook, stirring occasionally, for 10 to 15 minutes, until heated through and well combined.
7. Gently spoon the filling into the peppers so they are well filled but not overflowing. Set the stuffed peppers on a baking sheet and sprinkle with 2 tablespoons flour.
8. To prepare the batter: In the bowl of a standing mixer, beat the egg whites and lime juice on high speed until stiff, about 3 minutes. Reduce the speed to medium and add the yolks one by one. Add the flour and keep beating until well mixed.
9. Heat the oil until very hot in a large heavy skillet or deep-fryer.
10. Grabbing the peppers by the stem, dip them in the batter, coating them well. Be careful not to spill the filling. Working in batches, deep-fry the chiles until golden brown on all sides. Place the chiles on a wire rack set over a baking sheet or a tray lined with paper towels.
11. To prepare the walnut sauce: Place the walnut pieces and bread in a food processor and add milk to just cover. Add the queso doble crema and process until smooth.
12. To serve: Place the peppers on a platter, spoon sauce on top to just cover, and sprinkle with pomegranate seeds and chopped parsley.

SERVES 4
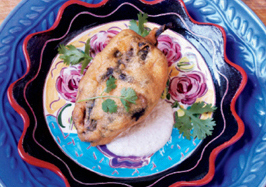
GRANVILLE, OHIO

In the summer of 2002, the people of Granville, Ohio, created a potluck to fight childhood hunger in Licking County, Ohio. The local football team set up tables on Main Street in Granville. Families came, paid $5 to rent a table, and laid out food to share. Cooks brought their best dishes. The local gourmet club evaluated each. No one was more surprised than Barbara Rush when her zucchini casserole took the blue ribbon. “I am not a cook,” said the retired schoolteacher. “This award should really go to my mother-in-law. She was a simple farm woman. Every summer night of her life, she made this casserole. Every night her husband came in from the field, said something surly, and sat down and ate without looking up. A good night was when he said nothing. When I make this recipe of hers, and everyone goes nuts for it, I like to think she’s up there in heaven, hearing it all, getting her due at last.”
2 cups grated sharp cheese
3 cups cubed bread crumbs
¼ cup melted butter
4 cups thinly sliced zucchini
1 large onion, thinly sliced
3 cups thinly sliced Roma tomatoes
½ cup finely chopped green peppers
½ teaspoon kosher salt
Freshly ground black pepper to taste
1. Preheat the oven to 350°F. Divide the cheese into 3 equal portions and set aside. Place the bread crumbs in the food processor with all but 2 teaspoons of the melted butter and pulse to combine.
2. Butter a 1½-quart casserole dish. Alternately layer the zucchini, onion, tomatoes, peppers, cheese, and bread crumbs in the casserole. Sprinkle each layer with salt and pepper ending with bread crumbs. Cover the casserole with tinfoil and bake for 45 minutes. Remove the foil and continue baking for 15 minutes more to brown the top.

SERVES 6 AS A SIDE DISH, 4 AS A MAIN COURSE
SANTA FE, NEW MEXICO
Patricia Greathouse, author of Mariachi, is descended from a long line of chile-loving New Mexicans. Her recipe for chiles rellenos (stuffed chiles) is her mother’s. Suitable for vegetarians, it lets the chile shine through, unlike the more conventional heavily battered dish. First choice for the chiles in the dish is freshly roasted New Mexican green chiles, but frozen whole or canned chiles may be substituted. Chiles rellenos are excellent with juicy pinto beans, calabacitas (small squash), and warm flour tortillas. They also make a great burrito, wrapped in a warm flour tortilla.
2 cups all-purpose flour
1 teaspoon kosher salt
2 large eggs
1 pound Monterey Jack or longhorn cheese, or ½ pound of each
12 freshly roasted New Mexico or Anaheim green chiles, peeled and seeded, stems left on
Vegetable oil

1. Preheat the oven to 250°F. Line a baking sheet with paper towels or brown paper bags. Put the flour on a plate, and mix the salt in well. Beat the eggs to combine in a shallow bowl. Cut the cheese into logs ½ inch square and as long as you can make them.
2. Lay a log lengthwise in each chile, adjusting the fit by cutting it or adding a little extra piece as needed. Wrap the chile around the cheese so none of the cheese shows.
3. Heat ¼ inch of oil in a large skillet over medium heat until hot but not smoking. One at a time, roll the chiles in the flour and then in the egg, letting any extra egg drip off. Lay a few of the chiles seam side down in the frying pan. Don’t crowd them; they shouldn’t touch. Fry until golden brown, then flip and cook on the second side. Transfer to the baking sheet to drain.
4. Keep the fried chiles warm in the oven while you prepare the remaining chiles, or serve them hot as soon as they’re finished cooking. Add more oil to the skillet as necessary; be sure to reheat the oil sufficiently before adding the chiles.

MAKES 12 RELLENOS, SERVES 3 TO 4
LAS VEGAS, NEVADA
Before Ari Feyda, a croupier at one of the Las Vegas casinos and an amateur historian, passes the platter of her peppers, she will tell the origin of this delicate recipe. Even before their expulsion from Spain, Sephardic Jews were never isolationists. And when they immigrated to the Ottoman Empire in the fifteenth century, their cooking picked up traces of Turkish and Balkan influences, as well as hints of North Africa and the Middle East from Morocco, Algeria, Syria, Lebanon, and Iran. With their sweet, pungent, and spicy notes, these peppers tell that story.
8 red or yellow bell peppers
2 tablespoons sunflower oil
2 garlic cloves, minced
1 pound tomatoes, peeled, seeded, and chopped, or one 14.5-ounce can stewed tomatoes
Kosher salt and freshly ground black pepper
1 teaspoon sugar
½ pound fresh mozzarella cheese, cut in 8 pieces
½ pound fresh salty cheese, such as ricotta salata or feta, cut in 8 pieces
1. Preheat the oven to 500°F. Place the peppers on a baking sheet and roast for ½ hour, until the skins are blistered.
2. Place the peppers in a brown paper bag, seal the bag, and let the peppers rest for 15 minutes. Turn the oven down to 350°F.
3. Use a sharp knife to remove the skins and seeds from the peppers, leaving them as intact as possible.
4. Heat the oil in a skillet over high heat and cook the garlic until gold, about 1 minute. Add the tomatoes, crushing them between your fingers while allowing as few seeds as possible into the sauce. Season with salt and pepper to taste, add the sugar, and simmer for 20 minutes, stirring occasionally. Pass the sauce through a food mill to remove any remaining skins and seeds.
5. Slip a piece of mozzarella and a piece of feta or ricotta salata inside each pepper. Place the peppers in a baking dish, cover with tomato sauce, and bake for 20 minutes. Serve very hot.

SERVES 8
CAMARILLO, CALIFORNIA
Nancy Rigg’s Amish ancestors left Colorado after they got into trouble for serving homemade beer and wine to Civil War soldiers. This recipe literally grew out of her first vegetable garden in California. One morning in early fall she found her dog barking at a zucchini plant at the back of the plot, “a huge zucchini that had been growing, and growing, concealed by the large plant leaves,” until it was “as big as a leg of lamb or a standing rib roast of beef.” For an upcoming vegetarian feast, Ms. Rigg decided to core, stuff, and bake it, serving it like a roulade. The key to this presentation is to hollow out the zucchini without slicing it in half. Serve with salad, sautéed carrots, and freshly baked artisan bread.
2½ cups chicken or vegetable stock
3 tablespoons (⅜ stick) unsalted butter
¾ cup wild rice
¼ cup basmati or long-grain brown rice
1 tablespoon olive oil, plus more for the baking dish and basting
1 large Vidalia or other sweet onion, chopped
2 or 3 garlic cloves, minced
6 fresh sage leaves, minced, or 8 dried sage leaves, crushed
2 tablespoons chopped fresh thyme leaves, or 2 teaspoons dried
2 tablespoons chopped fresh marjoram leaves, or 2 teaspoons dried
1 tablespoon chopped fresh winter savory, or 1 teaspoon dried
2 celery stalks, sliced
1 pound fresh cremini mushrooms, stemmed and sliced
One 8-ounce can whole water chestnuts, drained and diced
¼ cup good quality Chardonnay
1 cup dried cranberries
1 cup fresh cranberries, washed
½ cup chopped walnuts
Kosher salt and freshly ground white pepper
½ cup chopped fresh curly parsley leaves
1 enormous zucchini, at least 12 inches long and 16 to 18 inches around
1. Bring the chicken stock to a boil. Add 1 tablespoon of the butter and the wild rice, reduce the heat and simmer, covered, for about 30 minutes.
2. Add the basmati rice and simmer for 15 to 20 minutes more, until all the liquid is absorbed, the wild rice cracks open and softens, and the basmati rice is cooked. Fluff and set aside.
3. Preheat the oven to 350°F. Lightly oil a baking dish just large enough to hold the zucchini.
4. Melt the remaining 2 tablespoons butter with 1 tablespoon olive oil in a large skillet. Cook the onion until translucent. Stir in the garlic, sage, thyme, marjoram, and winter savory. Add the celery, mushrooms, and water chestnuts and cook until golden, stirring occasionally and adding a bit more butter or olive oil if needed. Add the wine and the dried and fresh cranberries, cover, and simmer 5 minutes, allowing the sweet and tart flavors to emerge. Remove from the heat.
5. Add the walnuts, a touch of salt and pepper, and the parsley. Mix in the rice to complete the stuffing.
6. Wash the squash and trim the ends. Carefully core out the center of the squash using a long, thin knife such as a boning knife. Do not break through the skin. Discard the flesh or use it for another dish.
7. Gently fill the zucchini with the stuffing. Set the squash in the prepared baking dish and lightly baste with olive oil. Arrange any leftover stuffing around the squash. Cover with foil and bake for 40 to 60 minutes, until the squash is tender.
8. Let rest for 5 minutes, then carefully cut into 2-inch-thick slices.

SERVES 4 TO 6
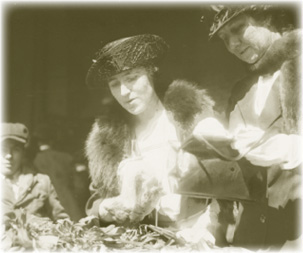
SAN FRANCISCO, CALIFORNIA
“Syrian Jews make stuffed vegetable dishes just for special occasions because the preparation is elaborate and takes a lot of time,” says Regina Safdie, a psychiatric social worker. “I always went home to Los Angeles to spend the Jewish holidays with my parents. One of the benefits was that my mother made incredible muhshi kusa (stuffed squash). In 2007, I realized that I better learn how to make the dish myself. My mother demonstrated it and I got the concept. But I’d not even made it when she died unexpectedly the next year. I consulted cookbooks and other relatives to get the amounts right. I lightened my version by using ground turkey instead of beef, and made it slightly sweeter by including onion. But I believe my mother would approve of my version, and it makes me feel close to her when I make this in my own kitchen.”
¼ cup long-grain white rice
¾ cup water
1 pound ground beef or ground turkey
1 teaspoon kosher salt
2 teaspoons freshly ground black pepper
1 tablespoon ground cinnamon
1 tablespoon ground allspice
⅓ cup ketchup or high-quality tomato paste
10 zucchini, 6 to 8 inches long, ends trimmed, halved lengthwise
4 or 5 green onions (scallions)
15 dried apricots
¾ cup pomegranate syrup or concentrate (preferably Sadaf or Cortas brand)
1. Put the rice and water in a small saucepan. Bring to a boil and simmer for 5 minutes. Remove from the heat and transfer to a medium bowl. Cool to room temperature. Thoroughly mix in the ground meat, salt, pepper, cinnamon, allspice, and ketchup.
2. Cut off the stem ends of the zucchini and carefully scoop out the middle of each half and leave an edge about ⅛ inch thick. Discard the flesh or use it for another dish.
3. Spoon the stuffing into the zucchini. Do not overstuff, as the rice will expand while it cooks.
4. Place green onions in the bottom of a large pot in a loose grid. (This prevents the zucchini from sticking.) Add the zucchini, also in a grid pattern. Place the apricots on top of the zucchini. Pour in the pomegranate syrup and water just to cover the zucchini. Cover with a plate or a lid that fits into the pot to keep the zucchini from moving during cooking. Bring to a boil, then reduce the heat.
5. Simmer for 1½ hours, until the filling is cooked and the zucchini are tender.
6. Transfer the apricots to a large platter. Top with the zucchini and spoon over the juices from the pot.

SERVES 10
PORTLAND, OREGON
Chicken, beef, or shrimp can be added to this traditional Khmer dish, but this version uses only vegetables. The delicate, woodsy flavor of the tree fungus is the star of the show, but almost any mushroom can be used.
2 slices galangal, ¼ inch thick by 2 inches long, peeled
1 stalk fresh lemongrass, woody parts removed, minced to equal 1 tablespoon
2 kaffir lime leaves (or the zest from 1 lime)
3 slices fresh turmeric root, ¼ inch thick by 2 inches long, peeled, or ½ teaspoon dried turmeric powder, toasted in a dry pan until fragrant and cooled
2 garlic cloves, roughly chopped and toasted in a dry pan until fragrant
½ teaspoon sweet paprika, toasted in a dry pan until fragrant and cooled
1 to 2 teaspoons oyster sauce (dark soy can also be used)
1 teaspoon sugar or honey
2 tablespoons toasted rice powder
1 cup coconut milk
2 cups water
1 teaspoon salt
1 tablespoon vegetable oil or coconut oil
1 Thai chile, whole
2 cups butternut or other firm winter squash, peeled, seeded, and cut into ½--inch cubes
1 Asian eggplant, cut into bite-size chunks
1 bitter melon, seeds removed, cut into ½--inch chunks
2 pounds coconi (also called tree eat fungus and cloud eat fungus)
2 cups fresh spinach or watercress leaves, rinsed well and coarsely chopped
1. Combine all the aromatics with the oyster sauce, sugar, rice powder, coconut milk, and water in a blender. Pulse until smooth, taste, adjust seasoning with salt, soy sauce, chili paste, or black pepper to taste, and set aside.
2. Warm the oil in a wok or large skillet. Add the chile pepper and cook until toasted and then remove and set aside. Add the winter squash and stir-fry until lightly toasted. Add the eggplant and stir-fry for 3 minutes. Add the bitter melon and coconi and stir to combine. Add the sauce and, stirring constantly, cook until the vegetables are tender, about 3 more minutes. Add the spinach, toss, and adjust seasoning with additional salt or some of the fried Thai chile if desired. Serve immediately with rice or French bread.

SERVES 4
TOK, ALASKA
“I was disillusioned with America when I came to Alaska in the 1970s. I thought I loved the place because it was wild and expansive. Over time, I realized that what I love about Alaska is that it is what America was meant to be, or used to be before everything got so crowded and corporate. There are people from everyplace, everyone needs each other, and if you have a dream and if you work hard enough, you can make it happen,” says Katherine Thundercloud Nichols, a former wilderness guide. She describes her current calling as “seeker, body-worker, cook, healer,” and there is no place she finds as pleasurable as the Yukon tundra that surrounds her best friend’s home. Spending the day foraging and the long evening cooking is her idea of heaven on earth, she says.
½ recipe Anne LaFiandra’s Lard Crust (page 694)
Kosher salt
2 tablespoons (¼ stick) unsalted butter
½ small onion, minced
3 garlic cloves, minced
¼ cup white wine
1 tablespoon dry sherry
1 pound wild mushrooms such as morels, chanterelles, and porcini (or a mix), cleaned and cut in bite-size pieces
3 large eggs
½ cup milk
½ cup heavy cream
1 cup sour cream
⅛ teaspoon ground nutmeg
⅛ teaspoon freshly ground white pepper
All-purpose flour, for rolling the pastry
1 cup grated Gruyère or similar cheese
1. Make the pastry, adding an additional ¼ teaspoon salt. Form into a ball, cover, and refrigerate for at least 30 minutes.
2. Preheat the oven to 300°F.
3. Melt 1 tablespoon of the butter in a medium skillet over medium-low heat. Add the onion and garlic and cook until translucent, about 3 minutes. Add the white wine and sherry and cook until the liquid evaporates, 3 to 5 minutes. Let the mixture cool, and puree in a food processor.
4. Melt the remaining butter in the skillet over medium heat. Add the mushrooms. Season lightly with salt and cook, stirring frequently, until they begin to soften. (The length of time needed will depend on the kind of mushrooms and moisture content.) Remove from the skillet and cool.
5. Whisk together the eggs, milk, and heavy cream in a large bowl. Add the sour cream and whisk again. Stir in the onion-garlic puree. Season with salt, nutmeg, and white pepper.
6. Sprinkle a work surface lightly with flour and roll out the pastry. Place in a 10-inch pie or tart pan and crimp the edges. Prick the bottom of the crust with a fork and sprinkle with the cheese. Spread the mushrooms over the cheese and pour the egg mixture evenly over the mushrooms. Tap the pie several times on the counter to evenly distribute the contents.
7. Bake until the crust is golden and the tart feels relatively firm, about 35 minutes. The tart can be served at room temperature.

SERVES 8
BETHESDA, MARYLAND
Vasugi Ganeshananthan grew up in Bethesda, Maryland, and like many girls, learned to cook at her mother’s side. She started cooking seriously when she moved to the Midwest for graduate school and realized that if she wanted curry, she would have to make it. “This gave me great social currency,” she says. “The only Indian restaurant in town was bad and most of the people who lived in town had never had Sri Lankan food. It became a way to lure friends. And I realized that I was not a terrible cook.” She got this recipe from her great-aunt, and often makes it without the curry leaves, which can be difficult to find. Rice is the traditional companion for this dish, but she prefers couscous. You can also use soy milk for a healthier curry or coconut milk for a slightly richer one.
A fiction writer and journalist, Ms. Ganeshananthan finds that both writing and cooking require flexibility and surprise. “If you start making curry and don’t have a cinnamon stick, you have to be willing to go with it and accommodate the lack in some other way.”
8 ounces mushrooms, thinly sliced (oyster, porcini, or other wild mushroom, or domestic white or portobellos)
½ teaspoon vegetable oil
1 small onion, diced small
1 garlic clove, finely chopped
1 medium tomato, roughly chopped
Pinch of whole fennel seeds
Pinch of yellow mustard seeds
1 teaspoon curry powder (preferably Ceylon curry)
3 or 4 fresh curry leaves
Pinch of ground fennel seed
Kosher salt
½ to 1 teaspoon whole milk
1. This step is optional, but will speed up the cooking process: Place the mushrooms in a bowl, cover with plastic wrap, and microwave on high for 90 seconds. When you remove them from the microwave, they will be very mushy.
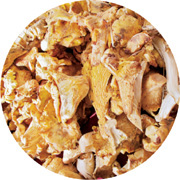
2. Put the vegetable oil in a medium nonstick skillet over medium heat. Add the onion and cook until soft, 3 to 5 minutes. Add the garlic, tomato, whole fennel seeds, mustard seeds, curry powder, curry leaves and ground fennel, and salt to taste. Cook for 3 to 4 minutes, until heated through. Add mushrooms and their liquid and cook over medium-low heat until the liquid is absorbed, 3 to 5 minutes. (If you skipped step 1, add the raw mushrooms and cook for 5 to 7 minutes, until the curry thickens.) Turn off the heat and slowly add the milk so it does not curdle. Serve warm.

SERVES 4
NEW YORK, NEW YORK
Marilynn Yee got this recipe from her Malaysian babysitter. At one time she used light soy sauce instead of the fish sauce, but Ms. Yee found that the fish sauce adds another layer of flavor. “You can use it with almost any green vegetable,” she says. “This dish has converted many children who wouldn’t touch broccoli. I would bet the elder George Bush might even like it.”
One 1- to 2-pound head broccoli
2 tablespoons premium oyster sauce
1 tablespoon fish sauce
¼ cup peanut oil
1½ teaspoons minced garlic
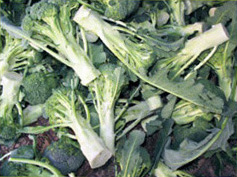
1. Cut the broccoli into bite-size florets. Bring a large pot of water to a boil. Drop the florets into the water and turn off the heat, making sure all the florets are submerged. After 4 to 5 minutes, drain the broccoli well in a colander. If you like the broccoli crisper, then drain it sooner.
2. While the broccoli is soaking, combine the oyster sauce and fish sauce in a large bowl. Heat the oil in a small saucepan over high heat until almost smoking. Add the garlic to the oil (be careful the garlic does not burn), then quickly pour into the bowl on the top of the sauce mixture.
3. Add the broccoli and stir well to coat with the sauce.

SERVES 4 TO 6
HIGHLAND, NEW YORK
Ron Rozman is a freelance writer who works from his home in Highland, New York. The variety of broccoli rabe he grows—as well as the recipe for preparing it—comes from his late mother-in-law, Celia Mannese, whose parents brought the seeds from near Naples almost a century ago. Mrs. Mannese “always made sure someone in the family was growing it so she could collect the seeds every fall,” he says. He also credits his mother-in-law with teaching him how to cook. Vegetables at her house were “green, not khaki,” he says. This deceptively simple preparation highlights the toothsome qualities of the somewhat bitter green.
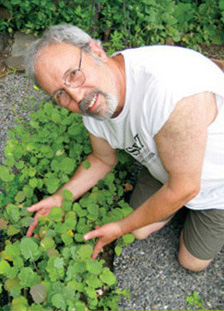
1 large bunch young broccoli rabe
1 tablespoon kosher salt
1 tablespoon extra virgin olive oil
4 garlic cloves, thinly sliced
3 ounces pancetta, fried until crisp, drained, and crumbled
1. Separate the leaves, florets, and tender stems of the broccoli rabe. Discard any woody, thick stems.
2. Bring a large pot of water to a boil and add 1 tablespoon salt. Add the broccoli rabe. Blanch for 30 to 40 seconds, then drain.
3. Heat the olive oil in a large, deep skillet over medium heat. Add the garlic and cook, stirring constantly, just until golden brown. Remove the garlic from the pan with a slotted spoon.
4. Add the broccoli rabe to the pan and cook, stirring, for 4 to 5 minutes, until heated through.
5. Transfer to a serving bowl and sprinkle with the crumbled pancetta and browned garlic. A piece of crusty Italian bread on the side is good.

SERVES 4
SEATTLE, WASHINGTON
Deseree Anne Kazda counts Filipino, French, and Norwegian immigrants among her ancestors—but much of her cooking style is the result of her own experimentation. “I helped Mom with big dinners like Thanksgiving,” she says, “and also worked as a waitress. That inspired me to re-create restaurant dishes at home.” She didn’t particularly like cauliflower when she developed this recipe, she says, but she and her husband like Indian food and thought these flavors would jazz up the vegetable. If the amount of cayenne in the recipe is too much for you, cut it in half. “That way, you will still get some of the cayenne flavor, but it won’t be overly spicy.”
1 head cauliflower, trimmed and cut into florets
1 tablespoon olive oil
¼ teaspoon ground turmeric
¼ teaspoon ground cumin
¼ teaspoon cayenne pepper
½ teaspoon chili powder
Kosher salt and fresh cracked black pepper
1. Put the cauliflower in a large resealable plastic bag with the oil, turmeric, cumin, cayenne, and chili powder. Add salt and cracked black pepper to taste. Seal the bag and shake to coat. The cauliflower will turn yellowish.
2. Pour the seasoned cauliflower into a large skillet or saucepan. Cover and cook over medium heat until the florets are soft, about 15 minutes, stirring occasionally.
3. Uncover and cook for 2 minutes more, just to brown some of the pieces.

SERVES 4
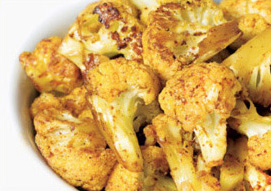
EAST EARL, PENNSYLVANIA
Leona Miller’s parents left the Mennonite community they’d grown up in and moved to western Pennsylvania, but returned to their family farm in the summers to lend a hand—or to drop off their children for a few weeks. “It was the best time of the year for my sisters and I. We spent the day with our grandmother in the kitchen, listening to her stories and learning how to make some of the traditional dishes.
“My grandmother used more vinegar and no wine, of course, but I figure that recipes are made for changing. I also replaced the brown sugar that she used with honey. We like to serve this with pork roast, sausages, or baked chicken.”
2 slices thick-cut, very smoky bacon, thinly sliced crosswise
1 medium red onion, thinly sliced
2 garlic cloves, minced
1 head red cabbage (about 1½ pounds), outer leaves removed, cored, and shredded, to equal 8 cups
2 teaspoons caraway seeds
1 bay leaf
Kosher salt and freshly ground black pepper
3 cups dry white wine
1 tablespoon honey
¼ cup cider vinegar
1. Fry the bacon in a heavy pot or Dutch oven over medium-low heat until almost crisp, about 10 minutes, stirring and turning to avoid burning. Add the onion and garlic and cook until soft, about 10 minutes. Reduce the heat to low. Add the cabbage, cover the pot, and cook for 5 minutes, stirring frequently. Add the caraway seeds and bay leaf, season lightly with salt and pepper, and stir.
2. Combine the wine, honey, and vinegar and stir into the cabbage. Cook, stirring frequently, until the cabbage is soft, about 45 minutes. Add additional water or wine if necessary to keep the mixture well moistened.
3. When the cabbage is tender and the liquid has evaporated, transfer to a bowl, and cool to room temperature. Cover and refrigerate overnight.
4. To serve, warm the cabbage over low heat or in a microwave. Remove the bay leaf, taste, and adjust the seasoning before serving.

SERVES 8
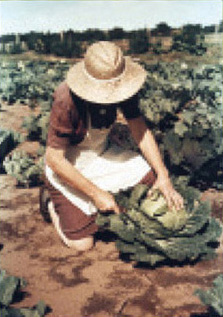
PALMER, ALASKA
In 1935, 203 Minnesota families reeling from the Great Depression relocated to Palmer, Alaska, to found the Matanuska Colony, a New Deal project. The Matanuska Valley’s fertile black soil and nineteen hours of daylight in summer have made the valley Alaska’s agricultural heartland. There are a number of different theories on why cabbages grow to the size of Volkswagens in the valley—the largest one recorded at the Alaska State Fair is 105.6 pounds!—but everyone agrees that giant vegetables are the region’s trademark. Descendants of the original homesteaders, like the Tamoreyas, are still operating farms.
3 leeks, white and pale green parts only
2 pounds Savoy cabbage, shredded
2 tablespoons (¼ stick) unsalted butter or vegetable oil
1 shallot, minced
1 teaspoon white vinegar
⅓ cup all-purpose flour
1 cup milk
¼ cup heavy cream
1 cup sour cream
3 large eggs
2 tablespoons brown mustard
1 teaspoon yellow mustard seeds
1 teaspoon dill seeds
3 tablespoons minced fresh dill
Kosher salt and freshly ground black pepper
1. Preheat the oven to 350°F. Bring a large pot of lightly salted water to a boil. Slice the leeks in thin disks and wash in three changes of cold water, separating the layers to remove the sand and create individual rings. Drain well.
2. When the water is boiling, add the leeks and cabbage and boil for 5 minutes. Drain through a colander. Cool under cold running water and drain again, pressing a spatula against the cabbage to remove any excess water. Transfer to a bowl.
3. Use some of the butter to grease a 6-cup glass casserole, pie pan, or gratin dish. Melt the remaining butter in a saucepan over medium-low heat. Add the shallot and stir to soften, about 1 minute. Add the vinegar and continue cooking, for 1 minute more. Add the flour and stir to combine. Add the milk and stir frequently, until the mixture is smooth and very thick. Remove from the heat. Whisk in the heavy cream, sour cream, eggs, mustard, mustard seeds, dill seeds, and dill.
4. Stir the sauce into the cooled cabbage and leeks. Taste and adjust the seasoning with salt and pepper. Pour into the prepared baking dish and bake until fragrant and lightly brown, about 40 minutes.

SERVES 8
SAN JOSE, CALIFORNIA
Annie Lau is ethnically Chinese, born in Malaysia. Her husband is ethnically Chinese, born in Hawaii. The couple moved to San Jose in the late 1990s and their kitchen is a laboratory where their regional and ethnic influences meet local ingredients. Neither had seen Brussels sprouts before moving to California, but after numerous attempts, they devised a recipe to bring out the nutty sweetness in the little cabbages. The final recipe, Ms. Lau says, “is an experiment in laziness. The less you do, the better.” Try to pick similar size sprouts.
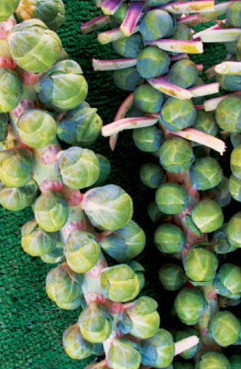
1 tablespoon extra virgin olive oil
4 garlic cloves, minced
2 cups Brussels sprouts, outer leaves trimmed, then halved
Kosher salt and freshly ground black pepper
1. Heat the olive oil in a nonstick skillet over medium heat. Add the garlic and cook until fragrant and light brown. Add the Brussels sprouts and turn the heat to medium-high. Season with salt and pepper.
2. Do not disturb for about a minute, so the edges caramelize, then toss. Leave for another minute or more. If the sprouts have not picked up enough golden color toss again. The more caramelization (browning) you get, the better the flavor (high heat is key!). Be careful not to overcook, though, which releases that nasty sulfur odor that puts people off Brussels sprouts.
3. Taste and adjust the seasoning with salt and pepper. Serve immediately.

SERVES 4 TO 6
CINCINNATI, OHIO
Back when Cincinnati was known as Porkopolis, Harry Woernik’s father, grandfather, and great-grandfather were butchers and sausage makers. “My grandfather also fried a mean onion ring. He had a big barrel that he rigged up for deep-frying outside the back door of the shop and figured out how to give the rings the lightness that a lot of the beer-battered onions don’t have, as well as some spice. He used a corn flour that a farmer friend ground real fine and a seasoning blend that is no longer made. I use a portable Fryolator that I got at a garage sale, but I’ve also used a countertop fryer. Heck, I even used to fry the onions in a cast-iron skillet. My grandfather used lard, of course, but I use mostly vegetable oil for frying. It’s not exactly health food, but I make them once a year, for the family reunion, where we serve all the old sausage and hams, sauerkraut, hot dogs, and hot potato salad. The rest of the stuff you can make ahead, but you don’t fry an onion until your cousin is standing in front of you with an empty plate and a sort of hungry look in the eye.”
2 large white onions, peeled and cut into ½-inch-thick slices
1 quart buttermilk
Dash of hot sauce (preferably Frank’s)
Vegetable oil, for frying
2½ cups all-purpose flour
½ cup fine corn flour, such as masa harina
¼ teaspoon celery salt
1 teaspoon sweet paprika
¼ teaspoon garlic powder
1 tablespoon Old Bay Seasoning
One 12-ounce bottle light beer
1½ cups club soda
1½ teaspoons kosher salt, plus more for sprinkling on the onion rings
½ teaspoon freshly ground black pepper
1. Separate the onion slices into rings and place in a large bowl. Combine the buttermilk and hot sauce, pour over the onions and soak at room temperature for at least 1 hour.
2. Fill a deep-fat fryer with oil and heat to 350°F.
3. While the oil is heating, sift together the flour, corn flour, celery salt, paprika, garlic powder, and Old Bay. Add the beer and whisk until smooth. Add the club soda and whisk until smooth. Season the batter with the salt and pepper and set aside.
4. Line several baking sheets with multiple layers of paper towels and keep a roll of towels handy. When the oil is the fryer reaches 350°F (hot enough to sizzle a sprinkle of flour), drain the onion rings and pat them dry with paper towels; discard the buttermilk. Place a few handfuls of rings in the batter and stir with a fork to coat them completely. One at a time, pick the rings up with the fork, shake off excess batter, and carefully slide into the oil. Do not overcrowd the fryer, and keep the temperature steady at 350°F.
5. Turn the rings once or twice to get an even golden brown, about 3 minutes. Drain on the baking sheets, sprinkle with salt, and serve immediately.

SERVES 4 TO 6
BALTIMORE, MARYLAND
Lan Pham was 2 years old when she immigrated to the United States from Vietnam with her family. Her father became a State Department official assigned to various posts in Asia and Africa and she lived in the Philippines during an earthquake and during a political uprising that closed her school. During civil unrest in Ethiopia, U.S. Marines escorted her to class. Yearly monsoons punctuated the relative calm of her high school years in Thailand. When she serves these herb-roasted allium, she tells her guests: “to taste, just one taste, and they are surprised by the sweet flavor and rich aroma. I tell them that everybody knows that slow-cooked onions don’t give bad breath.”
2 medium red onions
2 medium yellow onions
2 tablespoons fresh lemon juice
1 teaspoon Dijon mustard
2 garlic cloves, minced
1 tablespoon fresh thyme leaves
¾ teaspoon kosher salt
¼ teaspoon freshly ground black pepper
¼ cup extra virgin olive oil
1 tablespoon chopped fresh cilantro
1. Preheat the oven to 400°F. Cut each onion into quarters, keeping the root end still intact so wedges hold together.
2. In a large bowl, combine the lemon juice, mustard, garlic, thyme, salt, and pepper. Slowly whisk in the olive oil.
3. Add the onions to the bowl and mix well. Transfer the onions to a baking dish or sheet in a single layer. Bake for 30 to 45 minutes, until tender and browned at the edges. Toss the onions as necessary during cooking to ensure even browning.
4. Remove onions from the oven and transfer to a serving platter. Sprinkle with the cilantro.

SERVES 4

SOUTH BEND, INDIANA
Mrs. Lee, a midwife, began to think about her family recipes when she had children of her own and spent more time at home. She remembered that her mother, a war bride, had arrived in Chicago from Algeria equipped with no knowledge of English—and no understanding that “Algerian Muslim” and “Black Muslim” were not the same thing. That, along with her mother’s cooking, caused certain consternation in her father’s family. “The first time she met a beet was the day she landed in Chicago. My father is African American, and his family couldn’t believe that my mother didn’t know American greens or root vegetables. They tried to teach her how to cook for my father. It was a disaster. Eventually, they realized that her way with roots and greens was not half bad. My mother boiled the beets for this recipe, but I like the flavor better when I roast them.
“Theirs was an unlikely marriage. My mother likes to say it worked out as well as the beets.”
8 beets, well scrubbed, root ends trimmed but not removed, greens reserved
4 carrots, well scrubbed and cut into 1-inch-thick pieces
6 tablespoons olive oil
1 teaspoon ground cumin
½ teaspoon smoked paprika
4 garlic cloves, cut in thin slivers
2 tablespoons fresh lemon juice
Kosher salt and freshly ground black pepper
½ cup crumbled cheese, such as aged goat cheese, feta, or ricotta salata
1. The day before serving, place the beets and carrots in a bowl. Combine the ¼ cup of the oil, the cumin, and paprika. Pour over the vegetables and toss to coat well. Cover and refrigerate overnight.
2. Preheat the oven to 400°F. Remove the beets and carrots from the refrigerator and bring to room temperature.
3. Drain the beets and carrots and place on a baking sheet. Roast until tender, 20 to 30 minutes depending on the size of the beets, turning several times.
4. While the beets are roasting, prepare the greens. Remove the thickest parts of the stems and cut the leaves into ½-inch ribbons. Toss with 1 tablespoon of the olive oil.
5. Warm the remaining olive oil in a large skillet over medium heat. Add the garlic and cook until golden, about 2 minutes. Add the greens, increase the heat to medium-high and cook, stirring frequently, until the greens are tender, about 5 minutes. Remove from heat, stir in the lemon juice, and season to taste with salt and pepper.
6. When the beets are tender, remove from the oven and set aside until cool enough to handle. Cut the beets in half and place them, along with the carrots, in the center of a platter. Arrange the greens in a ring around the beets, sprinkle with cheese, and serve.

SERVES 6
MIDDLEBURY, VERMONT
The novelist Julia Alvarez grew up in the Dominican Republic; her husband, Bill Eichner, is the son of tenant farmers in Nebraska. Dinner at the couple’s Vermont home is a study in how far-flung flavors have enriched the simple sturdy fare of America.
Dr. Eichner spent hours coaxing Alvarez’s mother, her aunts, and her cousins (not to mention Ana, the family cook) into giving him the broad outlines of their family’s dishes—sweet-and-sour carrots, spicy Caribbean chicken, red beans and rice, and bread pudding. He tested the recipes on his parents, Ruth and John, who now live a couple of minutes away. Ruth, herself an accomplished cook, really liked the recipe for sweet-and-sour carrots.
2 pounds carrots, peeled
3 green bell peppers, cut into 1-inch squares
3 yellow onions, cut into 1-inch wedges
¾ cup cider vinegar
¾ cup sugar
1 cup tomato puree
1 teaspoon mustard powder
1 teaspoon Worcestershire sauce
Kosher salt and freshly ground black pepper
1. Boil the whole carrots until tender, then cut into ½-inch rounds. Steam the bell peppers and onions until tender. Combine all the vegetables in a large crock or bowl.
2. Combine the vinegar and sugar in a saucepan over low heat. Cook for 5 minutes, stirring to dissolve the sugar. Stir in the tomato puree, mustard, and Worcestershire. Remove from the heat. Pour over the vegetables and stir together well. Taste and adjust seasoning with salt and pepper. Cover and chill for at least 2 hours before serving.

SERVES 8
IOWA CITY, IOWA
“My great grandmother, Birdie Dubrow, was a radio cook back in the day before telephones,” said Emma O’Keefe. “The farms in the Midwest were so spread out that the women hung out with each other by broadcasting from their kitchens and exchanging recipes. It was their version of blogging. She gardened, and by this I mean cultivated about an acre of raised beds until several years ago when she turned a hundred and one. She did lots of inventive things with vegetables, like making ‘noodles’ from carrots or zucchini, in order to use what she grew, but also because she liked to confound the women who listened to her. She used lovage and parsley in this dish. I like the hint of licorice that chervil gives. It cracks me up when I see ‘vegetable ribbons’ and ‘vegetable pasta’ on the menus of fancy restaurants. My grandmother fixed this when the larder was low and she needed to economize.”
Kosher salt
8 large carrots
4 tablespoons (½ stick) cold butter
1 shallot, minced
½ teaspoon celery seeds
2 cups white wine
1 tablespoon minced fresh chervil
1 tablespoon minced fresh flat-leaf parsley
1 tablespoon minced fresh chives
Freshly ground white pepper

1. Fill a large container with cold water. Add ice cubes and a pinch of salt. Using a vegetable peeler, cut thin lengthwise strips of carrot, plunging them into the ice water as you go along.
2. Bring a large pot of water to boil over high heat.
3. Melt 1 tablespoon of the butter in a medium saucepan and cut the remaining butter into small chunks and return it to the refrigerator. Add the shallot to the melted butter and cook for 1 minute, until softened. Add the celery seeds and wine and simmer until the wine is reduced by half, about 7 minutes. Remove from the heat.
4. When the water comes to a boil, drain the carrots and drop them into the boiling water for 30 to 60 seconds to heat and barely soften. Drain immediately.
5. Return the saucepan to the heat and when the reduced wine is warm, begin whisking in the cold butter, one piece at a time. Remove the pan from the heat as you add and whisk to avoid completely melting the butter. Be very careful; the point here is to create a thick sauce, which relies on butter that is not fully melted.
6. When all the butter has been added, stir in the chervil, parsley, and chives. Season with salt and pepper to taste. Toss the carrot “noodles” in the sauce and serve immediately.

SERVES 8
COLBY, KANSAS
Joann Calhoon raised seven children on a farm on the western Kansas prairie. Ms. Calhoon found that both summer and winter squash varieties grew well in her garden—and filled bellies. She served them to her family and the hungry farmhands. “We grew a lot of butternut or Hubbard because it kept well in winter months,” she says, “and enjoyed the more tender squash throughout the summer.” This recipe can be used all year long. A clay tian (French casserole dish) gives the best results.
½ cup olive oil
4 medium delicata squash or 1 large butternut squash, peeled, seeded, and cut into 1-inch cubes, to equal 6 to 8 cups
1 garlic clove, minced
Kosher salt and freshly ground black pepper
½ cup grated Parmesan cheese
1. Preheat the oven to 450°F. Use some of the oil to grease a 2-quart clay pot or shallow ceramic casserole.
2. Toss the squash with ¼ cup of olive oil and the garlic and season lightly with salt and pepper. Place in the casserole. Season the top again lightly with salt and pepper, sprinkle with the Parmesan, and drizzle with the remaining oil.
3. Place in the oven and immediately reduce the temperature to 400°F. Bake until the top is crisp and golden and the squash is tender, 30 to 40 minutes. Serve immediately.

SERVES 4
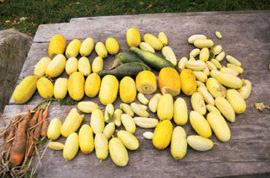
CLINTON, MISSOURI
Growing up with a sister and four brothers, Dena Young was her mother’s deputy cook. She learned the value of cooking for a crowd. Her simple squash dish is as wonderful for large gatherings or potlucks as it is for quiet nights at home.
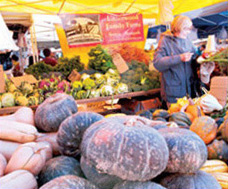
2 acorn squash, halved crosswise, seeds and fibers scooped out
Kosher salt and freshly ground black pepper
4 teaspoons unsalted butter
4 fresh sage leaves
2 small McIntosh apples, halved, cored and cut into ¼-inch-thick slices
1 teaspoon honey
3 cups apple cider
½ cup toasted nuts, such as pine nuts, chopped pecans, chopped walnuts, or shelled pumpkin seeds, for garnish (optional)
1. Preheat the oven to 350°F. Make a clean slice on the bottom of each squash half so that it will sit evenly, taking care not to cut into the flesh. Place in a medium roasting pan. Prick the squash with a fork.
2. Season lightly with salt and pepper. Place a thin slice of butter (about ½ teaspoon) in each and top with a sage leaf. Fan half of an apple in the cavity of each squash half. Add the remaining butter, combine the honey with the cider and pour ¼ cup of this mixture in each squash. Pour the remaining 2 cups of cider into the roasting pan.
3. Cover loosely with aluminum foil. Roast until the squash is tender, about 1½ hours.
4. Place one squash half on each of four plates, sprinkle with nuts, if using, and serve immediately.

SERVES 4
EUGENE, OREGON
Like wine, wild truffles require a complicated synergy of soil and temperature, sunlight and air, and just as Oregon produces fine varietal wines, the state produces a wild white winter truffle that obsessed native son James Beard, who declared Oregon’s Tuber oregonense the equal of the legendary Italian variety. In recent decades, however, the reputation of Oregon’s white truffles suffered serious damage, and to restore its rightful glow, Leslie Scott and her partner, the mycologist and truffle scientist, Charles Lefevre, founded the Oregon Truffle Festival. People, said Ms. Scott, were harvesting the truffles all wrong: “They were using rakes, tearing up the ground, pulling them up too early, before they had a chance to develop the remarkable scent that can turn a twice-baked potato into a work of art.” And so while the festival offers the tastings and truffle meals and wine pairings that one would expect, it also offers a two-day intensive for training truffle dogs, like this Lagotto Romagnolo, the Italian dog bred for truffling, who commuted from Blackberry Farm in Tennessee to teach neophyte pooches how to sniff and dig the tubers.
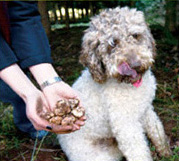
Use fresh Oregon winter white truffles in season (December through February) for the full truffle experience. If fresh truffles are not in season, then either Oregon White Truffle oil or white truffle butter may be used in place of fresh truffles. To make white truffle butter, place one large fragrant white truffle in a Ziploc bag with one pound of sweet butter and refrigerate for one week. Wrap in ⅛-pound cubes and freeze until ready to use.

4 medium-sized russet potatoes, well scrubbed
3 tablespoons olive oil (2 tablespoons Oregon white truffle oil optional)
2 tablespoons butter (white truffle butter optional)
8 large shallots, peeled and sliced thin
2 tablespoons dry vermouth
2 ounces fresh white truffles, half shaved and half grated or finely chopped
1 cup crème fraîche or sour cream
½ cup mild fresh goat cheese
1 teaspoon sea salt, or more to taste
White pepper to taste
2–4 cups cooking-grade rock salt (optional)
1. Preheat the oven to 400°F. Pierce the potatoes in several places with a fork, rub with 1 tablespoon olive oil, and bake until tender, 45 to 50 minutes. Remove from oven and cool to room temperature. Reduce the oven temperature to 350°F.
2. While the potatoes are cooling, melt the butter in a skillet over medium heat, add the sliced shallots, season lightly with salt and pepper, and sauté, turning often, until golden on all sides, about 10 minutes. Add the vermouth, stir, and simmer until evaporated, about 5 minutes. Use a slotted spoon to remove the shallots and drain on paper towels.
3. Use a sharp knife to cut a thin slice from the narrow end of each potato and then slice each in half widthwise. Scoop out the cooked potato flesh from each half, taking care to leave at least ¼ of an inch of cooked flesh on the bottom and sides of the potato. Place the scooped potato in a bowl.
4. Combine and whip together the grated truffle, the crème fraîche, and half the goat cheese.
5. Add 1 tablespoon of olive oil to the potato, along with the truffled crème fraiche and goat cheese mix. (Use 1 tablespoon of the white truffle butter or oil at this step if fresh truffle is unavailable.) Use a rice or handheld masher to create a smooth, creamy texture. Season to taste with salt and pepper and set aside.
6. If using rock salt, arrange in a baking pan; use a teaspoon to fill each shell with the potato mixture and place each into the salt. (If not using rock salt, muffin tins will preserve the potatoes’ shape.) Drizzle the remaining olive oil over the potato (truffle oil or butter optional), spread or thinly slice the remaining goat cheese over each, and bake for 20 minutes. Use the remaining truffle to shave over each potato and serve immediately.

SERVES 8
SAN FRANCISCO, CALIFORNIA
Software designer and founder of the Web site cookingforengineers.com, Michael Chu says that “as an engineer I strive for the most efficient path to a desired result. When the desired result is creamy mashed potatoes that everybody loves, I use floury potatoes, such as the russet variety.” Mr. Chu is an empiricist: “There are a variety of mashing techniques that will take you to smooth and creamy, but the handheld mixer, used quickly to avoid overbeating and overdeveloping the potato starch, is best.” For classic, unembellished mashed potatoes, omit the garlic, but Mr. Chu’s pan-roasted garlic technique delivers a heady, mellow garlic flavor.
20 garlic cloves, skin on
2 large russet potatoes
½ cup heavy cream
1 tablespoon sweet butter
Salt and pepper to taste
1. Place a heavy-bottomed pan with a tight-fitting lid over low heat and add the garlic cloves. Toss the garlic occasionally until dark, about 20 minutes. Remove from heat, cover the pan, and let sit for another 20 minutes. When the garlic is cool, peel, remove the woody stems, pass the cloves through a garlic press, and set aside.
2. Meanwhile, wash the potatoes, peel, cut into 1-inch chunks, and set aside. Bring a large pot of water to a boil (2 to 3 quarts), add the potatoes, cover, and boil for 10 minutes until tender.
3. While the potatoes are boiling, warm the heavy cream—do not boil. When tender, drain the potatoes. Using a ricer, masher, or for the creamiest potato, an electric mixer, mash the potatoes and garlic. Add the butter a little at a time, then the cream. Be careful not to overbeat as the potatoes will become pasty. Season to taste with salt and pepper and serve.

SERVES 4
WASHINGTON, D.C.
“I grew up in Minnesota, home of the covered dish, throne of the casserole,” said John Pull, a researcher at the Library of Congress. “Tater tot casserole, that midcentury construction of frozen tater tots, ground meat, creamed soup, and anything else you can imagine mixing into a casserole pan, occupied a special spot in my family’s culinary arsenal.” His culinary sights were set higher than the tater tot, and yet it was his tater tot casserole for which his stylish friends clamored. Oh, he improvised. He added wild mushrooms, ground veal, artisanal cheeses, but these revisions never reduced his dinner guests to licking the casserole or stealing from one another’s plates. In desperation, he secretly fabricated his own tater tots. Over 100,000 recipes for tater tot casserole are available on the Internet, but these potato puffs, which can be deep-fried or baked, make a noble substitute for the frozen fellows. They are also sensational with roasted chicken or meat.
1 small onion
2 large eggs
¼ cup vegetable oil, plus more for deep frying
3 tablespoons cracker crumbs
1 teaspoon salt
⅛ teaspoon freshly grated nutmeg
½ teaspoon baking powder
1 garlic clove, minced
¾ pound baking potatoes, peeled
½ pound celery root, peeled
1 piece of bacon, crisply fried and minced
Freshly ground black pepper to taste
⅛ teaspoon smoked paprika
1. If baking, preheat the oven to 400°F and grease 36 1¾; x 1-inch muffin cups. If frying, set up a deep fryer and bring the oil to 375°F. Peel the onion, grate into a fine-mesh strainer, and press hard to remove as much liquid as possible. Roll onion in paper towels to remove any remaining moisture and set aside.
2. Whisk the eggs, ¼ cup oil, cracker crumbs, salt, nutmeg, baking powder, and garlic together. Grate the potatoes into the mixture and stir. Grate the celery root together and stir. Add the onion and bacon, season with black pepper, paprika, and additional salt to taste.
3. If baking, use a teaspoon to form the mixture into balls, place each in a prepared muffin tin and bake until crisp, about 20 minutes. If frying, form the mixture into “tots” and use a slotted spoon to slide them into the oil. Working in batches, fry them until they are golden and crisp, about 5 minutes, turning occasionally.

MAKES 36 TATER TOTS
MONROE, NEW YORK
When Nancy Rothstein’s children were in elementary school, she made a decision: Armed with potatoes, a food processor, and an electric frying pan, she became the emissary for this Jewish holiday tradition in her small community, and went to her children’s elementary school to make her crispy, crunchy latkes. Soon enough, she became known around town as “The Latke Lady.”
Now, when the three generations of Rothsteins gather every year for Chanukah, she gets to expose the youngest to her famous potato creations. “I look forward to my grandkids getting older so I can cook with them,” she says. “For now, having my family together for Chanukah and sharing laughs, gifts, and potato pancakes will do.” Mrs. Rothstein recommends keeping young children out of the kitchen while the pancakes cook, though, since the process involves a lot of hot, spattering oil.
Her kids and grandkids love applesauce with her latkes. Since she lives in “apple country,” she makes applesauce in the fall and puts it in the freezer for Chanukah. However, she prefers her latkes with sour cream.
4 large russet potatoes
1 medium onion
2 large eggs
1 tablespoon all-purpose flour, plus more as needed
½ teaspoon baking powder
Kosher salt and freshly ground black pepper
Vegetable oil, for frying
1. Peel the potatoes and grate them on the large holes of a box grater or in a food processor, and place them in a bowl of cold water so they do not brown. Grate the onion into a separate bowl. Drain the potatoes and onion, put them in a clean kitchen towel, and squeeze out as much water as possible.
2. In a large bowl, combine the eggs, flour, baking powder, and salt and pepper to taste. Stir in the potatoes and onion and mix well. If the potato batter gets watery as it sits, add a small amount of flour.
3. Heat oil in a large frying pan over medium heat until very hot but not smoking. Drop the batter by large spoonfuls into the hot oil and flatten slightly with a spatula. Fry on both sides, flipping once, until crisp and golden. Remove from the pan and drain on paper towels. Serve immediately with applesauce or sour cream. (You can also freeze the fried latkes between sheets of foil and reheat them in the oven as you need them.)

SERVES 4 TO 6
CHICAGO, ILLINOIS
According to Polish tradition, a prosperous marriage begins with gifts of bread, salt, and wine, and dancing ensures happiness for the couple. For more than two decades, Cecylia Roznowska, a Polish-born dancer and choreographer, has been leading wedding dances and twirling Polish-American couples in a polonaise toward happily-ever-after. Since immigrating to Chicago in 1984, she is the founder and artistic director of the Northwest Center of Traditional Polish Dancing and the Polonia Ensemble, a youth folk dance company that performs at celebrations, festivals, parades, and—of course—weddings.
Dancing with the troupe’s young people, including three of her own grandchildren, makes her feel like a girl again in the village of Rabka, learning the steps to the krakowiak and mazur. She can imagine that her stomach is full of her grandma’s pierogi with sauerkraut, her pigtails flying, and her embroidered skirt whipping around her legs. When Ms. Roznowska is not dancing alongside her grandchildren, she is with them in the kitchen where she’s taught them to make pacski doughnuts as well as these wonderful stuffed pancakes.

1 tablespoon vegetable oil
2 slices bacon
2 large onions, diced
6 white mushrooms, thinly sliced
½ teaspoon kosher salt
Freshly ground black pepper
FOR THE PANCAKES
5 to 6 medium russet potatoes (about 2 pounds), scrubbed clean
1 large egg
1 tablespoon dry bread crumbs
Kosher salt and freshly ground black pepper
1 to 2 tablespoons vegetable oil
½ cup sour cream, for garnish
1. To make the stuffing: Preheat the oven to 250°F. Heat the oil in a large skillet over medium-low heat. Add the bacon and fry until it is cooked though but still a little pink and soft. Remove the bacon from the skillet (leave the oil and fat in the skillet) and, when cool enough to handle, chop it fine.
2. While the skillet is still hot, add the onions and place over low heat. Cook, stirring frequently, about 2 minutes. Add the mushrooms and bacon and raise the heat to medium. Season to taste with salt and pepper. Cover the skillet and cook for 15 minutes. Transfer the stuffing to an ovenproof dish and keep warm in the oven.
3. Meanwhile, make the pancakes: Grate the potatoes on the large holes of a box grater or with the grating disk of a food processor. Roll the potatoes in a clean kitchen towel and wring out any excess moisture. Transfer the potatoes to a bowl and stir in the egg, bread crumbs, and salt and pepper to taste.
4. To cook the pancakes, pour the oil into the skillet and place over medium heat. When the oil is very hot but not smoking, pour in a scant ¼ cup of batter and spread it out with a spatula until it is about 6 inches in diameter. Cook until the bottom is golden brown, about 3 minutes, then flip and cook the other side until browned and the pancake is slightly crispy, about 3 minutes more. Transfer the pancake to a plate and place in the oven to keep warm. Repeat until all the batter is used.
5. To serve, place ¼ cup of the stuffing mixture on each pancake and then fold over. Put a dollop of sour cream on the side.

SERVES 4
CHARLESTON, WEST VIRGINIA
Lee Ann Cueva regularly prepares some of her Spanish abuela’s (grandmother’s) favorite dishes. “I learned her techniques from the many years spent with her in the kitchen. When I moved to Charleston, I often called her for help, and she would walk me through her recipes with her own measurements, like ‘a handful of this,’ or ‘put some in and taste it.’” Through the years, she’s gotten pretty close to duplicating Abuela’s specialties—”My brothers sometimes say mine are better,” she says, “but I think it’s because we haven’t had the pleasure of her cooking for so many years.”
Ms. Cueva sometimes tops this classic Spanish dish with some freshly grated Parmesan cheese, fresh parsley, and paprika.
½ cup olive oil, plus more as needed
4 medium russet potatoes (about 2 pounds), peeled and thinly sliced
Kosher salt or coarse sea salt and freshly ground black pepper
1 or 2 garlic cloves, minced (optional)
8 large eggs, beaten until foamy
1. Warm the olive oil in a large skillet over medium heat. Add the potatoes and season with salt and pepper to taste. If using the garlic, add it now. Reduce the heat to medium-low and cook the potatoes, flipping them occasionally, until tender (do not brown; the potatoes should not stick together).
2. Shake the skillet to level the potatoes. Add the eggs and season again.
3. Cook over medium heat until the tortilla starts to brown on the bottom. Invert a serving plate over the pan and flip the tortilla onto the plate. Add more olive oil to the pan and slide the tortilla back into the pan to cook the other side. When the second side begins to brown, flip the tortilla again to give it a nicer shape.
4. Serve hot or at room temperature (Abuela served hers at room temperature, cut into wedges).

SERVES 8
WESTPORT, CONNECTICUT
After arriving in New York City from her hometown of Rome on the Michelangelo in 1969, Carla Rea searched for her professional calling for about thirty years. She was a housewife and, thanks to lengthy transatlantic calls with her grandmother, Nonna Concetta, a cooking student. She taught elementary school and Berlitz courses, owned a clothing boutique, and served as the town sheriff, delivering summons in her stiletto heels; she finally found her calling as a real estate broker. She has become famous for selling the sorts of palaces that have 5,000 square feet of marble on their counters and floors, a fame that rests, she says, on her habit of offering cooking class open houses that feature her grandmother Nonna’s potato casserole.
12 Yukon Gold or 6 large russet potatoes
1 tablespoon coarse salt or to taste
½ teaspoon white pepper
2 pounds aged whole milk mozzarella cheese
2 cups finely grated Parmigiano cheese
½ cup plain bread crumbs
2 tablespoons butter, cut into 14--inch pieces
1. Preheat the oven to 350°F and grease a 9 x 12-inch baking dish lightly with olive oil. Boil the potatoes with the salt in an 8-quart saucepan with enough water to cover the potatoes by 2 inches. Boil the potatoes until fork tender, about 20 minutes. When potatoes are cooked, remove from the water and allow to cool. Peel the potatoes and mash them in a large bowl.
2. Add the white pepper, mozzarella cheese, and Parmigiano cheese. Mix well with your hands until completely combined.
3. Pour the mixture in the baking dish and sprinkle the bread crumbs over it. Dot the top of the bread crumbs with the butter pieces and cover the baking dish with aluminum foil. Bake for 45 minutes, or until the cheese begins to bubble up around the sides of the baking dish.
4. Remove the foil and broil for 7 minutes more or until the bread crumbs are lightly brown.
5. Remove from the oven and allow to cool slightly. Serve with salad as a light lunch or a side dish with meat.

SERVES 8
BERKELEY, CALIFORNIA
Born in Casablanca, Laurent Roffe spent his childhood in Paris, moved to Israel as an adolescent, and served time in the Israeli army before attending Pratt Institute in New York. He cannot remember a time that he was not interested in food. But it was not until he left home for college that his talent—and passion—for cooking began to emerge.
2 pounds small white potatoes
1 pound pearl onions, peeled
2 pounds shelled, peeled fresh chestnuts, or frozen chestnuts, thawed
2 garlic cloves, crushed
2 tablespoons olive oil
½ cup heavy cream
1 tablespoon fine sea salt
1½ teaspoons freshly ground black pepper
1. Preheat the oven to 400°F.
2. Toss together all ingredients in a bowl. Transfer to a baking dish and bake about 1 hour, until the tip of a knife goes easily into the potatoes. The potatoes and chestnuts should hold their shape and not be mushy.

SERVES 6
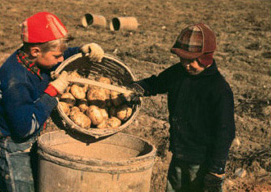
Children gathering potatoes, Maine, JACK JELANO, 1940.
SEATTLE, WASHINGTON
After graduating from the Culinary Institute of America, Joshua Henderson catered location shoots for photographers and got an itch for mobile food before returning to Seattle, where he grew up. There, his two retooled vintage Airstream trailers roam like nomads serving up delicious bistro cooking that has been known to incite brake-slamming high-speed chases and other unacceptable road acts. The location schedules are posted on the company’s Web site, and the fries served with the trucks’ Kobe beef triple crème cheese burger are not difficult to make at home. The secret is soaking the potatoes in cold water to stabilize the starch. The double frying also helps give a crisp fire. And fresh dill makes a unique—and addictive—magic.
1½ quarts vegetable oil
4 medium baking potatoes, scrubbed but not peeled and cut into ¼-inch-thick sticks
2 tablespoons chopped mixed soft herbs such as flat-leaf parsley, dill, and sage
Sea salt
Freshly ground black pepper, optional
1. Line a baking sheet with several layers of paper towels and set aside. In a large saucepan, heat the oil to 300°F. Fry the potatoes until softened but not browned, about 10 minutes. Work in batches if necessary to avoid overcrowding the pan. Use a slotted spoon or basket to remove the fries, spread them on the lined baking sheet, and drain for 5 minutes.
2. Increase the temperature under the oil until it reaches 350°F. Add the fries to the hot oil and cook until golden brown and crisp, 6 minutes. Transfer the fries to a bowl. Sprinkle the fries with the herbs, salt, and black pepper if using. Toss gently and serve immediately.

SERVES 4 TO 8
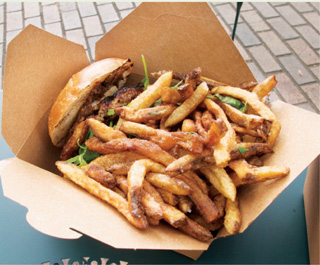
NEW ROCHELLE, NEW YORK
Devan Ganeshananthan is the vice principal at New Rochelle High School. His parents are Sri Lankan Tamils who left the country in the early 1970s. Mr. Ganeshananthan says his mother taught him to cook when he was a teenager because she was extremely concerned that he would waste away in college. “Many first-generation kids look to language, religion, or culture in terms of their identity,” he says. “The main way I associate with my culture is through food.” Sri Lankan dry potato curry is one of the recipes his mother taught him, although he has altered it to suit his own tastes, he says. He has made it heartier with the addition of buttermilk. It is also a little spicier than his mother’s.
2 pounds red-skinned or other boiling potatoes
Kosher salt
1½ teaspoons Jaffna curry powder
1 large yellow onion
1 garlic clove
1 long green chile
1 dried red chile
2 tablespoons vegetable oil
1½ teaspoons yellow mustard seeds
1½ teaspoons fennel seeds
Up to 1 cup buttermilk or coconut milk
1. Put the potatoes in a pot of cold water and bring to a boil over high heat. Reduce the heat and simmer for 5 to 10 minutes, until the potatoes are partially cooked but not quite soft when pierced with the tip of a knife.
2. Drain the potatoes and let cool until you can handle them. Cut into ½-inch cubes. Toss the potatoes with salt and curry powder to taste, making sure they are coated well.
3. Dice the onion. Mince the garlic and green chile. Cut the dried chile into about 5 pieces.
4. Heat a couple of tablespoons of vegetable oil in a deep skillet over medium-high heat and add the onion, garlic, and chiles. Cook, stirring frequently, until the mixture is golden brown. Add mustard and fennel seeds to taste and stir. Add the potatoes and just enough buttermilk to moisten everything. Cook and stir until the potatoes are coated by the onion mixture and tender—you may need to add a little bit of oil. Be careful not to overcook the potatoes—they should be firm and not crumbly. Serve hot.

SERVES 6
CLEVELAND, OHIO
Sally Levine’s parents were second cousins who grew up together in a little town in Romania. Holocaust survivors, they immigrated to America in 1949. Mrs. Levine considers her parents’ ordeal “a typical immigrant story,” a tale of tragedy, survival, and hope. And she tells her grandchildren their story when she teaches them the family’s Passover recipes. Cooking, she has learned, is not only an act of cultural identity but a means of connecting with her past while creating a future.
This recipe, passed down through generations, is rarely made by modern kosher cooks. Store-bought noodles do not hold a candle to the taste and texture of homemade noodles. Mrs. Levine’s mother, grandmother, and great-grandmother all made noodles from slices of potato-starch crepes.
Mrs. Levine makes the crepes on “regular” nights, too, filling them with cooked chicken left over from a pot of traditional chicken soup. If serving as filled crepes, serve at room temperature. The dish calls for a “bubbe cup” of potato starch, meaning a full, rounded cup. Share the noodle “ends” with the grandkids, as Mrs. Levine does with hers.
10 large eggs
1 “bubbe cup” potato starch
1 teaspoon kosher salt
2 cups cold water
Vegetable oil, for frying
1. In a large bowl, whisk together the eggs, potato starch, salt, and water.
2. Brush ½ teaspoon oil in a 9-inch skillet over medium-high heat. Using a ¼-cup measure per crepe, ladle the batter into the skillet, tipping the pan so that the batter covers the entire surface.
3. When the crepe starts to pull away from the sides, lift it up gently with a spatula and flip it. Cook just until the bottom is firm and golden; do not overbrown. (These fry up quickly, so keep an eye on them so they don’t burn.) Transfer the cooked crepe to a plate.
4. Brush another ½ teaspoon oil in the pan and reheat it before ladling the batter for the next crepe. Remix the batter well before pouring, as the starch tends to settle to the bottom. Repeat until all the batter is used, stacking the crepes as they are cooked.
5. Refrigerate the crepes overnight if using for noodles.
6. When ready to serve take 2 or 3 crepes at a time, roll them up tightly like a cigar, and cut them into 1-inch-wide strips. Add the noodles to a pot of your favorite chicken broth. Don’t forget to give the ends of the noodles to your little ones to eat!

MAKES ABOUT 22 CREPES
ASHEVILLE, NORTH CAROLINA
Historically, shell beans and field peas were the staff of life during the cold months in the mountain South. Thousands of varieties of beans and peas grow in pods on creeping vines or pole vines and can be eaten fresh or dried. Stewed with a bit of bacon or “side meat,” the dried beans kept mountain families alive between growing seasons. Chloe Porter, a gardener, pianist, music teacher, and cook in western North Carolina, inherited what she called “a reverent view of beans.”
Her favorite are butter beans. The United States grows nearly one hundred varieties. Lima is one variety and to Ms. Porter, nothing is finer than baby limas stewed with bacon and milk. Dried cranberry or cannelloni beans are the best store-bought substitutes for dried butter beans. The dried beans should be covered with cold water and soaked overnight before cooking. The secret to cooking tender beans, says Ms. Porter, is a heavy pot, gentle heat, and two rounds of cooking. Salt toughens the beans, so it should be added at the end of cooking. Older, drier beans will require more water than recently picked and dried ones. Always add enough cold water to a bean pot to keep them covered by a half-inch.
3 cups dried butter beans, soaked overnight and drained
3 slices thick-cut smoked bacon
1½ cups milk
1 tablespoon unsalted butter
Fine sea salt and freshly ground black pepper
1. Combine the beans and 8 cups of cold water in a large pot. Quarter 1 slice of bacon and add to the pot. Bring to a boil over high heat, reduce the heat, and simmer, covered, until the beans are tender, 40 to 45 minutes. Drain the beans and wipe out the pot. Discard the bacon.
2. Dice the remaining bacon. Place the pot over medium heat. Add the bacon and cook about 5 minutes, stirring occasionally, until it is crisp. Add the beans back to the pot with the bacon and add the milk, butter, and 1½ teaspoons salt. Adjust the heat if necessary and simmer about 10 minutes, until the milk is reduced to a creamy glaze. Taste the beans and season with pepper and more salt if they need it. Serve warm or at room temperature.

SERVES 4 AS A MAIN COURSE, 6 AS A SIDE DISH
ESTACADA, OREGON
“I had a dish like this in Israel, but it was made with fava beans,” says Madison Rothman. “I’m not a big fan of favas, but I do love limas and other butter bean varieties that we had in Tennessee when I was growing up. Here, we get some interesting old varieties in the farmers’ markets. I guess you could say that this recipe is the result of where I grew up, where I traveled, Oregon—where I came to attend college—and where I hope to live forever.”
4 cups medium fresh or frozen lima or butter beans
½ cup extra virgin olive oil
2 garlic cloves, minced
1 tablespoon fresh lemon juice
Kosher salt and freshly ground black pepper
4 chive blades or 1 scallion (green part only), minced
½ cup chopped peppermint leaves
1. Place the beans in a pot over medium heat, and cover with cold water. Add 1 tablespoon of the olive oil and half the garlic. Simmer until tender, about 15 minutes. Drain.
2. Using a ricer or food mill, mash the beans and remove the skins. Stir in the remaining olive oil, 1 tablespoon at a time. Stir in the lemon juice. Season with salt and pepper to taste. Stir in the chives and peppermint and serve.

SERVES 4
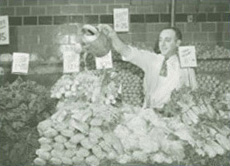
SAN FRANCISCO, CALIFORNIA
“I decided that a base recipe of lentils and roasted vegetables would be just the wintry ticket for a ski weekend,” says Vivian Richardson. “The first night I prepared pans of roasted vegetables: a carnival of carrots, fennel, turnips, potatoes, and an abundance of whole garlic cloves, crisp and caramelized and fragrant with olive oil. I mixed them with lentilles du puy (the lovely little green French beauties) prepared in a seasoned vegetable broth laced with lemon thyme.
“The lentils and roasted vegetables for the first night’s dinner acted as a cushion for a beautiful piece of fresh halibut à la bonne femme, in a white wine and stock broth. The last night, with very little time to produce dinner, I sliced and sautéed lamb sausages while I put on a pot of rice. I added vegetable broth to the lentil and vegetable mixture to moisten it and render it saucy. Rummaging around in the cupboard, I found cinnamon and oregano. A tablespoon of this and a teaspoon of that and I soon had a fragrant salmagundi redolent with flavors that bespoke romantic evenings in Marrakech. I set aside a large portion for the one vegetarian among us and added the lamb sausage to the rest.”
FOR THE ROASTED VEGETABLES
6 to 8 carrots, cut into 1-inch-thick coins
3 medium fennel bulbs, cored and cut into medium chunks
2 garlic heads, large cloves cut in half
½ pound fingerling potatoes, cut into 1-inch-thick coins
3 large turnips, peeled and cut into medium chunks
Olive oil
Kosher salt
FOR THE LENTILS
1 very small onion
1 pound lentilles du puy, examined for stones and rinsed
2 quarts water, homemade chicken or vegetable broth, or low-sodium store-bought chicken or vegetable broth
1 garlic clove
Scant ½ teaspoon lemon thyme or regular thyme leaves
1 teaspoon kosher salt
1. To make the vegetables: Preheat the oven to 400°F. Toss the vegetables with olive oil to coat, and sprinkle with salt. Spread evenly in one layer on rimmed baking sheets. Roast until they are crisp and browned around the edges, about 30 minutes. At the 15-minute mark, turn vegetables with a spatula. Turn once again if necessary.
2. To make the lentils: Cut the onion in half and skewer each half with a toothpick to hold together. Combine the onion, lentils, water, garlic, thyme, and salt in a large saucepan. Bring to a boil, reduce the heat to a simmer, and cook uncovered for 20 to 30 minutes, until lentils are tender. Drain and cool. Remove the onion and garlic.
3. Serve separately or combined.

SERVES 6 TO 8
SAN FRANCISCO, CALIFORNIA
At 19, Azalina Eusope was already a pastry chef in her hometown of Penang, Malaysia. She fell in love with and married an American and followed him when his work called him back to San Francisco. Wowed by the pastry shops and bakeries in San Francisco—”There is so much high quality pastry there, I didn’t want to compete”—she turned her attention to Malaysian savory fare, which she began selling at her local farmers’ market. Americans, she said, didn’t really know much about Malaysia: “It’s not as familiar as Thailand or Singapore.” In 2009, Bon Appétit named her lacy crepes with curry one of the top ten lunches to be had in the U.S. Had the magazine’s editors had a chance to eat the dumplings that she makes for her family, she would most likely have won two spots on the list.
1 cup dried black lentils, soaked overnight
1 cup dried yellow lentils, soaked overnight
2 tablespoons clarified butter
2 cups diced shallots
⅓ cup minced green pepper
⅓ cup minced red pepper
1 teaspoon freshly ground black pepper
1½ teaspoons sea salt
2 tablespoons fresh coriander, minced
2 tablespoons fresh mint, minced
1 teaspoon ground cumin
1 teaspoon ground coriander
2 tablespoons rice bran oil, or other vegetable oil, plus more as needed
1. Combine the lentils and drain well in a fine-mesh strainer. Warm the clarified butter in a skillet over medium heat. Add the shallots, reduce the heat to low, and cook until the shallots are golden, about 10 minutes, stirring constantly. Add the minced green and red peppers, stir, and continue to cook until the peppers are beginning to soften, 3 minutes. Add the black pepper, salt, fresh coriander, mint, cumin, and dried coriander, stir, and cook until the spices are fragrant, about 2 minutes. Add the drained lentils, stir well, cover, remove from heat, and set aside for 1 hour.
2. Warm the rice bran oil in a heavy skillet over medium heat. Taste the mixture and season with additional salt if desired. Shape the mixture into small patties that are about 3 inches in diameter and ½ inch thick. When the oil is hot, place the patties in the skillet and fry until golden on first one side and then the other, about 2 minutes on each side. Drain on paper towels and serve with coconut sambal (see recipe below)

MAKES ABOUT 24 PATTIES; SERVES 6 AS A MAIN COURSE, 12 AS AN APPETIZER
Azalina’s Coconut Sambal
Sambal is the Malaysian equivalent of salsa, a condiment that is served as a counterpoint and is sometimes used in cooking. Fresh coconut is essential to this remarkable sambal.
2 cups fresh coconut, shredded
2 cups fresh mint
2 teaspoons freshly ground black pepper
2 teaspoons sea salt
Combine all the ingredients in a bowl, stir well, and allow to sit for at least 1 hour prior to serving.

MAKES 2½ CUPS
MALIBU, CALIFORNIA
The thick bean and pork stew called feijoada, which all Brazilians embrace as their national culinary symbol, has historical origins that mirror the country’s cultural mix of Portuguese colonials, indigenous Indians, and African slaves who were brought to work plantations—rubber, sugar, cotton, cocoa, coffee—or mine diamonds and gold. Some Brazilians believe that feijoada had roots in the Portuguese caldeirada, a traditional stew. But most Brazilians accept the theory that slaves developed the dish and added discarded pork scraps from the Big House. The traditional topping of farofa (toasted manioc), comes straight from Indians in the rain forest.
Alice Moreira Howe, born into a distinguished Rio de Janeiro family, has a lineage from Portugal and Italy. An artist who has lived in the United States for more than twenty years, she brought with her a treasured cookbook of her grandmother’s. Those recipes mingle with Ms. Howe’s love of the Brazilian tastes cultivated by her childhood nanny, a direct descendant of slaves.
4 cups dried black beans
1½ pounds carne seca (Brazilian salted cured beef)
1 pound sweet sausage, cut in 1-inch pieces (preferably Portuguese chouriço; see Note)
1 rack spareribs, cut into 2-rib segments
1 bay leaf
1 onion
1 garlic clove
2 tablespoons olive oil
Farofa (optional; see Note)
1. The night before cooking, soak the beans in a large bowl with water to cover at by least 3 or 4 inches. Soak the carne seca in water to cover.
2. The next morning, drain the beans and place in a large pot with water to cover by at least 3 inches. Bring to a boil over medium heat.
3. Cut the carne seca into 1-inch pieces.
4. Add the carne seca, sausage, ribs, and bay leaf to the beans. Simmer about 2 hours, until the beans are soft and the meats are tender, stirring from time to time and adding water as necessary to keep beans covered. Keep an eye on the beans so they don’t burn at the bottom!
5. Chop the onion and garlic. Heat the olive oil in a cast-iron skillet over medium heat. Add the onion and garlic and cook until golden brown. Add 2 ladlefuls of beans and mash them. Stir this back into the pot of beans. It will thicken and season the beans.
6. Simmer gently for at least another hour, adding water as necessary. A good feijoada should have a creamy consistency when done. Remove the bay leaf. Some people take the meats out at this point and serve them separately on a platter. Top with farofa, if using.

SERVES 8 TO 10
NOTE: Ms. Howe says, “When I use the Portuguese sausage, I usually prick it with a fork and simmer it for ten minutes in enough water to cover; then I cut it.”
To make farofa, melt 2 tablespoons unsalted butter in a saucepan over medium heat. Add 1½ cups manioc flour and cook, stirring constantly, until the flour is toasted, 8 to 10 minutes.
SAN ANGELO, TEXAS
Throughout his many careers—he has worked as a hairdresser, a registered nurse, an addictions counselor, and a television talk show host—Steve Pope scheduled his work around the needs of his garden. “It began twenty years ago when my partner, Richard, and I moved to west Texas and planted a large garden. We always got a big crop of pinto beans and when they started to turn gold and to dry in their pods we started to mention ‘Refried Beans Weather.’ Every year, the first night that we made a pot of these beans and had them for dinner with a flour tortilla was the time when we said good-bye to summer. The beans gave us comfort and seemed to feed our souls. We separated some years back, but I always think of Richard and our younger selves when I make this dish, and I still make it every year.”
TO PREPARE THE BEANS
1 pound dried pinto beans
Water
2 smoked ham hocks or ½ pound cubed ham
One 14-ounce can tomato sauce
1 tablespoon chili powder
Salt and freshly ground black pepper
1. Soak the beans overnight in cold water to cover by 2 to 3 inches.
2. Drain the beans and cover with about 2 inches of fresh water in a large saucepan or Dutch oven. Make cuts in the ham hocks, down through the rind, and add to the pot (or add the ham). Stir in the tomato sauce and chili powder. Bring to a boil, then reduce the heat and simmer, covered, about 2 hours. Stir the beans up from the bottom occasionally, and add water if they start looking dry.
3. When beans are soft but not mushy, and still hold their shape, they are done. Taste and add salt and pepper, if desired, starting with about ½ teaspoon of each.

SERVES 4 TO 6
TO FRY THE BEANS
¼ cup bacon drippings
1 small onion, finely chopped
1 garlic clove, minced or pressed
1 recipe Richard’s beans
4. Melt the bacon drippings in a large heavy skillet over medium heat. Add the onion and garlic and cook until the onion is soft and clear.
5. Drain the liquid from the cooked pintos, reserving 1 cup. Remove the ham hocks. Add the drained beans to the skillet, and mash them with a potato masher. Work the cooking liquid, ¼ cup at a time, into the mashed beans until mixture is uniformly moist and smooth. Cook and stir the beans up from the bottom of the pan, until mixture is a thick paste.

SERVES 4 TO 6
WASHINGTON, D.C.
A Boston baked bean recipe is like any family recipe—everyone has his or her own version. This is Ris Lacoste’s mother’s recipe, which was lauded as the best in the family. “The beans were in demand and appeared at every wedding shower, baby shower, Tupperware party, family gathering, and at all holiday buffets,” Chef Lacoste says. “And, of course, at every Saturday dinner and Sunday breakfast.” On Saturdays, she says, they went in the pot by nine in the morning and were ready for dinner. “We had beans with ham, steak, burgers, hot dogs. On Sunday, we all loved baked beans, scrambled eggs, and toast after Mass at St. Anthony’s in New Bedford, Massachusetts. A cold bean sandwich for lunch was not too shabby, either.”
She has called her mother dozens of times to get the recipe, Chef Lacoste says, and her mother makes a new comment about the beans each time she calls. “One comment is always there, however, and I can’t hang up the phone until I hear it: ‘But your father didn’t like the beans too sweet, so I don’t put in much molasses.’ So none of the thirty-one people in my immediate family like their beans too sweet either,” Chef Lacoste laughs.
2 pounds white pea beans (navy beans)
¾ pound lean salt pork, cut into large chunks
2 large onions
2 tablespoons molasses
2 tablespoons brown sugar
2 teaspoons mustard powder
1 teaspoon freshly ground black pepper
1. Preheat the oven to 325°F. Pick through the beans by hand to remove any stones. Place the beans in a 4-quart bean pot or baking dish and bury the pieces of salt pork and the onions in them. Sprinkle with the molasses, brown sugar, mustard, and pepper.
2. Cover all with warm water. Cover the pot with the lid or foil and place in the oven.
3. Check every 1½ hours for dryness, as beans soak up the water, and add boiling water just to cover when necessary. Uncover the beans for the last hour of cooking, or after the last addition of water, to dry them a bit and to form a nice crusty topping. Cooking time is approximately 6 hours.
4. The beans are done when still firm but cooked through, beautifully browned by the long, slow absorption of the molasses and brown sugar, and the pork juices. Let rest at room temperature before serving.

SERVES 12
BLOOMINGTON, INDIANA
Detroit native Susan Welsand came to Bloomington to attend Indiana University and never left. She had her first “blissful” taste of chile at a neighbor’s, became a chile aficionado and realized she would have to start growing her own. Fortunately, her students—she has been a volunteer ESL tutor for twenty-five years—started bringing her chile seeds from all over the world. Her passion is now her business. What she doesn’t sell, freeze, or use fresh, she strings into ristras or dries to grind into powder. Ms. Welsand puts chiles “in anything and everything,” she says, including this stew of corn, squash, and beans, a trio known in the Southwest as “the three sisters.”
1 cup mixed dried beans
1 tablespoon baking soda
1 butternut squash (about 2½ pounds), cut in half, seeds and fibers discarded
6 fresh red or green New Mexico Hatch chiles
1 small onion, chopped
1 cup fresh corn kernels
4 to 6 sun-dried tomatoes, roughly chopped
1 cup cooked amaranth, quinoa, spelt, or kamut
6 ounces garlic-herb cheese, preferably Swiss Connection, crumbled (about 1½ cups)
1. Place beans in a deep saucepan with 3 cups of water and boil for 4 minutes. Remove from the heat and add the baking soda. After the beans fizz up, place the lid lightly on the pot, and let them sit for an hour. Rinse well, add 3 cups fresh water to the beans, and simmer for 1 hour more or until tender. Drain and transfer to a large bowl.
2. While the beans are cooking, preheat the oven to 400°F. Place the squash on a greased baking sheet flesh side down, and roast until the flesh is softened, about 30 minutes. Remove and let cool. Scrape out the flesh, chop it, and add it to the beans. Discard the skin.
3. Turn the oven to broil. With a sharp paring knife, slit each chile down one side. Put on a broiler pan or baking sheet and place directly under the broiler. Roast, turning occasionally, until the skins are blackened and blistered all over, about 10 minutes. Remove from the oven and, using tongs, place the chiles in a clean brown paper bag. Fold the bag shut.
4. When the chiles have cooled to the touch, gently peel off the blackened skin using your fingers, or rub off with a paper towel. Cut the seedbed and stem from each chile and discard. Roughly chop the chiles and add to the beans and squash.
5. Turn the oven back on to 350°F. Stir the onion, corn, tomatoes, amaranth, and cheese into the beans. Spread in a large glass baking dish. Bake for 40 to 45 minutes, until thick and bubbling. Serve.

SERVES 4 TO 6