
Polishing a pearl by the sea
Bon’s family beach shack is hidden away in the heart of Pearl Beach on the Central Coast of New South Wales. It’s a beautiful slice of the world, surrounded by tall trees and birds, that Bon and her family adore because of that mixture of beach vibe and rainforest. And although the shack is only small, it can comfortably accommodate three families with its open-plan living, high ceilings and outdoor spaces designed for entertaining kids and adults alike.
In its original ’70s condition, this beach getaway was just a box with a tad too much brown and beige. It definitely needed a little TLC. Most of the year, the house is a rental, so we renovated it over a few different stages so that it wasn’t off the market for too long. One of the first things we did was rip up the old carpet. We got lucky and discovered some beautiful pine floorboards underneath, which Bon’s dad helped her to whitewash. #bonus! We then painted EVERYTHING white (no surprise there). Walls, ceilings and all of the original built-in cabinetry, you name it ... no surface was spared.
Renovating the kitchen made a huge difference to the home’s appeal, as did the new deck we built, with stadium-style stairs so all the guests could sit and watch the kids going crazy in the front yard. The Beach Shack is not delicate or too precious. It’s fun, light-hearted, can get messy and is really easy to maintain. Everything in it is there to be used, sat on or drunk out of – there’s even a bar cart for that much-needed wine time after a day at the beach.

Hello, Sunshine!
#BEACHLIFE
PLEASE DON’T BUY TINY RUGS!
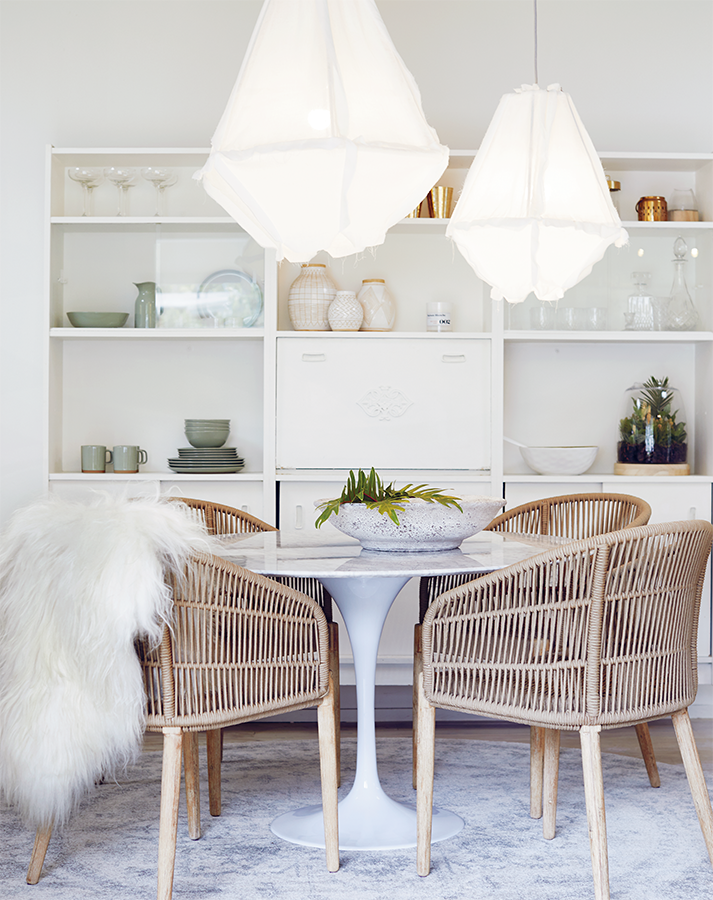
If you’re buying a rug for a lounge room, it should be large enough to sit under the legs of your couch, with enough on either side to feel generous. You can also layer two different sized rugs on top of each other for a more textured finish, or overlap them to cover a large area if you need a cheaper option than one huge rug.

White paint for days

Bonnie
“Cypress pine floorboards can be found in many older homes and wannabe beach shacks. Often, they’re hiding under some not-so-crash-hot carpet. Our advice? Rip up the carpet and whitewash those planks for an authentic coastal look which will stand the test of time. It’s not hard to DIY; my dad and I did the floors at this house and they came up a treat.”
Go a la carte
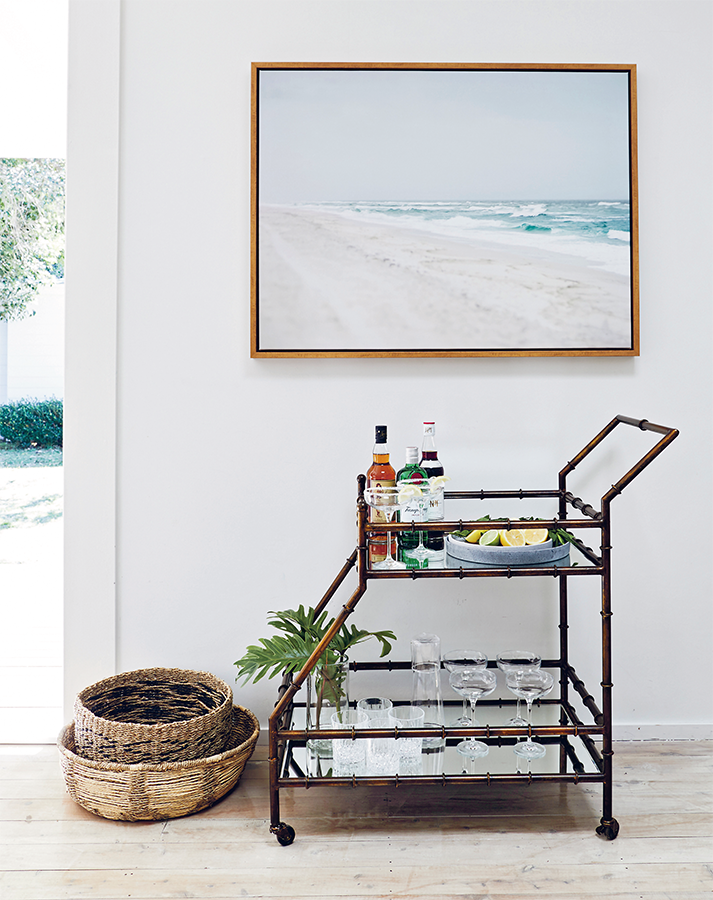
Bar carts aren’t just for booze. Style them up with lush green plants, stacks of books, tea sets ... if it’s pretty, it’s cart-worthy!
IT’S 5 O’CLOCK SOMEWHERE!
A bar trolley is a movable party. It’s a practical and pretty storage solution that can be positioned in the house like a piece of furniture … but it’s ready to be wheeled out at a moment’s notice to get the good times rolling. A bar cart or drinks trolley near your kitchen not only gives you extra storage, but it can also look divine and bring a relaxed holiday vibe to any home. Stock it with some good-looking glassware, a few bottles of your best and some fresh lemons and limes. It goes without saying that a roaming bar cart is NOT the best idea if you also have roaming toddlers! (Just imagine a little one testing out their new ‘walker’ while Mum and Dad aren’t looking. #omg!)
NEXT-GEN KITCHEN BENCH
The standard bench height in a kitchen is 900 mm but as generations get taller, so do benches. It’s now quite common to find heights of 910–920 mm. It really comes down to personal preference.
IT’S ALL ABOUT A FLUSH FRIDGE
To avoid the dreaded ‘fridge sticking out’ problem (hey, it happens to the best of us), make sure you build your cabinetry deep enough. Fridges come in all different sizes, so you’ll need to know which fridge you’re buying before finalising your kitchen design. Your cabinetry will need to be between 700–850 mm deep to ensure a flush finish.
WE LOVE OPEN SHELVES BUT THEY CAN CRUCIFY A KITCHEN
If your open shelves become a home for dusty books, chipped, mismatched crockery and (dare we say it) colourful plastic bowls it’s a #nooooo from us! Seriously guys, nothing ugly should ever be put on open shelves – that’s what cupboards and drawers are for. Open shelves are for pretty things – they can be practical too – let’s call them ‘pretty practical’. We style our shelves with a combo of greenery, candles, books, canisters, stacked plates and bowls, and even artwork. Cluster items together in groups and make sure there are gaps between the groups. Don’t overdo it – less is more. If you have multiple shelves, avoid putting crockery or glassware on the top shelf as it’s likely to get dusty.
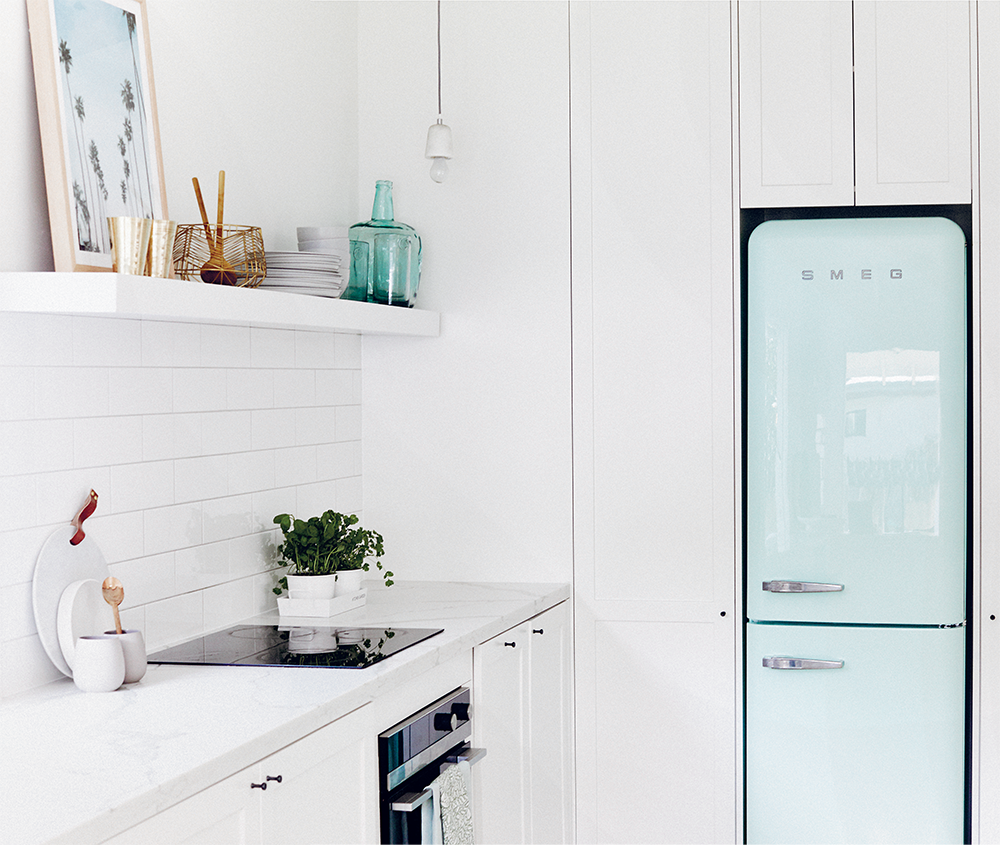
Retro cool
If you’re not going to integrate your fridge, why not make a statement with it? There are several colourful and old-school cool designs to choose from. For this kitchen, we chose a mint-green fridge for a laid-back holiday vibe.
Good grout! If you’re using light-coloured grout on your splashback, make sure you seal it well to avoid it staining.
SPACE OUT YOUR SEATING
Squeezing too many stools under a bench is a no-no. Assume each stool needs to be around 50–60 cm wide to be comfortable and work back from there. A 2.4 metre-long island can handle four stools, an island 1.8 metres long can have three. Avoid stools that are more than 70 cm in height, as this can make for a tight squeeze between the thighs and the benchtop! Around 65 cm in height is ideal for a stool. And the benchtop overhang required for comfy seating is between 300 and 450 mm.


TAKE THE INSIDE OUTSIDE
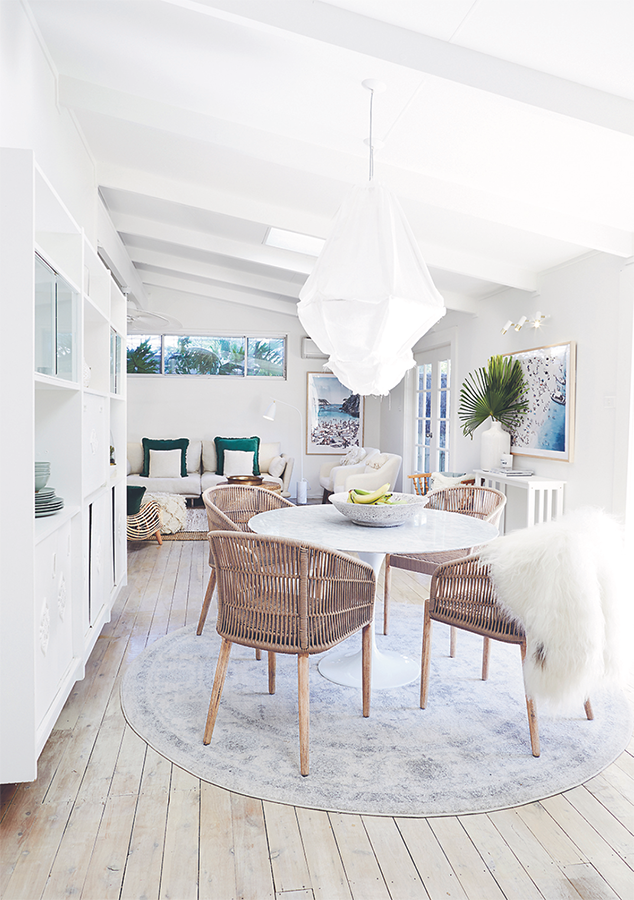
The best outside spaces are seamless extensions of the interior. So, when styling your outside space(s), it’s a good idea to borrow many of the same principles you used inside your house and execute them using outdoor-worthy products. Take inspiration from the colour schemes you’ve used indoors, particularly in any rooms adjacent to the alfresco space, and carry those through to the outside. Here, the rope chairs we used in the dining space are picked up again outside on the deck, and the blues and greens in the outdoor cushions complement the colours used in the lounge room on the other side of those French doors.
DON’T RELY ON MOONLIGHT
Lighting is frequently forgotten when designing outdoor spaces, but if you get it right, it adds atmosphere and can extend your entertaining hours well into the night (sorry, neighbours!) to really maximise your alfresco space. #hellowinetime! You should plan your exterior lighting at the same time you develop your landscaping and alfresco plans. Your electrician will need to know exactly where you want lights to go so they can ‘rough in’ the electricals while your home is under construction. And either you or your electrician will also need to source lights that are suitable and safe for the type of outdoor use you’re after.
FLIP TIP
Don’t throw too much money at outdoor lighting as most buyers will view your house during the day and struggle to adequately value the investment you’ve made on outdoor lights.
TRY THIS AT HOME
Once the sun goes down, grab a torch and stand outside in the space that you’re turning into your dream alfresco area. If you currently have outside lights in that space, turn them on. If not, just stand there in the dark. Try to visualise what lighting you would like to have to make this your dream outdoor space. What do you want to see? For example:
 Do you have some grass that you’d like the kids to be able to play on, even after dark? If so, a few well-directed spotlights mounted on the eaves at the back of your house could be just what you need.
Is there a feature in your yard you’d like to draw attention to; a beautiful tree, perhaps, or an architectural wall? In that case, some accent lighting (think uplights) that draws attention to those features might be a good idea.
Can you see all the way to your back fence? Would you like to? Lighting to the back boundary can make a yard look and feel bigger at night.
If you (and your guests) use the side access of your house, is there adequate lighting along the paths so you aren’t stumbling through the dark?
Once you’ve considered all of these things, walk around the outdoor area, using your torch if necessary, to nut out exactly what lighting you think you need.
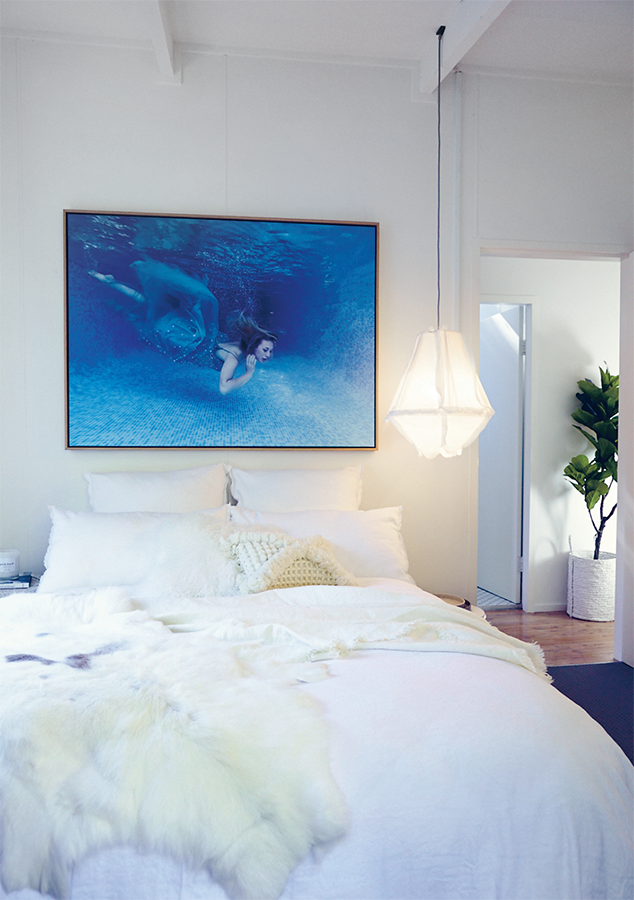
USING ART FOR IMPACT
Because this house is by the beach, we wanted to use some stunning underwater artwork in the bedrooms to bring the coastal theme to life.
When choosing artwork, you need to ask yourself this basic question: Do I want the colours in the piece of art to ‘complement’ or ‘contrast’ the rest of the room? The two underwater pieces contrast the whites of the rooms, while the large piece we went for in the guest cottage complements the blush tones of the linens and the rose gold vase.
Don’t forget to consider the frame. This important detail needs to work with both the art AND the surrounding colours used in the room. Black or white frames are safe options that look good anywhere, plus they won’t go out of fashion like metallic frames might. We love pale oak timber frames but you do need to ensure the timber works with any other timber elements in the room (especially if you have timber floors).
There are some really affordable artwork options out there, which look stunning. Lots of mainstream furniture stores now have a great range and you can even search by price point. Or, if you’re keen on an artist, buying a digital print of theirs instead of an original will also help your budget.
How big should the artwork be? There’s nothing worse than a piece of art too small for the space it’s in. If you’re unsure about size, tape some joined pieces of paper up on the wall to help you get a sense of scale and determine what size you need. If in doubt, go a bit bigger.
DECIDE ON THE FOCAL POINT
Knowing what the focal point of a room is going to be before you style it is really important. The focal point can be a structural element, like a picture window, or it can be a piece of statement furniture or something else, like the artwork we used in the master suite (right) and the guest bedroom (above). A focal point typically sets itself apart from the rest of the room because of its scale, colour or texture. We like to think about the focal point of each room very early on in a reno because it helps us work out where we’re going to build a structural focal point, or where we need to put a statement piece of furniture to create a focal point.

Guest cottage
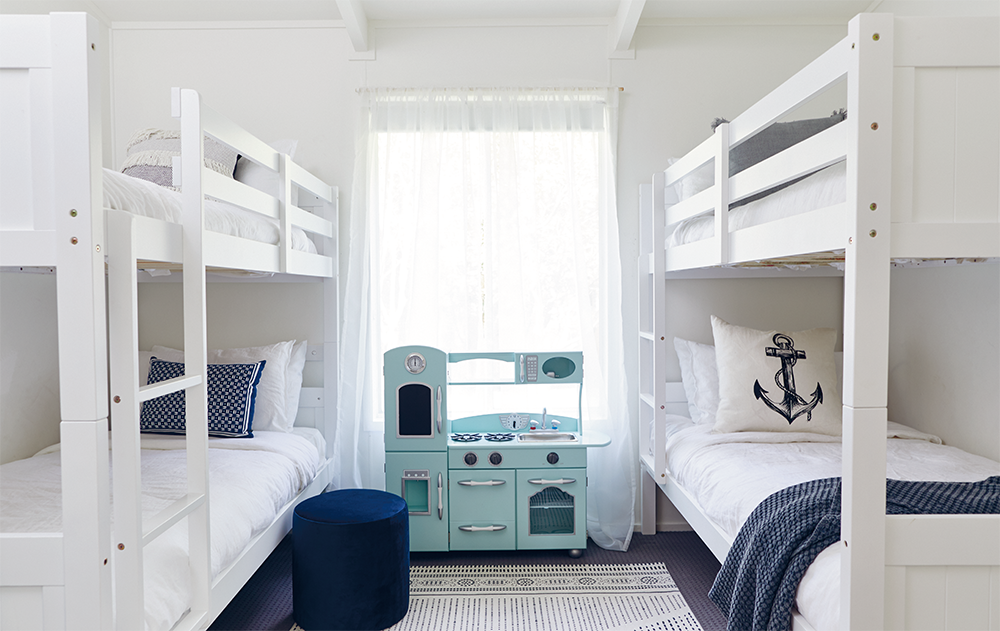
THE MORE, THE MERRIER
Holiday homes come to life with family and friends, so being able to accommodate lots of little people is key. Despite being a small room, the central window here allows space for a set of bunk beds on either side.