
WHAT IT TAKES
Time: 1 day
Skill level: Beginner
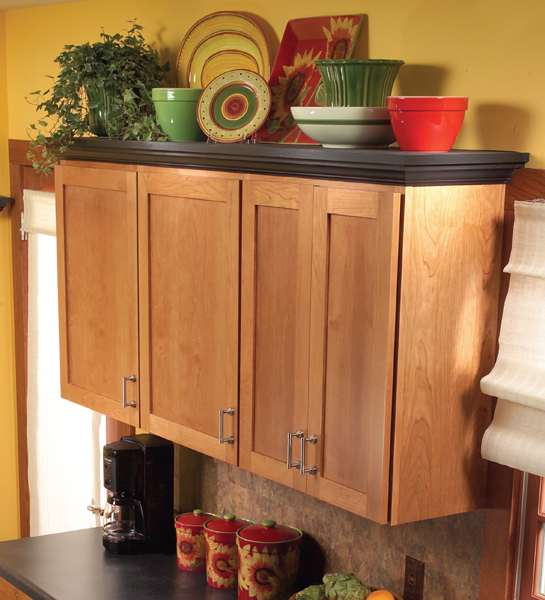
If you have empty space above your kitchen cabinets, you already know how difficult it is to keep it clean. And if you’ve ever tried to display anything above them, you also know the surface isn’t flat, so objects sink out of view. Why not solve both problems with an attractive display shelf you can easily build in a day?
This project only requires basic carpentry tools and skills. Even the miter joints can be cut with a simple handsaw miter box. We used an 18-gauge finish nailer to make the job go faster, but you can just as easily predrill and hand-nail. And don’t worry about trying to match your cabinet’s finish or wood type. The shelf will look great if you paint it to match another accent color in the room.
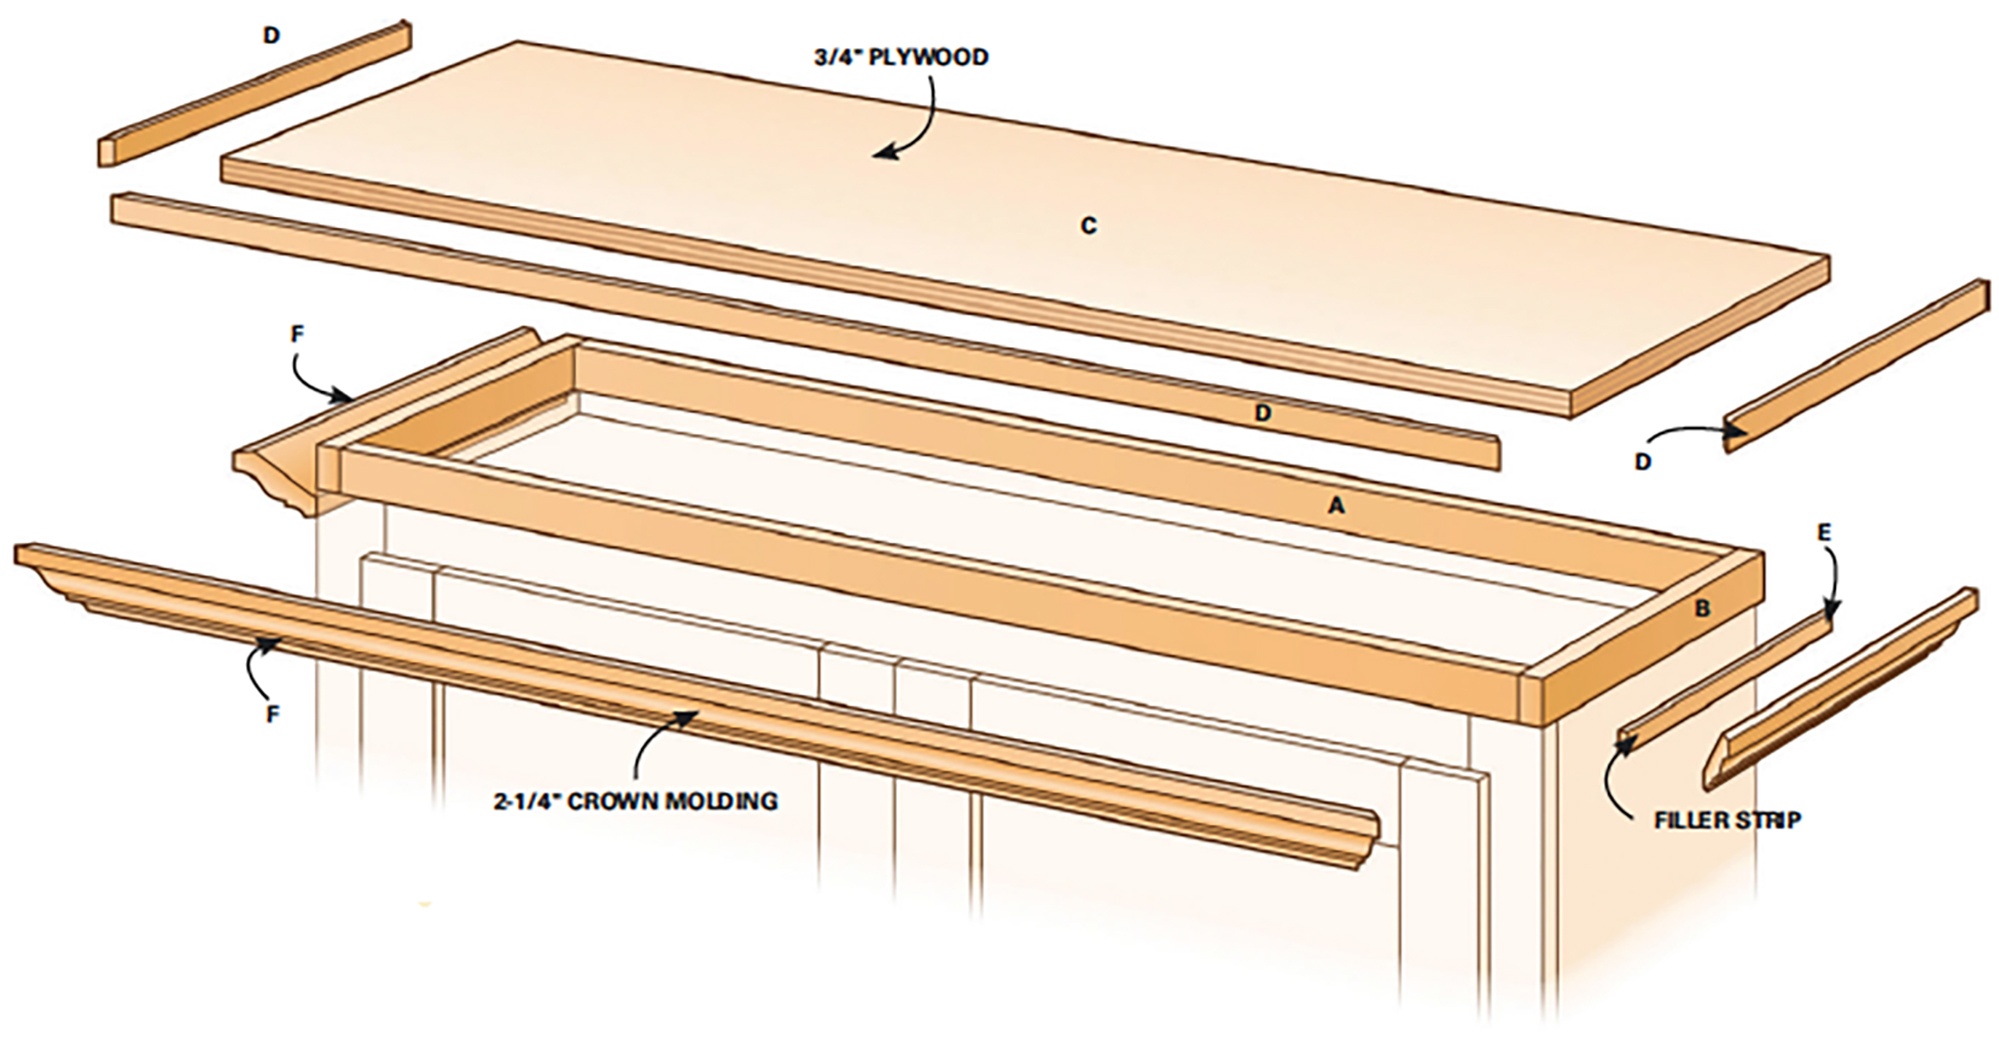
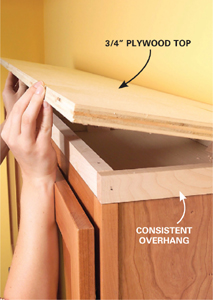
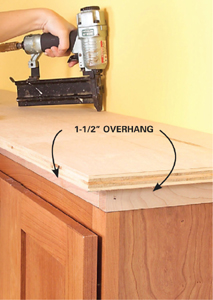
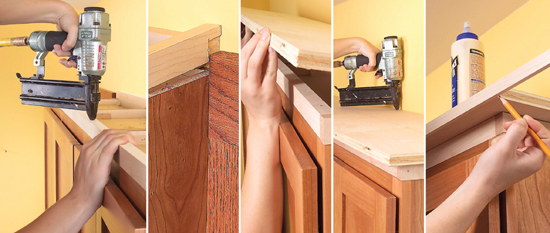
The best material for the main shelf is 3/4-in. plywood (Photo 4). Get a finished grade that is smooth and easy to sand. The cleats under the shelf (Photo 2) are fillers to elevate the shelf just enough so the crown molding fits under the shelf and yet comfortably clears the doors below. We had about 1 in. of space above the doors, so we needed cleats that were 1-1/4 in. high. If you don’t have access to a table saw, you can carefully cut them with your circular saw and an edge guide. Besides the 2-1/4-in. crown molding, you’ll need trim to cover the edge of the plywood (Photo 6) for a finished look. You can use “screen” molding or “parting stop,” or just rip a strip from a wider board to 1/4 in. or thicker. Just follow the photos for details about sizing and fitting the pieces.
Finish up by filling your nail holes and sanding the wood with 150-grit sandpaper. Prime the wood and then select a satin or gloss paint finish that’ll be easy to wipe clean. Because it’s difficult to get an exact cabinet color match for natural wood cabinets, simply pick a color that will accent your kitchen countertops or cabinets.
Cutting list
KEY |
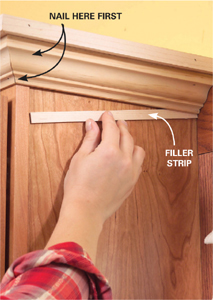
SIZE & DESCRIPTION |
A |
3/4" x 1-1/4" board cut 1-1/2" shorter than the cabinet face width |
B |
3/4" x 1-1/4" board cut the same as cabinet depth |
C |
3/4" plywood cut 3" longer than the cabinet face width and 1-1/2” deeper than the cabinet depth |
D |
1/4" x 3/4" molding cut and mitered to cover exposed plywood |
E |
Filler piece to fill void between the face frame and the wall |
F |
2-1/4" crown molding cut and mitered to fit over cabinet face and under shelf |
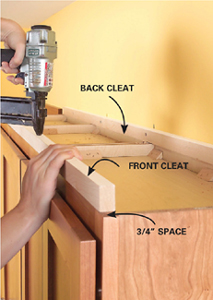
2
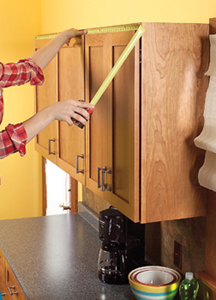
Nail cleats to the tops of the cabinets to elevate the shelf. Leave 3/4 in. of space on each side for the side cleats. The side cleats will overhang on the cabinet side.
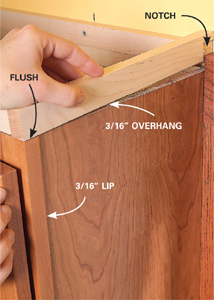
3
Fit the side cleats so there’s a consistent overhang on the edge. We had to notch the cleat to fit behind the window molding.
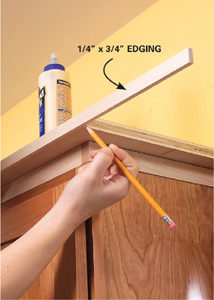
6
Glue and nail the 3/4-in.-wide edge molding to the exposed plywood edges. Miter the corners for a more finished appearance.
8
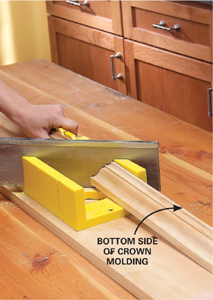
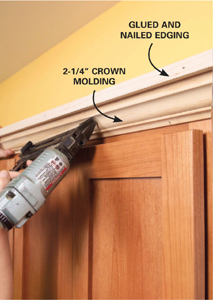
Nail the crown molding to the face of the cabinet and up into the shelf at an angle. The molding will completely cover the cuts.
9
Fit the side pieces of crown molding and slip a 3/16-in.-thick filler strip under the front edge to hide the gap created by the face frame overhang.
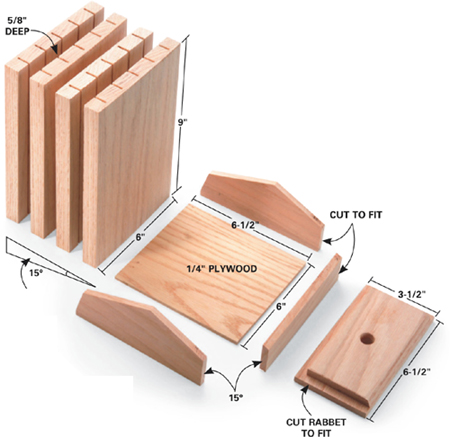
Store your kitchen cutlery in style with this handsome knife block. It’s fast, easy and fun to build, and includes a 6-in.-wide storage box for a knife sharpener.
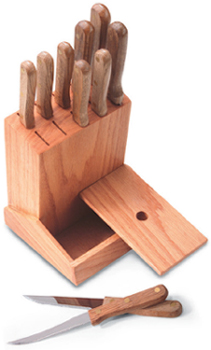
To build one, you only need a 3/4-in. x 8-in. x 4-ft. hardwood board and a 6-in. x 6-1/2-in. piece of 1/4-in. hardwood plywood to match.
Begin by cutting off a 10-in. length of the board and setting it aside. Rip the remaining 38-in. board to 6 in. wide and cut five evenly spaced saw kerfs 5/8 in. deep along one face. Crosscut the slotted board into four 9-in. pieces and glue them into a block, being careful not to slop glue into the saw kerfs (you can clean them out with a knife before the glue dries). Saw a 15-degree angle on one end and screw the plywood piece under the angled end of the block.
Cut the 6-1/2-in. x 3-in. lid from the leftover board and slice the remaining piece into 1/4-in.-thick pieces for the sides and end of the box. Glue them around the plywood floor. Cut a rabbet on three sides of the lid so it fits snugly on the box and drill a 5/8-in. hole for a finger pull. Then just add a finish and you’re set for years of happy carving!