
WHAT IT TAKES
Time: 2 hours
Skill level: Intermediate
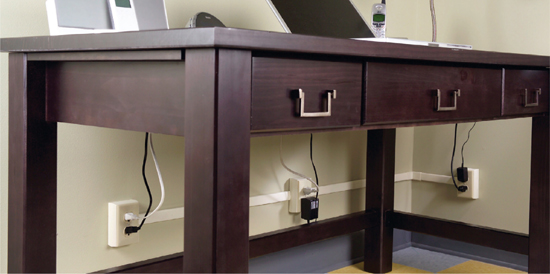
Surface wiring is a system of channels and boxes that allow outlets, switches or light fixtures to be put anywhere—without the hassle of cutting into walls, fishing wire and patching holes. And it can look much less messy, since the parts can be painted to match the walls. Mount outlets low on walls where they’ll be hidden by furniture.
All the parts are available in metal or plastic at home centers. This project uses plastic because it is easier to cut. All it takes for the project is wire, connectors, outlets and cover plates.
Add outlets to an existing circuit unless a device that draws a lot of power, such as an air conditioner or a space heater, will be plugged in to the same circuit. An electrical inspector will review the plan before approving a permit. Be sure to have the work inspected when it’s complete.
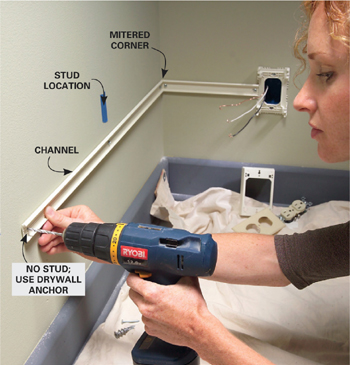
Start by mounting a box base at an existing outlet (Photo 1). Cut out the back panel of the box with a utility knife before screwing it to the junction box. Then use a stud finder to locate studs and mark them with masking tape.
Run the channel to the first outlet location (Photo 2). If the channel won’t have to make any turns or run around corners, just cut it to length with a hacksaw. But if the channel turns up or down or goes around a corner, miter the adjoining ends at a 45-degree angle. To mount the channel base, drill 1/8-in. holes at each stud and 1/2 in. from the ends. Wherever an end doesn’t land on a stud, use a drywall anchor.
With the first section of channel in place, fasten a box base to the wall. Don’t cut out the back panel. If the base lands on a stud, simply screw it to the stud. If not, use two drywall anchors. Continue adding channel and boxes.
Next, run wire from the existing junction box to each box base. The size of the wire added must match the size of the existing wire. Use the labeled notches on a wire stripper to check the gauge of the existing wire (14-gauge is most common, but it may have 12-gauge wire). Use only individual wires labeled “THHN,” which is sold in spools or by the foot at home centers and hardware stores. Get three colors: green for the ground, white for the neutral, and red or black for the hot wire. Don’t simply buy plastic-sheathed cable and run it inside the channel.
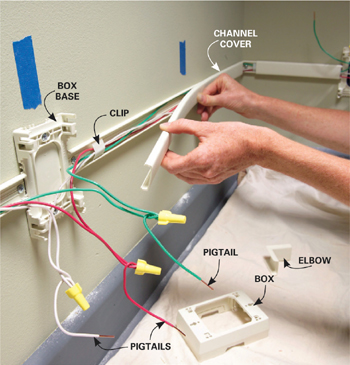
Cut channel covers to length (no need to miter them). At turns or corners, hold an elbow in place when measuring for the covers—the elbow will overlap about 1/4 in. of the cover. Snap the covers onto the channel base followed by the elbows and boxes (Photo 3). Wiring the outlets is similar, whether several outlets are added or only one. If two channels run from the existing junction box (as in Figure A), there will be two new sets of wire to connect to the old wiring (Figure B). If channel runs only one direction from the box (as in these photos), there will be fewer wires, but the process is the same: Join all the hot wires together, all the neutrals together and all the grounds together. Wiring is similar at the new outlet boxes that fall between sections of channel (Photo 3 shows “pigtails” ready for an outlet). At the last box in the run, there will be only three wires (see Figure A); connect them directly to the new outlet.
1
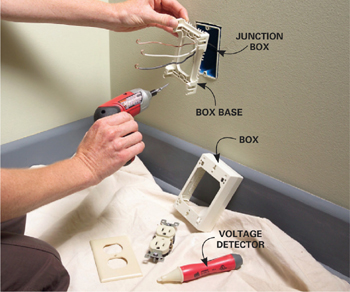
Turn off the power and make sure it’s off using a voltage detector. Remove the old outlet and screw a box base to the junction box.