
WHAT IT TAKES
Time: 1 day
Skill level: Beginner
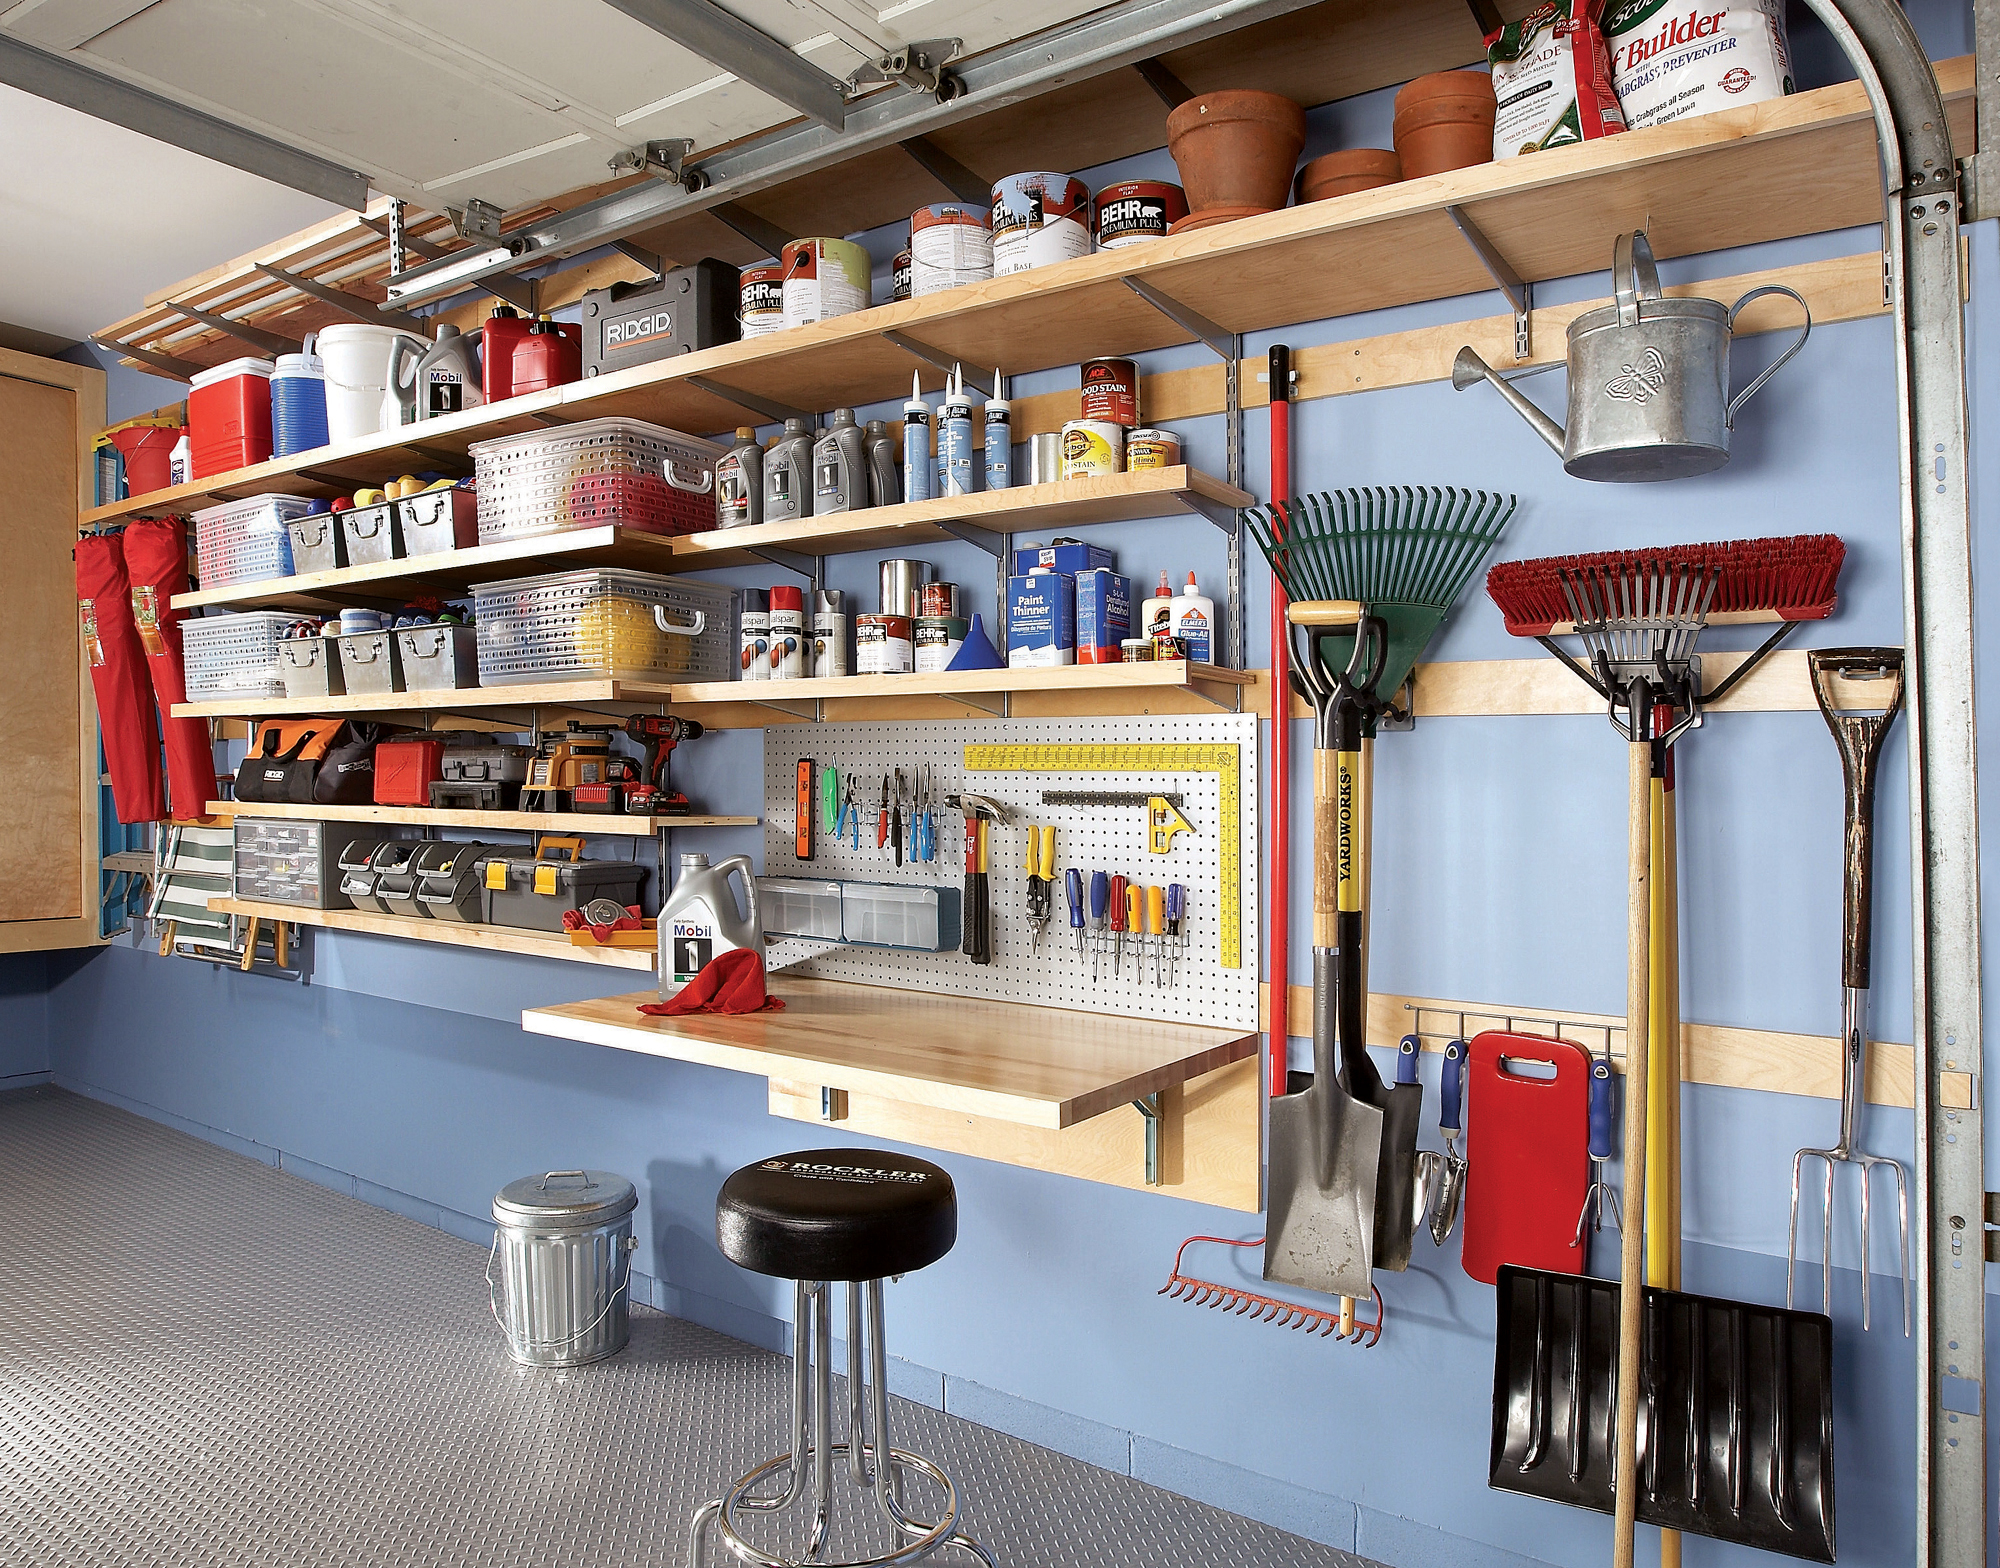
This storage system solves two challenges: first, how to design storage space for the narrow alley between the garage side wall and the family car; and second, how to create a solid mounting surface to hold shelves and hooks that are capable of carrying hundreds of pounds of stuff.
The solution is to create a framework of horizontal wood strips and inexpensive shelf standards. It can hold almost any arrangement of shelving and hooks, at any point on the wall, and it’s easy to rearrange.
Pull your car into the garage and measure how much space is available. Then look over what you need to store and figure out where it will fit. Generally it’s best to hang narrow shelves and smaller hooks lower where space is tight, with wider shelves up near the ceiling so you don’t bump your head or interfere with car doors.
Planning the layout and buying materials can take a few hours, but you can do the actual installation, including ripping the plywood shelves and strips, in less than a day. Put up horizontal strips even if you have exposed studs or block walls—they’ll make it much easier to install shelf standards and hooks. Apply finish to the strips and shelves, if desired, before installing them.
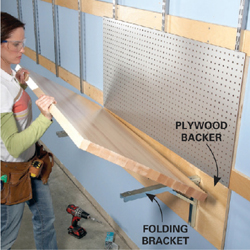
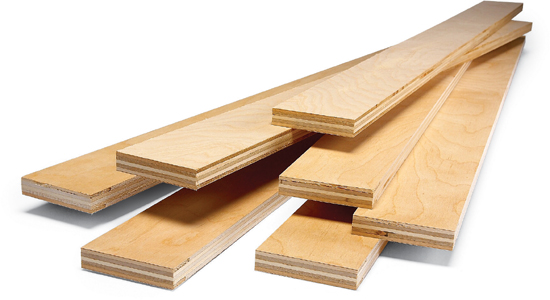
We used 3-1/2-in.-wide strips of 3/4-in. plywood for the strips because plywood is always straight and never splits—but pine 1x4s also work. Birch plywood was our choice for the strips and shelves, but you can also use less-expensive BC plywood. You can rip 12 strips from one 4 x 8-ft. sheet—that’s enough for an average wall. (If you don’t have a table saw, go to familyhandyman.com and search for “circular saw” for tips on making straight cuts.) We used four sheets of plywood for our system. For shelf edging, we used 1-1/2-in.-wide strips of solid birch (Photo 6). The total cost for our 20-ft.-long system was about $500, but you could cut that cost in half by skipping the fold-down workbench (Photo 5) and using less-expensive wood and plywood.
Just screw wood strips to the wall
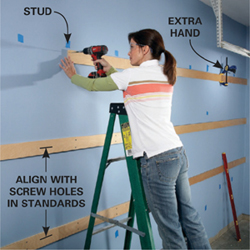
Strips of plywood fastened horizontally to the studs are the key to this system. Once they’re up, you can easily mount any kind of storage hardware or shelf standard without worrying about where the stud is or whether a drywall anchor will hold. Since you can drive a screw anywhere, you can pack more stuff on the wall.
Locate studs using a stud finder and mark them with masking tape, then draw a level line 3 ft. above the garage floor. Start at the center of the wall with a 4-ft. level and work to each side. Garage floors often slope, so don’t simply measure from the floor to establish the line. Set the first strip above the level line, screwing it to every stud with two 2-1/2-in. screws (Photo 1). Space the remaining strips so they line up with the screw holes on the standards you use—ours were 22 in. from center to center.
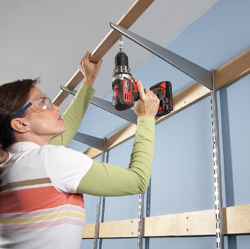
Screw on the first standard with 1-5/8-in. screws. Install the other standards, spacing them no more than 24 in. apart—less if you have lots of heavy boxes to store.
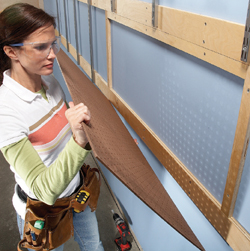
Attach pegboard, different widths and lengths of shelving, a workbench, a lumber and pipe rack, and any other type of storage you need (Photos 3 – 5).
Use a table saw or circular saw to rip shelving 1/2 in. wider than the depth of the shelf bracket. Use 3/4-in.-thick plywood or solid wood for the shelves—it’s stronger and resists sagging better than any particleboard shelving product available.
If you want to make the shelves more rigid as well as more attractive, nail on 1x2 front edges (Photo 6). Use an air nailer or predrill if hand nailing. Finally, line up the shelves and attach them to the brackets from underneath with screws 1/2 in. longer than the depth of the bracket.