
WHAT IT TAKES
Time: 2 hours
Skill level: Beginner
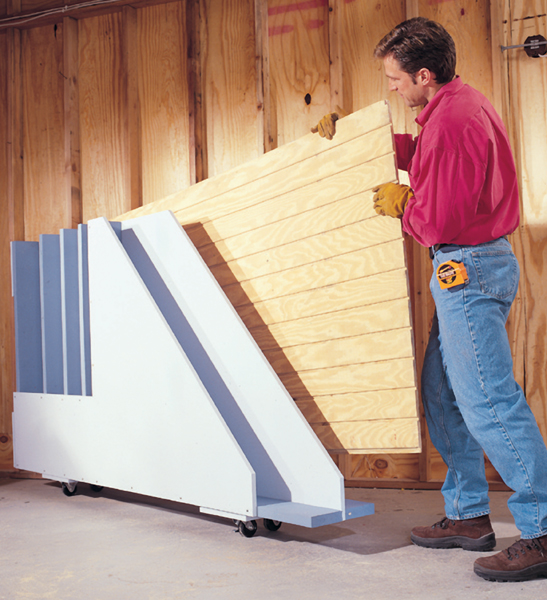
Plywood takes up relatively little space and is easy to store—simply lean it against a wall. The trick is getting at it when you need it. Nine times out of 10, you need the half sheet that’s buried behind 12 others.
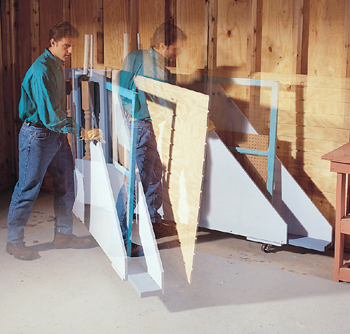
If you’ve experienced that frustration, you’ll love this rack. Casters and a set of hinges are the secret for easy access. They allow you to swing the storage rack out from the wall and slide out the storm window, paneling or other item you want. Dividers strengthen the rack while enabling you to separate large sheets from smaller ones.
Each slot has room for about six sheets of 3/4-in. plywood. Although you can modify this design and make the slots larger, keep in mind that anything that sits around for a year or two is a donation candidate.
Construction of the rack goes surprisingly fast. Plan an afternoon for the project plus an hour or two to run to the home center for materials. (See Materials List.) The least expensive wood will do, although for a few dollars more, an AC grade of plywood (sanded on one side) is usually flatter and nicer to work with.
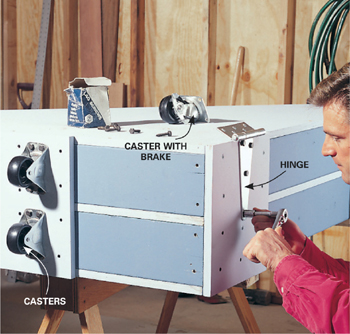
When loaded, this rack is heavy, so make sure to buy casters rated for at least 200 lbs. each. One of the casters should have a brake for extra stability. You can purchase all your materials new, but chances are you’ll have some of these materials lying around. (Use up that extra 3/4-in. plywood!)
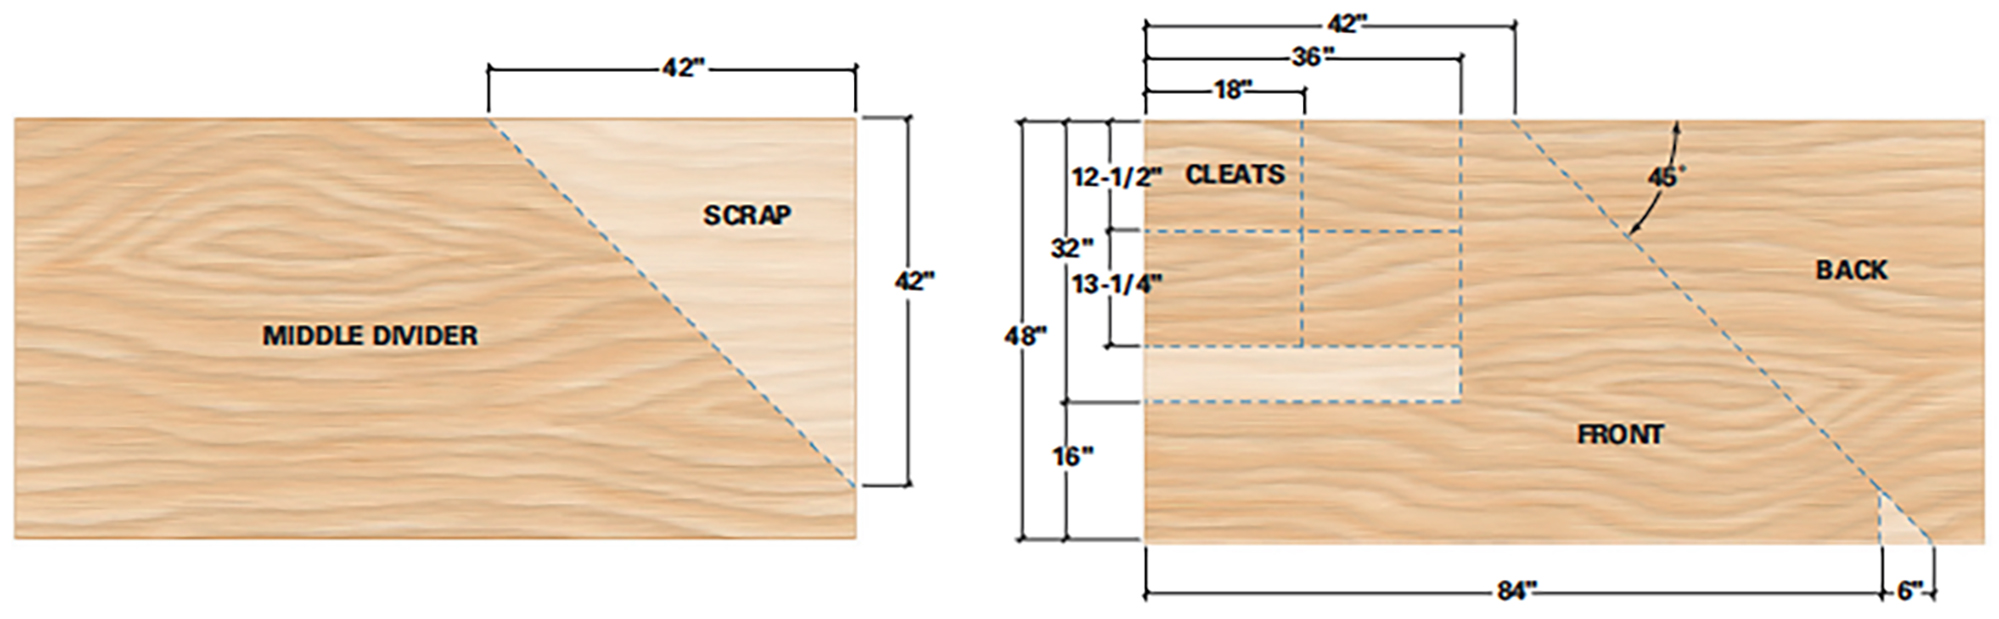
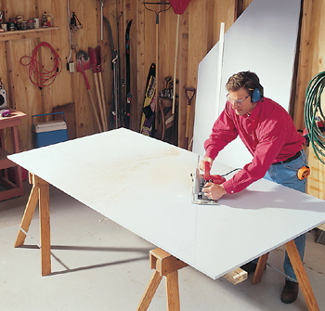
Cut the plywood and 2x6s to size first, following Figure B for dimensions (Photo 1). You can make your cuts freehand (without a guideboard) because they don’t have to be perfect. Use a sharp, carbide-tipped blade with at least 24 teeth to minimize splintering.
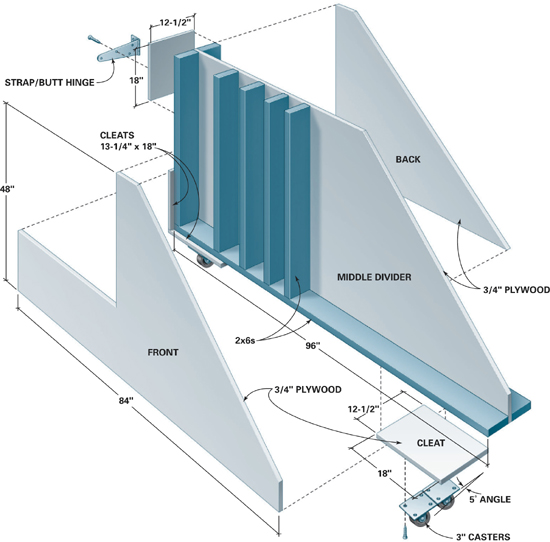
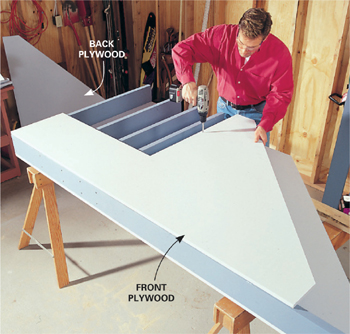
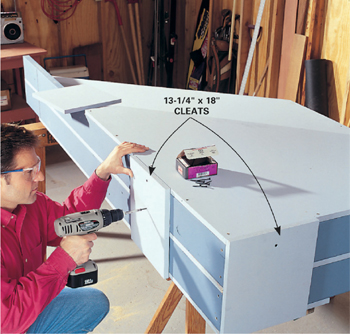
After cutting all the pieces, screw the rack together. Start with the center plywood divider first, attaching the bottom 2x6 and then the side. Use the factory edge of the plywood to keep it all square. Next, measure and mark out your center 2x6 dividers and set them in place (Photo 2). This spacing isn’t critical; use more or fewer dividers depending on your needs. After you fasten the front piece of plywood (Photo 3), you can turn the rack over and drive additional screws, spacing them every 12 inches. For the back bin you’ll have to toe-screw (screw at an angle) the bottom and side 2x6s through the center plywood divider and into the opposite 2x6 (Photo 4). These toe-screws hold them in place until you attach cleats, which solidly join the two sections (Photo 5).
All that’s left is attaching the hardware and fastening the rack to the wall. Since the rack and its contents are heavy, use lag screws to hold the casters and hinges in place. Predrill your holes with a 3/16-in. bit. Set the casters at a slight angle (5 degrees) to accommodate the swing of the rack (Figure A). Attach the hinges and you’re all set to swing the rack out from the wall and fill it up.
■ Two 4' x 8' sheets of 3/4" AC plywood
■ Five 8' construction-grade 2x6s
■ Three 3" casters
■ One 3" caster with a brake
■ 1 lb. of 2" drywall screws
■ 1 lb. of 3" drywall screws
■ Thirty-four 1/4" x 1-1/2" lag screws
■ Two combination 4" butt/ 6" strap hinges (Photo 7)
1
Cut plywood to the dimensions shown in Figure B. The cuts don’t have to be precise; you don’t need a saw guide. Wear goggles and hearing protection.
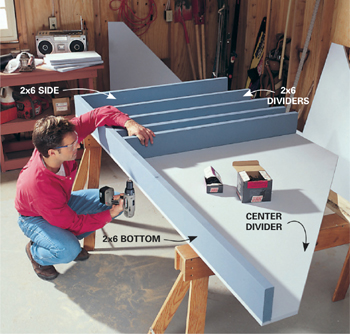
2
Cut the 2x6s to length and position them on the center plywood divider. Tack them to the plywood with 2-in. drywall screws driven from underneath. Then screw the 2x6 dividers to the bottom 2x6 with 3-in. drywall screws.
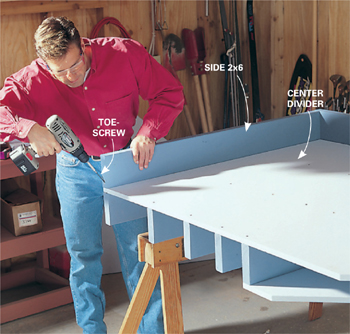
4
Flip the project over and assemble the back section. Position back 2x6s for the bottom and side and fasten them with two 3-in. screws where they meet. Then drive screws at an angle (toe-screw) through the ends of the 2x6s into the assembly below. Attach the plywood back piece to the 2x6s with the 2-in. screws.