
WHAT IT TAKES
Time: 3 hours
Skill level: Beginner
This 2 x 5-ft. table is a handy option for any laundry room. Located right across from the washer and dryer, it’s the perfect place for sorting colors before washing and folding the clothes as soon as they’re dry. This project uses heavy-duty brackets that’ll hold more than 100 lbs. and neatly fold the top down (preventing future clutter).
Buy the countertop (and end cap) at a home center or salvage one from a friend who’s getting new countertops. Also buy three 8-ft. pine boards—a 1x2, a 1x3 and a 1x4—as well as some wood screws. Buy 1-1/4-in. and 2-1/2-in. wood screws for mounting the wall cleats and the countertop stiffeners. Order the fold-away brackets online. (Ours are from rockler.com.)

1
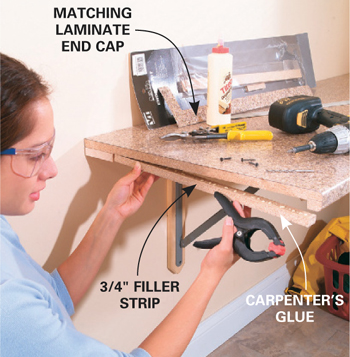
Buy a 6-ft. laminate countertop. Draw a straight line 1-1/2 in. from the back side. Cut this section away with a circular saw. Trim the countertop to length, cutting from the back side.
2
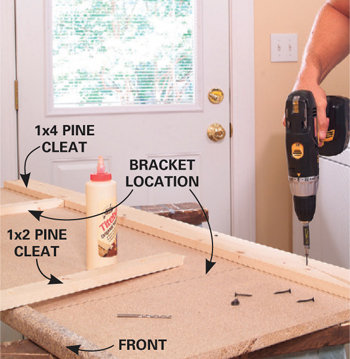
Predrill, glue and screw pine supports under the countertop. Use 1x4s along the back and 1x2s at bracket locations. The supports will stiffen the top and provide backing for the brackets. Space the brackets no more than 32 in. apart.
3
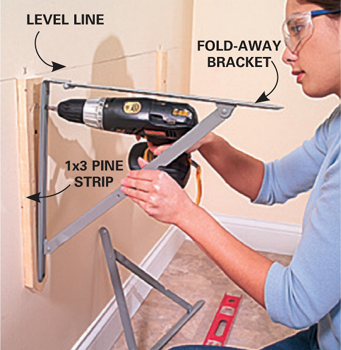
Draw a level line 1-1/2 in. below the finished height of the laundry table. This one is 33 in. high including the thickness of the top. Screw 1x3 pine strips to the wall into the studs behind.
4
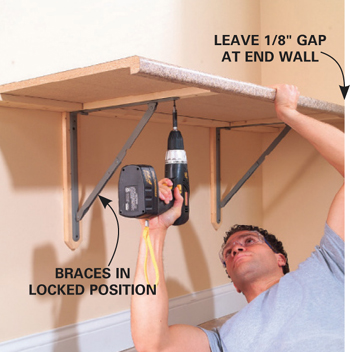
Screw the top to the brackets at the pine cleats. Keep about 1/8-in. clearance between the wall and the end for clearance when you lift and close the table. This will prevent damage to the wall.