
WHAT IT TAKES
Time: 4 hours
Skill level: Intermediate
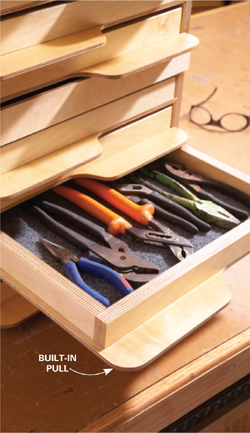
Because most hand tools are relatively flat, piling them in deep drawers wastes a lot of space and makes them hard to find and dig out. This rather fetching cabinet separates and organizes all those tools. Best of all, you can remove the tray containing, say, the open-end wrenches, and take the whole collection to wherever you’re wrenching.
There are several plain versions of this design: a few drawers made from MDF with utilitarian handles. We decided to bump it up a notch and build a 10-tray unit out of cabinet-grade birch plywood. And rather than use handles, we made the tray bases with built-in “paddle pulls.”
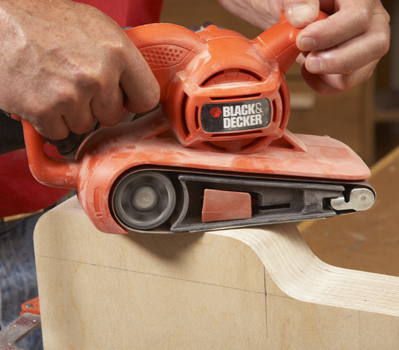
Shaping the paddle pulls is the trickiest part of the whole project. You’ll get the best results by clamping the tray bottoms together and gang-cutting the paddle pulls all at once with a band saw. Sanding them all at once also saves lots of time and ensures that the parts are identical (Photo 5). (Then get the alternating paddle pulls by flipping over half of the tray bottoms.)
If you don’t have a band saw, a jigsaw will do. If you’re jigsawing, mark one paddle pull on a tray bottom and use it to scribe and gang-cut five at a time. You can also just skip the paddle pulls and add the drawer pulls of your choice. To do that, cut the tray bottoms to 15-1/2 x 12 in., but “gang-sand” them all as shown in Photo 5.
This project calls for a table saw and a dado blade. The good news is that absolutely no hardware is needed, including fussy, expensive drawer slides to mess around with.
This project is a real plywood eater. You’ll need a full sheet of both 1/4-in. and 3/4-in. plywood to build one. Build it with more or fewer trays; it’s up to you. If you choose to make a wider or taller cabinet with more trays, fine. But it’ll take more than two sheets of plywood!
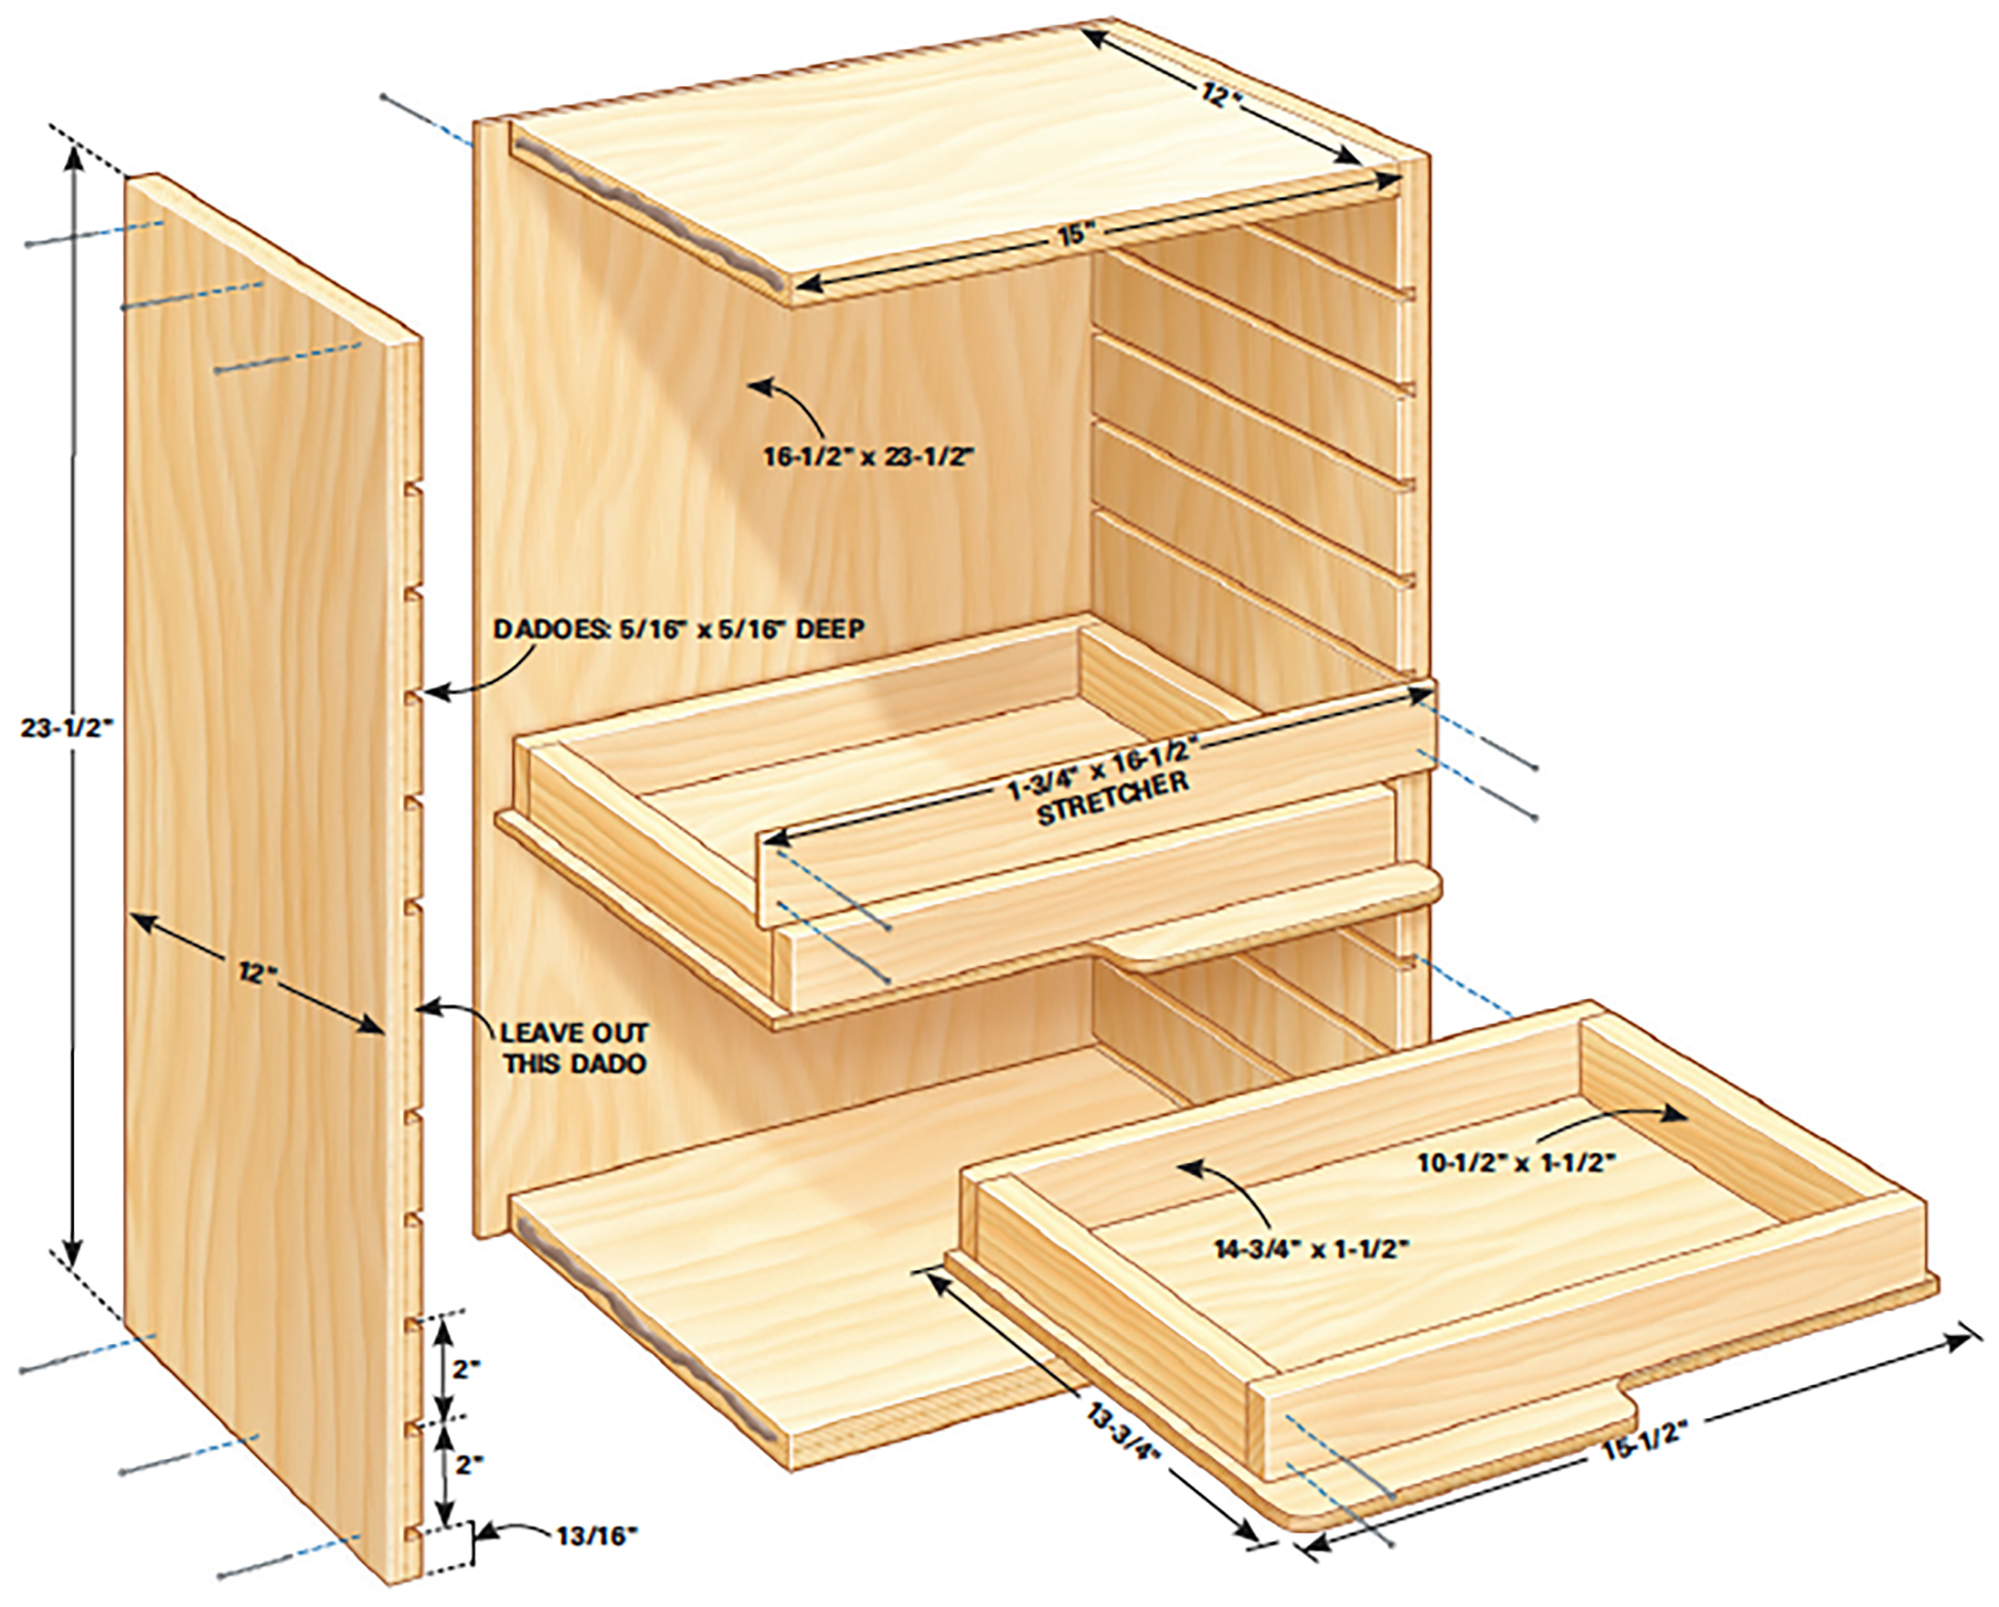
Cut the 1/4-in. back first. Take a notch out of a corner of the sheet rather than ripping a whole strip or you won’t have enough leftover plywood to make the drawer bases. Cut the back 1/8 in. larger than the illustration calls for. After the cabinet is assembled, you can get extremely accurate measurements and either cut the back to fit or use a flush-trim router bit after it’s attached. Cut the sides a full 24 in. tall and cut them to length after the dadoes are cut. (You don’t need to cut a dado in the center where the stretcher goes. We forgot and cut one there, but it’s hidden anyway.)
Gang-sand the exposed tops of the tray sides before assembly. After you get the cabinet box and trays assembled, finish sanding and apply the clear coat. A nice finishing touch is to line the tray bottoms with squares of indoor/outdoor carpeting.
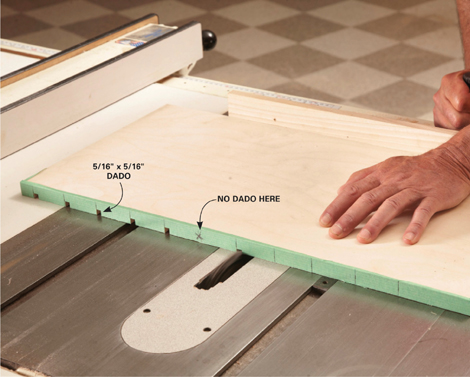
1
Mark and cut the dadoes for the drawers. Mark the dado bottoms on the edges beginning at 13/16 in. up from the bottom and then every 2 in. Don’t cut a dado in the center—that’s where the stretcher goes. After cutting all 10 dadoes, cut off the top, 2-3/4 in. above the last dado bottom.
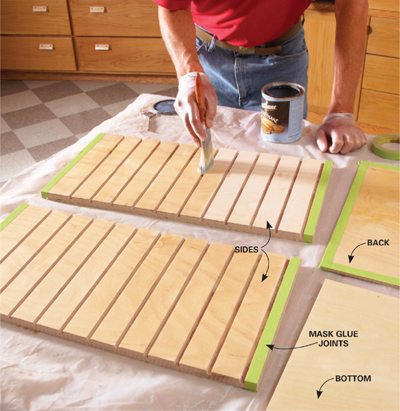
2
Prefinish the interior surfaces. Protect the gluing areas with masking tape and varnish surfaces on the cabinet interior. It’s much easier to do now than later. For smooth tray operation, be sure to brush out any varnish pools or drips inside the dadoes.
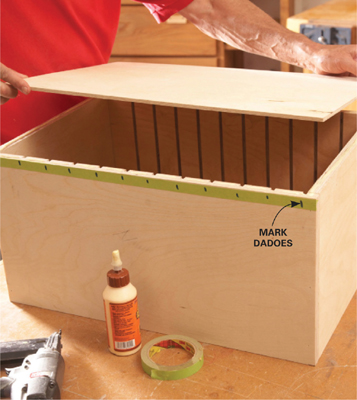
3
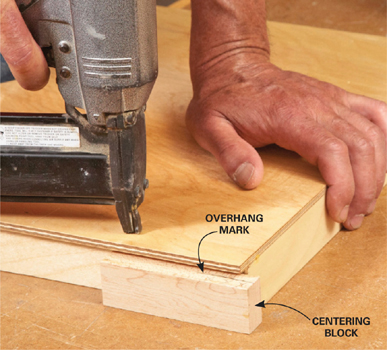
Assemble the box. Glue and nail the box together with 1-1/2-in. brads. Then mark the dadoes to avoid misses when you nail on the back with 1-in. brads. Glue the perimeter, then nail one edge flush with the box side. Square up the box with the back to nail the second side. Then finish nailing the remaining two sides.
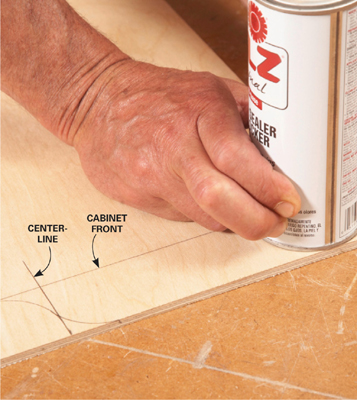
4
Mark the paddle pulls. Cut the tray bottoms into 15-1/2 x 13-3/4-in. rectangles. Draw a line 12 in. from the back edge of the trays and mark a centerline. Use the centerline and one of the corners as a guide while you trace around a spray paint can to mark the curves. Then cut the shapes with a band saw or jigsaw.