
WHAT IT TAKES
Time: 4 hours
Skill level: Intermediate
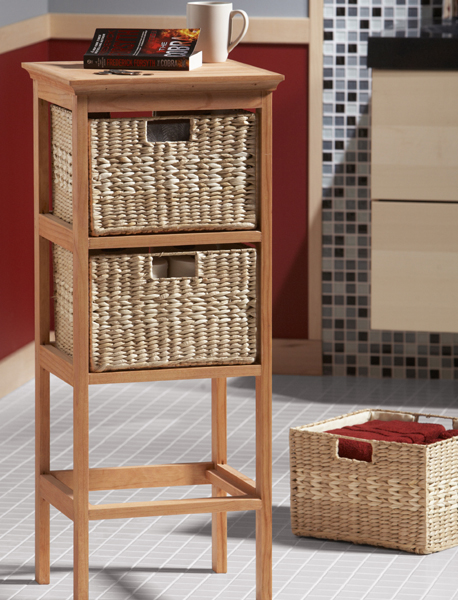
You’ve seen chests of drawers—well, here’s a “chest of baskets.” It can be used in nearly any room—but its small footprint makes it perfect for bathrooms with limited floor space. Use it for towels, hair dryers, extra toilet paper and anything else that fits.
The total materials bill for our pine stand, including the baskets, was about $50. We bought baskets at a craft store, but lots of other retailers such as Pier 1, West Elm and IKEA also carry them. Make sure to buy your baskets first; you need to construct the stand based on their dimensions.
To keep the frame of the stand both lightweight and strong, we used biscuit joinery. It’s a clever way to join wood, and a technique you can use with many other projects. See here for biscuit joiner tips.
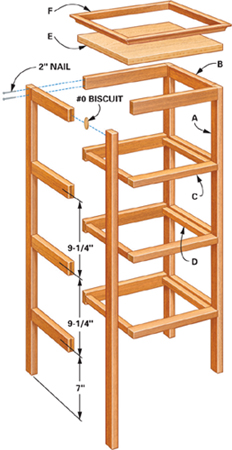
You’ll build the two “ladders” that form the sides of the stand, then glue and nail the crosspieces to join the two ladders.
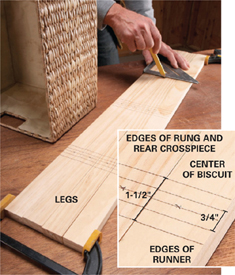
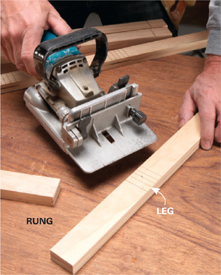
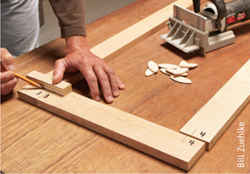
To get started, cut all the parts to length (see Cutting List). Mark the rung and crosspiece locations on the legs. Mark all four legs at the same time to ensure the framework is uniform and square (Photo 1).
As you mark the legs, keep picturing how your baskets will sit on the runners, especially if you’re using baskets smaller or larger than ours; it will help you avoid mental errors. Use the biscuit joiner to cut slots in the edges of the legs and ends of the rungs (Photo 2). You’ll need to clip the biscuits to suit the 1-1/2-in.-wide legs and rungs (see here).
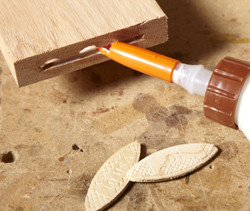
Apply glue to the biscuits and slots (Photo 3) and assemble each joint. Clamp the ladders together and set them aside until the glue dries.
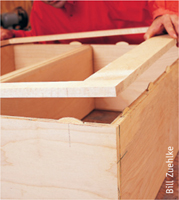
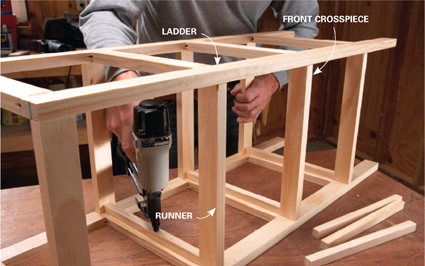
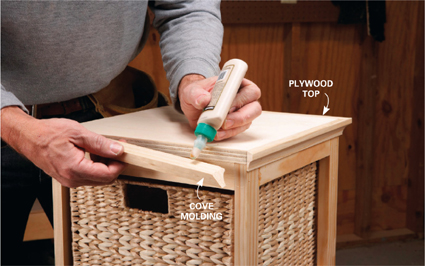
Join the two ladders by gluing and nailing the crosspieces between them. Remember that the three front crosspieces that will support the baskets lie flat. Next, install the basket runners (Photo 4) even with the flat crosspieces that run across the front. Glue and nail the 3/4-in. plywood top to the stand, then apply cove molding to cover the edges (Photo 5).
Overall Dimensions: 14-1/2" x 15-1/4" x 36-3/4"
Materials list
Here’s what we used to make this basket stand: 30 ft. of 1x2, 6 ft. of 3/4-in. x 3/4-in. square dowel, 6 ft. of 3/4-in. cove molding, 3/4-in. plywood, 12 x 12 x 8-in. baskets, No. 0 biscuits, wood glue, 2-in. finish nails, penetrating oil cherry finish.
KEY |
PCS. |
SIZE & DESCRIPTION |
A |
4 |
3/4" x 1-1/2" x 36" legs |
B |
8 |
3/4" x 1-1/2" x 10" rungs |
C |
8 |
3/4" x 1-1/2" x 12-1/4" crosspieces |
D |
6 |
3/4" x 3/4" x 10-3/4" runners |
E |
1 |
3/4" x 13" x 13-3/4" top |
F |
4 |
3/4" cove molding (cut to fit) |
2
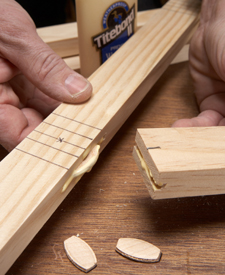
Cut the biscuit slots. Cut slots in the ends of the rungs and sides of the legs. Assemble each ladder in a “dry run” to make sure they fit together correctly.
3
Assemble the “ladders.” Join the rungs to the legs with glue and biscuits, then clamp the ladders together. Work fast! You have to assemble eight joints before the glue begins to set.
4
Connect the ladders. Install the front and back crosspieces with glue and nails. Then add the runners that support the baskets.
5
Top it off. Glue and nail the plywood top to the top of the stand, then apply cove molding to neaten up and hide the edges.
A biscuit joiner is a superb tool for joining wood where it would be difficult to use nails or screws. The joint is strong, invisible and easy to create. The compressed wood biscuits expand on contact with moisture in the glue. Since the biscuits are placed in slots that are wider than the biscuit, you can adjust the joint a little after butting the two pieces together. Biscuits come in three common sizes: No. 0, No. 10 and No. 20. Whether you’re building this basket stand or some other biscuit project, here are some of our favorite biscuit tips:
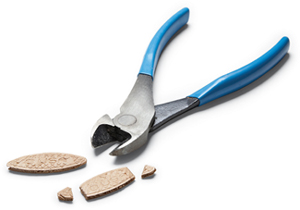
The smallest common biscuits (No. 0) are almost 1-7/8 in. long. That’s too long for the 1-1/2-in. wide parts on this basket stand. But there’s an easy solution: Just clip about 1/4 in. off both ends of each biscuit. Your slots will still be too long and visible at inside corners, but a little filler and finish will hide them.
While you’re marking the center lines of each biscuit slot, also number each joint. That will eliminate confusion and misalignments during assembly.
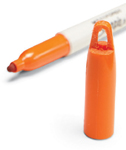
Spreading a neat, even bead of glue inside a biscuit slot isn’t easy. You can buy special injectors online, or make your own using the cap from a marker and a fine-tooth saw.
Biscuits grab fast. During glue-up, you don’t have time to correct mistakes or dig up a longer set of clamps. So always test the whole assembly—including clamps—before you get out the glue. For complicated assemblies, give yourself more working time by using slow-setting wood glue.