WHAT IT TAKES
Time: 2 hours
Skill level: Intermediate
WHAT IT TAKES
Time: 2 hours
Skill level: Intermediate
This clever shelf holds DVDs, CDs or even small books. You can make yours with as many shelves as you like simply by changing the length of the trunk.
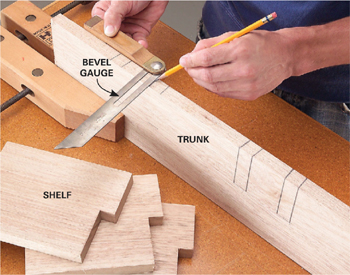
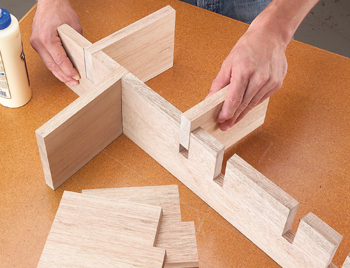
To get started, cut the trunk and shelves to length. Bevel one end of each shelf by tilting your miter saw or table saw blade to 5 degrees. Mark the notches in the shelves and trunk (Photos 1 and 2). Measuring from the top of the trunk, center the notches at 8-1/2, 11-1/2, 17-1/4, 20-1/4, 26-1/4 and 29 in. Cut the notches using a 5-degree guide block and a pull saw (available at home centers). Assemble the shelf (Photo 3). Screw metal straps to the back of the trunk, leaving one screw hole exposed so you can screw the DVD holder to the wall.
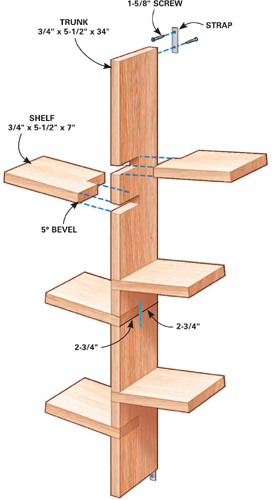
Materials: 8 ft. of 1x6 hardwood, wood glue, 2-in. x 1/2-in. metal straps, 1-5/8-in. screws, spray lacquer.