Materials list
■ |
One half-sheet (4' x 4') of 3/4" oak plywood |
■ |
Three 8' oak 1x3s |
■ |
Four 8' oak 1x4s |
■ |
One package (25') of 7/8" oak iron-on veneer (available at home centers) |
■ |
Veneer edge trimmer |
■ |
Wood glue |
■ |
1-1/4" brad nails |
■ |
Foam pads (3/4" round, self-adhesive non-skid pads) |
Cutting list
QTY. |
SIZE & DESCRIPTION |
1 |
3/4" x 3-3/8" x 30-1/2" oak plywood (shelf A base) |
1 |
3/4" x 5-3/4" x 30-1/2" oak plywood (shelf B base) |
1 |
3/4" x 8-3/16" x 30-1/2" oak plywood (shelf C base) |
1 |
3/4" x 10-5/8" x 30-1/2" oak plywood (shelf D base) |
1 |
3/4" x 13" x 30-1/2" oak plywood (shelf E base) |
2 |
3/4" x 2-1/2" x 4-3/8" oak (shelf A sides)* |
2 |
3/4" x 2-1/2" x 6-3/4" oak (shelf B sides)* |
2 |
3/4" x 2-1/2" x 9-3/16" oak (shelf C sides)* |
2 |
3/4" x 2-1/2" x 11-5/8" oak (shelf D sides)* |
2 |
3/4" x 2-1/2" x 14" oak (shelf E sides)* |
5 |
3/4" x 2-1/2" x 30-1/2" oak A–E (shelf backs) |
2 |
3/4" x 3-1/2" x 14-1/2" oak shelf cleats F (cut with 10-degree angles) |
8 |
3/4" x 3-1/2" x 11-3/4" oak shelf cleats G (cut with 10-degree angles) |
2 |
3/4" x 3-1/2" x 10" oak shelf cleats H (cut with 10-degree angles) |
2 |
3/4" x 3-1/2" x 84" oak uprights J (cut with 10-degree angles) |
*Front part of side cut at 10 degrees.
2
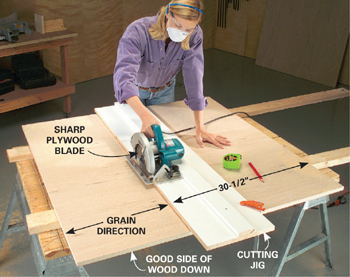
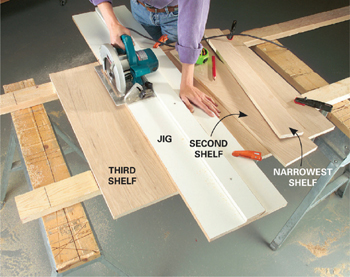
Cut the individual shelves, beginning with the narrowest, using the jig for perfectly straight cuts.
3
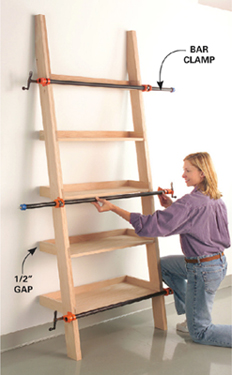
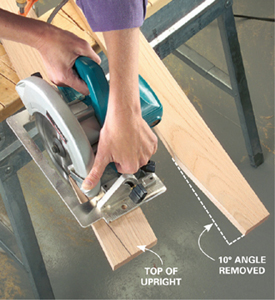
Cut both shelf uprights to length with a miter saw. Clamp to sawhorses. Mark the 10-degree angle at the top (dimensions in Figure B), then cut with a circular saw.
4
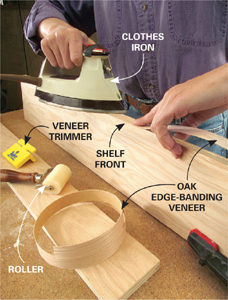
Iron edge-banding veneer to the front edge of all five shelves. Roll the entire surface to ensure a solid bond, and trim the edges.
5
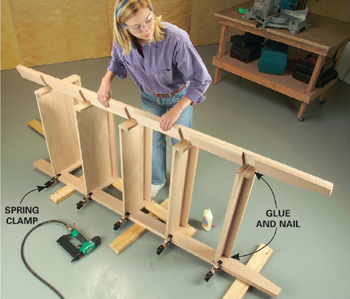
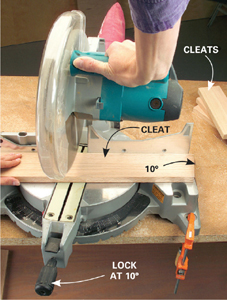
To maintain accuracy, lock the miter box at 10 degrees, then cut all angled pieces—uprights, cleats and one end of shelf sides—without changing the table.
7
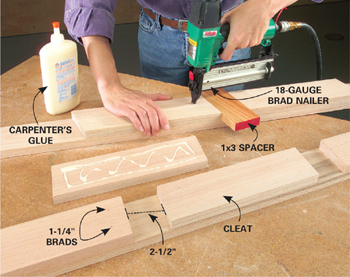
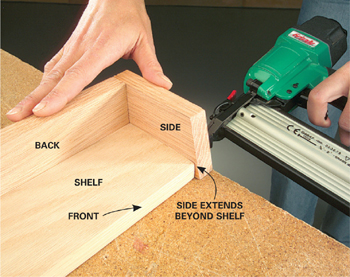
Glue and nail the shelf backs, then attach the sides to the plywood shelves. Position the sides to overlap the shelf base as shown.