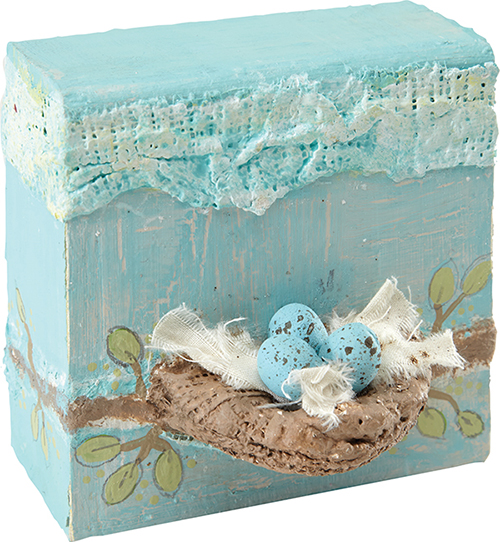
Nestled within this little nest are tiny eggs created from paper clay. Ruth once again pays homage to her love of home and life. In creating something that signifies the beginning of a new life cycle we are oftentimes renewing our creative energy. Your task is to create a piece that employs the techniques Ruth has used while breathing energy into your creativity.
acrylic paint, assorted colors
acrylic sealer
foam brush
hot glue gun
knife
muslin
paintbrush
paper clay
paper towels
plaster wrap
plaster
stiff brush
Styrofoam ball
white school glue
wood board, 31⁄2" × 31⁄2" (9cm × 9cm)
Paint the board with Titanium White acrylic paint and let dry.
Place a medium coat of white school glue over the dry white paint. Let it sit for five minutes.
Mix equal parts of light blue paint and Titanium Buff (slightly watered down), then apply the mix over the glue. Let it dry completely, which can take up to about two hours. A heat gun can be used, but the paint will start to blister easily, so it is better to let it dry naturally.
Use paper clay and roll out three small eggs in the palm of your hand then set them aside to dry.
Paint the dried eggs with two parts light blue to one part Titanium Buff. Mix one part Raw Umber with one part water to make a wash, and use a stiff brush to splatter the wash on the eggs.
Tear three 1" × 1⁄2" (3cm × 1cm) strips of muslin for the nest. Splatter the Raw Umber mix on the strips with a stiff brush.
Cut a 1" (3cm) strip of plaster wrap and place it on top of the board. Then cut a Styrofoam ball in half and place it onto the plaster strip.
Cut three 1" (3cm) strips of plaster and place them over the Styrofoam. Follow this by placing a 1" strip of dipped plaster wrap across the base where you want your nest to rest.
Place the nest on a plaster strip. Use a few pieces of the plaster to secure the nest to the base. Blot up any excess plaster left on the board with a paper towel. Allow it to dry.
Mix equal portions of Burnt Sienna and Raw Umber with two parts of white. Paint the nest.
Using a light blue watered-down wash lightly paint over the top layer of plaster. Blot away excess water with a paper towel, making sure not to let too much of the mixture run over onto the crackle paint.
Paint on light green leaves. Once dry, paint the entire piece with acrylic sealer.
Secure the fabric and eggs with hot glue.