SNEAK PEEK: Cornhusk dolls—or action figures •
Creating a butterfly buffet • Crunch-n-munch beds •
Zoo beds • and more
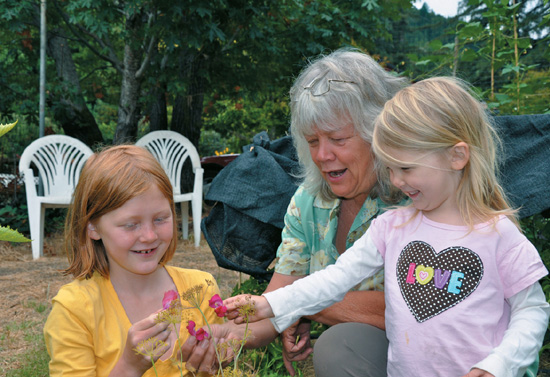
Beth and granddaughters have a snapdragon chat.
With its wide array of plants of various shapes, colors, and sizes, the spiral-shaped bed in the center of our Life Lab Garden Classroom inevitably draws the attention of all our young visitors. We often find children smelling the catnip, rubbing the soft lamb’s ear and fuzzy kangaroo paw flowers, or staring down a bat-face cuphea. “What do all these plants have in common?” we ask. With signs naming each plant, the children soon begin to realize that every plant in this bed has an animal name. It’s a zoo bed!
On a production farm, you might see acres and acres planted in the same crop. Part of the charm of a home garden, however, is the great variety of plants packed into a small space. In a family garden, this biodiversity not only allows the gardener to grow a variety of crops for the kitchen; it also provides a wide range of sights, smells, textures, and tastes for kids to explore.
Many gardeners working with children arrange their gardens into kid-friendly themes. In Life Lab’s Garden Classroom, for example, we have a pizza bed, where we grow ingredients necessary for making a pizza; a tops and bottoms bed, with plants featured in Janet Stevens’s storybook, Tops and Bottoms; adaptation beds, with plants adapted to live in unique habitats; a pollinator bed, with plants that attract bees, butterflies, and other pollinators; and an herbs of the world bed. There are so many ideas for theme beds—our suggestions are by no means exhaustive but may prove a useful jumping-off point as you and your kids brainstorm themes for your garden. If you want to explore even more theme garden ideas, browse the website of Michigan’s 4-H Children’s Garden (4hgarden.msu.edu/kidstour/tour.html) and take a look at more than 50 themed garden areas.
Of course, the best source of ideas for engaging your kids in your garden will be, well, your kids. Children know what they love, and they rarely hesitate to share what they are into with the rest of us. Look for opportunities to incorporate what they like into a Favorites Bed in your garden. You might have a bed of all pink plants, a prehistoric bed filled with plastic dinosaurs and prehistoric-looking plants, or a bed with plants growing out of pirate ships or pirate hats.
A great way to help kids make the connection from soil to supper is by planting all of the ingredients for a meal in a single garden bed. As you and your kids tend to the crops, you can talk about the meal in store. Imagine the excitement of eating a soup that your kids helped prepare, not only all day, but all season. While you wait to harvest, prepare, and enjoy your meal, you and your kids will almost be able to taste the anticipation.
PROJECT
Planting a Pizza Bed
Who thinks pizza grows in the ground?” we ask children as they circle around our pizza bed. In this circular garden bed, the circumference, or crust, is planted in wheat, and the slices are full of plants for pizza toppings. Depending on the season, children may find tomatoes, peppers, and eggplant—or onions, garlic, artichokes, and spinach. As they brainstorm different pizza ingredients, we work together to trace the ingredients back to their source, and then look together for the corresponding plants. Of course, it wouldn’t be pizza without the cheese, and so we have a wooden cow in one of the slices, and we’ve planted some oats for her to graze on. By the end of their visit, everyone can explain how pizza does indeed comes from the soil.
If you have less space than the 6-foot-diameter bed would require, you can plant all of these ingredients together in a smaller bed of any shape.
Finished, sifted compost
A shovel or digging fork
A circular garden space, at least 6 feet in diameter for a pizza-shaped bed
8 (1-foot) stakes
String
Scissors
Wheat seeds
Seasonally appropriate plants for pizza toppings, such as tomatoes, peppers, basil, eggplant, zucchini, onions, garlic, spinach, and herbs
Statues of a cow and a pig (optional)
 Mark out your circle with a shovel, and then clear and prepare your garden bed.
 Place a pair of stakes across from one another on the circle and tie the ends of a string to each stake, cutting your circle in half. Do this three more times, dividing your pizza into 8 equal sections, or slices.
 Plant seeds and seedlings into each slice, following the spacing directions on the seed packets or planting guides.
 Dig a furrow about 1 inch deep around the circumference of your bed. Sow wheat seeds around the edge to give the pizza a crust.
 Water your bed regularly and watch your pizza grow.
In addition to pizza beds, here are some other meal-themed beds that you and your family can plant together. If you want to harvest everything at once to make a meal, use the days until harvest guidelines to stagger your plantings. For example, if you want to make a salad with lettuce that takes 50 days and carrots that take 75 days, then plant the carrots 25 days before you plant the lettuce.
• Salad bed: beet, carrot, cucumber, lettuce, nasturtium, radish, spinach, sweet bell pepper, tomato
• Stir fry bed: Asian greens like bok choy or tatsoi, bunching onions, cabbage, chard, garlic, kale, snow pea, sweet bell pepper
• Salsa bed: cilantro, garlic, hot pepper, onion, sweet bell pepper, tomatillo, tomato
• Soup bed: garlic, green bean, greens like kale or chard, onion, shelling bean, sweet corn, potato, winter or summer squash
Searching for the ripest tomato.
Tomato Harvest Celebration
One family we know hosts an annual tomato harvest party with their friends and neighbors. In the late summer, everyone brings tomatoes from their gardens and they make all sorts of treats. Salsas, sauces, Caprese salads, and roasted tomatoes are just a few items on the menu. They also have tomato tosses for the kids, and tomato still-life painting for all.
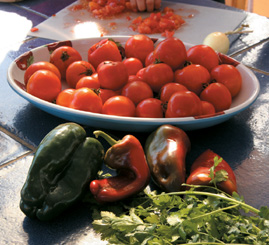
Salsa ingredients don’t come any better than this.
Grab a bag of tortilla chips and head out to the garden with your children. If you have a lemon tree, pick a lemon. Harvest an onion and mince it. Then you and your kids can take a tortilla chip and put some salsa ingredients on top: a cherry tomato, a small piece of onion, a sprig of cilantro, and a squeeze of lemon juice, for example. Arrange the ingredients on top of your chip and then use your teeth to blend as you enjoy a one-bite salsa.
The Iroquois and many other Native American tribes traditionally planted corn, beans, and squash side by side. These crops grew so well together that they became known as the three sisters, and they remain a common intercrop in gardens today. The three sisters provide children with a wonderful example of interdependence. The corn stalks provide a trellis for the bean plants to climb; the beans, in turn, return nitrogen to the soil for the corn and squash; and the squash plants provide ground cover for the corn and beans. Children can learn a lot about cooperation by watching the three sisters grow together.
There are many ways to plant a three sisters garden. One method that works well in a home garden is to build a mound of soil. Plant your corn seeds first, in the center of the mound. Once the corn has grown to about 6 inches tall, plant pole bean seeds in a circle around the corn, and squash seeds along the sloping edges of the mound.
Kids appreciate instant gratification and, while all gardening requires patience, these plants all grow large and fast. This bed will give children a thrill as your mound becomes a densely packed jungle with plants climbing up and around one another.
Corn, beans, and squash make a great growing team.
Cornhusk Dolls
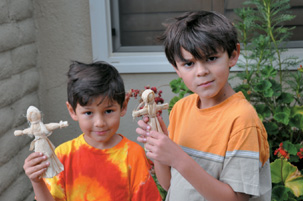
Gardengrown dolls (aka action figures).
You and your kids can use dry cornhusks, either from a three sisters garden or from a regular corn crop, to make dolls, animals, and even action figures. One mother and garden-based science teacher described the spontaneous creation of cornhusk action figures as her biggest garden craft surprise and joy. As imaginations were sparked, she would hear banter about corn ninjas, corn brides, and corn witches. Here was an activity that had delighted kids for hundreds of years, a solid part of our cultural heritage, still doing its magic today.
10 dry cornhusks
Handful of dry corn silks
Soaking bowl filled with water
Scissors
Thin string
Dried flowers and twigs
A felt tip pen (optional)
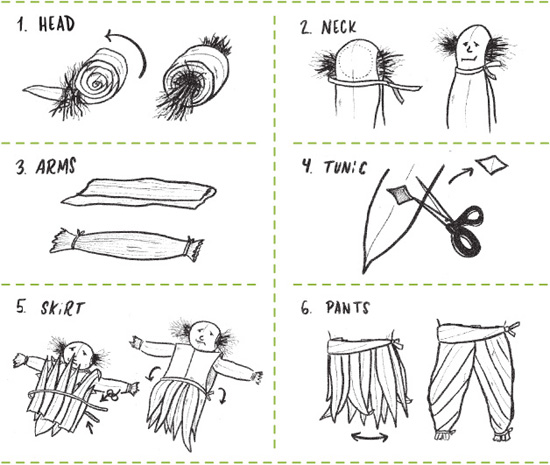
 Roll corn silks inside of a cornhusk to create the head.
 Wrap 1 long husk over the head and tie below the head to form the neck. Allow the corn silks to stick out from each side, making hair.
 Roll 2 husks together and tie them off at each end to create 1 long piece. Slip this piece under the neck to create arms. Now tie below this piece to hold the arms in place.
 Cut a hole in a large husk to create a tunic. Slip this tunic over the head and tie it off at the waist.
 Add skirt husks all around the waist and tie from below. Fold skirt husks down and add a sash along the top of the skirt to finish it off.
 If you want to make pants instead of a skirt, divide the skirt in half and tie off each half along the bottom to form legs.
 Decorate your doll however you like. You can draw on a face with a felt tip pen, add flowers to the hair and clothes, make tools from twigs, or do anything else you come up with.
SiMPLE STEPS TO CREATE
YOUR OWN
CORNHUSK DOLL
7. DECORATE & ENJOY!
Homegrown for a floral fundraiser.
With their bright yellow petals, edible seeds, enormous stalks, and popularity among birds and insects, big sunflowers are a huge hit in family gardens.
PROJECT
Growing a Sunflower House
What child doesn’t love secret hideaways, forts, and playhouses? While we usually think of these as building projects, you and your kids can actually plant a simple, temporary sunflower house in your garden by growing sunflowers in a circle and tying the tops together. This will make a magical place for kids to spend time.
To grow a sunflower house, we recommend selecting a tall, sturdy variety of Helianthus annuus, such as ‘Mammoth’, ‘Sunzilla’, or ‘American Giant’. You can intersperse these with smaller varieties of sunflowers or other flowers, so that when children are inside the sunflower house, they also have flowers to enjoy at eye level.
For seedlings
Seeds of the sunflower varieties you’ve chosen Containers for starting seedlings indoors Seed-starting mix
For transplanted sunflowers:
A garden space at least 8 feet in diameter
Finished, sifted compost
A shovel or digging fork
Access to water
Stepladder
Bailing twine
 Start about 30 sunflower seeds indoors.
 Once your seedlings are ready to be transplanted (when they have at least 4 true leaves), mark out a circle about 8 feet in diameter.
 Prepare the soil and plant your seedlings about 1 foot apart, leaving about a 3-foot gap on one side, where your children will enter the house.
 Water and weed your sunflowers, and watch them grow.
 Once they are about 7 feet tall, you can start to tie your sunflowers together. You will probably need a stepladder.
 Using bailing twine, tie a loose knot around a stem, about 1 foot below the flower itself. Pull gently across the circle and wrap your twine around a flower on the opposite side of the circle. Pull these flowers toward one another, allowing the flowering heads to cross. Then tie the stems together.
 Continue like this until each flower is tied to another, across the circle.
If you grew an edible seed variety of sunflower, don’t forget to save some sunflower seeds for yourself. If you don’t take the seeds, the birds and squirrels surely will.
Picking the seeds one by one out of the flower head might be all your family needs to enjoy the harvest. You can simply place the giant head on the kitchen table or somewhere else where you’d leave a snack bowl and watch the seeds disappear. But roasted seeds are a tasty treat, too. This is an easy recipe.
ACTIVE TIME: 45 minutes
TOTAL TIME: 11 hours
1 large sunflower head yields 2–3 cups of seeds
1 or more large, dry sunflower heads
Large paper bag
Gloves
Hardware cloth screen
Mixture of ⅓ cup salt per 2 quarts water
Baking sheet
Airtight container
 Watch your sunflower for when it’s time save the seeds. The petals will drop, the backside of your sunflower head will turn yellow and dry, and the seeds in the middle of the flower should be fully developed.
 If you have competition (from birds or squirrels) for these seedy snacks, cover your flower head with a large paper bag until the dried head is ready to be harvested. If the bag gets moist, change it out to prevent mold growth.
 Once the flower head is fully dry and brown on the backside, cut the stem and store the flower head in a warm, dry place where critters cannot eat it.
 If it is truly dry, getting the seeds from the head should be fairly easy: just rub or pick them out. You might want to wear gloves since many parts of the dried sunflower can be prickly.
 If you are processing many sunflower heads at once, try rubbing the face of the dried flower on a ½-inch hardware cloth screen to speed up the seed removal process.
 Cover unshelled seeds overnight with a salt mixture of ⅓ cup salt per 2 quarts of water.
 Drain the seeds and pat dry.
 Place evenly on a baking sheet and bake at 300 degrees Fahrenheit, stirring occasionally, for about 30 minutes or until golden brown.
 Cool and store in an airtight container (if they make it that long).
Experiment with different types of seasoning like chili powder, tamari, or Cajun spice.
As your sunflower heads dry, the seeds will loosen. You and your kids can pull out some seeds to make happy faces or other designs with the flower heads. You can also leave the dry flower heads standing in your garden and watch as birds begin to congregate and eat the seeds right out of the flower head.
Edible flowers allow us to bring the beauty of the garden into the kitchen, adding rich colors to salads, entrees, and even beverages. You may choose to plant edible flowers all together in a single bed or intersperse them throughout your garden. Consult a local garden center or planting guide to find varieties that will thrive in your area. A fun challenge can be to seek out an edible flower in every color of the rainbow, or varieties that bloom in various seasons. Your kids will delight in contributing to family meals by sprinkling the petals over salads, into pitchers of water, or along the edges of plates.
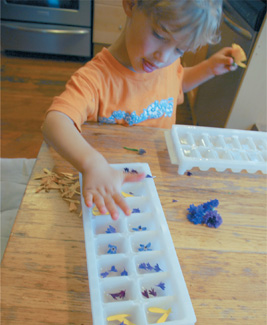
Filling ice trays with flower petals and water is a fun job.
You can use edible flower petals and mints to make fanciful ice cubes for any festive occasion. Fill an ice cube tray halfway up with water and freeze. Then collect colorful, edible flowers and place a single petal on top of each ice cube. Pour a thin layer of water over the petals and freeze again, this time locking the petals into the ice cubes. These flower cubes are beautiful in glasses of water, or placed together in a large bucket with beverages at a birthday party or other event.
Did you know that the color of a flower often determines which pollinators will visit it? White flowers, for example, are often pollinated by nocturnal insects, such as moths. Their light color makes them easier to spot in the dark. Red flowers, on the other hand, are often pollinated by hummingbirds. By planting a wide range of flowers in your garden, you and your children will not only fill your garden with various colors to enjoy, draw, and use in bouquets and other garden art projects—you will also invite a diverse group of pollinators and other beneficial insects into your garden, creating exciting wildlife viewing opportunities for all visitors.
Cut flower gardens are wonderful areas for children to explore harvesting, because the more flowers that are cut, the more will grow. A good rule of thumb is to cut at the base of the flower stem. This makes for nice bouquets and leaves the plant looking tidy. Ideally, flowers should be cut in the early morning before the heat of day, with stems placed in a bucket or vase of water as soon as possible. If a plant has spent flowers, remove those dead heads. Deadheading is a great garden task for kids to take on throughout the year.
In addition to cut flowers, you and your children can also create other rainbows in your garden. An edible rainbow bed in the summer, for example, might include red bell peppers, orange cherry tomatoes, yellow summer squash, green beans, and purple eggplant. In the fall, you might plant red beets, orange carrots, yellow-stemmed chard, green lettuce, and purple kohlrabi or kale.
Bouquet-making can be a great party activity.
Plan your rainbow flower garden by identifying cut flowers of each color that thrive in your region and bloom during the same general time frame. We’ve listed suggestions, but you will need to consult a local garden center or planting guide for regional specifics. Once you have selected flowers for each color, you can prepare a bed for planting. You and your kids may choose to plant your rainbow in a traditional rectangular garden bed or, if space permits, you may choose to plant it in the shape of an actual rainbow.
In addition to bouquets, you and your kids can make flower bling, or jewelry. Head out to the garden with some 40-pound gauge fishing line, and cut flowers with sturdy centers, like daisies, black-eyed Susans, zinnias, or dahlias. Help your kids push the fishing line through the center of the flower. It should be sturdy enough that they won’t need a needle. They can string as many flowers as they like onto the line. They may also want to add leaves or other soft garden items. To finish it off, tie the ends together to make bracelets, anklets, crowns, necklaces, or whatever else they can come up with.
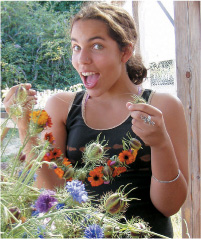
Blooming necklaces make great flower bling.
Gathering a Bountiful Bouquet
It is no wonder that fresh flower bouquets are classic gifts and decorations. Bouquets allow us to bring the brilliant colors and scents from the garden into our homes. A hand-picked bouquet also communicates to our friends and family that we were thinking of them. Some gardening parents keep a fresh bouquet in their kids’ rooms at all times. We imagine that coming home from school to find a fresh bouquet in one’s room reminds a child that someone loves them, and thought of them while they were away.
Kids of all ages will delight in helping make bouquets by choosing, cutting, and arranging flowers. Happily, there is no wrong way to build a bouquet. This is one way to do it.
Garden shears
Gathering basket or container for cut flowers
Vase or jar to hold bouquet
Water
 Cut flowers in the early morning if possible, before the heat of the day. Have children choose big, tall flowers for the center of the bouquet. Cut at the base of the flower stem.
 Gather some medium-sized flowers that they think look nice surrounding the big flowers. They can even hold the big flowers up next to other flowers to test out the combinations.
 Surround the bouquet with the smallest flowers, grasses, ferns, or anything else that fills the spaces in and around the bouquet.
 When your kids are happy with the appearance of their bouquet, cut stem bottoms so that they are all even.
 Place the flowers in a vase or jar of water. Kids can set their bouquets somewhere special to them: maybe on the kitchen table, a windowsill in the den, or the desk in their room.
Must munch much milkweed to metamorphose.
Butterflies fascinate children. From their amazing life cycle to the mesmerizing patterns on their wings, butterflies give us so much to look at and enjoy. You and your kids can attract butterflies into your garden by planting perennial plants that butterflies use for food or shelter. Then, when the butterflies visit, you will have ample opportunities to explore them together. A wonderful challenge for a child of any age is to see if they can sit perfectly still next to a butterfly until it lands on them.
As we know, butterflies have different stages of life and therefore different needs when it comes to the plants on which they depend. You and your kids can plant beds or areas that are tailored to the needs of butterflies at their different life stages, then observe what happens during that stage.
A wonderful way to experience the butterfly’s life cycle firsthand with your kids is to raise your own butterflies. Of course, different regions have different varieties of butterflies, and the method of raising them will be determined by the variety you choose. For a wonderfully user-friendly, visual introduction to raising butterflies, including species selection, appropriate food and habitat provisions, and more, visit raisingbutterflies.org/getting_started.
Make an ordinary drink fancy with herbal infusions.
Herbs pique children’s interest by appealing to their senses. Young kids love to run their hands along the tops of leaves and then smell the scents left, to freshen their breaths by chewing on a cool mint leaf, or to enjoy a hot tea flavored with herbs they themselves collected. Because many herbs are perennial, they also provide us with garden activities and beauty throughout the year, even when many of our beds may be bare. Finally, growing culinary and medicinal herbs gives children firsthand experience with the variety of ways people use plants to enrich their lives.
COMMON MEDICINAL HERBS FOR HOME GARDENS
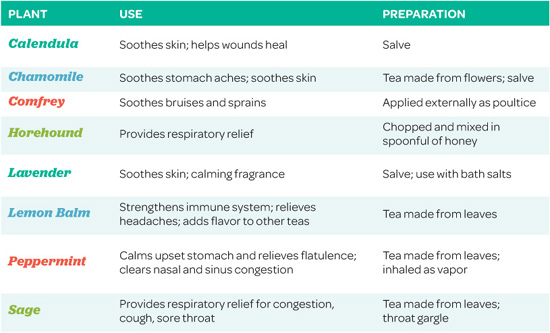
Of all the garden plants we grow, herbs are some of the easiest. Most common culinary herbs are perennials, and some of the annual varieties—like dill and chamomile—reseed so well you might think they are perennials. Some, like mints (which kids love), are very hardy and just keep spreading. You could consider planting mints in a container to keep them in check. Most prefer full sun and good drainage, and are well suited to container growing.
The idea of solar energy becomes real to kids when they can use it to make tea in the garden. Sun tea is a wonderful, kid-friendly garden treat for a sunny day. Find a quart-sized glass jar, clean it thoroughly, and then fill it with water. Walk around the garden with your children and have them add five sprigs of the herbs of their choice. Some nice options include lemon balm, mint, and chamomile. If you are collecting herbs with very young children, you can snip the sprigs and then let them tear the leaves off. Older children can snip the sprigs themselves. Once you have added the herbs, seal the jar and set it in the direct sunlight. Within a few hours, the flavor from the herbs should have infused the water. Serve the tea warm, or pour it over ice for a cool beverage on a hot day. On a cloudy day, you can also use garden herbs to make a hot tea.
You and your kids can make tea bags with dried chamomile, lemon balm, peppermint, mint, or other herbal tea plants growing in your garden. Simply harvest the herbs and hang them upside down in a warm, dry place until they are dehydrated. This will usually take about 2 weeks. Then you and your kids can crumble the dried herbs onto clean coffee filters, and tie each one into a bundle with a string. Label your tea bags, either by tying paper tags to each string, or by placing all of the bags into boxes and labeling and decorating the boxes.
You can also mix a few herbs together before making the tea bags, for a garden medley tea. A fun way to do this with kids is to have them close their eyes and smell various combinations of herbs to decide which combinations smell the best together. Or they can make combinations for you to smell while you close your eyes. In addition to creating delicious garden teas, you and your kids are also enjoying a sensory garden experience.
As long as you and your kids are making teas, why not invite some friends over for a tea party? You can set up a table and chairs indoors or out, decorate with fresh flowers and other garden-fresh items, and enjoy your garden tea together. Tea parties give us a great opportunity to explore our theatrical sides.
At a garden-based summer camp in California, garden tea parties became a tradition. Kids would all harvest herbs and add them to the boiling water. While the tea was steeping, they would decorate a little table and chairs in the garden, and then don costumes from the costume trunk. Once the tea was served, it was traditional for everyone to speak in boisterous British accents and clink cups frequently until the party wound down.
Soothing Salves
It’s always fun to introduce children to nature’s pharmacy in the garden. We show them plants for healing cuts, settling upset stomachs, soothing sunburns, or cooling the itch left by poison oak. This knowledge then comes to life for kids when we incorporate medicinal herbs from our garden into balms, salves, and the like. Furthermore, salves made with herbs from the garden make delightful gifts for family and friends. When making salve, young children can contribute by harvesting and drying garden herbs, stirring the ingredients, and decorating the containers. Older children can also help with heating, testing, and adjusting the recipe as needed to obtain an ideal consistency.
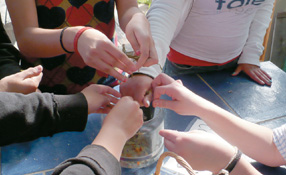
Homemade salve and lip balm require many helping hands.
Salves and balms are really the same thing. So you and your kids can make personalized gifts for friends and family, using the same recipe, simply by choosing different containers, or by customizing labels—Batter’s Balm for a baseball player, or Gardening Grammy’s Hand Salve for a grandmother with a green thumb.
Making Julie’s Lavender Belly Balm
Former Life Lab staffer Julie Grinvalsky was known to be particularly talented with homemade treasures, including a belly balm she gave as a gift to expectant mothers. Making her soft, soothing balm requires a little pre-preparation, but it’s well worth the effort.
At least a month prior to making your balm, harvest and dry a handful of lavender stalks. To do this, simply snip the stalks and bundle them together. Hang your flowers upside down in a warm, dry place for at least 2 weeks. Once dry, brush the flowers from the stalk and, if you are not using them right away, store in an airtight container. Then, at least 2 weeks prior to making your salve, mix ¼ cup dried lavender flowers with ½ cup organic, cold-pressed extra virgin olive oil in a clean, dry, pint-sized mason jar. Leave in a dark, warm indoor place for 2 weeks, allowing the lavender to infuse the oil. Now you are ready to make your balm.
It can be very difficult to get the wax off of items once you make balm with them, so it is best to use old things that you will use only for making balms. Thrift stores are a good place to find containers and old kitchen items that can be reused for making balm.
3 metal teaspoons
Small saucepan
Water
Stove
¼ cup lavender-infused olive oil, prepared ahead of time
Cheesecloth
1 empty glass jar
4 tablespoons grated or chunked beeswax
3 tablespoons cocoa butter, grated or chunked
10 drops lavender essential oil
12 small tins or jars
Chunked beeswax and cocoa butter are available at health food stores or via mail order; a good source is Mountain Rose Herbs, at mountainroseherbs.com, which also offers small tins or jars.
Salves and balms can be used for hands or lips; purchase containers at an herbal medicine store or online.
 Place a few metal teaspoons in the freezer for later.
 Strain your lavender-infused olive oil through cheesecloth and into an empty glass jar.
 Compost the lavender bits.
 Fill a small saucepan with a few inches of water and place over low heat on the stove.
 Place your glass jar of lavender oil into the water while it is still cold, and allow the water and oil to heat together in this makeshift double boiler. The jar can break if the temperature changes too rapidly, so keep the heat on low.
 Add the beeswax inside the jar and stir just until melted.
 Using tongs, remove the jar from the saucepan.
 Immediately add the cocoa butter, stirring it into the mixture and allowing it to melt. If the residual heat does not melt the cocoa butter completely, return the jar to the water until the cocoa butter is melted.
 Now it’s time to test the set of your balm. Take a spoon out of the freezer and pour a small drop of balm on the spoon. If it turns into a hard, smooth lump when you rub it, your balm is ready. If it is still too liquid-like, add a bit more cocoa butter to the jar, stirring to melt. Retest until the texture is to your liking. Occasionally, if heated too much, cocoa butter will give the balm a grainy texture. This is actually fine, as the grains will soften when rubbed into the skin.
 Once the texture is to your liking, add 10 drops of lavender essential oil and stir to combine.
 Pour balm slowly into tins or jars. You can let them sit overnight to harden, or you can carefully transfer them to the freezer where they’ll set faster.
 Decorate your containers with labels, stickers, raffia, dried lavender, and the like.
Balms and salves work with all sorts of garden herbs. You and your kids can walk your garden and harvest any edible or medicinal herbs you find and create various salve combinations.
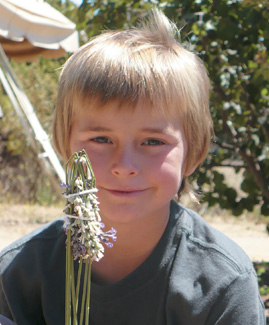
A magic wand with super-herbal powers.
Lavender wands are wonderful, whimsical crafts that children of all ages can help make. Simply harvest five sprigs of lavender with flexible stems. Tie the stalks together with a thin, pretty ribbon at the base of the flowers, leaving one end of the ribbon long. Now turn the flowers upside down and bend the stems back over the ribbon knot. Take the long end of the ribbon and weave through the lavender stems, going over then under each one. Once your woven stems cover the entire flower heads, tie them together to form a lavender wand.
PROJECT
Lavender Bath Salts
Lavender bath salts are easy to blend, and they make wonderful gifts for friends, family, and anyone you want to acknowledge for their hard work, such as teachers, farmers, or parents.
1 cup Epsom salts
1 cup sea salt
2 tablespoons baking soda
10 drops lavender essential oil
Handful of dried lavender buds
Large bowl
 Stir everything together in the bowl.
 Scoop some of the mixture into small bags or jars.
 Decorate with labels and ribbons. Your label might include some directions, like “Add several tablespoons of these bath salts to a warm bath and take a well-deserved soak.”
There’s nothing like a lemon cuke for garden snacking.
A mother of a 2-year-old told us that her summer garden goal was to create “an edible food forest” for her daughter, a place where every plant her daughter encountered would be thorn-free and edible without cooking. She envisioned a sort of jungle where her daughter could wander through, picking and eating as she went. Indeed, children of all ages love eating foods fresh from the vine. In fact, another mother told us that her 4-year-old son would not eat green beans, carrots, or peas at all in the house, but he would harvest and eat basketfuls out in the garden.
Kids are inherently fascinated by anomalies. Just think about how they react when they see a 4-leafed clover or identical triplets, for example. As they construct their view of how the world works, these unique sightings thrill them. Carnivorous plants seem to fall into this category. While most plants make their food from sunlight via photosynthesis, this small group of plants supplements their diet with nutrients from insects. And in order to do this, they have to hunt. Kids will watch for hours on end to see how a plant attracts and traps its prey. They will count the daily catch. And in the process, they will learn a surprising amount about the adaptive features of these amazing plants.
You might be surprised to know that carnivorous plants grow all over the world. They are usually found in bog-like environments, which you can replicate at home. Californiacarnivores.com is the largest carnivorous plant shop in the United States. Growing these fascinating plants isn’t difficult, but there are a few secrets that will increase your chances of success.
Use a plastic or glazed ceramic pot to help retain moisture in your soil mix. Make sure the pots have drainage holes. Use a soil mix of horticultural grade sand, perlite, and sphagnum peat moss. There are lots of types of peat moss available, so make sure to get sphagnum, which give carnivorous plants the acidity they need. Water with distilled, reverse-osmosis, or pure rainwater. These plants do not succeed if watered with domestic water that has high mineral content. Finally, place your pot in a deep tray filled with the same pure water so your plant will always be moist.
Since these plants grow in a low-nutrient environment, which is one reason they evolved to digest animals, they do not need much or any fertilization. If you do fertilize, sprinkle lightly with Max-Sea fertilizer applied monthly at a ratio of ¾ teaspoon per gallon of water.
Clearly, carnivorous plants require specific care, but it is well worth it since kids love having a flesh-eating plant to call their own. Each species is a bit different and you can find indoor and outdoor varieties, so make sure to read up on specific care instructions to keep your critter-eating plant thriving.
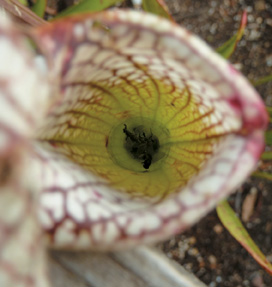
Staring down a pitcher plant.
Getting Close to Your Carnivore—But Not Too Close
One of the most fun things to do with carnivorous plants is just to study them carefully and try to figure out how they work. Together with your child, look carefully at each plant. How does the plant attract insects? What kind of insects does it trap? How does the plant keep the insects there once they land? Have your child look, smell, and feel the plant for sweet nectar, sticky walls, spiny traps, and other structures that help it capture insects. Then draw the plants together, including all of the detailed features you see. You can label these parts, and even give them names, such as “delicious sweet pool of nectar,” or “spiny gates.”
After looking carefully at carnivorous plants together, you and your kids can design your own carnivorous plants. Using art supplies, you can draw or build models of plants with various imaginative structures that would aid them in capturing prey.
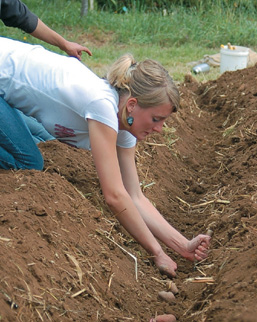
Going deep for the spud–planting in furrows yields more taters.
Potatoes make a fantastic addition to any family garden for several reasons. Kids will be fascinated when they see that you can grow potatoes from other potatoes. Potatoes also provide a very high edible yield per square foot, a yield which can be cooked up into so many tasty meals. And there is something positively magical for kids about digging potatoes out of the ground. Squeals are guaranteed as your kids hunt around in the soil for buried treasure. They will often search every corner of a potato patch to make sure they have not left any in the ground. Of course, if they did, they will know the following spring when those plants start to grow again.
Growing Potatoes in Pots
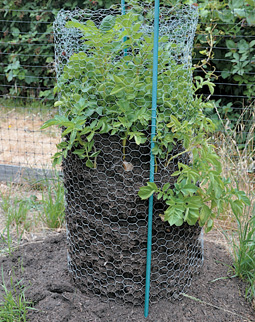
A tower of potatoes.
Growing potatoes in a container is fun and saves space. We have seen potatoes grown in large reused plant containers, in wire fencing staked in the ground, and even in chicken feed bags. You might have heard of growing taters in tires, but the jury is still out on the toxicity of tires, so we would opt for another method.
Amended soil
Straw (optional, for later)
Seed potatoes
Container no less than 18 inches in diameter, with drainage
 Fill the bottom of your container with about 6 inches of amended soil.
 Place your seed potatoes 6 inches apart on top of the soil, and bury with about 4 inches of soil.
 Initially water gently. Overwatering can lead to rotting seed potatoes.
 Once you see growth pop up, keep your container evenly moist but not wet. Containers can heat up and dry out quickly, so monitor moisture often.
 Once your plants have about 8 inches of growth, it is time to add more soil. Or you can add a soil and straw mix, which will make pulling out young potatoes easier down the road. You just want to make sure that the mix you add will be able to stay moist and cover the leaves and stems below. This time, cover about two-thirds of the exposed plants.
 As the plants continue to grow, repeat this process, covering stems and leaves to stimulate more potato tubers to grow.
 Eventually your plants will flower. When they do, you can dig down and pull out some new potatoes.
 You can also wait for the plants to die back, stop watering for about 2 weeks to let the potatoes cure, and then dump your container over, counting the jewels that emerge.
Kids tend to enjoy finger foods. Potato pancakes, or latkes, can be eaten with a fork and knife or by hand. Latkes are associated with traditional Eastern European Jewish cuisine, although similar fare exists in Ireland, Sweden, India, and Korea. They are especially delicious when topped with a dollop of sour cream and warm applesauce.
ACTIVE TIME: 45 minutes TOTAL TIME: 45 minutes
Makes 10–12 pancakes
Enough potatoes to fill 2 cups when grated
1 onion
3 eggs
1 ½ tablespoons all-purpose flour
1 ¼ teaspoons salt
Cooking oil
Large frying pan
Here’s what you’ll do:
 Grate 2 cups of potatoes.
 Mince 1 tablespoon of onion.
 Crack and beat 3 eggs.
 Stir grated potatoes in with eggs.
 Mix 1½ tablespoons flour and 1¼ teaspoon salt. Stir in with potatoes and eggs.
 Stir in onion.
 Heat cooking oil in skillet.
 Use about 2 tablespoons of the potato mixture to create a pancake in the frying pan. Spread it out to about a 3-inch round. Cook until brown on a side, about 5 minutes. Then flip and cook until brown on the other side, approximately 5 more minutes.
 Top with sour cream and warm applesauce or stewed apples or pears. Serve immediately.
Potato Stamps
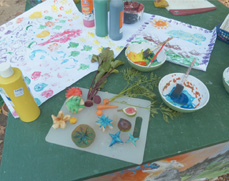
Potatoes aren’t the only food to make prints with.
Older kids who are adept with X-Acto knives can use potatoes to make stamps. Younger children can draw designs that you can then carve into stamps for them to use. To make a potato stamp, simply slice a potato in half. Then, using an X-Acto knife, carve the flat surface of a potato half to make the shape you want for your stamp. Dip the raised design in a shallow dish of tempera paint or brush it on, and then press gently onto paper. You can use these potato stamps to create artwork, or to decorate wrapping paper, gift cards, or the like.
Picking the perfect pumpkin.
Even families who spend little to no time on farms or in gardens can often be found visiting pumpkin patches in the fall. From jack-o’-lanterns to pumpkin pie, these easy to grow giants from the squash family are a symbol of fall and lend themselves to all sorts of fun activities for children and adults alike.
There are not many things you can grow in your garden that will be as big and prolific as a pumpkin vine. Make sure you have about an 8 × 8-foot space for these ramblers to spread out. If you are short on space, you can train the vines where you want them to go by carefully guiding them, even training them up a trellis or building. We saw a pumpkin fanatic who placed large nails up the side of his shed. These served as tendril holds and allowed him to train the vine to grow on the shed roof. He had to pick flowers off of the vertical vine so that the pumpkins wouldn’t weigh them down.
Ideally, pumpkin seeds are planted directly in the ground when nighttime temperatures stay above 50 degrees, but if your growing season is short or your spring is cold and damp, you can choose to start your seeds indoors 3 weeks before your last frost. Pumpkins are heavy feeders, so add lots of compost and consider feeding throughout their growth with fish emulsion or another organic fertilizer. If you desire the perfect pumpkin, make sure that you sit it on its bottom, which will allow it to grow evenly round. You can even place it on a board to reduce the chance of blemishes and rotting in wet soil.
Pumpkin Leapfrog
What could be more fun for kids than playing leapfrog over big, orange pumpkins? To set up your course, harvest five or more pumpkins. Set them up in a row, each a few feet ahead of the last. Then play pumpkin leapfrog, and have young children use their hands to jump over each pumpkin. Don’t forget to show them where the stem comes up so that they can make sure to not put their hand there. You can also set up a pumpkin slalom and have children weave back and forth between the pumpkins. This is a great party activity, and you can even make it a relay race with multiple teams.
Personalize Your Pumpkin
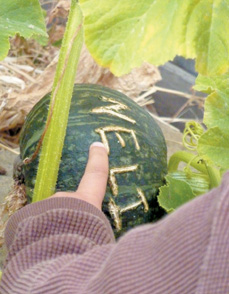
Scratch and grow gardening.
There are not many vegetables that you can write your name on, but you can with squash. When your green little pumpkin is about 3 to 4 weeks old and still on the vine, take a blunt, pointed object like a nail or ballpoint pen and etch in a word or drawing. No need to scratch in more than ⅛ inch, just enough to break the skin. There will be a bit of residue, which you can wipe off. In the following weeks, you will see what you drew grow with the pumpkin.
Imagine your child’s delight when you take the lid off of a pumpkin and ladle a cup of soup from inside. Even the pickiest eater is likely to have some of this enticing soup or stew. To start, select a pumpkin that stands upright without wobbling. Wash the outside well, take the top off, and scoop out the seeds and strings. Brush the inside lightly with oil and bake the pumpkin at 350 degrees for an hour. While the pumpkin is baking, make the stew or soup of your choice. Pumpkin or winter squash soups are good options.
After an hour, check your baking pumpkin. When it is ready, the shell will be soft on the inside but still hard on the outside. At this point, remove the pumpkin from the oven. When your stew or soup is ready, pour it into your pumpkin shell. Stick a ladle inside and serve your soup fresh from the pumpkin. As you ladle out the soup, add a scoop of baked pumpkin to the top of each bowl. This is sure to be a hit at any fall gathering.
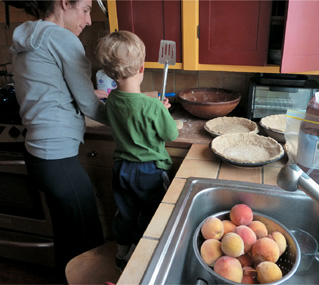
A little pie guy learns the secrets to a flaky crust.
Adding fruit trees or shrubs to a family garden is an exciting endeavor. Just think: most fruit trees planted when your children are babies will still be living there when your children grow up and leave home. Fruit also offer many opportunities for family activities. Do some comparative taste testing with different fruit, or varieties of the same fruit. Or preserve fruit for winter treats by dehydrating it or making fruit leathers and jams.
A new tree planted with your kids will grow with your family and most likely be woven into family traditions. In John’s family, just such a tradition has already been set with Neli’s birthday. Peach pie is his birthday cake of choice.
With help from a friend, straight from the tree to little Lee.
Some avocado trees can get to 50-plus feet, and not all backyards can afford to dedicate that much garden real estate, especially when you consider the shadow such a large tree will cast. Caring for and harvesting from such a tree can be difficult, to say the least. Look for dwarfing rootstock when purchasing fruit trees. Dwarfing rootstock and effective pruning can keep trees to a more manageable size.
Look for early, midseason, or late varieties of the fruit you are selecting. For your family, it might make more sense to stagger the harvest dates of the trees you are planting for an early summer through fall harvest, rather than having all your fruit come on at once. Some trees even come with three or four varieties grafted on the same tree for an extended harvest. This is a great idea, but be aware that these trees often take a bit more pruning and maintenance.
We don’t really know if trees have feelings, but we do know that they have needs, especially in relation to climate. For instance, some fruit trees, such as apples, need a certain number of chill hours below 45 degrees Fahrenheit to flower and fruit properly. The chill hours vary among varieties, so you should be able to select the tree that is right for your zone. Other trees, such as citrus, cannot tolerate freezing temperatures. Some species of trees have been bred to be more cold tolerant and disease resistant, so research the temperature range and common diseases in your region and get what will work best for your yard. John selected a leaf curl-resistant peach tree for his yard, which has saved him time and effort from spraying to control the disease.
In order for a tree to produce fruit, it must be pollinated. This means that pollen must be carried (on bee’s legs, butterfly whiskers, wind, or by some other mechanism) from a flower’s anther to a flower’s stigma. Some trees, such as sour cherries, are self-fruitful, which means that the anther and stigma needed for pollination are on the same variety, sometimes on the same tree, and sometimes even on the same flower. Most fruit trees, however, cannot self-pollinate, which means that they require cross-pollination from another tree in order to bear fruit. This information is usually listed on the plant label. If there isn’t another tree that could provide pollination in your neighborhood, plant two trees to ensure a harvest.
For more information on fruit trees, see our Suggestions for Further Reading.
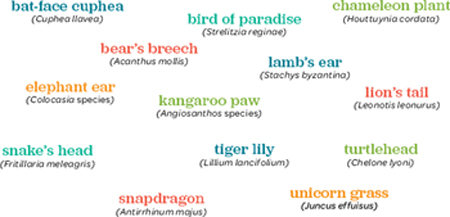
A zoo bed is simply an area in your garden where every plant has an animal name. At Life Lab, kids love to look for the different ways that the zoo bed plants resemble their namesake animals. These plants also often lend themselves to sensory exploration, as in the soft leaves of a lamb’s ear or the fuzzy flower of a kangaroo paw.
CHOiCE FOR A ZOO BED
Not all plants that have animal references in their names have animal-like
characteristics. The plants on this list all have obvious forms that resemble animals,
and therefore they make great additions in any zoo bed.
Using your Zoo Bed as an Imagination Station
The zoo bed is a space that really awakens the imagination. You and your kids might pick flowers and leaves from the plants and make a puppet show, with each plant representing its namesake animal. You can stick googly eyes on some to make them look even more like animals. Or you might place the plants along a pathway, and label them to make it look like a real zoo. Next to the lamb’s ear, for example, you might have a sign welcoming visitors to the Lambs Petting Zoo, and inviting them to pet a lamb’s ear. Some children even name their individual plants, as they would an animal.
A Blindfolded Walk Through the Zoo
Since the zoo bed has plants with such a variety of textures and smells, it makes a great place to engage the senses. Of course, a great way to pique your other senses is to eliminate sight. For a fun, trust-building activity, walk around your zoo bed with your kids and make sure you all know the names of at least a handful of plants. Now you and your children can lead one another blindfolded to a single plant at a time. Have the blindfolded person feel it and then try to guess which plant they are visiting. If you would prefer to do this without a blindfold, you can also pick leaves or flowers from a handful of plants, put each into its own paper bag, and have each person feel the plant part to guess which plant it came from.
Nectar-rich ray and disc flowers attract pollinators.