SNEAK PEEK: Cooking tasks for every age • Harvest applesauce • Garden pizzas • Green garden smoothies • Cooking with the sun • and more
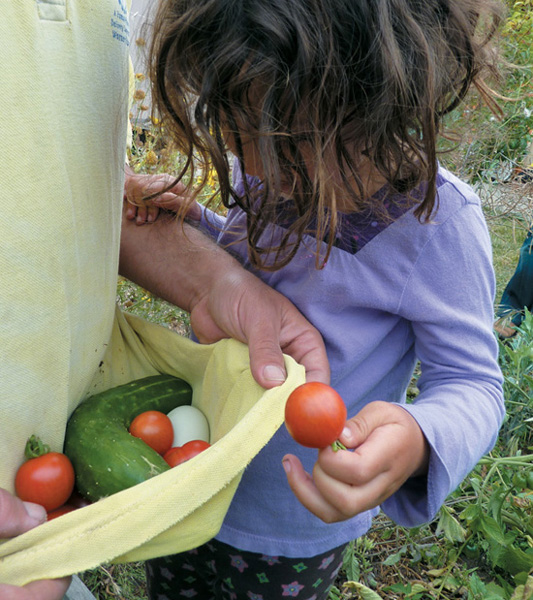
Harvesting ingredients for a delicious—and healthy—dinner.
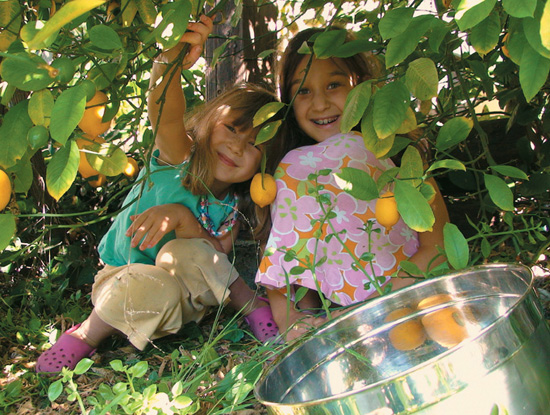
There is no getting around it: gardening is hard work. One thing that can keep you committed to your garden over the long haul is the innate joy you will find in reaping its many rewards. Whether you and your kids are pulling a carrot from the ground, drinking nectar from a sage flower, or having a community-wide tomato harvest party, make sure to find time to enjoy the fruits of your labor together—it will help keep your inspiration alive year after year.
Kids who are involved in harvesting and preparing healthy foods from the garden are also more likely to eat them. This is great news for the health-conscious parent. So if you wish your child would eat more vegetables, one of the best things you can do is grow, harvest, and prepare some vegetables together.
Using kid-sized kitchen implements will help keep your children safe and provide them with opportunities to be helpful and excited about food preparation. In the Life Lab Garden Classroom, we invite kids of all ages to use mortars and pestles, eggbeaters, measuring cups, salad spinners, blenders, hand-held juicers, apple corers, and more.
We also have knives for different age groups. The youngest children simply tear things apart with their hands. With very close supervision and careful instruction, once they are about 5 years old, we invite our young visitors to chop soft fruits and vegetables using nylon knives designed specifically for children, such as those sold by Curious Chef and Kuhn Rikon Kinderkitchen. In order to make chopping and slicing easier, we pre-steam hard vegetables, such as carrots and beets. For children 7 to 11 years old, we have round-tipped, serrated steak knives that they use to chop all kinds of fruits and vegetables, and once kids are about 12 years old, we let them use any of the kitchen knives. Again, we always supervise children very closely when they are using knives of any type.
Of course, the ways in which kids can get involved in food preparation will depend on their age, experience, dexterity, ability to follow directions, and your judgment. This list of age-appropriate food preparation tasks was brain-stormed by Life Lab teachers who cook with their students. These are all recommended for supervised groups of up to six children at a time.
Cracking eggs
Crumbling
Cutting soft items (with scissors or nylon Curious Chef knives; you can parboil carrots and other hard veggies to make them softer)
Grinding
Juicing
Kneading
Mashing
Measuring (you can pre-measure and then have each child measure part, knowing that the entire amount will eventually get mixed in)
Picking off stems
Presentation (decorating with flowers, for example)
Pushing buttons (on a blender, for example)
Rolling/wrapping
Scooping
Spinning salad
Spreading
Sprinkling
Squeezing
Stirring
Tearing leaves, etc.
Using an apple peeler
Using an egg separator
Using a food mill
Using a mortar and pestle
Washing (you can give each child 1or 2 leaves to wash thoroughly)
Blending
Chopping, slicing, dicing, and mincing with round-tipped steak knives
Collecting compost
Doubling or tripling recipes
Grating
Reading recipes
Sautéing
Seasoning
Washing
With appropriate supervision and instruction, children in this age group are generally capable of just about any task described in a recipe. Cooking with this age group also provides us with excellent opportunities to teach or reinforce their learning of math skills, such as adding or multiplying fractions. As your kids cook with you more and more, they can also start to get more creative in the kitchen and use their own ideas to improve upon recipes.
Life Lab’s KNIFE SAFETY TIPS
AT THE BEGINNING of any cooking activity with kids, we teach simple methods for safe knife use:
1 Claw and saw. Hold your fruit or vegetable with your hand in a claw shape, keeping your fingers curled in while you saw with the knife in your other hand.
2 Cut round things in half. Put the flat edge of the food down before making any more cuts. This makes it so that you are not cutting an object as it wobbles and rolls away. For young kids, we cut all of the produce first, so that they can always start with a flat surface.
3 Leave knives at the table. We have a knife basket in the center of the table, and ask that kids always leave their knives there if they are walking away from the table for any reason. At the end of the cooking activity, kids help with clean up, but adults always wash the knives.
Round-tipped knives are a good option for those new to knives.
4 Keep your eyes on the prize. We let kids know how important it is to stay focused on the task at hand when they are using knives. Then we watch them carefully whenever they are slicing or chopping, to make sure they are focused and using the knife in a safe way.
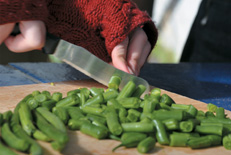
Sunny Seed Green Bean Pâté
Even green bean fanatics can struggle to keep up with the harvest on a productive green bean patch. This unique spread gives green beans a new look and feel while preserving their wonderful taste. Older kids can help with every step, and kids of all ages can help prepare the green beans for cooking and blend the ingredients together.
ACTIVE TIME: 30 minutes TOTAL TIME: 30 minute
Makes about 3 cups
2 large onions, peeled and thinly sliced
1 tablespoon olive oil
1 pound green beans, trimmed and cut into ½-inch pieces
8 cups water
1 cup sunflower seeds, roasted
2 teaspoons salt
3 scallions, chopped
Sliced bread or crackers (optional)
Large frying pan
Large pot
Colander
Food processor or blender
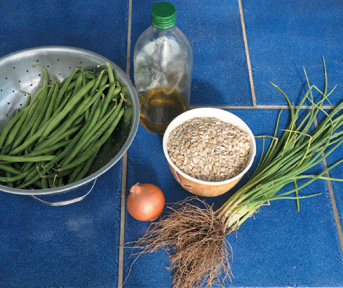
Gathering ingredients for Sunny Seed Green Bean Pâté.
 Heat oil in a frying pan and sauté onion until soft and lightly browned.
 In a large pot, bring the water to a boil. Add cut green beans and continue to boil for 4 to 5 minutes. Once tender, drain the green beans into a colander, reserving ½ cup of the cooking water for later use.
 Grind the sunflower seeds in a food processor or blender. Add green beans, salt, chopped scallions and the reserved ½ cup of cooking water and continue to blend until creamy.
 Serve pâté with bread or crackers.
Zucchini Baba Ga—what? Baba Ganoush
Have you ever walked into your garden and found a zucchini the size of a baseball bat? Maybe you were on vacation when it grew, or maybe it was just hidden beneath some leaves. Either way, this recipe is wonderfully delicious, and also a great way to use ripe and even overripe zucchini. And by the way, it’s pronounced “bah-bah gah-noosh.”
ACTIVE TIME: 20 minutes TOTAL TIME: 45 minutes
Makes about 2 cups
5 medium-sized zucchini (about 8 inches in length), or the equivalent with smaller or larger zucchinis
¼ cup plus 1 tablespoon olive oil, divided and kept separate
¼ cup tahini
1 to 2 cloves garlic, chopped
6 tablespoons lemon juice
½ teaspoon salt (or more to taste)
2 tablespoons chives, chopped (optional)
Large baking sheet
Food processor or blender
 On a large baking sheet, roast the zucchini whole under the oven broiler until they are soft and the skins start to blacken, about 3–5 minutes per side. Turn them periodically so all sides become charred. Remove the baking sheet from the oven and set aside to cool. Once the zucchini are cool enough to handle, cut them in half lengthwise and scrape the insides into a bowl. Discard the charred rind.
Greta prefers her zucchini raw.
 In a food processor or blender, add the zucchini insides, ¼ cup olive oil, tahini, chopped garlic, lemon juice and salt. Blend until smooth.
 Scrape the dip into a bowl and garnish with chopped chives and remaining tablespoon of olive oil. Serve with toasted pita, vegetables, or olives if desired.
Fresh 6-plant-part burritos, ready to roll.
Veggie Roll-Ups
Roll-ups make vegetables into tremendously kid-friendly finger foods. Older kids can help slice the veggies, and kids of all ages can select and arrange the veggies, spread the dip, and roll them up. Just about anything you have to harvest can work here. Nice raw options include beets, bell peppers, broccoli, carrots, cauliflower, cherry tomatoes, green beans, and snap or snow peas. You can also roast or sauté dark, leafy greens, eggplant, or potatoes.
ACTIVE TIME: 15 minutes TOTAL TIME: 15 minutes
Makes 18 sliced rolls
Fresh vegetables from the garden
6 large, whole grain tortillas
Hummus, Baba Ganoush, Sunflower Seed Green Bean Pâté, or any other spreadable dip of choice
Large frying pan
 Harvest all of the veggies you want to use in your roll-ups. Slice larger items into strips, and grate root vegetables.
 Warm your tortillas on a hot frying pan to make them more pliable.
 Spread a layer of dip over your tortilla.
 Place veggies on the tortilla and roll it up. Be careful not to overstuff the tortilla with veggies to avoid cracking. Once rolled, slice into 2-inch rolls, turn upright and serve.
If you are growing lettuce with big leaves, you can use a lettuce leaf in place of the tortilla. At Life Lab, kids love to make 6-plant-part burritos. We use lettuce leaves to wrap everything together, and help them place an edible root, stem, flower, fruit and seed inside (5 pieces inside plus the lettuce leaf wrap makes 6 plant parts). For example, they might have a piece of carrot, a piece of broccoli stem, a cauliflower floret, a cherry tomato, and a sugar snap pea inside. They roll these all up inside their lettuce leaves and eat them whole.
Popcorn
Popcorn is a wonderful crop to grow with children. It grows fast and tall, creating a naturally cool, shady hideaway in the heat of the summer. The harvest window is long because it can dry on the stalk. And most kids love to prepare and eat popcorn.
ACTIVE TIME: 20 minutes TOTAL TIME: 20 minutes
Makes 2 quarts
⅓ cup popcorn kernels
1 air popper or large pot (at least 3-quart capacity) with lid
3 tablespoons canola, safflower, or grape-seed oil, if using large pot
Potholders, if using a large pot
Topping ideas:
2 tablespoons butter, melted
Salt to taste
chili powder, nutritional yeast, olive oil, Parmesan cheese, soy sauce, sugar and cinnamon
 Harvest ears of popcorn when they are completely dry. If needed, store in a warm, indoor place until they dry completely.
 Have kids pick the corn off of the cob with their fingers into a bag or bowl. Starting a row of kernels yourself or breaking the cob in half can help this process along.
 If you are using an air popper, follow the manufacturer’s instructions.
 If you are popping popcorn on the stove, heat the oil in the pot over medium heat.
 Place 4 kernels in the oil and cover the pan.
 When the kernels pop, add the rest of the kernels in one layer.
 Cover the pot and remove from heat temporarily, keeping the burner on. Have your kids help you count out 30 seconds.
 Return the pot to the heat. The popcorn should start popping soon. Once it starts, gently shake the pan back and forth over the burner continuously.
 Once the popping slows significantly, remove the pot from the heat, remove the lid, and dump the popcorn out immediately into a bowl for serving.
 Customize toppings to your family’s preferences. Some like their popcorn unadulterated. Others prefer melted butter with some salt to taste. Or get creative—some kids love the combination of olive oil, soy sauce, and nutritional yeast. We have also used toppings such as chili powder, Parmesan cheese, sugar, and cinnamon.
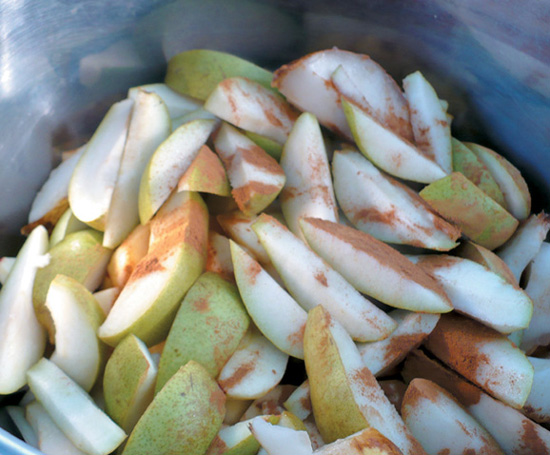
Harvest Applesauce
For families with a productive apple tree in the garden or nearby, applesauce is a must. Many families enjoy apple-picking excursions to u-pick farms in the fall. When you get home, you can make lots of applesauce at once and preserve it to enjoy year-round. Remember, in addition to the traditional straight-from-the-fridge snack, applesauce is delicious when served warm, and it makes a kid-friendly complement to savory dishes, such as pork chops or beef stew.
ACTIVE TIME: 30 minutes
TOTAL TIME: 1 hour, 30 minutes
Makes about 2 quarts
5 pounds apples
1 (32-ounce) jar apple juice
Food mill, if available
Large pot (at least 3-quart capacity) with lid
Large fork, wooden spoon, or potato masher
Pint-sized mason jars with lids (optional)
If you have a food mill, simply cut the apples in half or, if they are very large, in quarters. If you do not have a food mill, core, peel, and cut the apples into halves or quarters.
Pour about ½ inch of apple juice into a large pot, add the apples, and place over medium heat and cover.
Soon to be sauce.
When the cooking liquid starts to boil, uncover the pot. Cook the apples for about 30 minutes, stirring and mashing with a large fork, wooden spoon, or potato masher occasionally until the apples reach your desired consistency.
If you have a food mill, pass the mixture through to get smooth applesauce. If not, simply mash up and enjoy a chunky applesauce.
 You can store jars of applesauce in the freezer, or preserve in jars according to safe canning practices.
Curry Winter Squash Soup
If it grows in the summer, why is it called a winter squash? Winter squash is unique in the garden because it stores well, allowing us to enjoy its sweet flavor all the way through winter. It is also tremendously popular with kids because it’s so sweet. This soup will make a wonderful, warm treat for you and your kids on a winter’s day, when other garden produce is in limited supply. Older kids can chop and prepare vegetables, while kids of all ages can help you measure spices, scoop out the winter squash flesh, stir the soup, and use the blender.
ACTIVE TIME: 30 minutes
TOTAL TIME: 1 hour, 15 minutes
Serves 4 as a main dish or 8 as a starter
1 small edible pumpkin, medium-sized butternut, or other winter squash (or 20-ounce can of pumpkin puree)
3 tablespoons olive oil
1 leek, white part only, chopped
1 large yellow or white onion, peeled and chopped
4 cups vegetable broth
½ teaspoon salt
½ teaspoon curry powder
½ teaspoon nutmeg
¼ teaspoon ginger
1 bay leaf
1 cup coconut milk
1 bunch cilantro or chives, chopped (optional)
Baking pan
Large pot
Food processor or blender
If roasting your own pumpkin or winter squash: preheat the oven to 350 degrees Fahrenheit. Cut the squash in half, scoop out and discard the seeds and strings, and poke the skin a few times with a fork. Rub 2 tablespoons of olive oil onto the cut edges and place cut edges down in a baking pan. Bake for about 45 minutes, until it’s easy to push a fork into the flesh. Remove from the oven and cool, then scoop out the cooked squash and discard the skins.
Heat 1 tablespoon of olive oil in a large pot over medium heat. Add the chopped leek and onion and sauté until soft, about 10 minutes.
In a food processor or blender, puree the squash with the sautéed leek, onion, and vegetable broth. You may need to work in batches to get through all the squash.
 Return the pureed squash mixture to the soup pot. Add the salt and spices. Bring to a boil over medium heat, stirring often, and then reduce the heat to low and simmer for about 15 minutes, uncovered.
Stir occasionally.
 Remove the bay leaf, add the coconut milk, and stir until the soup is hot.
 Divide soup into bowls and serve garnished with chopped cilantro or chives.
Most kids love pizza, which makes it a great mechanism for encouraging them to try new vegetables. You can buy pre-made crust or make your own, using the recipe below. Regardless, involving your kids in topping the pizzas will make them more excited to taste their culinary creations. Older kids can chop and prepare vegetable toppings and kids of all ages can help you mix the dough ingredients, grate cheese, and add sauce, cheese, and other toppings to each pizza.
Using too much sauce or other wet and heavy toppings will prevent the dough from becoming crisp, so remember that less is more when making pizza.
ACTIVE TIME: 1 hour TOTAL TIME: 1 hour, 15 minutes
Makes 2 large rectangle sheets or 4 medium rounds
For the dough:
4½ teaspoons (approximately 2 packages) active dry yeast
2⅔ cups warm water
7 to 7½ cups all-purpose flour, plus more for dusting work surface
7 tablespoons olive oil
2 tablespoons salt
2 tablespoons sugar
Coarse ground cornmeal (for dusting)
2 baking sheets or a round pizza stone
Rolling pin or other implement to roll out dough
Large mixing bowls
Dish towels or plastic wrap
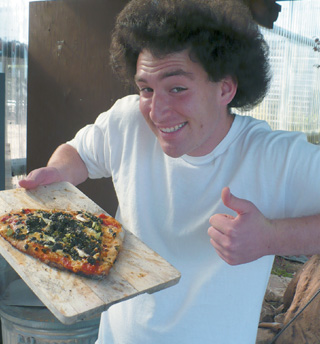
There’s nothing better than homemade pizza fresh from a wood fired-oven.
Topping ideas:
Tomato sauce or pesto sauce
Fresh produce, sliced or prepared: basil, bell peppers, fresh tomatoes, spinach, summer squash, zucchini, or others
Fresh produce, sliced and pre-cooked: asparagus, eggplant, leeks, potatoes, or others
Mozzarella cheese, grated
Fresh herbs
Combine the yeast, 1 tablespoon of sugar, and warm water in a large mixing bowl and let stand until the yeast is dissolved, about 5 minutes.
Add 4 tablespoons of olive oil, then flour, salt and remaining 1 tablespoon of sugar, and mix for about 1 minute to blend all of the ingredients.
Knead for 10 to 15 minutes, until the dough is smooth and elastic. Divide dough and shape into 2 or 4 balls (depending on your baking method). Transfer each ball of dough to a mixing bowl, each greased with some of the remaining 2 tablespoons of olive oil. Turn each ball over once to coat.
Preheat the oven to 475 degrees Fahrenheit. Place the baking sheets or pizza stone in the oven to preheat while you prepare the dough and toppings.
 One at a time, flatten the balls of dough on a lightly floured work surface and roll out into the desired shape.
 Remove baking sheets or pizza stone from the oven and dust lightly with cornmeal.
 Transfer the flattened dough to the pans. For pizza that will be heavily loaded, it’s helpful to pre-bake the crust for 5 minutes before adding the sauce and other toppings.
 Spread your toppings of choice. Tomato sauce or pesto and mozzarella cheese are classic starters. From the garden, basil, bell peppers, fresh tomatoes, spinach, summer squash, and zucchini all make great additions. If you pre-cook them, asparagus, eggplant, leeks, and even potatoes are also delicious on pizzas.
 Bake for 10 minutes, or until desired crispness is achieved. Remove pans from oven, transfer pizzas to a cutting board and cut into slices or squares. Repeat with any remaining dough.
Garden Frittatas
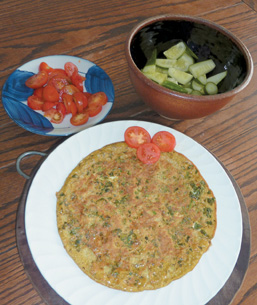
A garden meal that’s 100 percent fresh from the garden.
What child doesn’t love to crack an egg? If you and your family are raising chickens, your kids will also be thrilled to collect the eggs from under the hens. In this recipe, you will mix eggs with lots of fresh garden vegetables to create a delightful frittata for children and adults alike to enjoy. Older kids can prepare all of the ingredients, while children of all ages can help grate the cheese and crack and whisk the eggs.
ACTIVE TIME: 20 minutes TOTAL TIME: 30 minutes
Serves approximately 6
2 tablespoons olive oil
1 onion, peeled and chopped
2 leeks, white part only, chopped (optional)
4 cloves garlic, chopped
1 bunch leafy greens (kale, chard, or collards), washed, stems and ribs removed, and leaves chopped
2 small summer squash, sliced thin
¼ cup water
6 eggs
½ cup milk
¼ cup cheese, grated
1 tablespoon fresh oregano or ½ tablespoon dried oregano
1 tablespoon fresh parsley, chopped
1 teaspoon salt
Pinch of pepper
1 large cast iron pan (if you don’t have a cast iron pan, you can cook this on the stove in a regular frying pan and then transfer to a casserole dish to finish in the oven)
Preheat oven to 325 degrees Fahrenheit.
Heat oil in a large cast iron or other type of frying pan over medium heat. Add chopped onions, leeks, and garlic and sauté for 3 minutes.
Add greens, squash and water. Cover and cook over medium heat for 3 to 4 minutes.
While the greens are cooking, whisk together in a separate bowl the eggs, milk, cheese, herbs, salt, and pepper.
Add the egg mixture to the greens in the pan. Cover and cook over low heat until almost set, about 4 minutes.
If cooking in a regular frying pan, transfer contents to casserole dish. Place the cast iron pan or casserole dish in the oven and bake for 5 to 8 minutes or until the frittata has browned lightly on top and is completely set in the center.
Your kids will love to watch eggs turn into feathery wisps as you add them into this simple soup. You can vary the vegetables in this soup with whatever you have in season.
ACTIVE TIME: 20 minutes TOTAL TIME: 20 minutes
Makes 2 large or 4 small servings
2 leeks, diced
2 tablespoons olive oil
1 bunch chard or other dark, leafy greens, chopped
5 cups vegetable stock
2 eggs
2 tablespoons green onion or chives, chopped
Salt and pepper to taste
Soup pot
Sauté leeks with olive oil in your soup pot for 2 to 3 minutes.
Add 1 cup of chopped chard and sauté for another 2 minutes.
Add vegetable stock, bring to a boil, and cook until chard is tender and ready to eat, about 1 minute.
Beat eggs in a small bowl and slowly pour into the boiling broth, stirring gently.
Add salt, pepper, and green onions and serve hot.
Zucchini Fritters
We love this recipe, not only for the delicious end result, but because kids of all ages can help with almost every step. This can be a fun cooking activity for a group, with one child grating zucchini, one grating lemon zest, one cracking and beating eggs, one measuring flour, oil, and salt, and one grating or crumbling cheese. Older children will also enjoy helping you flip the fritters on the pan.
ACTIVE TIME: 45 minutes TOTAL TIME: 45 minutes
Makes about 12 small fritters
1 pound (about 3 medium) zucchini
½ onion, diced
1 tablespoon of lemon zest, freshly grated
2 tablespoons fresh parsley, chopped
2 large eggs, lightly beaten
½ cup all-purpose flour
¼ cup Parmesan cheese, freshly grated, or feta cheese, crumbled
1 teaspoon salt
Dash of freshly ground pepper
2 tablespoons canola oil, or more as needed
Medium bowl
Large frying pan
In a medium bowl, coarsely grate the zucchini, leaving the skin on.
Add diced onion, lemon zest, chopped parsley, eggs, salt, and pepper and mix well to combine.
Slowly add the flour, stirring so no lumps form. Then fold in the cheese.
Heat 2 tablespoons of oil in a large frying pan over medium-high heat. One at a time, carefully drop about 2 tablespoons of zucchini mixture into the hot pan; spacing fritters a few inches apart. Cook fritters until golden, 2 to 3 minutes. Reduce heat to medium. Flip fritters with a spatula, and continue cooking until golden on all sides, 2 to 3 minutes more.
Transfer cooked fritters to a plate and set aside in a warm place. Repeat cooking process with any remaining zucchini mixture, adding more oil to pan if necessary.
Green Garden Smoothie
Amy Carlson runs our garden field trips and summer camps at Life Lab, and is also mother to young daughter Greta. Between her work here and at home, Amy has loads of experience preparing garden-fresh foods with kids. Amy says she can think of no more effective way to “get raw, leafy greens into kids” than by incorporating them into fruit smoothies. In fact, by having one of these smoothies every morning, Amy has also dramatically increased her own consumption of dark, leafy greens. Greta helps Amy prepare the smoothies by chopping the leaves with her nylon knife and pushing the buttons on the blender.
Drink right away or keep refrigerated for up to 24 hours.
ACTIVE TIME: 15 minutes TOTAL TIME: 15 minutes
Makes 3 servings of 12 to 14 ounces
1 bunch kale, spinach or chard, washed
1 ⅓ cup water or juice
¾ cup plain yogurt
3–4 cups fresh and/or frozen fruit, chopped or sliced
1–2 tablespoons nut butter (optional)
1–2 tablespoons ground flax seed (optional)
Blender
Remove stems from greens and coarsely chop or tear the leaves into pieces.
In a blender, combine the greens with 1 cup of water or juice until smooth, about 2 minutes.
Add yogurt, fruit, and nut butter and continue to blend until smooth. Add additional ⅓ cup of water or juice if needed to reach desired consistency.
If desired, stir in ground flax immediately before drinking.
• Change your smoothie with the seasons. For example, a great winter smoothie might include apple or pear (cored and sliced, with skin still on), citrus fruit (peeled, sectioned, and seeded), and frozen strawberries. Combining a tart-tasting fruit, such as berries or citrus, with milder fruits, such as apples or persimmons, complements the greens and yields a tasty smoothie.
• Experiment with other greens. Beet greens, escarole, and bok choy are all great in smoothies.
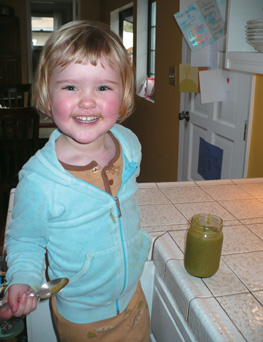
After helping with the preparation, Greta enjoys her kale smoothie.
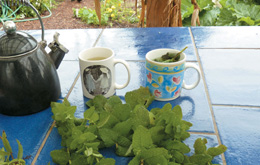
Tea time in the garden.
Herbal Tea
The most fun way to make herbal tea with kids is to heat water and carry it with you in a thermos while your kids gather and add the herbs of their choice. Follow this recipe to make tea while walking around the garden together. Good options for tea herbs include chamomile, lemon verbena, mint, and peppermint.
ACTIVE TIME: 5 minutes TOTAL TIME: 30 minutes
Makes up to 6 servings
Tea herbs growing in the garden
1 thermos
Small tea cups
Water
Boil a pot of water. Pour hot water into thermos.
Carry your full thermos with you as you and your kids take a walk around the garden.
Pick and rinse the herbs you want to include in your tea. Then throw them in, stem and all.
Let the tea brew for 5 minutes or more. Pour a little into a cup and check the temperature and flavor. When it feels and tastes right, serve and enjoy.
Lemon Ice
This is a drink that could also be considered a dessert. It makes a deliciously refreshing treat on a warm day. Older kids can help with every step, and younger kids can help juice the lemons, measure sugar and lemon juice, and blend, garnish and serve the ices.
ACTIVE TIME: 15 minutes TOTAL TIME: 3 hours
Serves 7 to 9
4 cups water
2 cups sugar
4 medium-sized lemons (or ¾ cup fresh lemon juice)
Saucepan
Ice cube trays
Food processor or blender
Place the water and sugar in a saucepan over medium-high heat. Boil for 5 minutes, stirring occasionally.
While the sugar water boils, slice lemons in half and juice them. Measure ¾ cup of lemon juice. Add lemon juice to sugar water and stir.
Remove the pot from the heat source and pour the mixture into ice cube trays. Freeze until solid.
When life gives you lemons, it’s time to make Lemon Ice.
When you are ready to serve your lemon ices, pop the cubes from the tray into a food processor or blender and blend them very quickly. Make sure to stop before they melt.
Spoon lemon ice into cups or bowls and serve with a straw and a spoon.
• Try these ices with other citrus fruits like oranges, limes, or grapefruit as they become ripe and available. You can also add mint or lemon verbena to the mixture before blending for a bolder, herbed flavor.
• Have your kids add garnishes to the ices: a mint or lemon balm leaf, or a slice of strawberry or lemon, for instance.
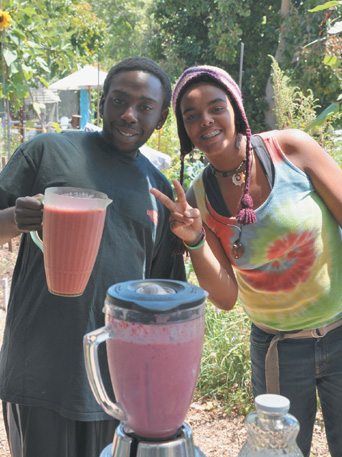
Sweet strawberries, tangy lime, and bubbly seltzer water make this drink a wonderful, healthy alternative to soda pop.
ACTIVE TIME: 45 minutes
TOTAL TIME: 1 hour, 45 minutes
Makes about 15 servings
3 cups fresh or frozen strawberries, chopped
1 cup sugar
1 cup water
⅓ cup lime juice
1 ½ teaspoons lime zest
Sparkling water
Saucepan
Blender
Mesh strainer
Combine berries, sugar, water, and lime zest in a saucepan over medium heat and simmer until thickened, about 30 minutes.
Remove from heat and puree using blender.
Pour mixture through a fine mesh strainer into a bowl or jar, discarding the solids.
Stir in the lime juice and chill until cold.
To serve, pour about ¼ cup of strawberry-lime syrup into a glass and add sparkling water to taste. Stir and enjoy.
Lemon-Rosemary Spritzer
Your friends and family will be happily surprised by this unique herbal combination.
ACTIVE TIME: 30 minutes
TOTAL TIME: 1 hour, 30 minutes
Makes about 15 servings
1 cup lemon juice
1 cup sugar
½ cup water
1 teaspoon fresh rosemary, finely chopped
Sparkling water
Saucepan
Mesh strainer
Combine all of the ingredients in a saucepan over medium heat and simmer until slightly thickened, about 15 minutes.
Pour syrup through a fine mesh strainer into a bowl or jar, discarding the solids.
Chill until cold.
To serve, pour about ¼ cup of lemon-rosemary syrup into a glass and add sparkling water to taste. Stir and enjoy.
Zowee! This is a delightfully sweet and sour drink.
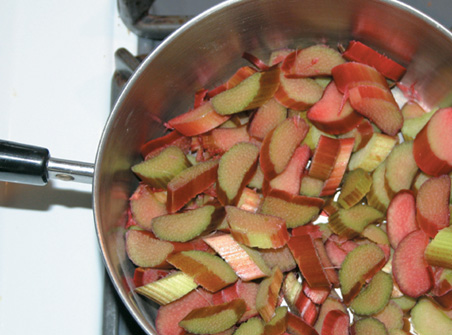
Be sure to remove and compost any rhubarb leaves; they are poisonous if ingested.
ACTIVE TIME: 20 minutes
TOTAL TIME: 1 hour, 20 minutes
Makes about 15 servings
3 rhubarb stalks without leaves
2 cups water
1 cup sugar
Sparkling water
Small saucepan
Slotted spoon
Wash and cut rhubarb stems into ¼-inch pieces.
Add rhubarb pieces to water in a small saucepan and bring to a simmer.
Simmer for 5 minutes to make a rhubarb syrup.
Strain out rhubarb pieces with slotted spoon. Add sugar and stir until it is fully dissolved.
Chill rhubarb syrup.
To serve, pour about ¼ cup of rhubarb syrup into a glass and add sparkling water to taste. Stir and enjoy.
Fresh fruit smoothies and spritzers are always a treat.
Stewed Apples or Pears
When paired with something sweet, like ice cream or whipped cream, these stewed apples or pears make a wonderful dessert on a cold fall or winter day. Older kids can help by slicing the apples or pears, and kids of all ages can help you measure the apple juice, cinnamon, and salt; juice the orange; and grate the peel.
ACTIVE TIME: 30 minutes TOTAL TIME: 45 minutes
Serves 8 to12 as a dessert
6 medium-sized apples or pears
1 medium-sized orange
1 cup apple juice
½ teaspoon cinnamon
¼ teaspoon salt
Saucepan
Peel, core, and quarter the apples or pears.
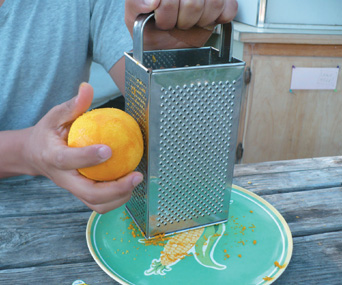
Zest and juice the orange.
Place the apple or pear slices in a saucepan. Add the orange juice and zest, apple juice, cinnamon, and salt and bring to a boil over medium heat.
Reduce the heat to low and simmer until the fruit is soft, 10–15 minutes.
Serve in bowls plain or with yogurt, ice cream, whipped cream, or as a topping for pancakes.
Strawberry-Rhubarb Tartlets
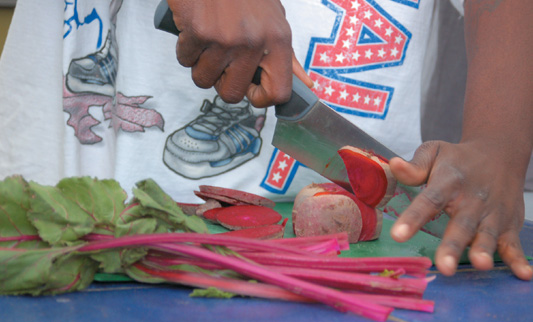
When kids come to Life Lab, we bring them to the rhubarb patch and cut off a leaf and stem. We compost the leaf (remember—rhubarb leaves are poisonous) and then chop the stem into bite-sized pieces and hand them out for our sour-face-making contest. After fair warning, all the kids who want to try something very sour take a bite and then watch one another react. We’re not sure if this is more fun for the kids or the counselors. As you can imagine, it is hilarious. In this dessert, we sweeten the rhubarb with sugar and syrup and add strawberries for a delightful springtime treat.
ACTIVE TIME: 45 minutes TOTAL TIME: 45 minutes
Makes 4 tartlets
6 graham crackers
4 teaspoons butter, melted
3 cups rhubarb, chopped
⅓ cup sugar
⅓ cup plus 1 teaspoon orange juice, divided and kept separate
Pinch of salt
1 teaspoon cornstarch
1 ½ cups strawberries, sliced
4 tablespoons cream cheese, softened
2 tablespoons vanilla yogurt
1 teaspoon maple syrup
Food processor or blender
4 tartlet pans
Just add sugar to make this sour stem sweet and tasty.
To prepare crust, grind the graham crackers in a food processor or blender until fine. Add melted butter and continue to blend until combined, about 15 seconds more. Divide the crust equally between 4 tartlet pans, pressing the mixture into the bottom and up the sides of the pans. Set aside.
To prepare filling, combine rhubarb, sugar, ⅓ cup of orange juice, and salt in a saucepan. Cook over medium heat, stirring occasionally, until rhubarb is soft, about 10 minutes. In a small cup, combine the cornstarch with the remaining teaspoon of orange juice to dissolve and stir into the hot rhubarb mixture. Bring to boil over medium-high heat then reduce heat to low and simmer, cooking mixture for an additional 30 seconds, stirring frequently. Stir in strawberries and remove from heat. Divide among tartlet pans.
For topping, mix together the softened cream cheese, yogurt and maple syrup in a small bowl. Stir until smooth and spoon over the tartlets equally.
If you do not have tartlet pans, or just want to try an alternate technique, pour your rhubarb mixture into a large pie pan. Top with cream cheese topping and then crush the crust mixture over the top for a crumbly finish.
Kids of all ages love popsicles. In this activity, they can use fresh garden produce to make their very own. Older kids can help slice the lemon and pour the mixture into cups, and kids of all ages can help blend the fruit, taste and sweeten the mixture, and put in the popsicle sticks.
ACTIVE TIME: 20 minutes
TOTAL TIME: 4 hours, 20 minutes
Makes 12 popsicles
1 lemon
1 basket of strawberries, either fresh or semi-thawed
Blender
Pitcher
Sugar to taste
12 (3-ounce) paper cups
Metal pan
Popsicle sticks
Wash lemon, cut it in half, and squeeze the juice from one of the halves.
Wash and blend the berries.
Put the blended berries and lemon juice in a pitcher.
Add 2 cups of water and stir.
Add sugar to taste and stir again.
Set out paper cups in a metal pan.
Pour fruit mixture into cups and place the entire pan of cups in the freezer.
About 2 hours later, when the popsicles are frozen enough to hold a popsicle stick upright, push sticks into the center.
Leave the popsicles in the freezer for at least 2 more hours, or until they are frozen completely.
These popsicles will work with almost any fresh fruit. Try different ones and choose your favorites. You can also experiment with adding yogurt to make creamier popsicles, or by sweetening with juice instead of sugar.
Lavender-Lemon
Shortbread Cookies
These delicious and simple shortbread cookies are an excellent complement to fresh herbal tea. Kids of all ages can help harvest the herbs, grate the lemon zest, remove and measure flowers from the lavender stalks, mix the ingredients, and press the dough into the pan.
ACTIVE TIME: 25 minutes TOTAL TIME: 1 hour
Makes about 12 cookies
1 cup unsalted butter, softened
1 cup sugar
2 teaspoons lemon verbena, finely chopped, or lemon zest, grated
3 cups flour
2 teaspoons de-stemmed lavender flowers, dried or fresh
¼ teaspoon salt
Mixing bowls
8 × 8-inch baking pan or 9-inch pie pan
Preheat the oven to 325 degrees Fahrenheit.
In a large mixing bowl, beat butter, sugar, and lemon verbena or lemon zest until creamy, 1 to 2 minutes.
In another bowl, mix together the flour, lavender, and salt. Add the flour mixture to the creamed butter mixture, stirring just until combined.
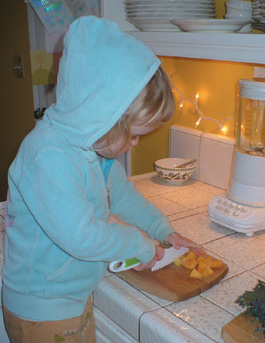
Learning to use different kitchen tools keeps kids interested in cooking.
Press the cookie dough into baking pan or pie pan. Pierce dough in a few places with a fork. To make cutting the cookies easier after baking, score the dough into equal squares or wedges with a knife, being careful not to cut completely through.
Bake until golden brown, 25–30 minutes. Let cool 5 minutes before cutting. Slice, remove from pan and enjoy.
Learning to use a culinary knife is a skill kids will use their entire lives.
In addition to our seasonal cooking activities in Life Lab’s Garden Classroom, there are a handful of edible activities that we like to do with whatever fruits or vegetables are in season at a given time of year.
If you and your kids have an abundance of any produce, it can be fun to set up a sale in your front yard. Label each item with the name and price. Even if you have too little produce to sell, it can be fun for young kids to set up a small farmers’ market stand where their parents, grandparents, or other friends can come and role-play the farmers’ market experience, purchasing, say, 10 green beans or three cherry tomatoes.
Mmm, Mmm, Good—Comparative Tastings
A wonderful way to get your child eating new foods is to show a genuine interest in his or her opinion. For example, you might say, “Hey Luis. I’m making a salad tonight and I want to put sliced peaches on top. Which of these peaches do you think tastes sweeter? Which has the best texture?”
A comparative taste test provides a more structured way to gather kids’ input on different varieties of the same crop. You might do this prior to selecting which variety of plum tree to plant, or which variety of winter squash to use in a soup. It is exciting for them to be able to contribute in this way. Taste tests also give us the opportunity to slow down and really experience the unique tastes within a garden crop. Finally, comparative taste tests can be fun with large groups, with each person casting a vote for his or her favorite.
To hold a taste test, have your kids harvest a single apple, for instance, from as many varieties as you have growing in the garden. You can also do this with produce from a farm, farmers’ market, or grocery store. Help your kids wash and prepare each one for sampling. If you like, you can label each plate.
Then have your kids decide if they want to blindfold the participants or not. Have participants taste each variety and describe the unique textures and flavors to one another. Then have them decide which Malus domestica (apple) variety they like the best, and for which purposes. Maybe they will like ‘Jonagold’ best for salads, but ‘Mutsu’ for snacking. Your kids may want to take turns conducting and participating in the taste test. Allow them to blindfold you and serve you various apples as well.
Needless to say, this activity works well with all sorts of garden produce. At Life Lab, we conduct comparative taste tests on everything from winter squash to tomatoes. A local school even hosted a taste test with students to determine which foods to offer on their school lunch menu.
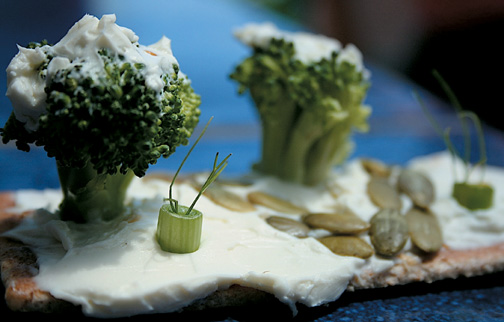
Cream cheese snow on an evergreen tree.
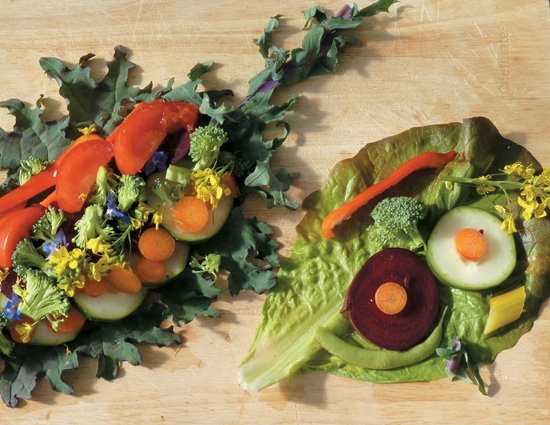
This is a great activity for engaging your kids’ creativity while also encouraging them to taste a wide variety of produce from the garden. Simply head out to the garden together and gather four or more fruits or vegetables that are edible when raw, and preferably are all different colors. You might grab a beet, a carrot, a yellow bell pepper, some broccoli, and some petals from a few edible flowers, for example. Grate carrots and beets, and chop all other veggies or fruits into bite-sized pieces. Then place each type of produce in a separate bowl.
Give your child a cracker and have them spread hummus, cream cheese, or another dip across the top. Now have them use the garden produce to create a miniature garden landscape on their cracker. They might put broccoli florets upright to represent trees, make a row of grated beets to mimic a brick pathway, or use a slice of yellow bell pepper as a miniature row of blooming sunflowers. Have them give you a tour of their garden and then enjoy their little garden snack.
A neighbor’s persimmons make a favorite dried fruit.