
LESSON ONE
Parts of the Flute
The following photo shows the three sections of the flute - the middle joint (longest), foot joint (shortest) and the head joint which contains the mouth hole

Putting the Parts Together
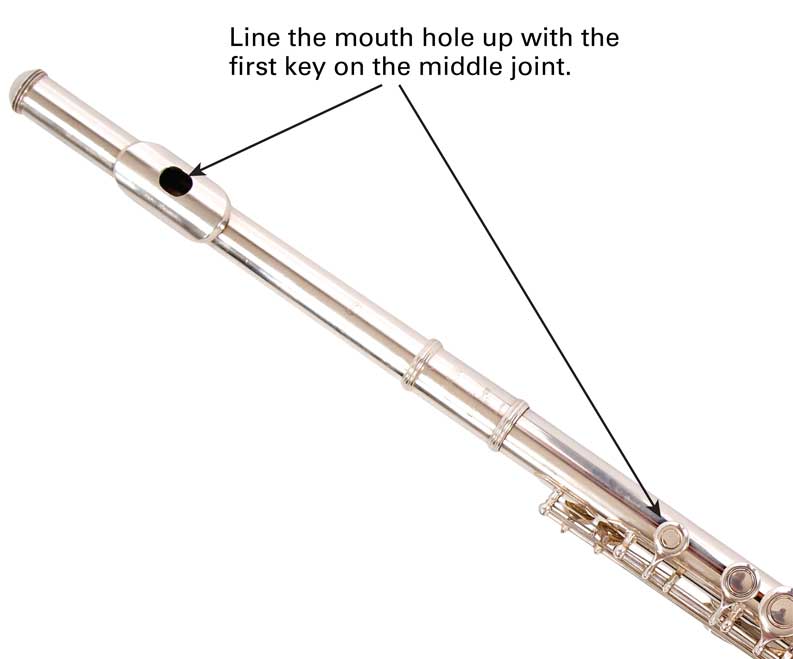
First attach the headjoint to the middle joint by inserting it and twisting both parts while pushing gently.
Use the same method to attach the foot joint to the middle joint. Line up the middle of the first lever on the foot joint with the end of the shaft on the middle joint.
The exact alignment of parts on the flute is a personal thing. The positions given here are useful as a guide, but you may wish to alter them slightly when you have been playing for a while.

How to Hold the Flute

Hold the flute with the palm of your left hand facing behind you, and the palm of your right hand facing ahead of you. Place your fingers in position for a G note, which is shown in the following diagram.
Memorize this fingering, as this is the first note you will learn to play. Once your fingers are in the correct positions, hold the mouthpiece gently but firmly against your lower lip. The photo here shows the correct method for holding the flute in a playing position. In the beginning, it is best to work on your playing position with a teacher. After a while you will do it automatically.
Fingering Numbers
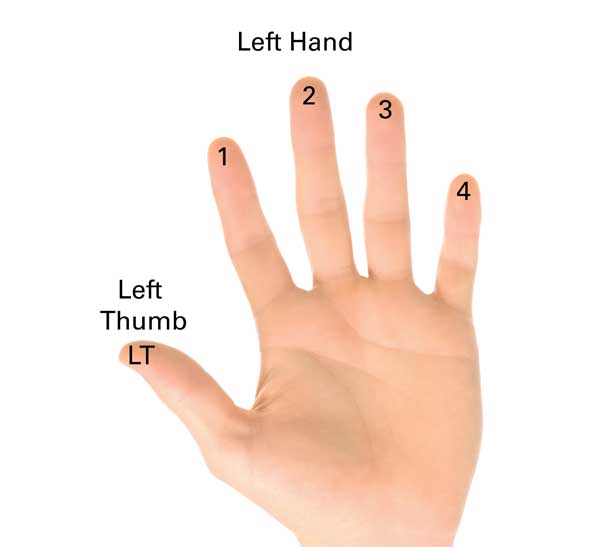
Left Hand
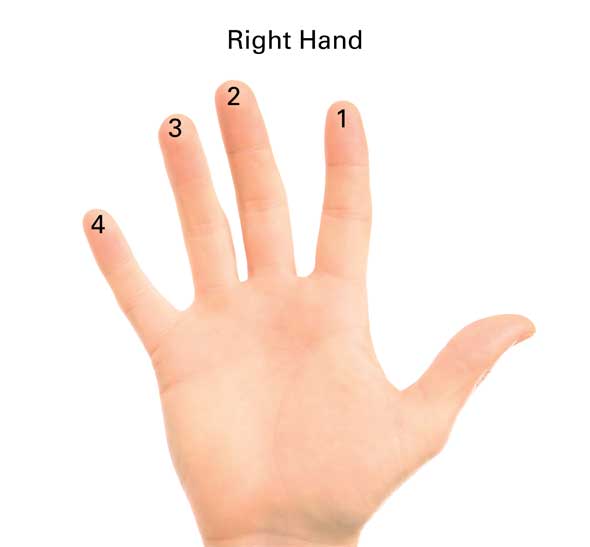
Right Hand
The numbers on the fingers in this illustration are the same as those used on the fingering diagrams throughout the book. The following diagram uses these numbers to demonstrate the fingering for a G note.
Fingering Diagram
Here is a diagram showing where to place your fingers for the note G. This note is used to tune your flute. These diagrams are used throughout the book to show you where to place your fingers for each new note.

A white number or letter in a black key tells you to press and hold down the key with the finger indicated.
A black number or letter in a white key tells you to keep the tip or your finger or thumb near the key ready to press it down when it is needed for a new note.
The Note G
To play the note G, hold down the keys as shown in the previous diagram. Notice that there are two possible keys which can be played with the left thumb. Make sure that your thumb only touches the key marked T, otherwise the wrong note may sound.
This note is a G note. It is written on the second line of the treble staff. Music notation will be explained as the book progresses. For an introduction to reading music, see Lesson 2 .
Playing Your First Note
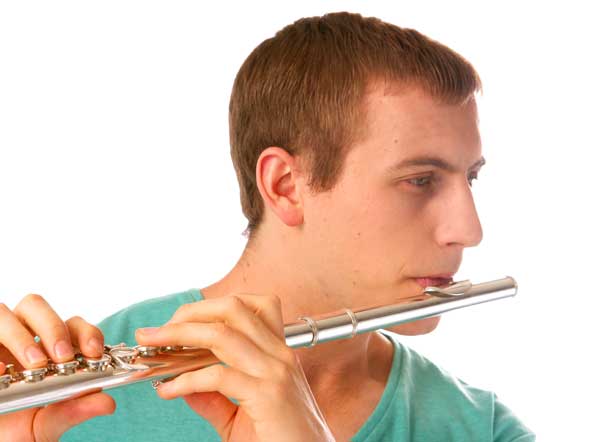
One of the most important aspects of playing any instrument is the ability to produce a strong, even tone. On the flute this largely depends on the position of the mouth and lips, the amount of pressure used, and the way the air is directed across the mouth hole. The mouth and lip position is known as the embouchure.
To form the basic embouchure for flute playing, hold the mouthpiece of the flute against your lower lip so that your lip covers about a quarter of the hole.
To sound your first note, place your fingers in position for the note G, then blow across the hole towards the centre of the opposite edge. Don’t worry if you can’t make a sound right away, most people have trouble at first. Try moving the flute slightly to the left or right. You can also try rolling the flute either towards you or away from you to create different angles. Experiment.
Watch and listen carefully to your teacher and above all, keep practicing. Soon you will have no trouble producing a note.
When you have succeeded in making a sound, try to be aware of the sensation in your lips. Associate the sensation with the sound, and aim to recreate the sensation to recreate the sound.
Tonguing
To control the beginning and end of a note, the technique of tonguing is used. To prepare for this technique whisper the sound "taa". The sound begins with your tongue sitting behind your top teeth, blocking the passage of air, and you make the "taa" sound by quickly withdrawing it, and letting a stream of air begin from your outgoing breath.
Next, place the flute in the playing position against your lip and let your tongue rest lightly against your top teeth. Quickly release your tongue (like the taa movement), and the note will start. To stop the note, simply put your tongue back against your top teeth. The note will stop immediately, and your tongue will be in position to start the next note.