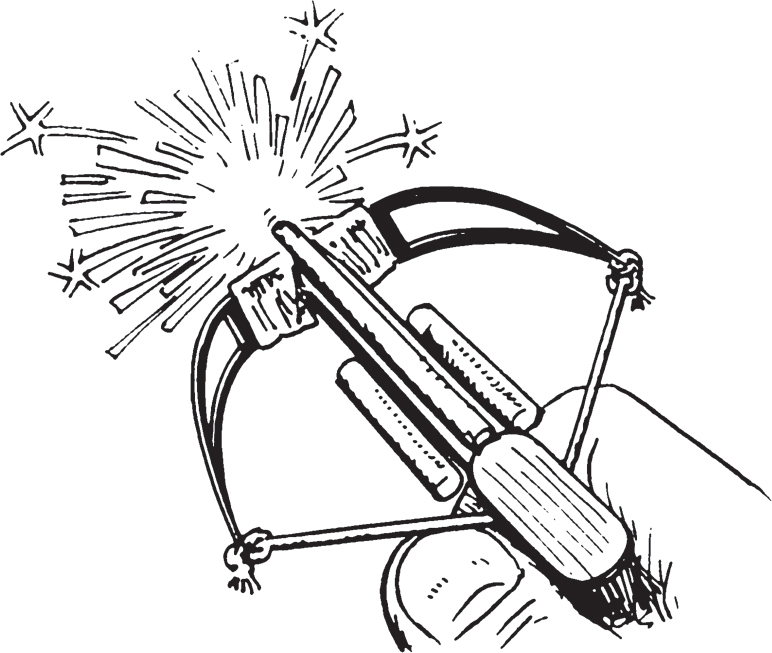
Turn household items into a micro crossbow that accommodates multiple rounds of ammunition, launches exploding tipped crossbow bolts, and slings wooden matches over thirty feet away!
28
ASSASSIN’S MICRO CROSSBOW
SAFETY KEY:
+ Use outdoors + Adult supervision recommended
SKILL LEVEL:
EASY
INTERMEDIATE
ADVANCED
APPROXIMATE TIME:
1 hour
WHAT YOU’LL NEED:
+ Popsicle sticks
+ Scissors or gardening shears
+ 2 metal snap hair clips (barrettes)
+ Embroidery floss
+ Hot glue gun
+ Sharpie
OPTIONAL:
+ Matchsticks
+ Pop-Its
+ Electrical tape
NOTE: This project was in collaboration with the Sonic Dad team, with credit to Ritchie Kinmont for designing the template. Check them out at www.sonicdad.com
LET’S BEGIN
MICRO BOW
1. Use the template below to mark your Popsicle sticks and trim them to size.

2. Color each of the sticks black using a Sharpie.
PRO TIP: Using a large black Sharpie is the quickest and easiest way to get it done.
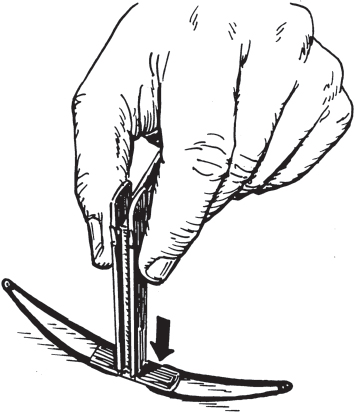
3. Find two metal hair clips, and break the inside band cleanly out of the center. Secure the clips to the smallest wooden supports (cut Popsicle sticks) with a little hot glue. When it cools, the limbs should arch away from each other in a bow shape.

4. Add some hot glue to the inside and press the second support firmly into place, then when it cools, clean up any excess glue with a utility knife.
MAKE THE PISTOL GRIP

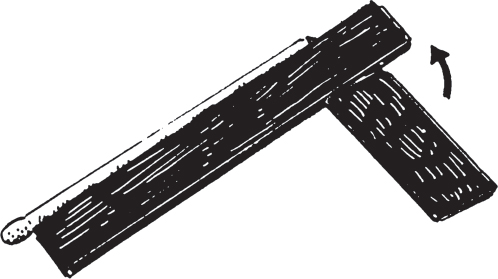
1. Use hot glue to join a crossbow rail to the inner rail spacer so they’re matched flush with the tip.
PRO TIP: Drop the inside rail down a touch to form a little groove about half a matchstick deep, then remove any excess glue to ensure that the flight channel stays clean.
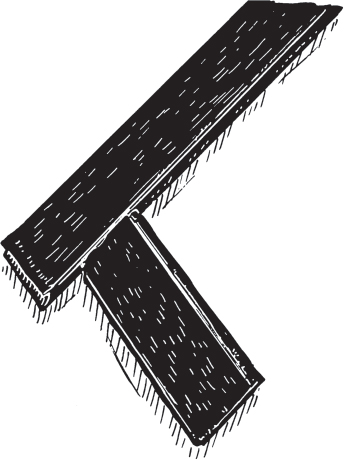
2. Attach the handle support right behind the spacer, then glue the last rail in place on top.
HELPFUL HINT: Leave a matchstick in the flight channel to make sure the glue cools with enough spacing.
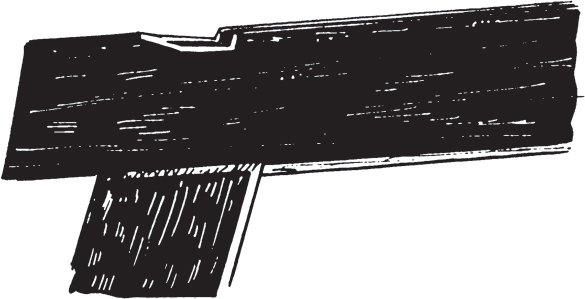
3. Finally, glue the pistol grip panels so they overhang slightly at the back.
PREP FOR ATTACHMENT
1. You’ll need a shallow groove for catching the bowstring, so whittle out a small catch in the upper rails, just above the front of the pistol grip.
PRO TIP: Round the top edges of the flight channel with sandpaper to prevent the bowstring from fraying and breaking later on. Don’t worry about messing up the paint job—it’s super easy to touch up with a marker and make good as new.
2. Connect your pistol grip to the bow by placing a bead of hot glue on the inside of the bow and pressing in the tip of the gun rail. Make sure the inner rail is flush with the top of the bow.
3. Add glue to each side of the rails for added support and durability, then give it a couple of minutes to cool and harden.
STRINGING THE CROSSBOW
1. The crossbow strings are made with embroidery floss. Thread the floss through the circular holes in the tips of the hair clips and tie each one with a double knot. Add a bit of glue to keep the knots from unraveling.
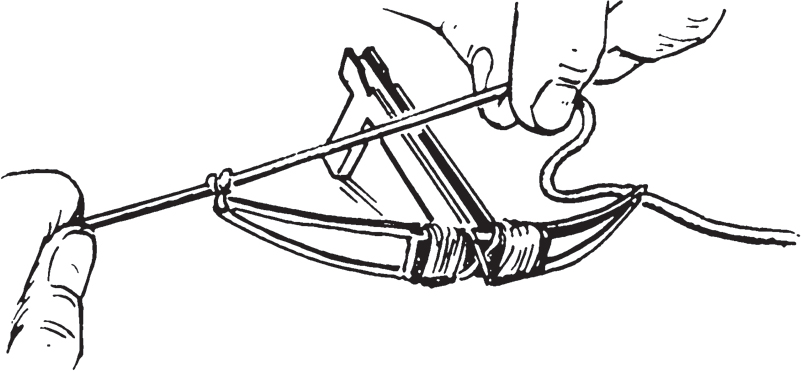
PRO TIP: Twisting the bowstring before tying it off will help keep it tight. This keeps tension on the string and increases the draw weight of the bow.
HELPFUL HINT: You can find embroidery floss in the craft section of supercenters like Walmart.
2. Before moving on, it’s a good idea to reinforce the bow by adding string where the hair clips meet the grip. Glue your string to the back side of the bow and wrap the support around ten times on each side.
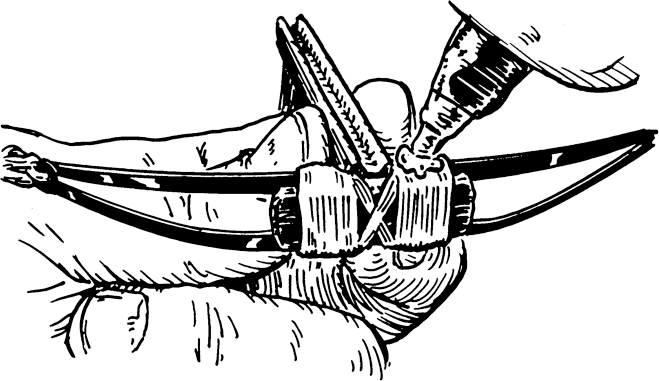
3. Finish by adding some glue to this knot as well, and trim the excess thread.
ALSO TRY: For bonus points you can wrap string around the handle to create a custom grip.
FINISHED! TIME TO FIRE YOUR CROSSBOW
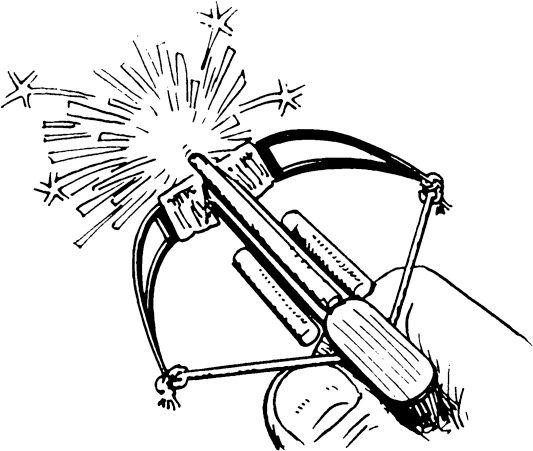
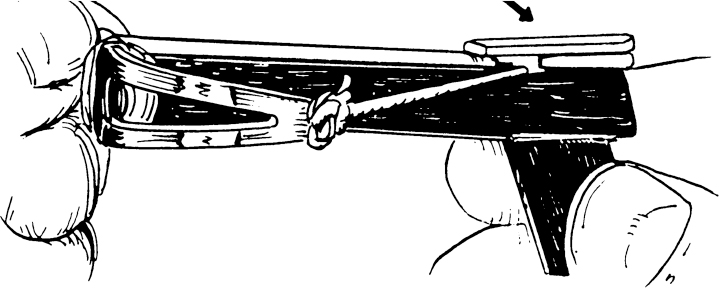
1. Cock the bowstring by drawing it back into the notch you made earlier.
2. Insert a wooden match into the groove, and use your thumbnail to press up gently on the string.

3. The string will snap into the back of the match, sending it flying off at incredible speeds and up to thirty feet away!
PERFECT IT! You can increase effectiveness and accuracy by using scrap wood to create a retention spring on the back.
OTHER THINGS TO TRY
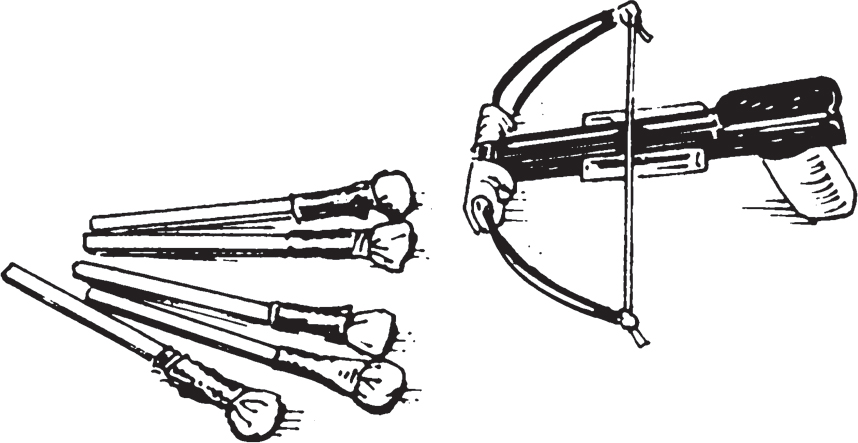
SIDE-MOUNT QUIVERS: Cut two small pieces of a drinking straw, cap one end on each with hot glue, and attach them to either side of the barrel at a bit of an angle.
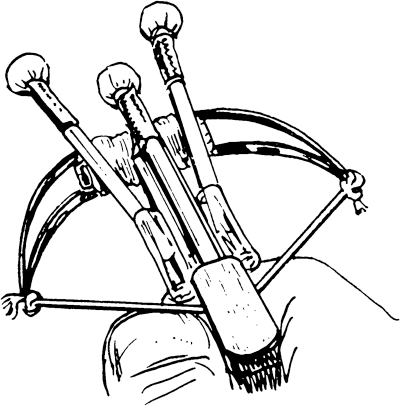
EXPLOSIVE BOLT HEADS: Flying matches are cool, but what if they exploded on impact? Secure an individual Pop-It to the tip of a match using electrical tape. Now your bolts will make a bang when they hit a hard target.
TARGETS: Make your own targets to practice your accuracy. You could make ones using cardboard and glued-on images or anything that your creative mind can come up with.
BE INNOVATIVE! Whether you stick to simple crossbow game play or take it to the next level with explosives, there’s always more to explore with this versatile weapon in your arsenal.
FUN FACT: Crossbows may seem like a noble weapon now, but back in medieval days, the weapon was seen as so dishonorable that crossbowmen were paid double the amount of a regular soldier to use them.