Whether you just want to play with flames or need to get a campfire going in a survival situation, this cheap and easy tool will allow you to harness the full force of the sun into a powerful pinpoint.

31
MINI SOLAR SCORCHER
SAFETY KEY:
+ Fire
SKILL LEVEL:
EASY
INTERMEDIATE
ADVANCED
APPROXIMATE TIME:
30 minutes
WHAT YOU’LL NEED:
+ 10 paint sticks
+ Fresnel lens (you can get one at the dollar store)
+ Piece of cardboard
+ Everbilt hardware:
#8-32 × ½ -inch machine screws combo
#8-32 × ¾ -inch machine screws combo
#8-32 × 1¼-inch round head combo
#8 flat washers
#8-32 wing nuts
#8-32 × 1⅝ -inch eye bolts
+ Wood glue
+ Drill
+ Aluminum foil
+ Saw
+ Pliers

LET’S BEGIN
BUILDING YOUR FRAME
1. Use eight paint sticks to build two wooden frames that will sandwich the Fresnel lens. Cut each of the sticks at a 45-degree angle on both ends. The exact length depends on the size of your lens, but you’ll probably end up making a rectangle. After you cut the angles off the paint sticks, you will have eight little triangle scraps. Save those for later.

PRO TIP: If you don’t have a tool to measure a 45-degree angle, fold a square piece of paper diagonally.
2. Use wood glue to construct two wood rectangles. While you’re at it, glue the saved wood triangles onto the frame corners.
3. Glue the Fresnel lens between the two rectangles, pressing tightly.
4. Drill three equidistant holes through each side of the frame. Thread #8-32 × ½-inch machine screws through the top and bottom holes of each side.

5. Drive 1¼-inch machine screws through the middle holes on the short side. These will be your sun finders, so they need to be as straight as possible.

6. Attach two eyebolt screws to the middle holes on the long sides of the frame. Secure each with a bolt, making sure these are on the rough side of the lens.
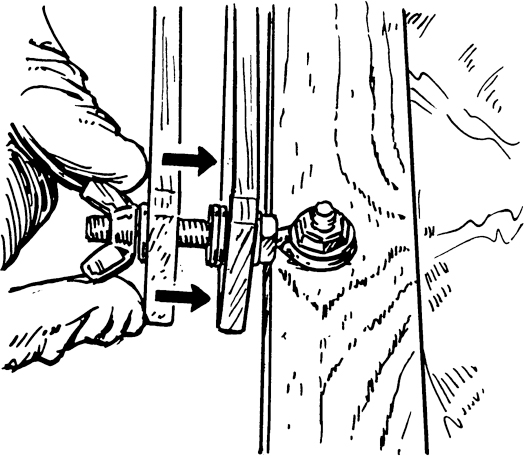
7. Drill a hole through the wide ends of four paint sticks. Add a screw and a washer to the end of the eyebolt, then add a paint stick. Follow up by adding two washers, another paint stick, and then end with a washer and wing nut. Do this to both sides.
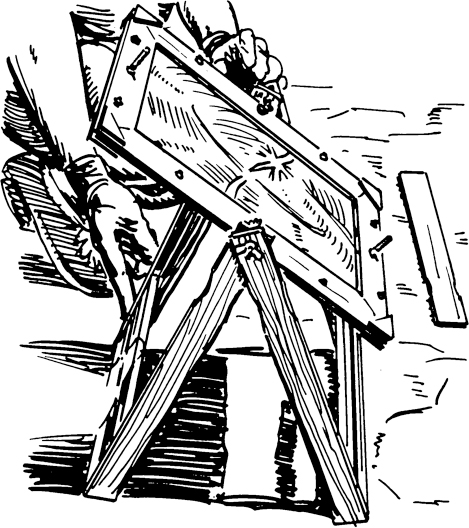
8. Now you have two pieces of wood hanging from each side, and it’s time to connect them. Measure the distance between the opposing legs. Cut four sticks to size and glue them across, creating a reinforced stand and a shelf.
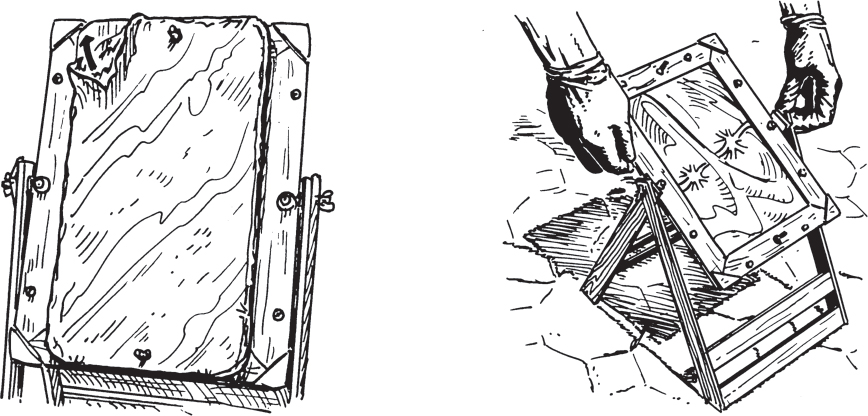
9. Cut a piece of cardboard to fit over the lens and a piece of tinfoil to cover the cardboard. Glue into place.
USING YOUR SOLAR SCORCHER
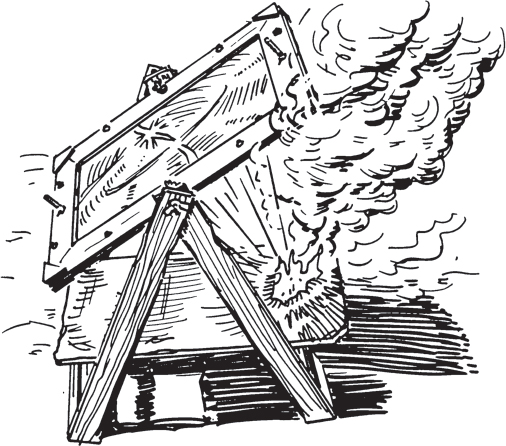
1. Take it outside and find a sunny spot. Choose what you want to burn—try starting with a spare paint stick. Hold it underneath the lens and slowly raise it until you find the center point. You will know you’ve hit focus when your stick instantly catches fire!
ALSO TRY: Using the tinfoil–covered cardboard, you can add colored powder and slide it slowly out from the bottom until it ignites. Try playing around with smoke powder, a book of matches, two-by-fours, or anything small. But whatever you do, don’t hold small things in your hands.
From cracking fireworks to fireballs on burning matchsticks, you’ll be impressed with the potential of this small but mighty scorcher.
FUN FACT: Photons are the particles that bring light from the sun to the earth. When narrowly focused, the energy from the photons can light things on fire once it reaches 450 degrees Fahrenheit.