MATERIALS AND SUPPLIES
FABRIC
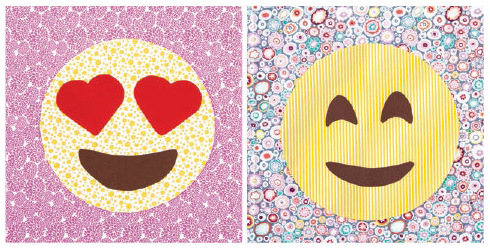
I created my emoji projects with solid-colored fabric. I like how that lets the emojis speak for themselves. (Pun intended.) You can use solids, as I did, or mix it up with prints.

COLOR BY NUMBER
Here’s a list of the specific Kona Cotton by Robert Kaufman Fabrics I used in these projects.
QUILT AND BOLSTER BLOCK BACKGROUNDS
K001-1282 Peacock
K001-1376 Turquoise
K001-1031 Blue Grass
K001-1009 Azure
K001-494 Malibu
K001-405 Alegria
K001-1061 Candy Green
K001-1183 Jade Green
PILLOWCASE BODY
K001-1282 Peacock
PILLOWCASE CUFF
K001-1376 Turquoise
PILLOWCASE TRIM
K001-1009 Azure
EMOJI FACES
K001-1089 Corn Yellow
EMOJI FEATURES
K001-1237 Mocha
K001-1387 White
K001-1019 Black
K001-7 Tomato
K001-1228 Melon
K001-1011 Bahama Blue
K001-192 Mango
K001-144 Sour Apple
K001-1223 Medium Gray
K001-1083 Coffee
(poo background)

OTHER MATERIALS
SEW-IN INTERFACING
I use Pellon P45 Sew-In Interfacing to help me turn under the edges of my circle appliqué (see Turned-Edge Appliqué Using Interfacing). I find that this is the lightest weight, yet stable, sew-in interfacing I can find. I prefer to use this nonwoven interfacing because it helps hold the face circles very securely, without stretching or distorting, in case I push too hard against the seam when turning. You can also use a knit or woven interfacing and you can try different weights of interfacing and stabilizers to see what turns under for you the best and what gives you the best hand in your projects. Experiment to see what’s right for you!
FUSIBLE WEB
I use Lite Steam-A-Seam 2 (by The Warm Company) to fuse the features (see Fusible Appliqué). I find it consistently holds well and releases easily from its paper. There are lighter-weight fusible webs, such as Mistyfuse, and also heavier-weight fusible webs to play with. You can buy it in sheets or on the roll. A lightweight paper-backed fusible web works best for machine appliqué. Choose your favorite fusible web and follow the manufacturer’s instructions.
BATTING
There are many different battings you can try. When selecting batting, keep your quilting plans in mind. Different battings have different guidelines for how far apart the quilting lines should be. Keep in mind that many battings require stitching to be 8˝ apart or closer. The faces are 10˝ wide. If you are not quilting inside the faces, be sure to use a batting that allows quilting lines to be at least 10˝ apart.
If you are sending the quilt out to a machine quilter, you will need a piece of batting 8˝ wider and longer than the quilt top (in this case, 78˝ × 98˝). While batting and backing 8˝ larger than a quilt top is always a safe plan, I find that I don’t need that much excess when I’m quilting it myself. The Quilters Dream Batting I used is twin size, 72˝ × 93˝. I find this a perfectly acceptable size.
STUFFING
The bolster and throw pillows use stuffing. You can easily use standard pillow stuffing such as polyfill (a washable polyester fiber stuffing that is widely available). There are other fun options to consider. Polyester pellets and beanbag filler can be a lightweight addition. Shredded foam is a good substitute for polyfill but can be a bit lumpy, if the pieces are larger or if some are stiff. Pillow forms work as well. It’s hard to find pillow forms of the exact size, but similarly sized square forms work well in round pillows! Think of them as flexibly contained material and not as square pillows. You can even recycle your old stained clothing by cutting it into pieces. (Keep in mind with this one that old T-shirts will be softer than jeans in a pillow and you should wash the clothes before using them as stuffing.)
Check the manufacturer’s information for washing instructions or limitations for using your chosen stuffing in finished home-decor items.

Note:
More About Stuffing
With most of these options, there are some universal truths:
• The more stuffing you put into the pillow, the stiffer it will be.
• If you are using a material that can bunch (including polyfill), putting the material into the pillow a little at a time is best, to keep the fill consistent throughout the pillow—not more compact in some areas and fluffier in others.
• If the material is light and small in size, filling and closing the pillow will make a mess. (Yes, beanbag polystyrene, I’m talking about you.) Consider stuffing outdoors or on a towel that can be shaken out.
THREADS
I use standard Coats & Clark All-Purpose Thread for almost all my sewing and quilting. You can try different sewing threads, experimenting with weights and sheens for the edges of the appliqué, and for your quilting stitches.
My goal for sewing down most appliqué is to make the appliqué stitches blend into the fabric.
For the faces, I matched the thread to the face color, as opposed to the background color. If your stitches are a bit farther away from the face, you might want to use the background color instead.
If you’d like the appliqué stitches to blend with the fabric, try an invisible thread, such as Dritz Invisible Thread or Sulky Premium Invisible Thread. You will need to adjust the sewing tension if you use this thread.
I zigzag stitched the features down. For me, that provided a nice combination of speed and neatness. I used a standard sewing thread in a color that matched the piece being appliquéd. Had I wanted the thread to form an outline on the shapes, I would have used satin stitch. While I use a standard thread for satin stitching, you can also play around with an embroidery thread (40-weight). It’s a little thicker than all-purpose thread and has a little bit of sheen.
TOOLS AND SUPPLIES
NEEDLES
I used a standard universal needle in size 80/12 for all the stitching on these projects. If you are using an embroidery thread or other heavier-weight thread for satin stitching, consider trying a microtex needle.
GLUE
I have a definite fondness for glue. Glue can often hold together pieces to be sewn more securely and more conveniently than pins. Water-soluble glue is a great option because the light hold is not permanent and won’t add stiffness to the project. I use Roxanne Glue-Baste-It, but there are other great options, including a standard craft glue stick (but not a bottle of school glue) and a glue pen designed for appliqué.

OTHER TOOLS
Here’s a list of other handy tools to have on hand:
• Iron
• Ironing board
• Sewing machine
• Turning tool
• Pins
• Rotary cutter, mat, and rulers
• Scissors
• Permanent marker (or any marker that won’t smear) to trace features onto fusible web
• Light-colored pen or pencil or a water-soluble pen to draw the emoji circle onto interfacing
Optional:
• Diet Coke (It’s always on my list.)
• Pattern paper
• Teflon pressing sheet, if using fusible for your turned-edge method
• Blind hem foot for your sewing machine to keep stitches close to the edge of the appliqué
• Pinking shears