
TECHNIQUES
PREPARING THE CIRCLE TEMPLATES
There are two circle patterns in this book to make circle templates. The 10˝ circle pattern is what you’ll use for the quilt, bolster, and pillowcase. The circle does not include a seam allowance.
The other circle pattern measures 12½˝ in diameter and will be used for the throw pillows. This circle includes a seam allowance.
I had originally cut my throw pillow faces at 11˝ (a 10˝ circle for the face with a ½˝ seam allowance added), but once the pillows were stuffed, they looked like miniature faces next to the emojis on the other projects. I hadn’t taken into consideration the depth the stuffing would add! Back to the drawing board! After some experimentation, I found that the 12½˝-diameter circle appeared to be 10˝ faces when complete.
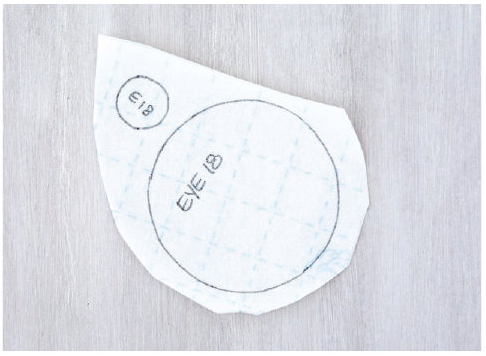
Both circle patterns include only a quarter of the circle. To make a template, trace the circle onto pattern paper (or 2 pieces of copy paper taped together) 4 times, rotating the quarter each time to get complete circle.

Or you can use a round object, such as a dinner plate, that is 10˝ in diameter as the template for the quilt, pillowcase, and bolster faces, and 12½˝ in diameter for the throw pillow faces.
TURNED-EDGE APPLIQUÉ USING INTERFACING
Because this bedroom set is for my preteen daughter, it will be washed with some frequency. For me, the faces themselves are a little too large to use fusible appliqué. I like the clean look of a turned-under edge and a matching blanket stitch. Furthermore, if I’d used fusible appliqué, the faces would be a little bit stiffer and I like the softer feel. I also don’t have the patience (or maybe the fine-motor skills) to use just an iron to turn under the edge of the appliqué circles. This technique creates turned-under edges easily. This technique also works for the background of the hand and poo emojis.
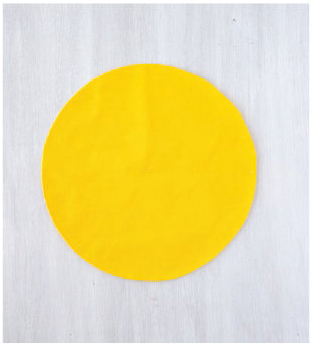
When using interfacing to turn the edges, layer the appliqué fabric and interfacing, sew the shape, slit the interfacing, and turn the shape right side out through the slit. When you press the edges you have crisply turned-under appliqués ready to go. That’s just a brief overview. … Of course, there are details to discuss.
INTERFACING OPTIONS
Lightweight Interfacing
I use a lightweight interfacing to turn the edges, and I leave it in the project. It creates another light layer between the yellow faces and the darker-colored backgrounds to help minimize the darker color showing through the yellow. It can also provide a little more support for the appliqué stitching on the fusible appliqué features.
Wash-Away Stabilizer
Treat wash-away stabilizer as you would a standard sew-in interfacing. The stabilizer will wash away when you wash the finished quilt. You can use water-soluble thread with the wash-away stabilizer if you’d like to remove the thread as well.
Fusible Interfacing
The advantage of fusible interfacing is that the turned-under shape can be easily fused to the background to hold it in place for stitching. The disadvantage is that you are going to be turning the edges with fusible on the back, so you need to be extra careful and pay close attention (or you may iron the face to the ironing board or to the iron itself). When you layer the fabric and interfacing together, layer the right side of the fabric facing the fusible side (the rough side) of the interfacing. You can follow the turn-under steps below. When you press the shape, make sure you always use a Teflon pressing sheet between the fusible and the iron, or the fusible and the ironing board.
TURNED-EDGE APPLIQUÉ USING INTERFACING—HOW-TO
1. Using a light-colored pen or pencil or a water-soluble pen, draw a 10˝ face circle onto the interfacing. If you are tracing more than 1 circle at a time, leave at least 1˝ between circles. Cut out the circle adding about a ½˝ extra for the seam allowance.
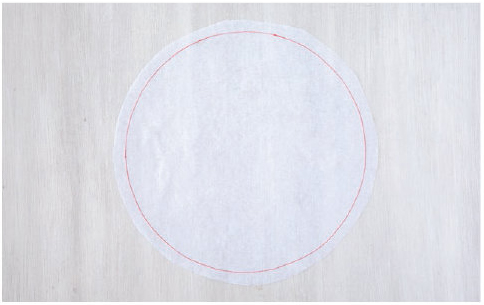
2. Place the cut-out interfacing circle (with the drawn circle shape facing up) on top of the right side of the face fabric. Cut out the fabric circle even with the outside edge of the seam allowance of the interfacing (not on the drawn circle). Pin it in place.
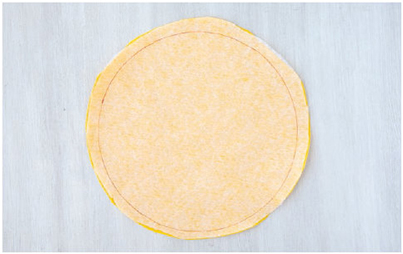


There is no need to be tidy and precise when cutting out the interfacing and face fabric. If you’re more of an assembly-line quilter, you can cut all the face fabric into 11˝ × 11˝ squares. Since the interfacing is only 20˝ wide, you’ll still want to draw the interfacing circles staggered to make the best use of the narrower width. When you cut out the interfacing circles, you can layer each one on the fabric square. You can easily sew around the circle in the next step when the fabric is a square. The one drawback is that you’ll use a little bit more fabric because you won’t be nesting the circles by offsetting rows. But don’t worry, the yardage for the project does call for enough fabric.
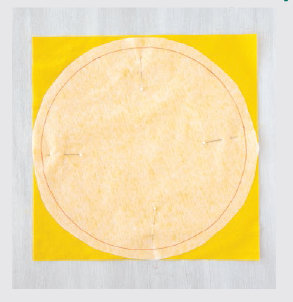
3. Sew around the circle, using a straight machine stitch.
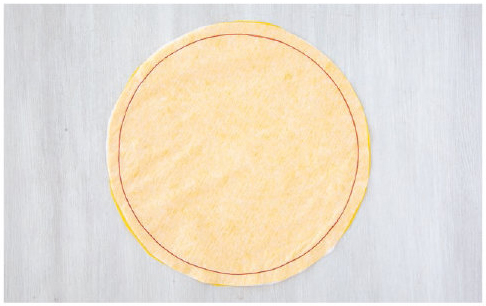
4. Trim the seam allowance down to ¼˝ and clip V-notches every ¼˝ all around the outside edge, getting close to the stitching but being careful not to snip the threads.


An alternative to clipping the curves is to use pinking shears to trim the seam allowance down to ⅛˝. It’s much faster than clipping notches!
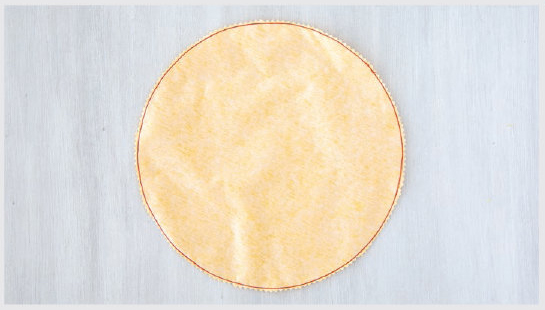
5. Cut a slit in the back of the interfacing only. Be careful not to catch the face fabric with the scissors.
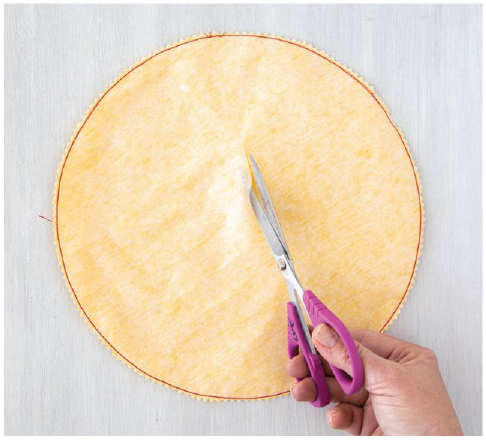
6. Turn the face circle right side out and use your fingers to start pushing out the edges. Use a pointed tool, such as Alex Anderson’s 4-in-1 Essential Sewing Tool (by C&T Publishing) or a chopstick, to smooth out the edge, carefully pressing against the fabric side of the seam to encourage it to curve slightly.
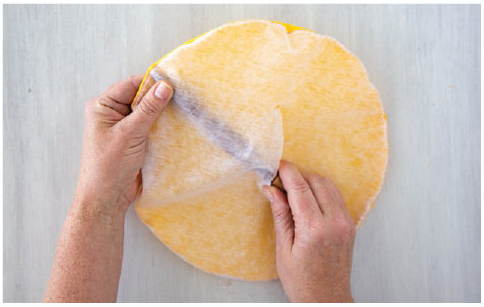
7. Use the tip of an iron to press around the smoothed edge.

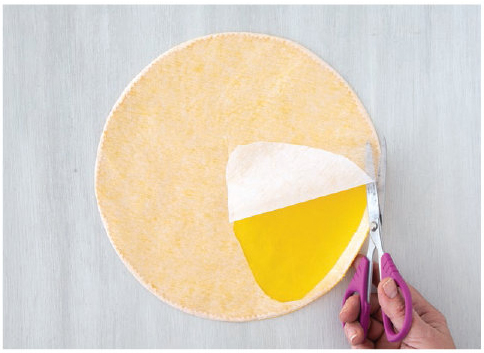
8. Once you’re happy with the circle, you have the option of trimming the interfacing down to ¼˝ to ½˝ (as shown in the photo below) or leaving the interfacing layer intact. It’s a good idea to leave it in if you plan to satin stitch the features or if the background color will show through the yellow face fabric.
9. Center the face onto the background square. To easily find the center, fold both the background and the circle in half each direction and press lightly. Layer the face and background both right side up and use the pressed marks to align the pieces. Pin or glue baste around the edges (see Glue).

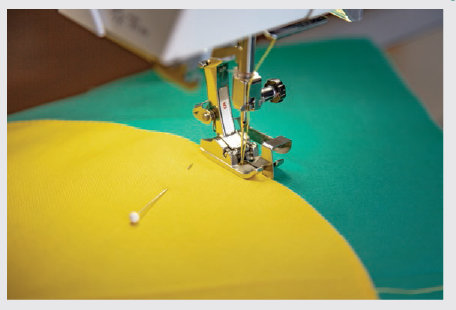
10. Stitch around the outside of the face. I used a blanket stitch and matching yellow thread (see Appliqué Stitching Basics).


To keep your stitches right next to the face, consider using a blind hem foot!
I love the way the guide down the center of the foot runs alongside the edge of the appliqué shape. I select the blanket stitch and then move the needle position 2 spots to the left. That puts the needle right into the little groove in the center of the foot. Then, I lengthen the stitch a little (to a 3 setting on a BERNINA) and widen the width just a little (to a 1.75 setting).
Now you’re ready to fuse the features!
FUSIBLE APPLIQUÉ
With all those little appliquéd features, I’m a bit too impatient to use turned-edge appliqué. These pieces are small, however, and I think they are the perfect candidates for fusible appliqué. Basically, fusible appliqué is using double-sided fusible web (see Fusible Web) to glue the features to the background. You can stitch down the edges of the shapes with your sewing machine after fusing, to ensure they stay stuck over time.
I used fusible appliqué for the entire hand and poo emojis. (I featured the hands on a bolster but not on my quilt. Had I been mixing hands in with the face emojis on the quilt, I would have used a turned-edge method for the backgrounds.)


While some fusible web is adhered to one piece of release paper, some paper-backed fusible web sandwiches the web between 2 pieces of a nonstick paper. Often one of those pieces of paper comes loose from the web easier than the other. Try peeling the paper from the web in a corner. If one side comes off easier, trace the design onto the other side. You will be taking off the nondrawn-on side first and its positioning is not important if it shifts or slips off the web altogether after you initially cut the shape.

FUSIBLE APPLIQUÉ—HOW-TO
1. Trace all parts of the appliqué design onto the paper side of the fusible web. Trace each piece of the design separately.
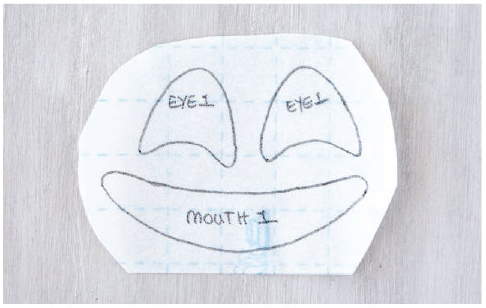
2. Cut around the appliqué shapes, leaving about ¼˝ extra around each piece.


If you are tracing all the features at one time, group pieces that will be out of the same fabric onto the same sheet of fusible web. Then, you can skip cutting apart the fusible pieces and fuse the entire sheet to the fabric at one time. I had multiple sheets for the brown and then grouped the other colors onto sheets and cut out the sets of each color as one large piece before fusing.
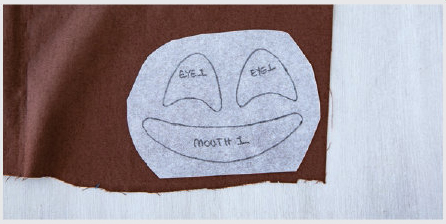
3. If the fusible web has 2 pieces of release paper, remove the one without the traced lines. Iron each fusible-web shape to the wrong side of the desired fabric, following the manufacturer’s instructions for fusing.
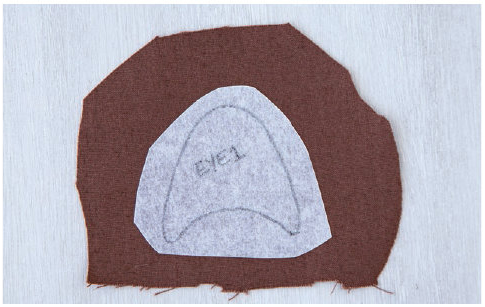
4. Cut on the traced lines.
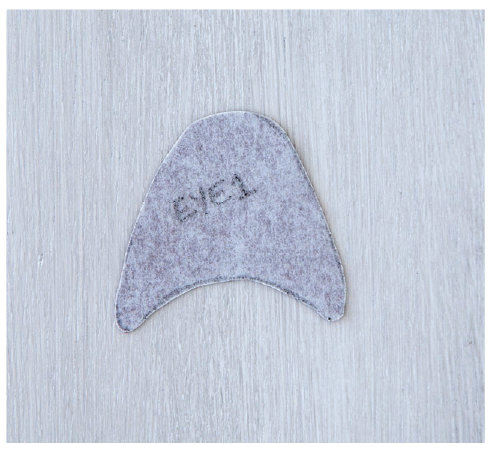
5. Peel off the paper backing. A thin layer of fusible web will remain on the wrong side of the fabric. This layer will adhere the appliqué pieces to the face.
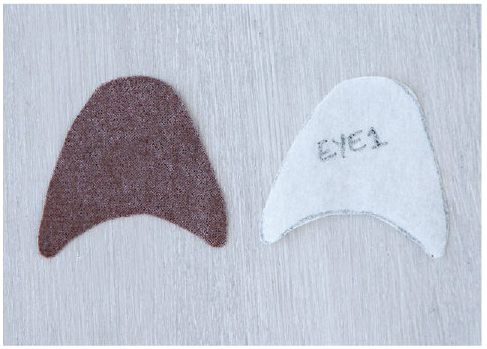
6. Repeat the process (Steps 1–5) with all the features for one emoji.
7. Position the pieces on the face fabric and play with them to perfect the overlaps and get the expression just right. Press with an iron to fuse them in place.
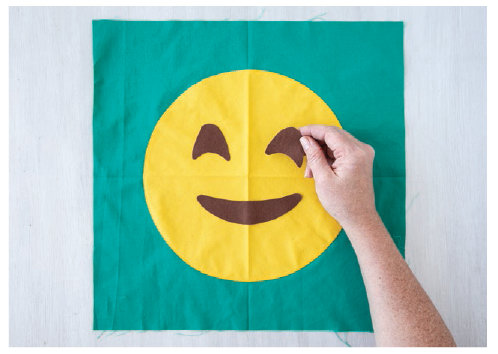
8. Machine stitch around the appliqué pieces, using a zigzag, satin, or blanket stitch.


When selecting a stitch to hold down the appliqué, try different options on a scrap before tackling the actual block. Practice. I had intended to use satin stitch but I struggled to be tidy enough. In the end, I chose to use a zigzag stitch and thread that matched the feature. For the zigzag, I used a slightly longer stitch length (just under a 2 on the BERNINA) and a narrower stitch (a 2 setting).
1. First create a sandwich similar to what you’ll have in the project. In this case fuse a scrap to a background piece and layer that on top of the sew-in or other interfacing and another background piece.
2. Select the desired thread and stitch and take some stitches. Check the width and length. Are they right both in covering the edges as you wish but also creating the right look? Once you get the settings right, write down what they were so you remember when you pick the project back up (or take a quick photo of the settings with your smartphone).
3. Once you get settings for the look of the stitches right, check the tension. Often when you are satin stitching the top thread can get pulled a little onto the back of the project. While balanced stitches are best, the top thread pulling to the back is preferable to the bobbin thread pulling to the front (aesthetically). If the top thread is pulling to the back, tighten the tension on the top thread. If the bobbin thread is showing on the front, loosen the top thread tension.
USING THE FEATURE PATTERNS
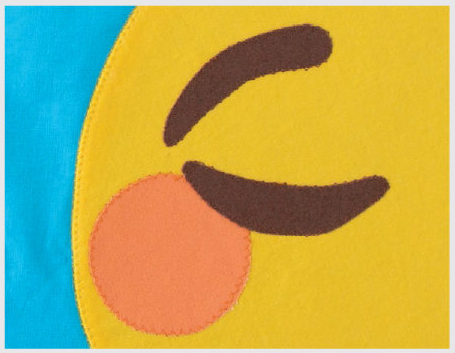
The emoji face features are provided to mix and match. Pick your favorite eyes, mouth, and embellishments (tears, hearts, hands, and so forth). These patterns are prepared for fusible appliqué and as such are included reversed from what you see in the finished face and do not include seam allowances.
If you are going to use a different appliqué method, you may want to reverse the image if it is not symmetrical. You’ll also need to add seam allowances for turned-edge methods.
The patterns of the features are all complete; they include all the elements. For example, an eye includes both the white and the iris, shown as they would appear in the finished eye. You need to trace the 2 pieces onto fusible web separately.
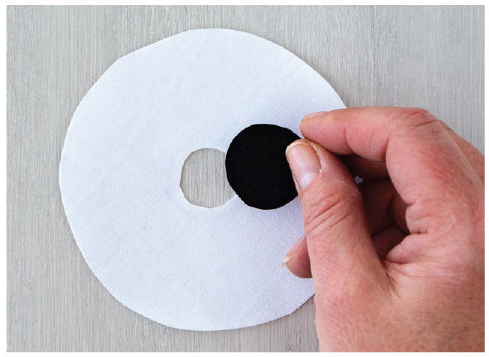
Whenever 2 pieces overlap, you can decide if you want to remove the extra material below the top piece or leave it in place. Two things to keep in mind: Too many layers can make the face stiff, and if you layer a lighter fabric over a darker, the darker might show through. For the faces in this book, I left all the layers intact.
If you are going to trim the fabric in the bottom layer, keep a narrow  ˝–⅛˝ seam allowance on the bottom fabric, so there is no gap between the 2 pieces. This is the same if you have 2 pieces that appear to butt together. Overlap the pieces by
  ˝–⅛˝ to prevent any potential gap between them. Note: When tracing the shapes, extend the underlapped edge beyond the drawn edge in the pattern.
The patterns in this book were created using a heavy outline to make tracing easier. If you have a hard time tracing them, photocopy them and trace from the photocopy. That way you can place the photocopied pattern on a light source (a window during daytime or the screen of a tablet computer) and trace.
USING THE HAND AND POO PATTERNS
Like the eye-with-iris and mouth-with-teeth features, the hand and poo emojis are made with 2 layers. The background layer (shown in brown on the hand examples) provides the outline and contour lines for the shape. The foreground pattern (shown primarily in yellow with a little splash of blue in the hand examples and medium brown for poo) is the main design.

Unlike the stacked feature patterns, the background and foreground hand and poo patterns are provided separately. The layered eyes and mouths are pretty simple and easy to trace. If stacked, the hands (and poo) patterns are bit harder to keep straight.
Before you trace the hand and poo patterns, you will need to enlarge them 120%. I was able to do this on my home printer onto 8½˝ × 11˝ paper and just fill in the bits that were cut off the edges of 1 or 2 patterns. You can also tile them using 2 sheets of letter paper or use a larger-format printer and ledger (11˝ × 17˝) paper.

APPLIQUÉ STITCHING BASICS
APPLIQUÉ STITCHES
There is no right or wrong stitch for machine appliqué. Zigzag stitching works great. Blanket stitching works wonderfully. Using a blind hem stitch is a good option. Satin stitching is very popular. You can use a decorative stitch around the edges or even a straight stitch right along the edge on the appliqué shape. Stitch selection all comes down to the look you want, both right after stitching and later after washing and using, and to your patience and stitching ability.

Some stitches can create a smoother, tidier finished look than others on fusible appliqué. For turned-edge appliqué, the edges of the shape will not fray because the cut edge is not on the surface. With fusible appliqué, the edges of the cut fabric are on the surface. Fusible web is great, but the ends of the threads in the fabric can pull loose over time and washing. The wider apart the stitching that tacks down the edge, the more likely it is that you will see a little roughness coming through. Satin stitch covers the cut edge of the fabric entirely. Other stitches vary based on how far apart you set the stitch length.
Appliquéing shapes is a bit of an art. You want to practice keeping the stitches a consistent distance from the edge of the appliqué. Unless you are using a straight stitch along the edge on top of the appliqué, curves and corners will either fan out the stitches or cause overlaps. You also want to practice turning different shapes, from loose curves to tighter curves to inside and outside corners.
Some stitches are easier than others to use. I find that a standard zigzag stitch—medium length and medium width—is a very forgiving stitch. I can get a little bit off and I can turn the corners a little sloppily and it’s fine. And it’s a pretty quick stitch to do. I can also use a zigzag stitch with a blind hem foot (moving the stitch position to the left so that the zig or zag that is to the right lands in the blind hem foot’s notch) to help align the stitches with the edge, keeping it as close as possible to the appliqué shape while still landing in the background.
The key for me with a lot of this appliqué is that I want to get it done and I want it to look fine when I’m finished. I don’t need it to look perfect. (If you want to enter your quilt into a show or competition, then that’s a different story.) When you look at one feature on one block, you may notice imperfections. But when you look at the whole finished project, the imperfections are very hard to see.
Sometimes I want the look of a satin stitch. A satin stitch is a zigzag with a shortened the stitch length. Ideally, you shorten the stitch until the zigzags are very close together.
STITCHING TIPS
Here are some hints for working with any of the stitches (except straight stitch):
Pivoting is your friend. When stitching around curves, frequent pivots keep the stitches tidy. You need to pivot frequently enough to keep the stitches pointing toward the center of the work (perpendicular to the edge). To pivot, stop stitching, make sure the needle is in the down position, and rotate the fabric a hair. Start stitching again. On deep curves, you may want to pivot every stitch or two.
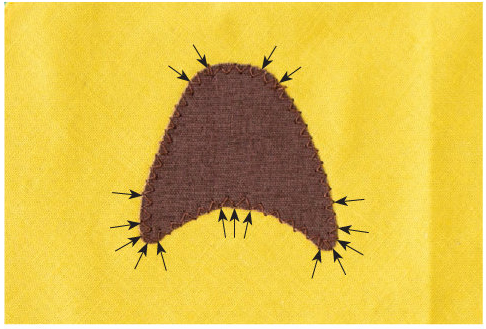
Pivot at arrows
Be conscious of where the needle stops when pivoting and turning corners. You want to avoid creating gaps in the stitching. Creating overlaps is much less visible. If you are pivoting on an inside curve, stop with the needle in the appliqué fabric.
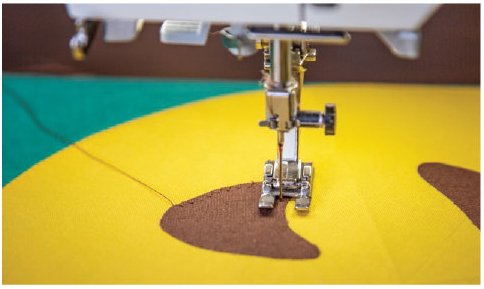
If you are pivoting on an outside curve, stop with the needle in the background fabric.

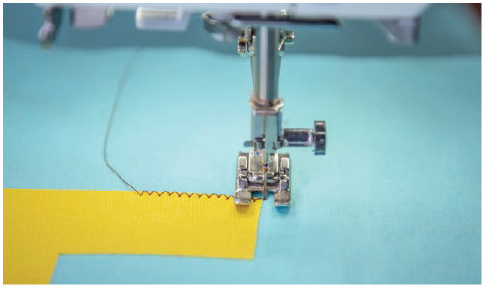
Pivoting is important in turning corners as well. To turn an outside corner, stitch a little past the end of the shape, to where you want the next line of stitching to line up on the background. Stop with the needle on the background. Make sure the needle is in the down position and pivot the project to line up the next edge of the appliqué. This forms a nice little square overlap on the outside.
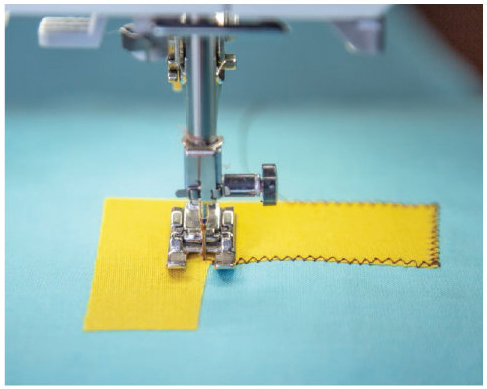
To turn an inside corner, stitch a little past the inside edge of the shape, and stop with the fabric on the inside edge of the stitch. Make sure the needle is in the down position and pivot the project to line up the next edge of the appliqué.


If you are new to satin stitching, here’s a little trick that will help the stitches look even and solid. Select settings that will create a stitch that is a little narrower and a little more spaced out than your desired finished stitch. Stitch around the object. When you get back to the starting point, widen the stitches a little. Then stitch around the object again, centering the first line of stitches under the new ones. The more spaced out stitches will help you more smoothly handle the curves. Covering the narrower line of stitches with wider ones allows you to make small corrections if the original line wasn’t as smooth as you like.