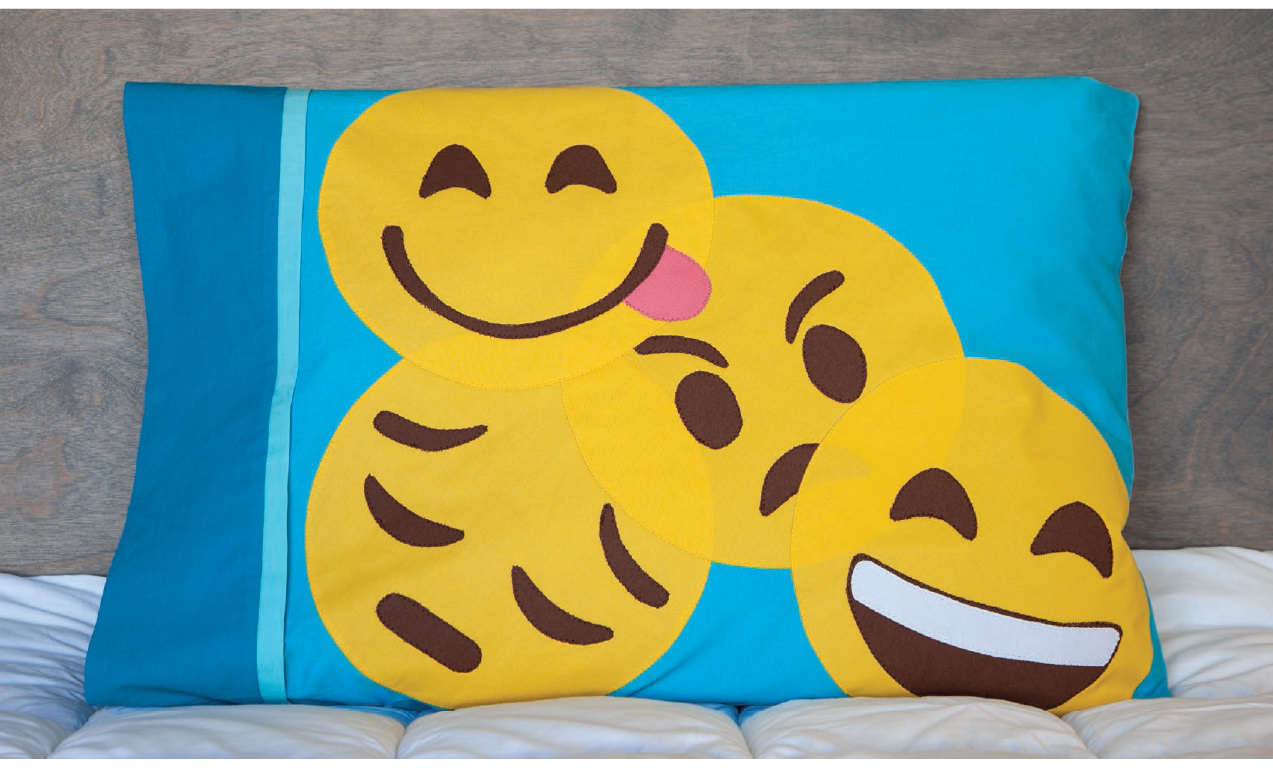
PROJECT 2
FACE-TO-FACE PILLOWCASE
Finished pillowcase: 27⅛˝ × 19⅞˝

I used four emoji faces on my pillowcase and chose to overlap them in a fun jumble. You can use as few or as many emoji faces as you want, and layer them like I did or appliqué just a few side by side!
Because pillowcases can see a lot of wear and tear (my daughter drags her pillow to every sleepover and campsite) and you will be removing it often to launder, this pillowcase includes tidy—but easy—finishing techniques to keep the seams strong and looking good! Because you sew the pillowcase in a roll, you tuck the seams of the cuff inside itself without having to topstitch. You also use simple French seams for the sides and bottom to encapsulate the raw edges.
Note: French Seams
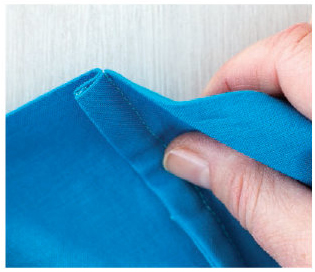
French seams are a higher-end garment staple. They are used by sewists to finish the seams inside a garment as an alternative to overcast or pinked seam allowances to prevent raveling.
Usually when you are sewing a seam together you layer the fabrics right sides together. To create a French seam, you layer the fabric pieces wrong sides together first and sew the seam. Then, you fold the fabrics back on themselves, so they are right sides together. You stitch the seam again, encasing the raw edge of the original seam. Et voilà!
MATERIALS
Solid 1: ¾ yard for background
Solid 2: ⅓ yard for cuff
Solid 3: ⅛ yard for trim
Yellow: ⅔ yard for up to 6 faces
Scraps: For features
Interfacing: 1⅛ yards (if you are using it to turn under the faces)
Fusible web: 180 square inches (if you are using it to fuse the features)—½ yard from a 12˝ roll
CUTTING
Solid 1: Cut 1 rectangle 41˝ × 24˝.
Solid 2: Cut 1 rectangle 41˝ × 9˝.
Solid 3: Cut 1 strip 41˝ × 2˝.
CONSTRUCTION
Seam allowances vary. Follow the notations in the instructions.
PREPARING THE PILLOWCASE
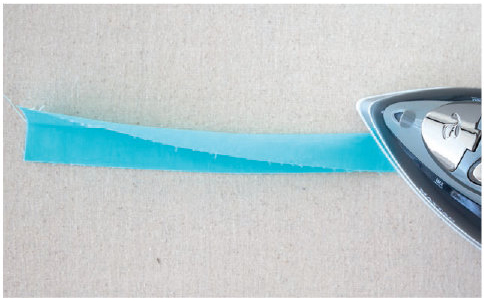
1. Fold the Solid 3 trim strip in half lengthwise, wrong sides together, and press.
2. Place the Solid 2 cuff rectangle right side up. Layer the folded trim piece on top of the cuff, aligning the raw edges of the trim fabric with one raw edge of the cuff. Pin in place.
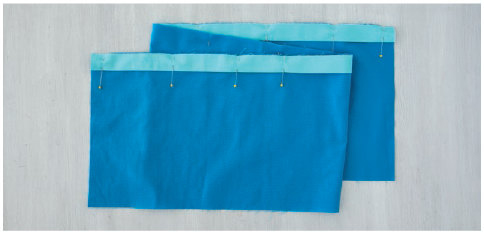


Baste: Temporarily hold together fabric by stitching by hand or machine using a long stitch length.
3. Place the Solid 1 background rectangle right side down on top of the cuff and trim, again aligning the raw edges. This creates a sandwich with the trim between the cuff and main fabrics. Pin and baste together, using a ¼˝ seam allowance.
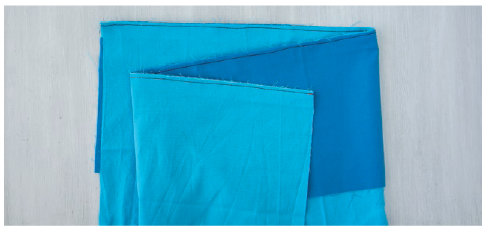
4. Beginning at the bottom of the background fabric, roll the fabric up until it is a few inches below the top basted edge.
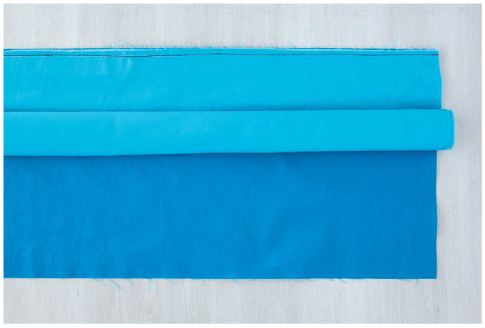
5. Fold the bottom edge of the cuff fabric up, wrapping it over the rolled background fabric, and pin it to the basted edge. Sew along the basted edge, using a ⅜˝ seam.

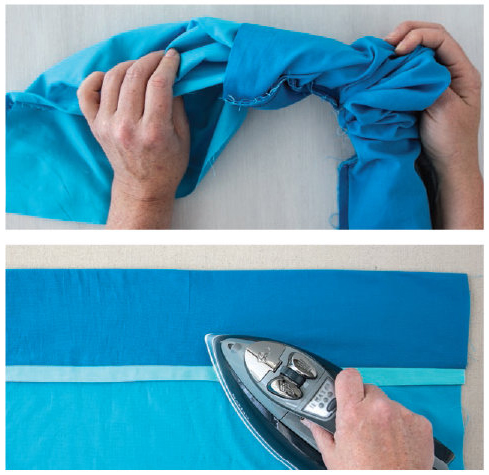
6. Carefully pull the fabric roll out one end of the cuff and press the cuff and trim, with the trim pressed toward the main fabric. Set aside.
APPLIQUÉING THE EMOJIS
1. Prepare the yellow emoji faces (see Turned-Edge Appliqué Using Interfacing, Steps 1–8).
2. Prepare the fusible emoji features (see Fusible Appliqué).
3. Arrange and fuse the features on the faces. Stitch the features down (see Fusible Appliqué).

4. Fold the prepared pillowcase in half, wrong sides together, aligning the cuffed edges, and press to mark the middle edge, which will demarcate the pillowcase front and back.
5. Arrange the emoji faces on the pillowcase, avoiding the outside ⅝˝ for seam allowances.
6. Appliqué the faces, starting with the lowest (most covered) face (see Turned-Edge Appliqué Using Interfacing, Step 10).
FINISHING THE PILLOWCASE
1. Fold the pillowcase in half, wrong sides together, and pin, taking special care to line up the folded edges of the cuff and the trim. Sew a ¼˝ seam along the side and bottom. Clip the bottom corners at an angle close to (but not cutting into) the stitching.
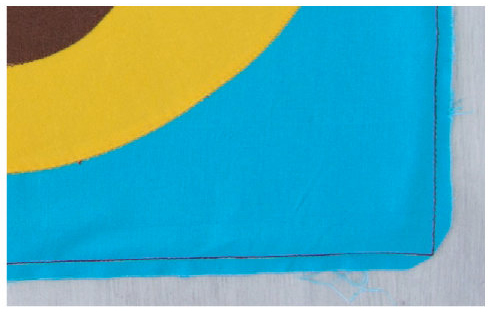
2. Turn the pillowcase wrong side out, so the right sides are together. Press the seams.
3. Sew the sides and bottom again with a ⅜˝ seam.

4. Turn the pillowcase right side out, using a turning tool to push out the corners. Press.