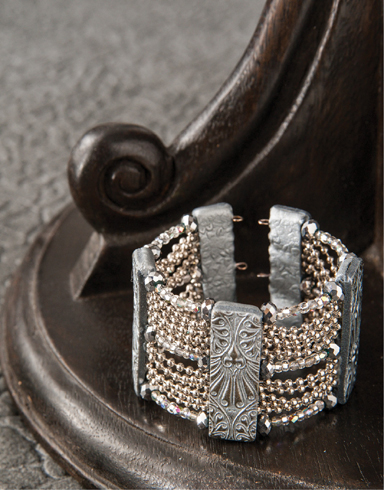

Simple ball chain, when repeated, offers a fascinating pattern. Take this utilitarian material and turn it into a stunning fashion statement. See the materials around you in a new light, as you learn a surprisingly easy way to incorporate metals with polymer clay. You can make a fitted cuff bracelet and flirty, glamorous shoulder-duster earrings with these techniques.
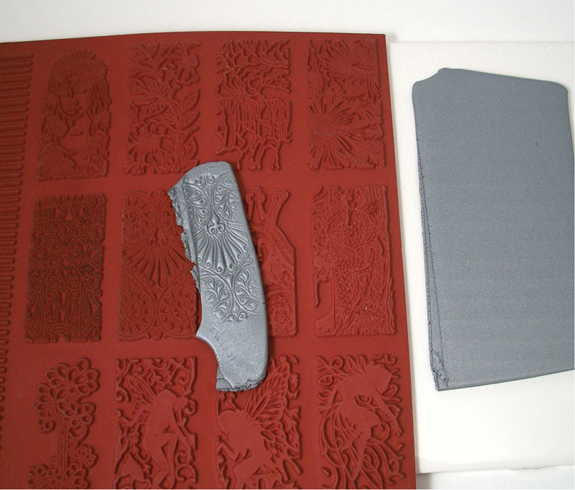
STEP 1 Roll the silver clay into a medium-thin sheet. Cut into 5 strips about the size of a domino or 1" × 2" (25mm × 50mm). Texture one side of each strip by placing the stamp on the clay and pressing with your fingers.
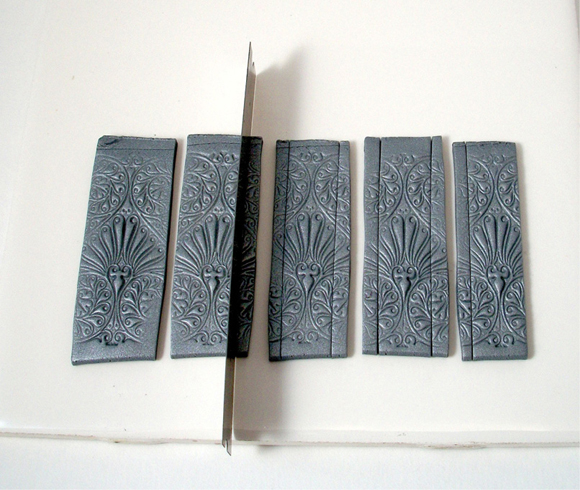
STEP 2 Lay the strips face up on a tile and trim the edges. Choose an area of the design to be in the same place on each strip. Cut the strips to a little less than 1⁄2" (13mm) wide, with the design centered on each strip.
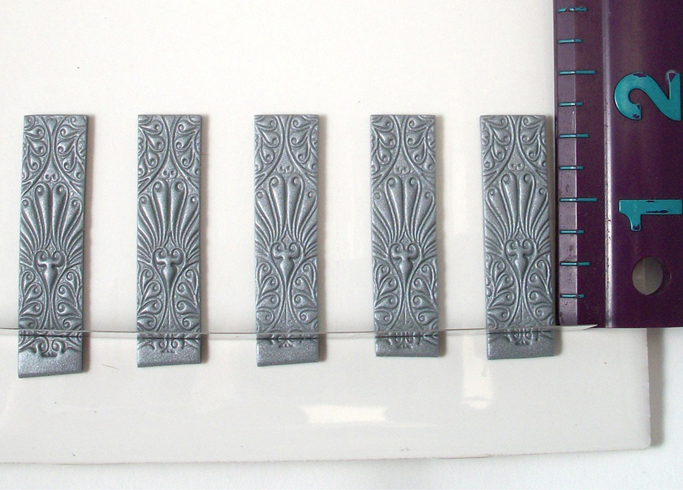
STEP 3 Measure the strips and cut them all the same height, about 13⁄4"(4cm). Again, keep your center design aligned as you make these cuts.
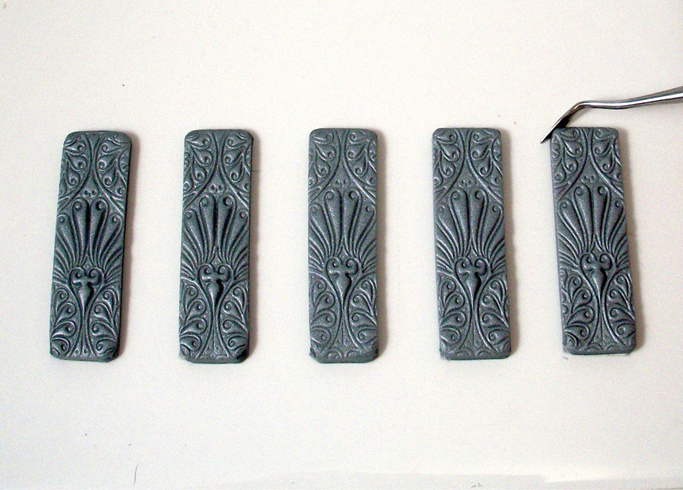
STEP 4 Round the edges of each piece so they are not sharp. You can use your fingers or a tool.
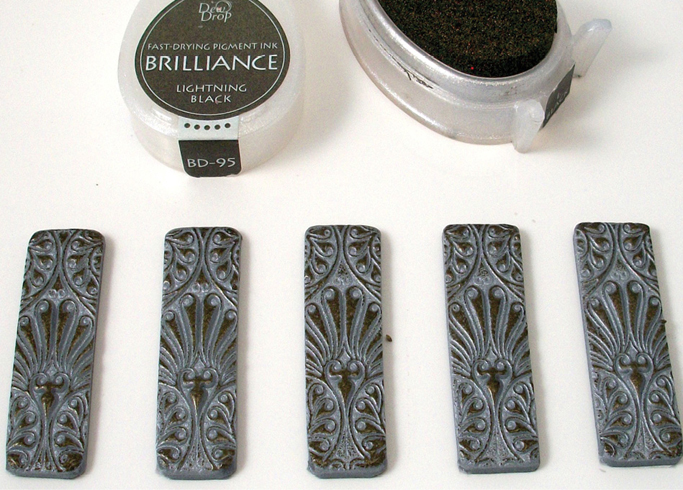
STEP 5 Apply ink to the highlights to bring out the patterns, then bake the tile for 10 minutes to set the design. Cool.
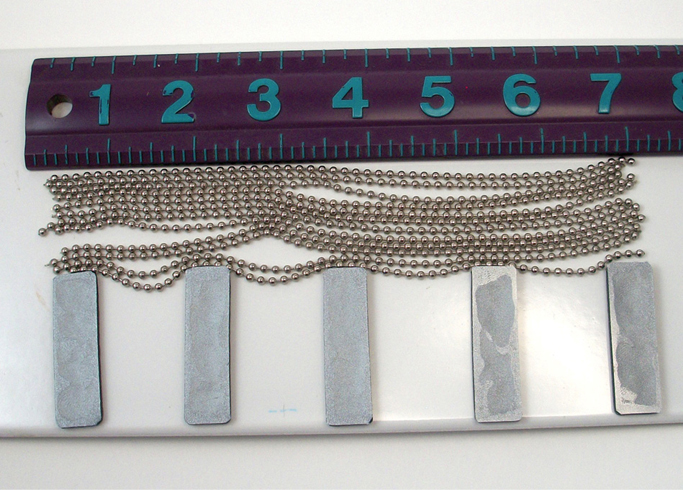
STEP 6 Measure 12 pieces of ball chain to the length you want the final bracelet to be. This is a cuff bracelet, which is a bit forgiving. An average wrist is 7" (18cm), so that’s the length of our chain. If your wrist is significantly smaller or larger, adjust the length of chain accordingly.
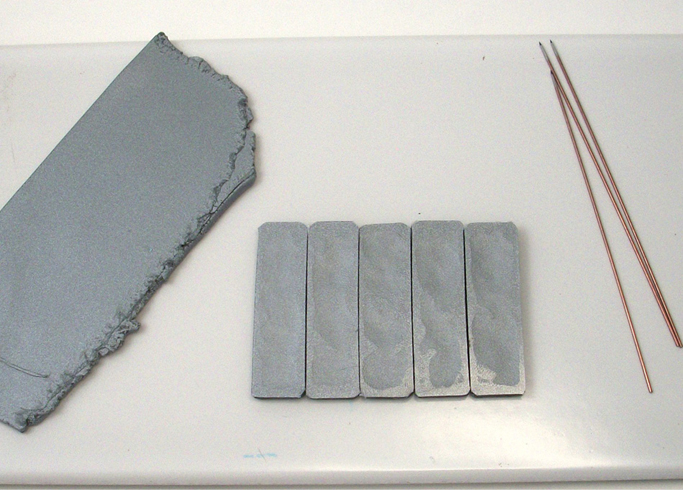
STEP 7 Lay the tile pieces wrong side up and next to each other. Roll a medium thickness sheet of clay and gather your pins or straight wires.
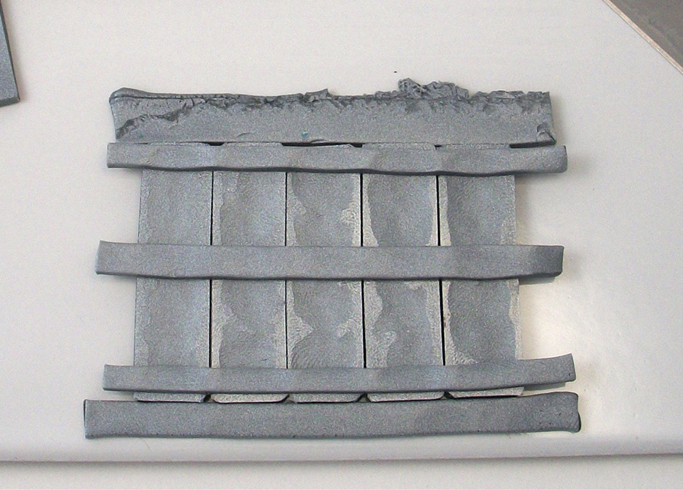
STEP 8 Cut 2 strips from the unbaked clay into support strips and place them at the top and bottom of the tiles to hold them in place. Cut 3 strips of the unbaked clay 1⁄4" (6mm) wide. Place these strips across the top, middle and bottom of the tiles.
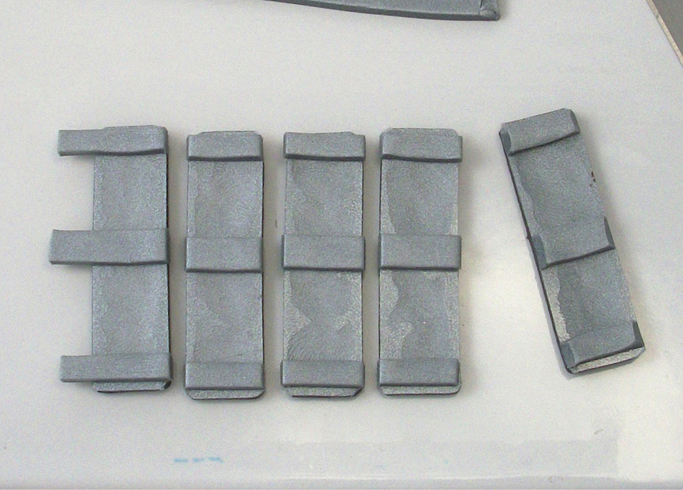
STEP 9 Take away the 2 support strips, and cut carefully between the tiles to separate them. As you cut, bevel the edges by slanting your blade.
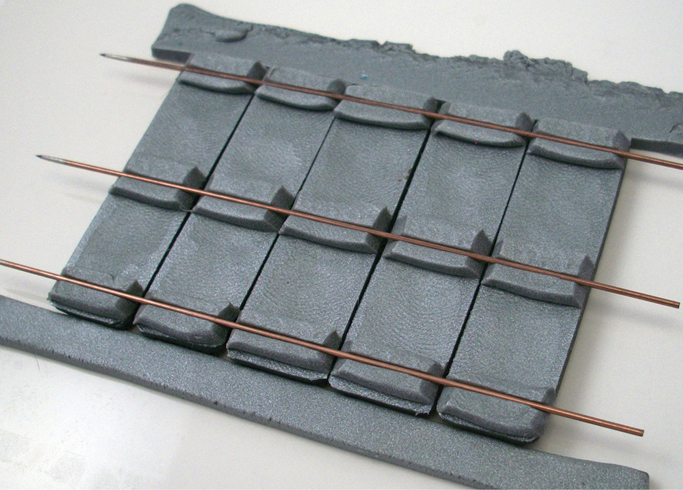
STEP 10 Line up the tiles and support the tiles again with the 2 support strips. Lay the pins across the 3 strips of unbaked clay to create a channel for the memory wire to go through later. Push the pins in deeply, but do not allow any clay to cover them. Remove the 2 support strips, and with the pins still in place, bake for 15 minutes, and cool.
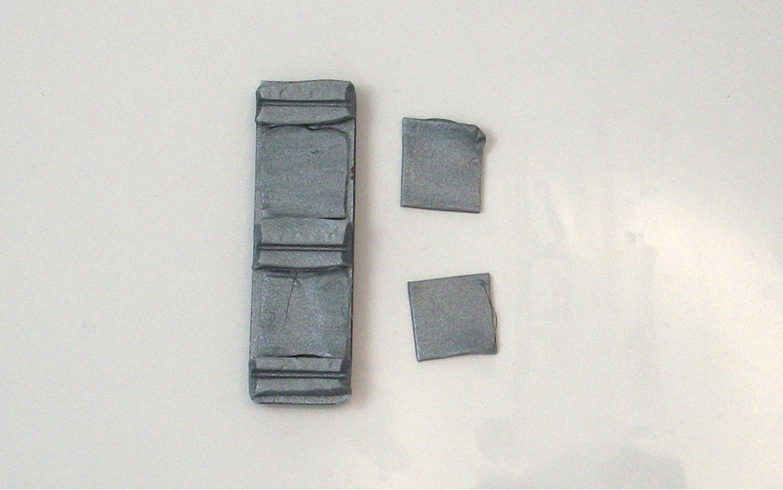
STEP 11 Roll a very thin strip of silver clay and cut 10 little pieces that will fit on the tile between the clay strips. Gently lay the pieces in place.
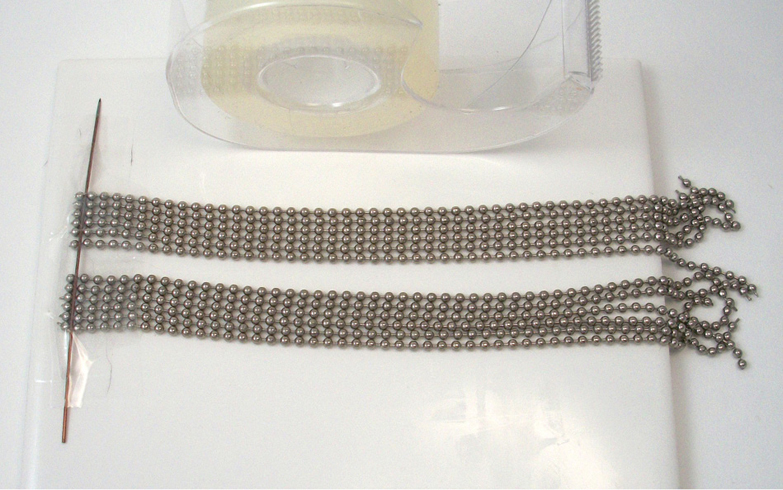
STEP 12 Lay out the chain on a tile in 2 groups of 6 pieces. It may be easier to use a pin or wire to line up the edges and a piece of clear tape to hold them down, as shown.
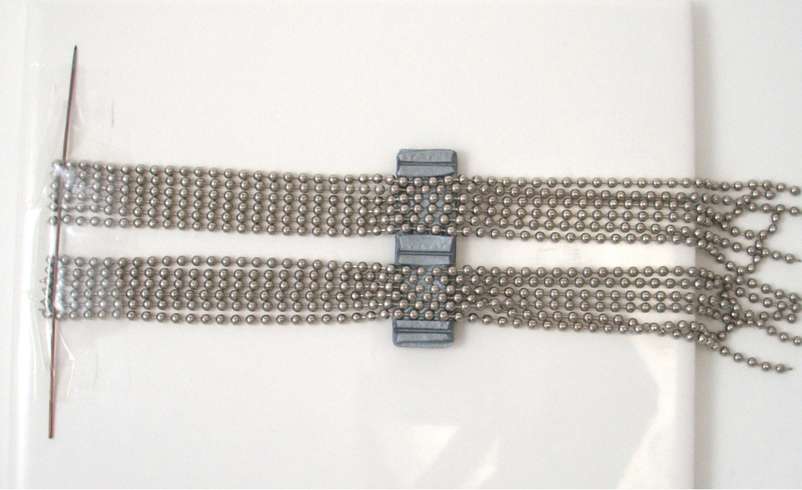
STEP 13 Find the center of the chains and slide the middle bar under it. Use your fingers to lay the chain between the channels and embed it in the uncured clay strips between the channels.
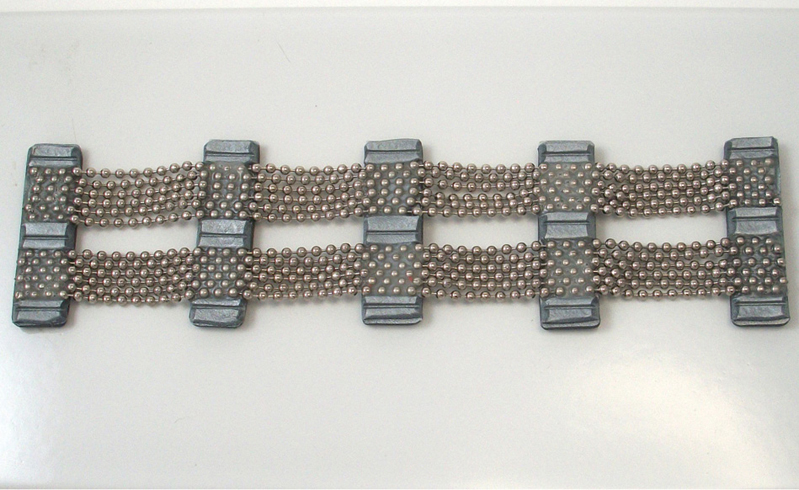
STEP 14 Remove the tape to free the chain from the tile. Spread out the spacer bars evenly, making sure there’s a bar at each end of the chains. Embed the chain on the other 4 tiles in the same way.
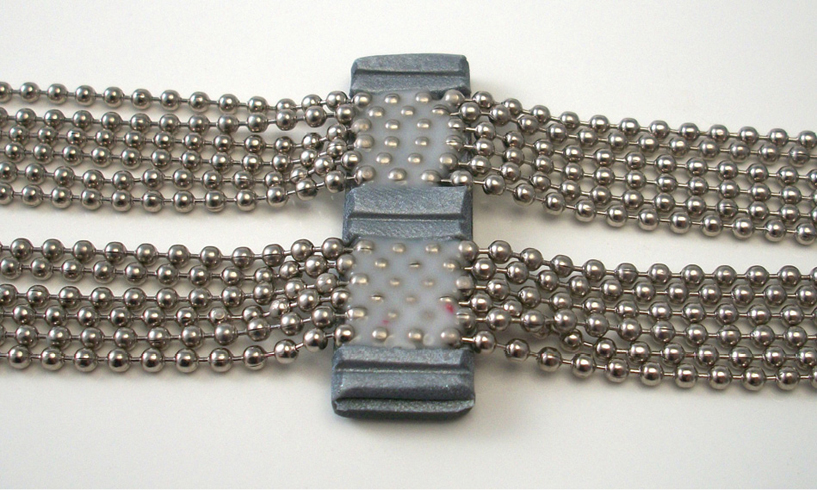
STEP 15 Lay a small puddle of liquid clay over the embedded chains and bake the bracelet for 15 minutes to set the chains. Cool.
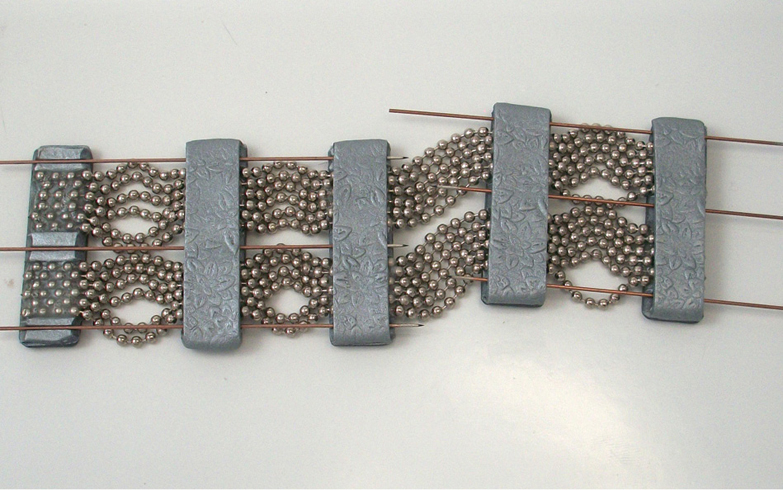
STEP 16 Roll another piece of thin clay. Texture and cut strips to fit over the back of the spacer bars. Before attaching, lay the pins back into the channels to preserve the space for the memory wires. Be very gentle as you place the clay strips so you don’t disturb the texture on the unbaked clay. Use your fingers and tools to smooth the edges. Bake the bracelet 1 final time, with the pins in place, for 30 minutes.
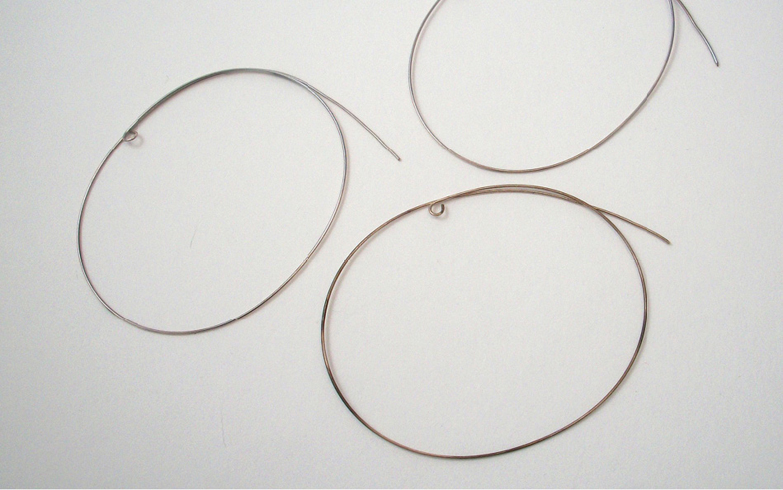
STEP 17 Cut 3 loops of memory wire. Each loop should have 1 full circle plus about 1⁄3 of another circle, approximately 8" (20cm) total, depending on the final length you have chosen for your bracelet. Straighten 1⁄2" (13mm) of each with flat pliers to make it easier to thread through the spacer bars. Add a small loop at one end of each wire with round-nose pliers.
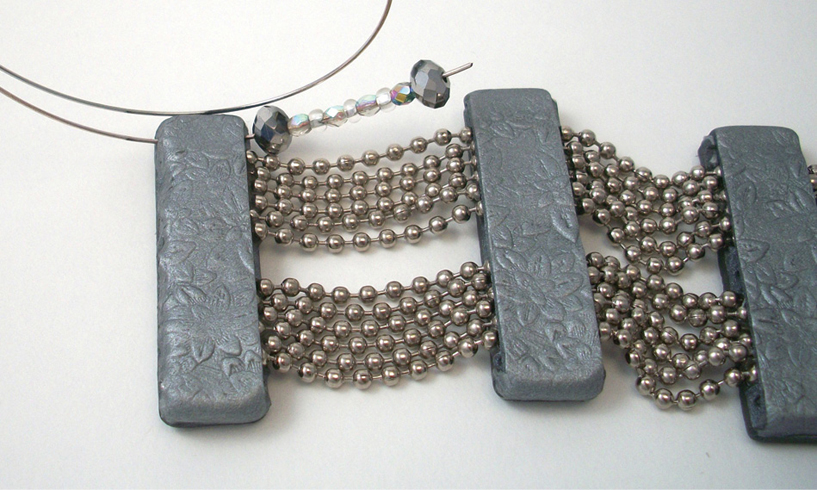
STEP 18 Thread 1 piece of wire through the top hole of the first tile. Thread just enough through that you can thread beads onto it. Thread 1 rondelle, 7 beads alternating between the size 8 beads and the Czech beads, and 1 more rondelle onto the wire; the beads should just fill the space between the 2 tiles.
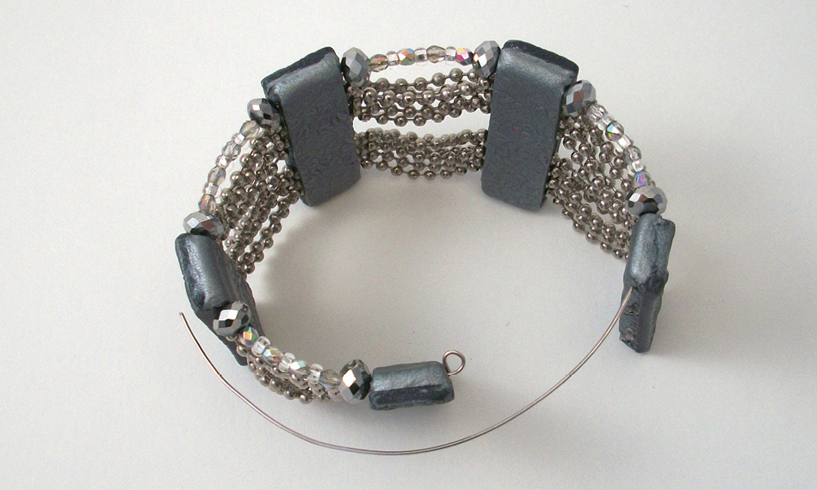
STEP 19 Continue to thread the wire through the top row of tiles, adding beads between the tiles. It may be difficult to thread some of the wires through. Have patience and go slowly. It may help to wrap the bracelet around a soda can to support the tiles as you work. When the wire is through all 5 tiles, cut off the excess wire and finish with a small loop.
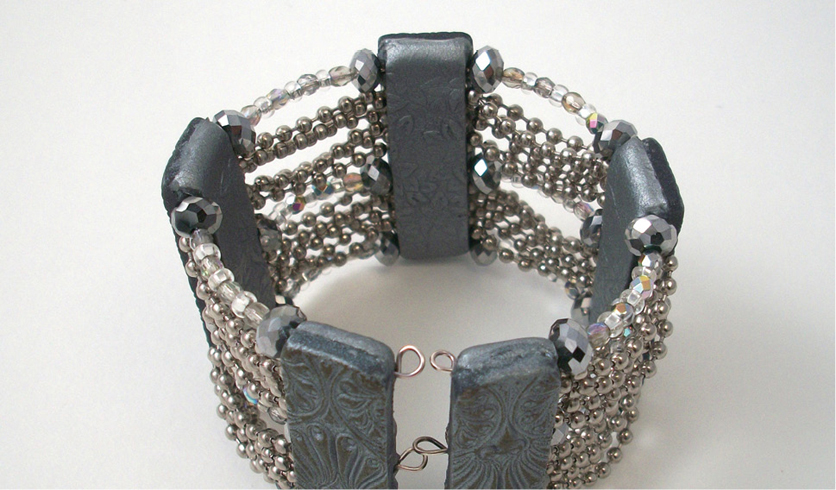
STEP 20 Repeat steps 18 and 19 to thread the remaining 2 pieces of memory wire through the tiles, adding beads as you go. At the end of each wire, make a tight little loop to secure the wire.
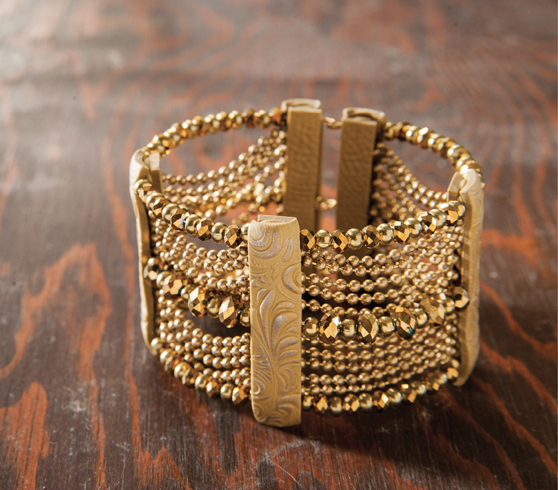
When in doubt, add more sparkle. For this bracelet, we created a golden variation and used more crystals.
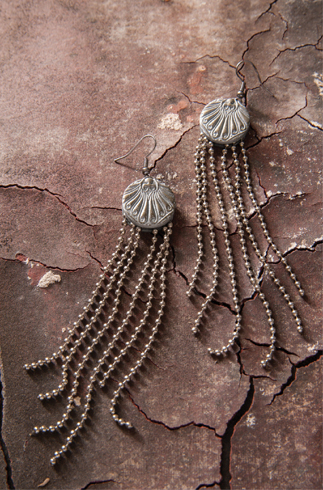
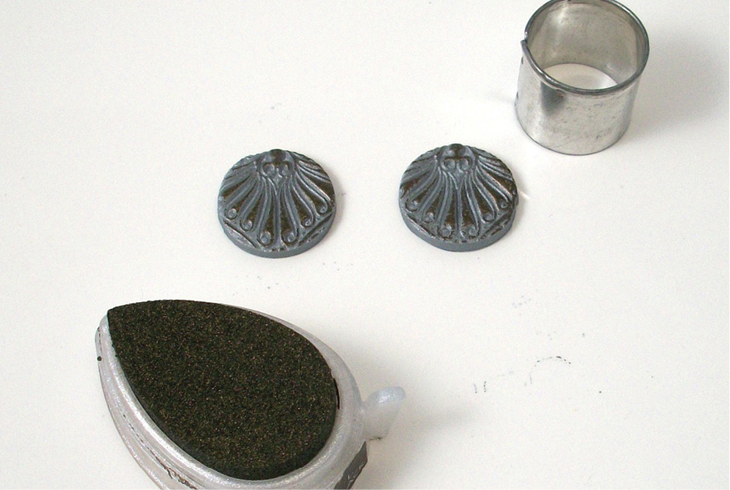
STEP 1 To make matching earrings, roll out a small strip of clay. Texture with the same rubber stamp used on the bracelet. Cut out 2 circles and highlight the texture with ink. Bake for 10 minutes to set.
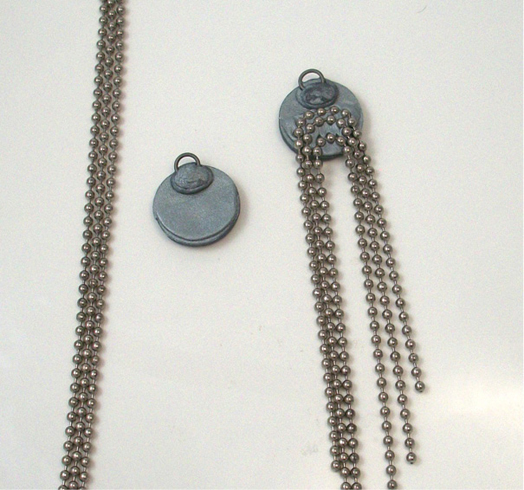
STEP 2 Place a small piece of clay on the top back of each circle. Embed a jump ring into each piece of clay then secure each ring with another smaller piece of clay.
Cut 3 pieces of chain 6" (15cm) long for each earring.
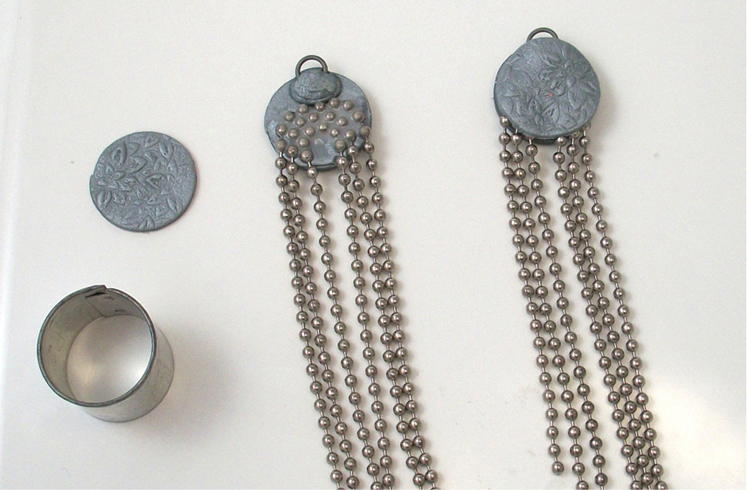
STEP 3 Roll a very thin sheet of clay. Bend the 3 chains approximately in half and embed them in the uncured clay, staggering the lengths. Lay a small puddle of liquid clay over the chains and bake the pieces for 10 minutes.
Texture and cut out and ink 2 more circles of clay for the backs of the earrings. Bake them for 30 minutes. When cool, use your chain-nose pliers to add ear wires.