
CHAPTER 7
Taste and Smell
Desensitization to the Sensation of Food
Playing with food is a good way to help desensitize a child to the touch, smell, sight and taste of different foods. Food play is not done at mealtime, when the goal is to ingest the food, but at another time of the day when the intention is to gain tolerance to foods. As an exercise for a very picky eater, it should be done frequently. Here is an example of using play with a child who is a picky eater.
Place bits of food in front of the child and let him play with them. Show him how to make a house out of cubes of cheese and draw stick figures with spaghetti or pieces of rice. Use ketchup and ranch dressing as finger paints. In this way, the child slowly gets used to the color, smell, texture and sizes of a variety of foods. He can feel the food’s crunchiness or mushiness. He can squeeze it, press it or pull it apart. When the child has gotten used to handling food, he is ready for any number of interesting activities. He could help his parents prepare meals by washing vegetables, or opening cans or scooping food out of the jar into a bowl. He can carry food from the stove to the table. All of this continues the desensitization process. We still have not yet asked him to eat the food, but we’ll do so slowly with just a drop or just a lick. We might add a small amount of the new food to foods he already likes. With time, we continue to gently increase his exposure to a variety of new foods.
Food desensitization can be a lengthy process. In some situations, we can speed up the process by increasing the number of exposures in a day to new foods.
Consider the challenge of desensitizing a child to the smell of eggs. You could put some cooked eggs into a jar and reward the child when she opens the lid and takes a quick sniff. You can make a game of this in which she tries to keep the jar open for longer periods of time while keeping a straight face. Eventually she will become accustomed to the smell of the eggs.
Who is doing this desensitization? It could be a parent, clinician, teacher or therapist at school. If you are doing this in the clinic or at school, try to involve the parent in the intervention so that it more readily transfers to home. Transitioning feeding gains to the home setting is the most difficult step of the desensitization process.
In many households, parents try to limit exposure to sugars, food coloring, and crunchy snacks with salt and fat. While this is an admirable goal, we sometimes break the rules (all the rules!) when working with the very picky eater. We can find a “way in” to the picky eater’s difficulties by making food sweeter, saltier, or more colorful. But once the child is eating these new foods, we will need to slowly decrease the level of the tempters (salt, sugar, fat, coloring) we have deployed. Meanwhile, it is a good idea to avoid artificial ingredients. Two-to-three percent of children become hyperactive when given food coloring (especially the reds and yellows) and some food additives, notably sodium benzoate found in sodas.
Safety Considerations: Food sensitivities and allergies are common in children with autism and not uncommon in children with other neurodevelopmental disorders such as ADHD and sensory processing disorders. Always ask parents about known or suspected food issues. If a child has never eaten a particular food that is a known allergen (such as soy or tree nuts), proceed slowly and keep an eye out for rashes, behaviors and bowel changes.
These activities from other chapters also have taste or smell input:
Touch activity, Ch. 6
#6, Scented dough
#7, Cook’s helper
#8, Birds’ nests
Vision, Ch. 9
#13, Collage with dried flowers and leaves
Food Activity 1
Gelatin Shapes
Make a sheet of gelatin and then cut it into play shapes.
Materials: One packet of gelatin; water or juice; bowl; cookie cutters or knife; spatula; Optional: bits of fruit for decoration. Unflavored, uncolored gelatin is available in grocery stores. Use grape, orange or apple juice to flavor it.
1. Heat ¾ cup of water and bring to a boil.
2. In a bowl, sprinkle the gelatin powder on top of the cold water or juice. Let it sit for one minute.
3. Add the hot water or juice and stir until it is completely dissolved.
4. Pour into a baking dish and refrigerate until it is firm to the touch.
Have the child use cookie cutters or a butter knife to cut the gelatin into shapes. Remove the shapes with a spatula. Create pictures, stack the blocks, or decorate them with bits of fruit.
Food Activity 2
Dolphins and Starfish for Breakfast
This is a novel way to increase a child’s interest in eating breakfast. For the very picky eater, introduce these foods during a play session where the goal is to explore rather than eat.
Materials: Regular or gluten-free, dairy-free bread; egg; apple. For decoration: peanut butter, nut butter or apple butter; jam; berries. Fish shaped cookie cutters or a knife and the fish patterns in Appendix of this book (trace the shapes onto waxed paper).
1. Dolphin scrambled egg:
a. Scramble an egg in a bowl and gently cook it in a pan. Turn it over when it is no longer runny. Cook gently on the other side and remove before it is brown.
b. Use cookie cutters to cut shapes of the egg, or use a knife and the pattern in this book to cut two dolphin shapes.
2. Fish toast:
a. Toast a slice of bread. Cut fish shapes in the toast. Decorate it with peanut butter or apple butter, jam and berries.
3. Sand dollar apple
a. Peel an apple, then cut horizontal slices. Use the star shape center of the apple as your guide to cutting out a star (the core) from the slice.
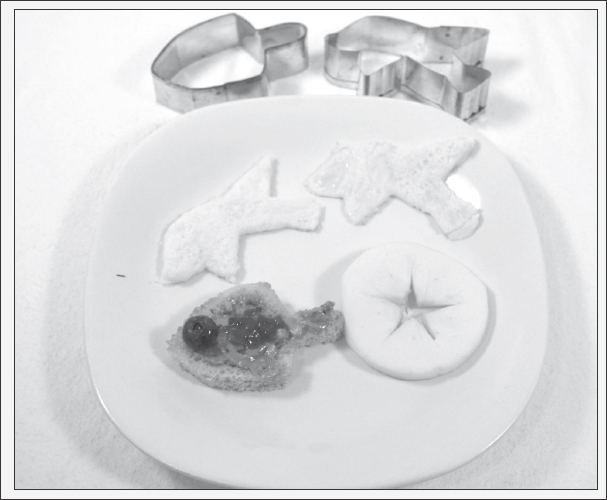
Dolphin eggs, fish toast with a blueberry eye and a starfish apple. Here is food that can be played with before it goes “down the hatch!”
Food Activity 3
Food Drawings and Paintings
Children can use all kinds of foods to make pictures during a play session. Here is a follow-up activity to the “food man” drawing in environmental enrichment exercise one. In this activity, the goal is exploration of foods. Once the child is comfortable with a given color, texture and smell, you might suggest that she put a dab on her tongue. Have a preferred food nearby to taste afterward as both a palate cleanser and a reward.
• Use frozen, canned or fresh vegetables to draw pictures of flowers, houses, robots and so on.
• Use catsup, mustard and ranch and French dressings for finger paints. Mashed blueberries, carrots, peas or broccoli can provide additional colors. Add colorful juice (carrot, grape or cherry) to yogurt or salad dressing to make pastel colors.
• Cooked spaghetti can be used to make the lines of objects like animals and houses.
• Look through your cupboards for soy sauce, molasses, jams, honey, tomato paste and other food items than can be useful during playtime.

Spaghetti outlines the house, and forms the door and window. Corn is used for siding; the roof is corn chips; the chimney is catsup; the grass is peas and broccoli is used for the tree. Blueberries mashed into yogurt were used to paint clouds.
Scent Immersion
Scent is craved by some children and found to be invasive to others. The treatment of scent immersion in this chapter utilizes a small amount of scent and places access to the scent under the child’s control. For additional information see “Using scents” in chapter 3. Also, follow these cautions:
• When using new scents or exposing the child to fragrant flowers, keep an eye out for signs of allergic reaction such as sneezing, rashes, stuffy nose, or scratchy throat.
• When using scents with children, stick to kitchen herbs and spices and known flowers. Herbs typically used in adult aromatherapy, such as lavender and eucalyptus, are not necessarily suitable for children.
• Do not sniff loose spices. They can irritate nasal passages.
Scent Activity 1
Make Scented Flowers
Here is a delightful way to provide a child with scent. The centers of the flowers are made of a natural fabric such as cotton or wool that will hold the scent of essential oil for a day or two. Add additional scent when needed.
Materials: Felt squares in different colors; scraps of natural fabric (cotton, linen, silk, wool hemp or bamboo); stapler; school glue; needle and thread or epoxy; several different bottles of fruit or flower scented essential oil; flower petal and center patterns (found in the Appendix).
1. Cut out six petals and two centers (circles) of felt for each flower.
2. Cut out one center (circle) of cotton. Trim it so that it is a little smaller than the felt circles. Set it aside.
3. Arrange petals around one of the centers and staple them. The staple prongs should be on the back (petal) side.
4. Flatten one end of a straw and staple it to the back side. The prong end is on the petal side.
5. Glue together the remaining felt center and the cotton center with school glue, and then glue that to the backside of the flower.
6. To make the flower secure, put a stitch or two through all the centers. Or have an adult put small dabs of permanent glue on the edges of the centers. Leave the middle of the center free of permanent glue—this is where the scent goes.
7. Add a drop of essential oil to the center. It will scent the cotton for a day or two. Safety hazard: be aware of allergies when choosing the essential oil scents.

Left flower petals are being stapled to center. Bottom: Straw has been stapled to the back side and the flower is ready for cotton and finish felt centers. Top right flower is complete.
Scent Activity 2
Make Medallion Necklace
1. Materials: Small pieces of felt; small pieces of cotton, linen, wool or silk; leather or cotton or a novelty band for a “necklace;” hole punch, glue, scissors, essential oil.
Medallion
a. Cut two identical shapes from felt. Optionally, use white felt and decorate it with ink, marker or paint.
b. Cut a piece of natural fabric (cotton, linen, wool) smaller than the first shape.
c. Arrange the pieces in order: felt, cotton, felt. Use a hole-punch or scissors to make a small hole through all three pieces. If they are too thick, mark each and punch them one at a time.
d. Glue the felt shapes together at the edges, avoiding the area with the cotton fabric. The scent will go there.
Band
a. Purchase a fashionable band, ribbon, or cord. Cut it to size.
b. Optionally, make a cord chain (see Touch activity 13). Leave long strings at each end for ties.
2. Put the band or cord through the hole in the medallion and fasten the ends.
3. Each day, place a drop of essential oil at the center of the medallion.
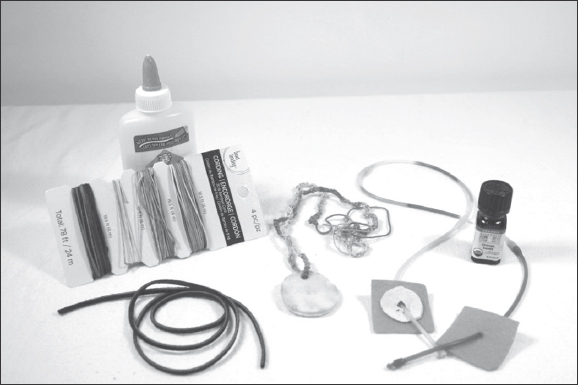
Make the scented medallion cover from fabric such as felt. Use natural fabric inside the cover to wick the scent. Leather, cotton chain or novel materials can be used for the necklace.
Scent Activity 3
Make Teas to Drink or Scent the Room
Teas have a wonderful fragrance that can calm the senses as you drink them. The teas listed in the materials list are non-caffeinated and are appropriate for children. Avoid unusual and medicinal herbs including lavender which may cause side-effects for children.
Materials: Dried herbs such as cinnamon, fennel seeds, chamomile, rosebuds, sage, lemon balm, citrus rind, and hibiscus. These are often available in bulk in health stores and online.
• Brew one tablespoon of herbs in a cup of boiling water for 5-10 minutes.
• Boil spices like cinnamon in a pot for 10-15 minutes. For a strong but pleasant fragrance, try cooking cinnamon and rosebuds together.
• To add fragrance to a room, put herbs or spices in a pot and let simmer for 15-20 minutes.
Scent Activity 4
Grow Your Own Plants
Consider growing pots of the herbs at home or school so that fresh herbs are on hand or shop at the bulk bins for dried orange and lemon rind, dried roses and spices
Grow indoor or outdoor plants:
1. Herb garden: Two kid-friendly herbs are mint and lemon balm
2. Kitchen garden: Other fragrant herbs that are easily grown indoors are basil, chives, thyme, sage, rosemary, oregano, tarragon, cardamom and parsley
3. Fragrant flowers: Rose, lilac, lily of the valley, gardenia and others – but watch for allergies
4. African violets (for visual stimulation rather than for scent)
5. Small pine or bonsai in the home
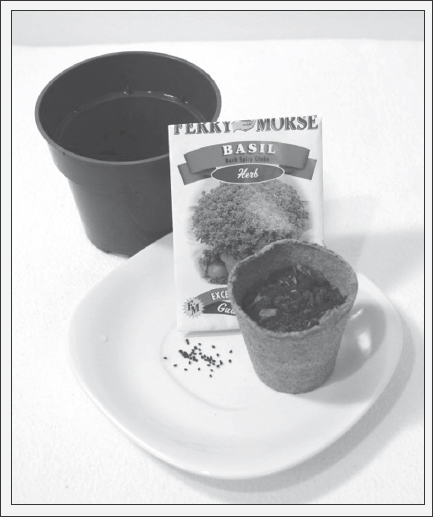
Materials: small peat pots; potting soil; seeds; permanent pots.
1. Put potting soil into peat pots. Optionally, you can plant the peat pot in a second bigger pot to help it retain moisture.
2. Put two seeds into a pot together and cover them with 1/4-1/2 inch (.5 cm – 1 cm) of soil (see recommended coverage on the seed package). Tamp down the soil.
3. Water the seeds.
4. Put the plant in a sunny location: outside (in warm weather), or on a sunny window sill or under a grow light. Keep the soil moist. In hot environments, water the seeds often and protect the pot from too much sun. When the plant is 2-3 inches tall, transfer the peat pot with plant into its permanent dish.
Scent Activity 5
Pocketful of Scent for a Child
Here’s a way to give a child natural scent each day. Use fresh herbs and a bit of flower (whatever is blooming indoors or outdoors) to make a small corsage or boutonniere. Or put a sprig of mint or lemon balm in his pocket. He can get the scent on his fingers by rubbing the herb through the day.
If fresh herbs are out of the question, then try ½ teaspoon of dry herbs in small sachet, pill container or simply in the pocket. To keep the scent strong, replace the herbs every 1-2 days.
More Ideas for Scent
1. Do crafts such as collages and mosaics using flower petals, herbs and seeds and citrus rind for the materials.
2. Make scented lotions. (See section on scent in the materials section of the environmental enrichment protocol.)
3. Burn incense at home (under adult supervision).
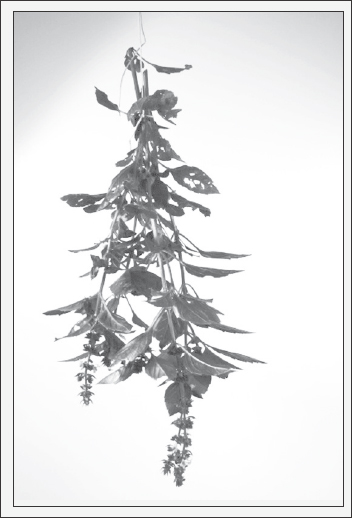
Grow herbs and fragrant flowers in pots or a garden. Harvest them (clip them) and hang them upside down in a cool, dry place to dry. When they are dry enough to crumble, store them in jars for scents in the winter.
Scent Activity 6
Multi-Sensory Dish Garden
Make a planter, then fill it with plants and décor. This is a multi-day project with many different sensory components: the earthy smell of the soil, desensitization to touch and immersion in touch as the child coats a dish in sand and pebbles; visual immersion through sorting colored pebbles and making a pattern with them; and the sensory aspects of the plants themselves.
The instructions for this project can be found in chapter 11, Multiple-day projects.
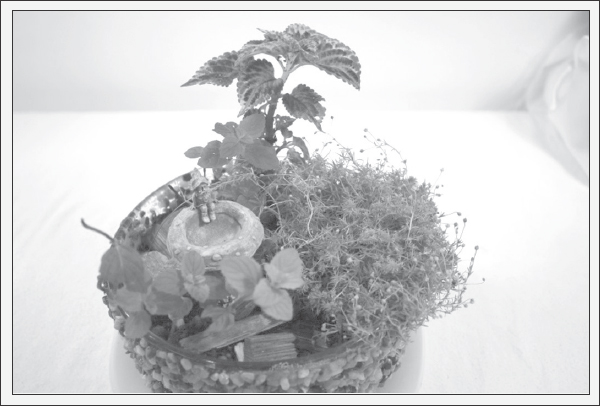
Planter contains mint (scent) moss (touch) and coleus (visual). They were planted in potting soil and have a woodchip covering. Pebbles would work, too.