Kadaif baklava with almonds & sour cherries
Makes 22–25 pieces
This is our take on a very traditional type of pastry. It is difficult to do justice to classic baklava. People have been making it for generations and if you want the genuine article, you need to buy it from one of those baklava masters who make tray upon tray of glistening sugary nuggets that stick to your teeth and give you a sugar rush like nothing else. Once you’ve eaten one of these, accompanied by some really good unsweetened black coffee, it will suddenly become clear why there are so many different recipes. This is my homage to baklava, bringing a little tartness, in the form of sour cherries, to balance the intense sweetness.
For the pastry
200g kadaif pastry
140g unsalted butter, melted
For the filling
150g whole almonds (I like them skin-on but use blanched if you prefer)
2 tbsp confectioners’ sugar
1 tsp sweet spice mix (here)
a pinch of flaky sea salt
2 tbsp almond oil (or any other nut oil will do)
100g dried sour cherries
For the sugar syrup
250g granulated sugar
125g/ml water
1 tsp orange blossom water
Put the almonds in a food processor with the confectioners’ sugar, spice and salt and blitz for 1 minute. Add the almond oil and sour cherries and pulse until the mixture comes together in a thick paste.
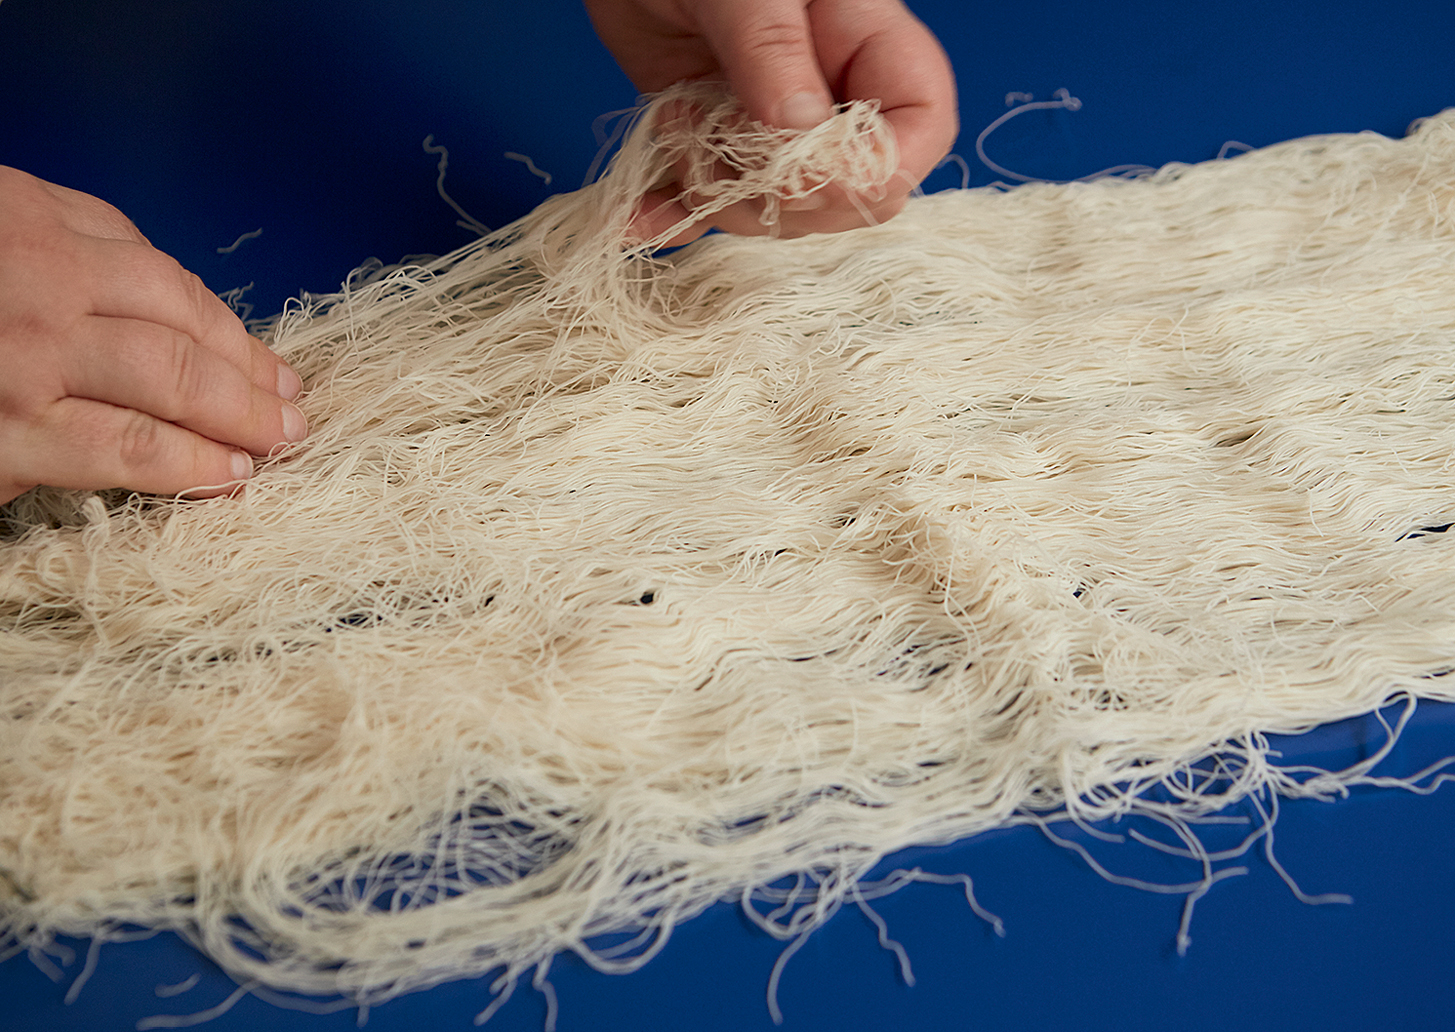
Spread a large sheet of cling film (at least 18 inches × 14 inches) on the work surface. Carefully open the packet of kadaif pastry and lift and unfold the strands a few at a time, keeping them intact (rather than mixing them up to loosen) so that the pastry stays in one piece. Lay it flat on the cling film and keep lifting and unfolding strands until you have one thin continuous sheet of about 16 inches × 12 inches. Pour the melted butter all over and pat to spread around a little. Use scissors to cut the pastry sheet in half lengthways so you end up with two rectangles of about 8 inches × 12 inches.
Remove the almond paste from the food processor and divide in two. Roll each half to a long “snake” of about 12 inches; don’t worry if it cracks a little. Place a “snake” along one of the long sides of a pastry rectangle, slightly in from the edge. Pick up the cling film closest to that side and lift the pastry over the nut paste, then use to roll up the pastry to enclose the filling. Wrap the filled pastry log in the cling film. Hold the ends of the cling film and roll the log on the table a couple of times to tighten and condense it as much as possible, then twist the ends firmly to secure. Repeat with the remaining paste and pastry. Set the cling-wrapped pastry logs in the fridge to chill and harden for at least 30 minutes and up to 48 hours.
Preheat the oven to 400°F/375°F convection. Remove the pastry logs from the fridge and take off the cling film. Wrap both logs together in a sheet of baking parchment, then wrap that in aluminum foil. Bake on a tray in the center of the oven for 20 minutes. In the meantime heat the sugar and water for the syrup together in a small pan, stirring as it comes up to the boil. Once boiling, remove from the heat and mix in the orange blossom water.
Remove the pastry logs from the oven and carefully open (but don’t remove) the wrapping, leaving the logs sitting inside. Return to the oven for 15–20 minutes until lightly golden and then remove from the oven again. Carefully pour half the syrup over the logs inside their baking parchment and foil basket and leave to cool for about 20 minutes.
Once the logs are cool enough to handle, remove from their wrapping, place on a chopping board and slice into 1 inch pieces. Place the pieces neatly next to each other in a small tray with a rim, sitting them upright so that the filling is facing upwards. Pour the remaining syrup all over, then allow to sit and absorb for at least 20 minutes before eating. These keep well for up to 3 days as long as you keep them covered.
Almond crescent cookies (aka kourabiedes or Greek ash cookies)
Makes about 36 bite-sized cookies or 18 larger ones (how I like my cookies)
There is no ash in these, just a heavy coating of confectioners’ sugar that makes them look ash-covered, and (if done properly) leaves your face and fingers coated in a dusty layer. Although the ingredients are quite simple, the taste of these cookies is so much more than the sum of the parts. If you cannot find mahleb, use a few drops of rose water for a different, but still wildly delicious, result.
For the cookie dough
110g cold unsalted butter, diced
60g confectioners’ sugar
1 tsp ground mahleb
a pinch of flaky sea salt
85g all-purpose flour
1 tbsp cornstarch
110g ground almonds
To coat
about 200g confectioners’ sugar
Put the cookie dough ingredients in a mixer with a paddle attachment (or rub the butter into the dry ingredients, if making by hand). Mix on a low speed to a breadcrumb consistency, then increase the speed to bring the dough together, continuing until large clumps form (this may take a little time). Remove from the bowl to your workbench and bring the dough together into a ball.
Divide into 36 pieces of roughly 10g or 18 pieces of roughly 20g, depending on what size cookies you want. (I think around 20g makes a satisfying cookie, but Itamar always says that good things come in small packages so he prefers 10g ones.) Roll each piece into a ball between your palms, then roll a little more at the ends to create a zeppelin shape (the ends should be thinner than the middle). Bend slightly to resemble a crescent moon and lay on a flat baking tray lined with baking parchment (you may need two trays, depending on the number of cookies). Allow about 1 inch between each one, as they will spread a little while baking.
Preheat the oven to 375°F/350°F convection. Bake one tray of cookies in the center of the oven for 8 minutes, then turn the tray for an even bake and leave for another 5 minutes for the small cookies, or 8–9 minutes for the large ones. They should still be pale but going golden around the edges.
Remove the tray from the oven and set a timer for 5 minutes. Place the confectioners’ sugar in a wide, shallow bowl. When the timer rings, carefully lift a couple of cookies at a time into the sugar and toss to coat all over. Return the coated cookies to the tray to cool entirely.
Now repeat the process with the second trayful of cookies (if they didn’t all fit on the first).
Once the cookies are cold, they can be stored in an airtight container for 3–4 days, but are best eaten fresh and buttery on the day of baking.