Chapter 9
What to Plant and Eat at School (School Lunch!)

Some things are just too much work to bother with growing at school and some fruit gets ripe in the school holidays, so it’s wasted.
These are all plants that are easy to grow. Just read through and see which ones catch your fancy.
(If you don’t really want to grow a plant you won’t remember to look after it so keep thinking till you come up with a plant you’d love to have.)
Loquats

Loquats are great in school grounds – they fruit in term time, don’t need looking after and grow really easily from seed. If you can, find someone in your area with a loquat tree (ring up the local paper in about August or September and ask them to write an article on how your class desperately wants some loquats).
Plums
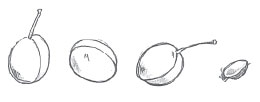
Plums are easy to grow but most fruit in school holidays.
Scout around your local area and see if anyone has a plum tree that fruits in the middle of first term – that is the sort of plum tree you need to grow.
(I can’t tell you what that plum might be, because trees fruit at different times in hot or cold parts of Australia.)
It’ll probably be the sort of plum that needs another plum to fertilise it. Ask at your local garden centre what else you’ll need to plant with it. The gardener who is growing the tree might know too.
Pine trees

No, not ordinary pine trees – pine trees you can eat.
Actually it’s not the tree itself you eat, it’s the pine nuts, which are the seeds inside the pine cones.
You can’t eat the pine nuts from most trees – so don’t try or you’ll end up poisoning yourself. You need to plant the right sort of pine tree – the Mexican stone pine or the Swiss stone pine.
What do pine nuts look like?
You can buy pine nuts at the supermarket. They’re usually sold in little packets with all the herbs and spices and they are very expensive unless, of course, you grow your own, in which case they’re free.
They’ll be about the size of a slice of fingernail, sort of creamy off-white.
How do you eat them?
Most people buy them to make pesto, which is a sauce made with basil, cheese, garlic and pine nuts that you put on pasta.
But in places where they’re grown, people eat them just like nuts, i.e. crunch them down straight from the pine cone, or put them on a greased tray in the oven and roast them till they turn brown (which is a great way to eat them) or put them into cakes or biscuits. They are lovely cooked with rice or added to oxtail stew or as part of the stuffing for stuffed mushrooms or capsicums.
What do they taste like?
Like tiny nuts – except often the ones you buy at the supermarket are too old, and they taste a bit off. If you grow your own they’ll taste much better. (Everything you grow yourself tastes much better.)
Why can’t I grow them at home as well
as at school?
Well, you can if you’ve got enough room. But stone pines grow big very quickly, your parents might complain there wasn’t enough room for the car, the cat or the roses.
When will I get some nuts?
In about three to five years – depends on how hot your climate is. The hotter the weather, the sooner you get your pine nuts.
(In Mexico and Italy where the pines live naturally, it can take up to 50 years for them to bear nuts but all the trees I’ve known have fruited in a few years.)
How do I get hold of a tree?
Ask at your garden centre, they probably won’t have one for sale, but they can order one for you.
Where do I plant a tree?
In a place where there’s lots of room for it to grow, with lots of sun. Pine trees grow happily in poor soil – but they grow much better in good soil if you water them every week and feed them once a year.
How do I get the nuts out of the
pine cone?
When the cones are just starting to open at the bottom, you take a long pole and bash the cones off the tree. (They may be very high up.) Then you leave the cones on a sunny window till they open – and the nuts will be nestling in every opening.
Don’t get excited when you see your first pine cone on the tree – they can take about two years to really get big and fat.
Pumpkin
One good pumpkin vine can give you dozens of pumpkins, or just two or three big ones. When they’re ripe your teacher can cut them up so you all get a slice.
Pumpkins are best planted in spring when the soil feels warm. If you plant your pumpkins later than spring, stick to small pumpkins like butternut, that ripen faster. In most areas you can plant pumpkins all the way through the last school term and even bush pumpkins in the first couple of weeks of first term.
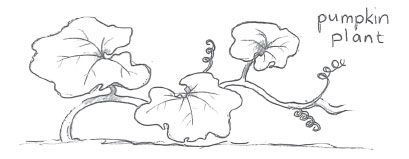
How to plant a pumpkin in the playground
You need: pumpkin seeds (these can be from a pumpkin you ate last night or from a packet); a tough spoon; newspaper; dead lawn clippings; a hose; Dynamic Lifter.
Step 1. Find a sunny, out of the way spot in the playground – you don’t want people running their skateboards over your pumpkins. Make sure the spot gets lots of sun.
Step 2. Dig a small hole with the spoon – just big enough for a pumpkin seed or two.
Plant the seeds. Cover the seeds with dirt, so you can’t see them but not much deeper.
Step 3. Now – surround the hole with newspaper, but don’t cover it, then pile lawn clippings on top so the newspaper doesn’t blow away.

Step 4. Sprinkle Dynamic Lifter on the lawn clippings. Water everything well.
Step 5. Water every two or three days.
Step 6. The plant will grow. If two come up because you planted two seeds, pull out the smallest one.
Step 7. Keep watering every three days and every two weeks scatter on more fertiliser.
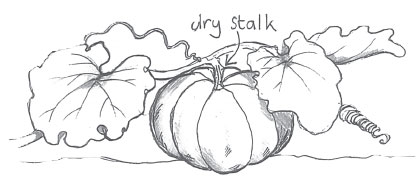
Step 8. When the pumpkin stalk starts to dry off, it’s ready to eat.
Avocados
Avocados take almost no work to look after – and they grow very easily from seeds.
Plant a hedge of avocados down along a fence. They’ll hide the fence – and they make the best cubbyhouses I’ve ever come across, as the branches grow down low to the ground.
Can I grow avocados anywhere?
No. If you get white frost on the grass in winter, avocados will probably die. Avocados also don’t like hot or cold winds, so either grow them in a sheltered spot at school (which is why growing them by a wall is good) or make a little shelter for them for their first two years. It’s worth it because avocado trees give you heaps of fruit.
How do I plant them?
The same as any tree (see Chapter Three). Ask everyone to collect avocado seeds for you. Plant the seeds one to a pot, the soil over each seed should be about as wide as the seed. Keep the pots in light shade and keep them moist. It may take one to six months for the tree to grow.
How do I look after an avocado…or
a long hedge of avocados?
Water them every week; feed them with a scatter of Dynamic Lifter every month when the weather’s hot. Mulch them too, especially when they’re young. You can do this by getting great piles of autumn leaves or dead grass clippings and piling them under the trees, but not right next to the trunks in case they start to rot.
When will they get avocados?
Between two and four years after you plant a tree, or three to five years after you plant a seed.
How do I know when
they’re ripe?
Good question.
Avocados don’t become soft till after you’ve picked them and any avocado will eventually get soft, even if it’s only small. Sometimes you can leave fruit on the tree for two years if the birds don’t eat them.
If the stems turn yellowish, they’re ready; if the fruit comes off easily in your hand, it’s ready; if it turns black (if it’s a black-skinned variety), it’s ready. And if they look smaller than the ones in the shops they’re not ready.
But if you pick them too soon you can still eat them.
I HATE avocado, so what
do I do with them?
- Try them with a different salad dressing – you may like them then.
- Try them mashed on hot buttery toast with a squeeze of lemon juice and a grind of fresh black pepper.
- Give them to your mum or dad or Aunt Jane for a present.
- Sell them to a local shop.
- Leave them for the currawongs – they love them.
- Make green snot sandwiches for lunch.
- Feed a bit to a blue-tongue lizard – they love them too.
- Send them to me (we have about thirty avocado trees here, but we never have enough because all our friends like them too).
Delicious
MONSTERS
(Monstera deliciosa)
You can only grow these in warm climates, no colder than Sydney and sometimes Melbourne (they’ll grow okay just about anywhere but you may not get any fruit). Most places north of Sydney can grow them, unless you’re high up in the Tablelands and it gets too cold.
What do delicious monsters look like?
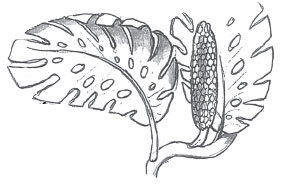
Well, you’ve probably seen them but didn’t realise they gave fruit – they’re glossy shrubs with very large leaves that have irregular-shaped, decorative holes in them. They are often grown inside in pots or against shaded walls outside.
The fruit resembles a fat spear or a cob of corn. It looks sort of scaly and then the scales start to open from the bottom after a year or so. Underneath, the fruit is creamy white and smells like a very strong fruit salad.
You can only eat the fruit from monstera deliciosa after the scales have lifted off. They don’t lift off all at once when they do start to lift off the bottom, so pick the whole fruit – with a long bit of stem – then stick it in a vase of water and cover it with Clingwrap.
When most of the scales have lifted up, scrape off the pulp with a spoon and eat it.
Warning
If it’s not quite ripe it’ll make your mouth pucker and your eyes stream and you’ll HATE it. Serves you right for not being patient.
How do I get a monster plant?
You can buy one at most nurseries, but they’re easy to grow yourself if you can find someone who has one already growing.
Just take a long piece of stem with two or three segments (when you look at the stem you’ll see what I mean by segments).
Plant the stem in a pot of good potting mix about two segments deep. Keep it in the shade and water it every two days.
Plant it in a shady spot a year later (unless it dies in which case you’ll have to try again).
And two or three years later you’ll get some fruit.

Do they really taste good?
Well, not really – just about any fruit tastes better – but they’re not that bad and they do taste interesting. And they are so easy to grow in the right spot – warm and shady and damp where nothing else grows (nothing much you can eat anyway) so it’s a pity not to grow them and have fun doing it.
Pomegranates
There’s a legend about pomegranates (actually there’s a legend with just about every fruit but I don’t have room to put them all in this book).
Anyway – Pluto, who was the God of Death, fell in love with the Earth Goddess’s daughter, Persephone, when she was out picking flowers, and instead of calling her up to see if she’d like to go to the pictures, he kidnapped her and carried her off in his chariot down into Hades, the Underworld.
Well, the Earth Goddess was pretty cheesed off and went into mourning so the whole earth did too. Nothing grew and there was snow and storms and darkness and cold…
Meanwhile, down in Hades, Persephone was furious and refused to eat or drink till Pluto took her back.
To cut a very long story short, the Earth Goddess negotiated with the King of the Gods for Persephone’s return, but meanwhile, Persephone had eaten six pomegranate seeds while she was in Hades, which meant that she could live up on the surface of the Earth for six months, but had to go back to Hades and Pluto for the other six months.
Which is why we have winter – when she’s down below and the Earth is in mourning – and spring, when her mother’s rejoicing that she’s back again. And, hopefully, no judge nowadays would tell a girl who’d been kidnapped that she had to spend half the year with the bloke who did it just because she ate some pomegranate seeds.
What the heck do pomegranates look like?
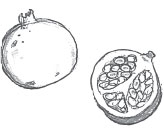
A bit like very hard, leathery apples, with bright red cheeks, and lots of seeds covered in beautiful, clear red jelly inside.
How do you grow them?
Bung in a tree, feed and water it, and wait about two years. See Chapter Three for instructions on how to plant and grow a tree.
How do you eat the fruit?
You can try spooning out the seeds and jelly, sucking off the jelly and spitting out the seeds. This is fun and very messy. In the days when pomegranates were more popular there used to be competitions to see how far you could spit the seeds.
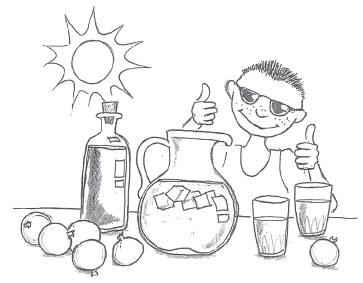
You can also make the reddest cordial in the world from pomegranates.
The REDDEST Red Cordial Ever
You need: Pomegranates; sugar.
Step 1. Scrape out the pomegranate seeds and jelly into a bowl. For every cup of seeds add a cup of sugar.
Step 2. Leave overnight.
Step 3. Now boil the whole lot in a saucepan for 10 minutes. Stir so it doesn’t burn on the bottom.
Step 4. Take it off the heat, use a strainer to strain the juice into a bowl and throw out the seeds.
Step 5. Pour the juice into a bottle – and there you are.
Use about a tablespoon in a glass of cold water – just like you’d make ordinary cordial.
But most cordial is artificial red. This is REAL red, as red as you’ll ever get.
Crab apples
What are crab apples?
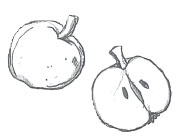
No, they’re not stuff you’ll find in a rock pool. They are tiny apples, sometimes as big as your fingernail and sometimes as big as a walnut.
Warning
I know there are a heck of a lot of tiny fruit around – and some can kill you. So ask – and don’t eat ANYTHING unless you are sure you know what it is, and that it is safe.
Most crab apple trees are grown for their beautiful blossom in spring. They’re also good trees to grow because they look after themselves; they don’t need pruning or spraying. Some turn lovely autumn colours and all lose their leaves in winter – so you get shade in summer and sun in winter. They also don’t grow too large so you can fit them into quite small areas.
Ask the garden centre which ones have the best fruit.
Can you eat them?
Yep. Crunch the tiny ones whole and spit out the seeds. Some are sweeter than others and some taste like cardboard. But the big ones can taste quite good.
I make a jelly (the sort that’s a clear jam) out of crab apples. You can find a recipe in lots of books so I won’t give it here. It’s fiddly to make but very good.
But next time you see a ripe crab apple, try munching it.
How will I know when it’s ripe?
Good question. Which means I don’t know. Probably when the apples come off with a twist of your fingers and they taste sweet and the birds have eaten about a third of them (watch out for bird droppings – birds love crab apples too).
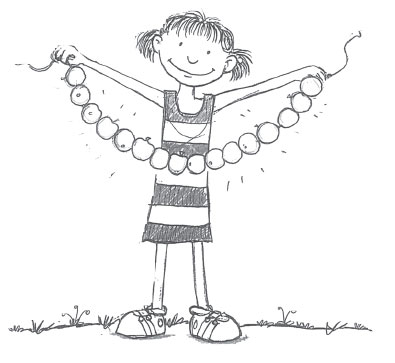
Crab Apple Necklaces
(Not for your neck – to eat.)
You need: Crab apples; a needle; cotton; 3 cups of sugar; 1 cup of water; string.
Step 1. Thread crab apples with a darning needle onto a piece of cotton. Tie a knot in the end so they don’t slide off.
Step 2. Now boil 3 cups of sugar with 1 cup of water for 10 minutes. Stir so it doesn’t stick.
Step 3. Lower the heat under the saucepan. Drop in the crab apple necklace, string and all.
Step 4. Simmer (that means small bubbles not big BUBBLE BUBBLE BUBBLE) for 5 minutes. Take off the heat.

Step 5. Use a fork to pull out the necklace – carefully so it doesn’t break. Leave it on a greased tray or baking paper till it dries.
Step 6. Then eat it, an apple at a time.
PS You can hang these up for a party game. Everyone has to eat them without using their hands. This is much more difficult (and stickier) than you might think.
