Project 11: Drying Fruit
Why would you want to do this? Drying allows you to preserve the bounty of a harvest or a bulk produce purchase and prolong the taste of the season, and dried fruit does not take up refrigerator or freezer space.
Why wouldn’t you want to do this? You don’t like dried food or you don’t want to try drying in your oven or buy/borrow a dryer.
How is this different from the store-bought version? Packaged dried fruit is often not entirely dry, so your homemade version may be drier and a little less flavorful than what you can buy. Manufacturers keep the fruit soft by vacuum-packing and/or using preservatives, but isn’t that what you’re trying to avoid?
Is there an easier way? If you are serious about wanting to dry fruit, consider buying a food dryer or sharing the purchase of one with a friend. A food dryer is designed specifically for drying food, and it uses much less energy than the oven does.
Skills needed: Basic cooking skills.
Learn more about it: Food Drying Techniques (A Storey Country Wisdom Bulletin, 1999) by Carol W. Costenbader; The Big Book of Preserving the Harvest (Storey, 2002) by Carol W. Costenbader.
Store-bought dried fruit can be rather expensive and quite often contains sugar and/or sulfur (to prevent browning), which have undesirable side effects on our digestive systems. Although using a commercial dryer really is the easiest option, you can dry fruit in your own oven.
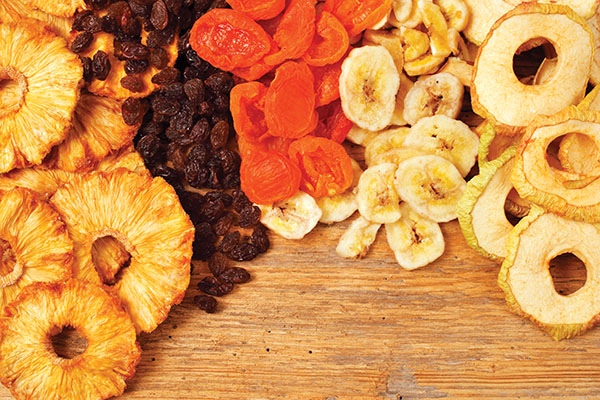
Almost everyone eats dried fruit, sometimes without even realizing it; for example, those raisins in your breakfast cereal are dried grapes, but they are so common that they almost seem like a fruit unto themselves. Dried fruit is ubiquitous in packaged trail mixes and has become much more common in salads.
Drying is a great way to preserve food, especially fruit, because the drying process concentrates (not increases) the sugars in fresh fruit, resulting in a sweeter taste. This project describes how to try oven drying before you commit to the purchase of a food dryer.
Dried Apples
Materials/Ingredients:
•Cooling racks
•Plastic storage containers or freezer bags
•Apples (less juicy varieties, such as Golden Delicious, Jonathan, and Gala, will dry more easily)
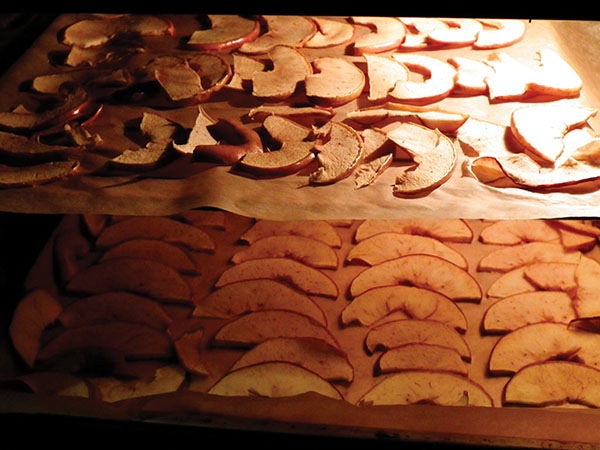
Step 1: Seed, core, and cut apples crosswise into slices of uniform thickness, about ¼–½-inch thick.
Step 2: Lay out the apple slices on the cooling racks, making sure that the slices don’t touch each other. Cookie trays will work, too, if you flip the slices over periodically during drying to expose the other sides of the apples.
Step 3: Heat the oven to 150 degrees Fahrenheit (or your oven’s lowest setting if it’s higher than 150 degrees). Put the cooling racks with the apple slices into the oven, centering them on all available oven racks and allowing space all around them for air circulation.
Step 4: Check the apples regularly, rotating the trays and switching oven racks (and turning the slices, if needed) to obtain even heating.
Step 5: When the slices are dry (after about 10 to 20 hours), remove them from the oven. If you’ll be storing them at room temperature, condition them (see next paragraph); otherwise, freeze them in plastic bags or other suitable containers once they’ve cooled completely.
To condition your dried apples, seal them in a plastic container once they are completely cool. Open the container and stir them once a day for seven to ten days to help distribute any remaining moisture. If moisture appears inside the container or lid, check that there is no mold in the container and let the slices air-dry longer.
Home-dried fruit makes a healthy, preservative-free sweet snack.