Project 13: Root Cellaring
Why would you want to do this? You grew produce and have an abundance of it, so it only makes sense to try to store it, and there are some types of produce that you’d rather not pickle or can.
Why wouldn’t you want to do this? You don’t have any outdoor space or aren’t interested in storing food at all.
Is there an easier way? This project is about as easy as root cellaring can get; if you have a basement or yard, there are many ways to make a root cellar that is larger and more elaborate (as well as more useful but also more complicated).
Cost comparison: This saves you the cost of buying root vegetables from the store.
Learn more about it: Putting Food By (Plume, 4th ed., 1991) by Janet Greene, Ruth Hertzberg, and Beatrice Vaughan is a great all-around book on food preservation, and it has a wonderful chapter on root cellaring, with a variety of different projects, styles, and sizes. Root Cellaring (Storey, 2nd ed., 1991) by Mike Bubel and Nancy Bubel is a comprehensive book, and these authors are my DIY role models.
What to do with that beautiful homegrown bounty when you have too much to eat at once? Because some produce doesn’t have to be specially prepared to be stored, you can try a form of root cellaring to save time and your precious harvest.
Root cellars seem like throwbacks to the days of our grandmothers’ or great-grandmothers’ houses and their big concrete basements with separate rooms for storing canned goods and barrels of apples and potatoes. With grocery-store produce always available, storing fresh produce may seem unnecessary and antiquated, but when you take the time and effort to grow something, it is a waste to not preserve the excess of the harvest. Many easy-to-grow foods can be stored with minimal processing (in the nonindustrial sense of the word) without taking up room in the refrigerator, freezer, or cabinets.
I grew up with a “potato-and-onion cabinet” with a screened bottom that sat over a hole to the basement. The cool air from below came up into the mesh shelved cabinet, keeping those items cooler than the rest of the kitchen. Airflow is important—without ventilation, mold and rot can build up from increased humidity produced by the vegetables.
When it gets cold outside, people tend to bring everything inside or under cover. Reverse that process and put a small version of a root cellar outside to take advantage of the natural chill for saving your hard-earned garden crops.
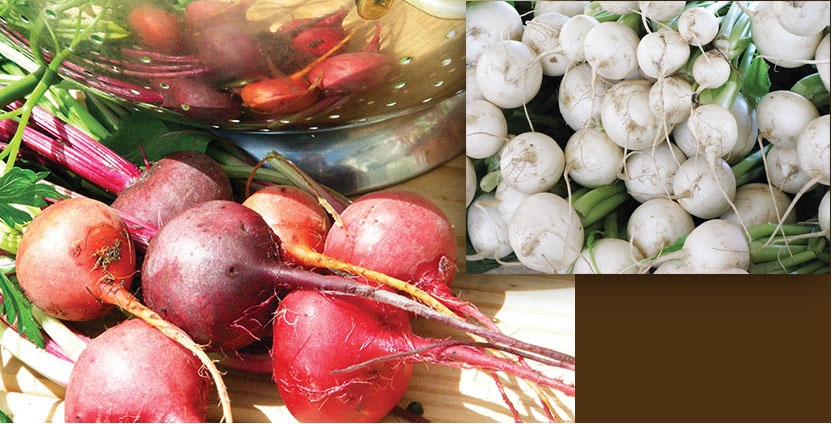
Beets (and radishes (inset) are just two of the vegetables that can be preserved by root cellaring.
Materials:
•Large plastic tub with a lid or cover (if your winter temperatures routinely stay below 40 degrees Fahrenheit) or large Styrofoam cooler with a lid or cover (if your winters are mild or unpredictable)
•Clean construction-grade sand
•Cold outside area, such as a deck, patio, porch, or uninsulated garage
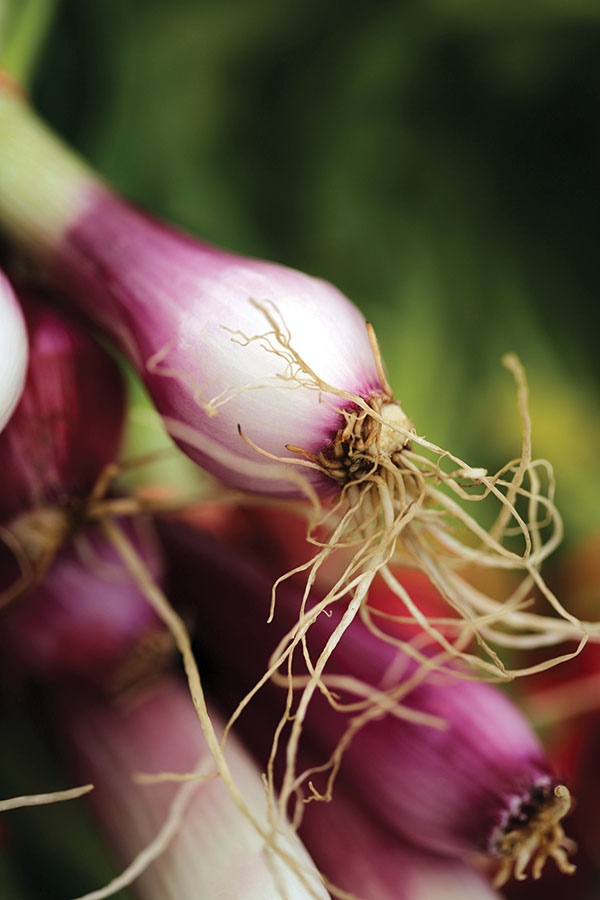
•Root vegetables, such as carrots, beets, turnips, and parsnips
Step 1: Wash out your plastic tub or cooler well and dry the interior.
Step 2: Moisten the sand. If it is in a plastic bag, poke a fork into the bottom several times and then pour water into the top until it runs out of the holes in the bottom. Let the bag stand and drain for a while—you want the sand to be damp, not soggy. If it is in a paper bag, you can just leave the bag out in the rain for a few days; when you’re ready to pack the root cellar, don’t move the bag (it will tear and spill) but just cut a slit in it and scoop the damp sand out.
Step 3: Have your vegetables ready and at hand. To prepare them, harvest them in late fall and trim the green tops to a ½-inch length. Wash off the dirt—they don’t have to be immaculate, and they can be damp for storage.
Step 4: Put a dense 1-inch layer of moist sand on the bottom of your container.
Step 5: Lay the vegetables on the layer of sand, making sure that the vegetables don’t touch each other or the container sides. Fit in as many as you can, keeping at least ¼–½ inch of space around each.
Step 6: Pour sand all over the layer of vegetables, gently packing it in and flattening it until the vegetables are completely covered by about another inch of sand.
Step 7: Repeat Steps 5 and 6 as many times as possible, ending with a layer of sand.
Step 8: Cover the box and store it in a cold, dark spot on your deck or porch. When you use the vegetables, dig out the desired quantity and make sure that the remaining ones are covered entirely. These vegetables should stay fresh for four to six months.
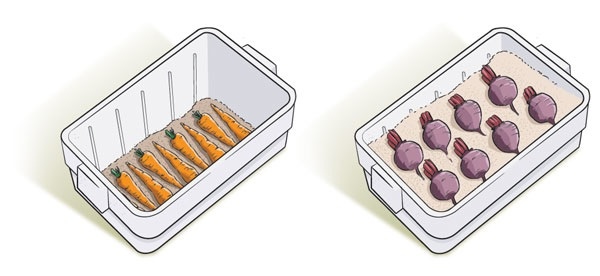
Allow ample space around each vegetable. Leave enough space to cover the top layer of vegetables with sand.