Project 4: Compost Piles
Why would you want to do this? You may save money on your garbage collection, and you will not have to buy compost; also, smaller-scale composting generates less methane than industrial-scale composting does.
Why wouldn’t you want to do this? You haven’t got a yard, or you share an outdoor area with people who object to a compost area.
Is there an easier way? You can purchase a composter, but they aren’t always cheap. Keep in mind that much of your success will depend on your commitment to the process as well as the amount that you compost, so give composting a try before you buy.
How does this differ from the store-bought version? Compost “manufacturers” often add material (such as ground-up wooden pallets) to make a more consistent, but less potent, product.
Cost comparison: A pile and the finished compost is free; the cost of the compost bin will depend on the materials.
Skills needed: Nothing in particular other than your attention.
Learn more about it: Let It Rot! (Storey, 3rd ed., 1998) by Stu Campbell (a classic); Compost This Book! (Random House, 1994) by Tom Christopher and Marty Asher; Easy Composters You Can Build (A Storey Country Wisdom Bulletin, 1995) by Nick Noyes; The Rodale Book of Composting (Rodale Books, 1992), edited by Deborah L. Martin and Grace Gershuny.
Many city dwellers have seen their trash-collection costs go up, and some of this is from cities’ charging residents a fee for collecting kitchen and yard waste, which the cities then compost themselves. They sell that compost back to gardeners, who use it to amend their soil. I say skip this middle step—getting rid of your kitchen and yard waste and then purchasing it back in finished form—by doing your own composting. There are many different ways to compost, and plenty of places where you can do it. It won’t be stinky or unsightly if maintained properly, and you may even be able to do it without anyone’s noticing.
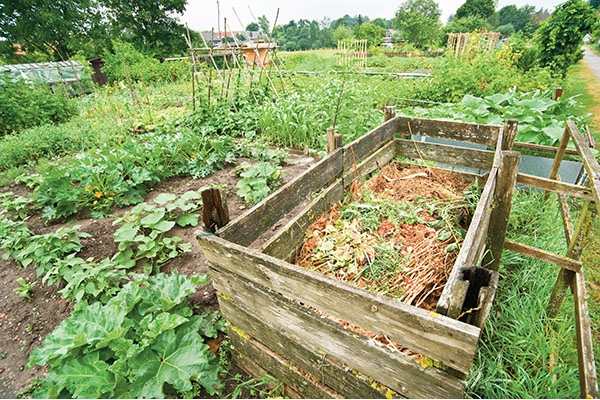
For this project, we’ll build a contained compost pile with fencing and posts, but you can also use shipping pallets or lumber (new or salvaged) to build a stylish enclosure. Alternatively, you may be able to purchase a yard compost container from your municipality for a nominal fee, or you can salvage 55-gallon drums. You can even just pile the waste in a heap in the corner of your yard. Try to salvage materials until you really know what you want and where you want to put it. Composting is a fairly individual “art,” and you have to experiment to find a system that works for you.
There are, in essence, two styles of compost piles, hot and cold (vermicomposting, a type of cold composting, is discussed in Project 3, Worm Bins, in this section), and they both involve natural chemistry. The basic formula for compost is: fuel + air + moisture + time = rot. The better you get at composting, the more you can experiment.

Leaves, kitchen scraps, and the like are referred to as greens.
Cold Compost Piles
Cold composting, also known as regular or long-term composting, involves collecting biodegradable matter in one area and letting it sit for an extended period of time. Biodegradable basically means “this rots and will make compost.” Rain, cold, sun, worms, bugs, and nature’s decomposers eventually break down the organic matter, turning it back into soil. If you have a small corner of your yard that you don’t regularly use, it could be ideal for a backyard compost pile.
You can put a variety of waste from your house and yard on the pile: weeds, wilted flower bouquets, fallen leaves, dead houseplants, kitchen trimmings (excluding any animal products), cat litter (minus the feces), and dryer lint. Make sure everything gets really wet once in a while, and in a year or two or three, you can rake everything out of that corner; remove any remaining branches, sticks, and avocado pits; collect the lovely black dirt; and put it where you want new plants to grow. You can then continue to use this area for a compost pile because the decomposer insects and microbes will already be present, or you can plant in the rich soil that remains and start a new pile elsewhere. Composting doesn’t get easier than that.
The downside of cold composting is that it does not kill off many of the seeds and pathogens found in your compost items. So depending on where you use your compost, you may have a lot of weeds (or squash or cucumbers, depending on your diet). Plants grown in the compost might have fungi or other soilborne diseases that were not eradicated during decomposition. These problems are rare—and worth the risk, in my opinion, for the small amount of work a cold pile requires.
Hot Compost Piles
Hot piles are more labor-intensive than cold piles, requiring more attention and more detailed construction, but they reward your labor with usable compost faster, and the finished compost is a “cleaner” product.
Hot piles create compost faster because the bacteria responsible for breaking down the materials find a hospitable living environment. Their lives consist of eating and increasing their population. Biodegradable materials that are high in carbon—such as paper, autumn leaves, straw or dry grass, cardboard, wood shavings, and sawdust—are colloquially called browns. Materials that are high in nitrogen are referred to as greens and are usually the wetter ingredients—kitchen scraps, rotting vegetable matter, fresh grass clippings, animal manure, and the like. Carbon consumption (oxidation) gives the bacteria energy, while nitrogen consumption yields the protein they use to multiply. All of this eating breaks down the matter in the pile as the oxidation generates heat as a by-product.
When the pile cools down, turning it (aerating) causes the process to repeat, reinvigorating the bacterial population with fresh food—thus turning hot compost regularly will help accelerate the decomposition. A hot compost pile can be turned three or four times before the process is complete.
When you build a compost pile, your ultimate goal is to balance the browns and greens. If there are too many browns in a hot pile, the pile won’t heat up because it will be too dry. Too many greens, and the pile becomes smelly and slimy from too much moisture. It requires a certain amount of both types of material—in chemical makeup and quantity—to be successful. While a too dry pile will be a letdown, a too wet pile can be a stomach-turning challenge to rectify.
Materials:
•2 feet of 3-foot-tall, 1-inch by 1-inch metal fencing
•Four 3-inch lengths of inexpensive 2x4,
•preferably rot-resistant
•3 small eye hooks
•Staple gun or pound-in U-style nails and a hammer
For either hot or cold composting, you can build a container, or bin. A bin provides a structure into which successive additions to a cold compost pile are confined tidily and easily. For hot piles, one or more bins help retain heat longer and make the necessary turning easier. Depending on how much compost you plan to make, and how often you think you’ll be using it, a series of bins also doubles as storage for the finished product.
Place your bin in an out-of-the-way area that still gives you easy access for tending to it.
Step 1: Lay out your fencing flat on the ground. Staple or secure one of the 2x4s along one end, preferably the end without the wires sticking out, so that the 2x4 is under the fencing.
Step 2: Measure (or count the squares) over 3 feet, slide another 2x4 under the wire, and staple or nail it straight up and down to the fencing. Repeat this twice more, until all four wooden supports are attached. Only one end of the mesh will be attached to wood; the other end will be loose.
Step 3: Turn the whole thing over so that the 2x4s are now on top of the fencing. Standing on one of the wood pieces 3 feet in from an edge, pull the fencing up toward you to bend it at a right angle around the corner of the wood. Repeat on the other edge and middle pieces. If you prefer a more rounded shape, skip this step.
Step 4: Stand the apparatus upright. Screw the eye hooks into the wood piece on the end of the fencing at even intervals.
Step 5: Bring the loose fencing end around to close the apparatus into a square. Bend the wires closest to the eye hooks down, creating hooks to attach into the screw eyes. This will secure the enclosure.
Step 6: Put the bin in your composting area.
Basic Composting How-To
For a cold pile, simply place all of your materials inside the compost bin you just built and let the pile sit. For a hot pile, gather the materials that you will put onto the pile. Fairly small pieces are best because they’ll break down more evenly and faster, but this will happen regardless, as long as the green-to-brown ratio is met. Getting the right balance will take some trial and error. Robert D. Raabe, professor of plant pathology at the University of California Berkeley (“The Rapid Composting Method” http://vric.ucdavis.edu/pdf/compost_rapidcompost.pdf), recommends that the compost material has a 30:1 carbon-t0-nitrogen ratio for the most effective composting. He writes that this is hard to measure but advises the following: “…experience has shown that mixing equal volumes of green plant material with equal volumes of naturally dry plant material will give approximately a 30:1 carbon-to-nitrogen ratio.”
Stack the compost material in alternating layers of greens and browns, trying to keep the layers about 6 to 8 inches thick; don’t worry about precision—you can eyeball it. Water the pile after every 4 to 6 layers if it’s not already wet. Try to build the pile to be at least as high as it is wide (this is where a contained system helps). End with a brown layer to prevent odors, flies, and scavengers.
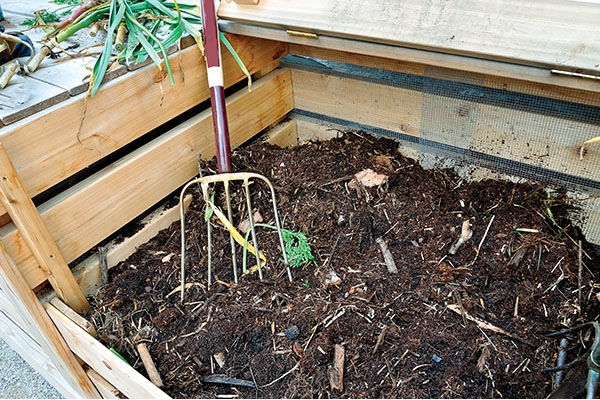
At some point during the first three to four weeks, turn the pile. To open the bin up for turning, unhook the fencing from the eyelets, opening just that panel. Shovel or fork everything out of the bin. Hook the door panel closed again and then shovel or fork the materials back into the bin. Water the pile again after turning and wait another three or four weeks.
Repeat the turning-and-watering process and wait another three to four weeks. At this point, the pile should look pretty well broken down and more like compost. Now you can either turn the pile again and wait some more or use the compost as is.
The following is another approach to hot composting that I found in an Organic Gardening magazine from the early 1970s. The fourteen-day, or University of California, method works on piles of a cubic yard or more. It requires more attention and management, but it produces finished compost faster. Here’s how it’s done:

Day 1: Gather your materials, shred or grind them if needed, place them in a pile, and water well.
Day 2: Check the temperature of pile, which should be around 110 degrees Fahrenheit (long compost thermometers can be purchased from gardening centers or catalogs). Check the moisture of the pile; water if needed.Day 4: Check the temperature, which should be
about 130 to 140 degrees Fahrenheit. Turn the pile; water if necessary.
Day 7: Same as Day 4.
Day 10: Turn the pile and check the temperature, which should be cooling down to around 110 degrees Fahrenheit—the compost is almost ready.
Day 14: The compost should be ready for use.
I have found that my piles can heat up as high as 160 degrees Fahrenheit and that this method is reliable for killing any weed seeds that were in the raw materials.
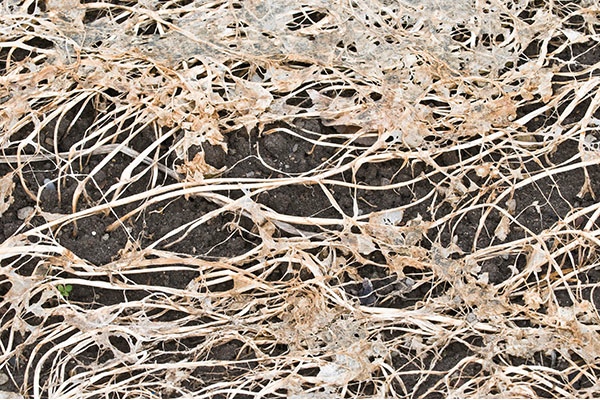
A close look at materials breaking down on the pile.
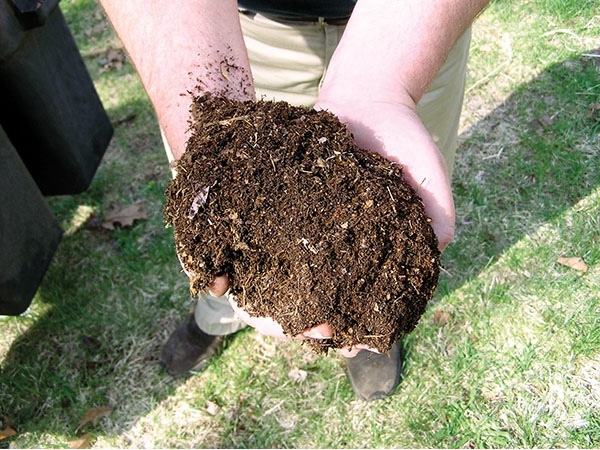
After two or more weeks, you will see remnants of your materials among the dark, rich compost.
Additional Advice
•For hot composting, a multiple-bin system is best so that you have somewhere to turn the compost into when rotating it. When the first bin has been turned into the second, the first is ready to be filled up again. Many people use a three-bin system; for me, four bins are ideal. By the final turning, the material is well finished and can be used almost immediately.
•Although the foregoing bin-building project uses fencing, any material that can form good, strong walls can be used, although there are pros and cons to each. Wooden shipping pallets, for example, provide good air circulation on all sides and can be readily found around Dumpsters in industrial areas, but they will rot after a few years, clog with compost, and provide a nice habitat for rodents. Cinder-block walls make a visually appealing containment system as well as a good solid structure. A solid multiple-bin system of stacked cinder blocks can be built for under $150 with no special tools or abilities. If you choose to, you can fashion doors from mesh fencing or wood (use your imagination) to go on the front openings; this will finish the bins with a tidy look while allowing the piles to be evenly stacked.
•For those with small or nonexistent yards, there are compost tumblers, which get rave reviews from everyone I know who has one. A tumbler is a rotating barrel that encloses the compost and aerates the materials as you rotate it. It keeps the compost away from rodents and other pests, blocks the sight and smell of decomposition, and minimizes the work of turning. It does limit the volume of your compost making, although this is not a problem for many urban dwellers, and it is still work to turn something as heavy as compost, no matter the device. It is possible to build one yourself, yielding varying degrees of success and function.