Project 7: Raised Beds
Why would you want to do this? Raised beds can extend your growing season because the raised sides collect early spring sun and warm up before the ground does, giving most plants and seeds a jump start. Gardening in raised beds can be easier on backs and knees.
Why wouldn’t you want to do this? You don’t want to build a structure, you don’t have room or sun exposure for a several-square-foot container filled with soil, or you have nowhere onto which water can drain.
Is there an easier way? Have the hardware store cut your lumber to the desired lengths for you, and ask someone (like that good-looking neighbor!) to help you attach the pieces and move the bed into place.
Cost comparison: Following these instructions to make a raised bed costs far less than using a raised-bed kit or buying a premade bed.
Skills needed: Basic construction knowledge, such as how to drill a hole and use an electric drill to install screws (nails can loosen and pop out as the wood shrinks and swells over time).
Learn more about it: Square Foot Gardening (Rodale Books, 1981) by Mel Bartholomew is one of the classics of small-scale and raised-bed gardening, and it will give you tons of great tips and ideas on the many plants you can grow and how to grow them in a relatively small space. It is a bible for many raised-bed gardeners.
As demonstrated by most of the projects in this section, a garden doesn’t have to go in the ground. Technically, plants need to be in soil (excluding hydroponic growing), but where and how that soil is located is not absolute. By building a raised bed or two, you can create a garden wherever you want one and increase your success by controlling the soil quality and condition.
No matter where you live, growing in raised beds is a great way to garden. If you have a yard, you can place the bed almost anywhere that has good exposure and skip the heavy-duty work of digging, which earthworms and roots will do naturally over time once the bed is in place. If you’re a condominium dweller, you can create growing areas where there is only hardscape, or you can even bring your planting area onto a sunny deck or balcony. If you live in an apartment, check with the building manager about constructing beds on the roof—with proper drainage, the roof is an ideal, yet often under-utilized, space for gardening.
Soil conditions inside a raised bed can be easily kept optimal for plants. By relegating compaction from footsteps or wheelbarrows to external areas, you can make sure the contained soil stays aerated for best root growth and health as well as good drainage. The beds can be maintained by simply topping them off with compost or mulch, and everything stays tidier because all of the dirt is contained.
Before obtaining materials, decide where you want the beds to be and how large an area you want to grow in. Although their sides can be as high as you’d like, raised beds should not be so wide that you can’t reach the middle—for planting, harvesting, and maintenance—from either side. Because this is a bottomless box, it should be positioned only on a surface that will tolerate direct soil contact and absorb or channel water completely. Do not situate it on a wooden deck, porch, or balcony.
Deciding on lumber is often complicated because of the many types that exist. In our area, cedar, although expensive, is the most common choice. In California, redwood is by far the most prevalent. Both of these woods have a natural resistance to rot and decay, which is imperative because they will be filled with dirt and water for their entire useful lives. If you use pressure-treated wood, make sure that the preservatives used do not contain arsenic if you are growing edibles. Otherwise, line the beds with plastic to prevent the toxins from leaching into your growing medium. Another option is a composite “lumber” product made from a mix of sawdust and recycled plastic. This is more expensive if bought new, but it will last indefinitely and can be curved into interesting shapes for aesthetic effect.
Materials:
•2x6 or 2x8 lumber of desired lengths, allowing for overlap on ends
•Electric drill
•Drill bit
•Phillips head deck screws
•Phillips head screwdriver bit
•Plastic for lining bed, if desired (you can use salvaged plastic bags or sheets)
•Cardboard, newspaper, or landscape cloth large enough to cover the bottom of the bed
•Soil
Step 1: Cut the lumber into the desired lengths for your bed walls, accounting for overlap at the ends.
Step 2: Attach upright supports to sides longer than 6 feet to prevent the sides from bowing when full of soil. Supports can be as simple as a 2x2 or 2x4 screwed into the middle of each long side (drill a pilot hole for each screw to prevent the wood from splitting during assembly). If the bed will be placed on a soft surface, such as dirt, the supports can extend below the bottom of the side pieces to be anchored into the ground.
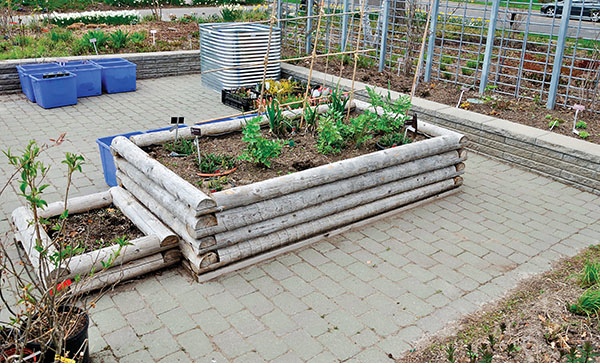
With proper drainage, raised beds can turn a paver patio into a growing area.
Step 3: Drill pilot holes at the edges of the side boards where the screws will go. With a helper, screw the side walls to the ends of the end wall pieces.
Step 4: With a helper, carry the bed to its intended location. By having a “free-floating” bed, you can move it around and adjust it until you are happy with it. It can be left as is, and the weight of the wood combined with the filling will keep it in situ.
Step 5 (optional): If you are putting the raised bed in a yard, attach metal pipes or wooden stakes for additional support and to prevent shifting of the finished bed. To use metal pipes (I salvage them), sink them inside the frame and secure them to the walls with pipe clamps. (These pipes can also be used to support hoops or trellising over the bed.) If you prefer to use wooden stakes, make sure that they are of a rot-resistant variety, and screw the bed walls directly to them from the outside.
Step 6: Line the bottom of the bed with cardboard, newspaper, or landscape cloth. Cardboard and newspaper will block grass and prevent weed seeds from germinating; it will eventually rot, allowing in-bed plants more root room. Landscape cloth keeps out the really pernicious weeds, allows drainage, and holds in the soil, but it can impede the roots of larger plants in the bed.

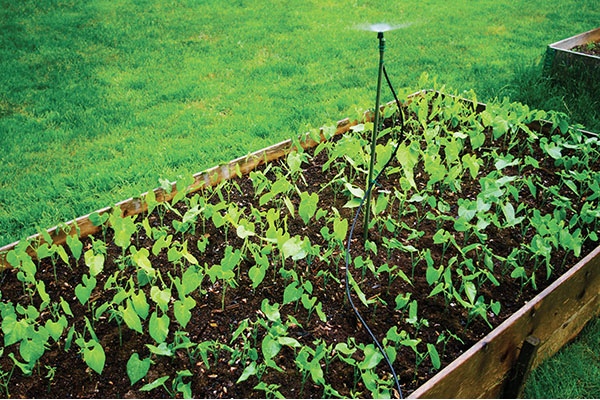
A bed can be placed on top of a grassy backyard area with less than-ideal soil conditions.
Step 7: Fill the bed. You can start with manure or unfinished compost, which will eventually rot, providing roots with a nutrition boost, or you can fill the bed with planting soil or finished compost.
With regular mulching, you can keep the planting beds filled and will see a happy, thriving population of earthworms and other beneficial organisms that will perform the tilling for you so you can have all the fun of planting and growing.
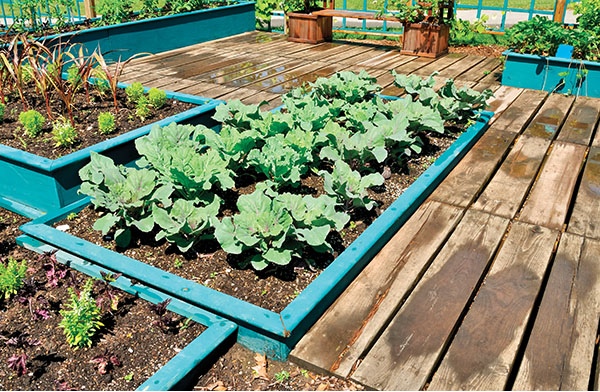
Raised beds are a good option if you want to turn designated areas of your deck into gardening spaces.