Project 9: Build a Trellis
Why would you want to do this? You can gain growing space, thus allowing you to grow more, and you can create or emphasize microclimates with these “living walls.” As a bonus, the flowers on flowering plants will be more visible and may attract hummingbirds.
Why wouldn’t you want to do this? You don’t have any plants that want to grow tall, you don’t want tall structures in your growing area, or you have constant high winds or risk of lightning in the trellis area.
Is there an easier way? You can grow climbing plants on existing structures: deck and stair rails, downspouts, conduit and pipes on exterior walls, laths over crawlspace areas. You also can purchase prefab structures—they are widely available in many different styles, but they often are not very durable. Making your own trellis will give you a strong structure for less money and allow you to be creative, perhaps even matching patterns that already exist in your home or garden.
Cost comparison: With a homemade version, you can salvage many of the materials, thus getting them for free. Even if you purchase the basic materials, it will be much less expensive than buying a ready-made model.
Skills needed: Basic carpentry skills.

Similar to how a large number of people can live in a small footprint in a high-rise building, a number of plants can be grown in a small bed if they are encouraged to grow upward. Upward growth can be accomplished with structures of wood, metal, or even string; for many plants, climbing is a natural growth pattern and is healthier for them than growing across the ground.
When a plant has a climbing habit, it is unhealthy for it to sprawl on the ground, touching the soil. Soil contact for many plants can encourage fungus, mold, or mildew, which will inevitably cause rot if not remedied. By minimizing the plant’s footprint, it also minimizes paths that destructive insects can use to get to the plant, exposes more of the leaves to sun and air circulation, and gives birds and other pollinators better access to the flowers. Many plants will act as natural screens for providing summer shade or windbreaks, and fruits on trellised plants are better shaped and more evenly ripe than those grown on the ground. Some fruits may ripen earlier due to the increased exposure to light, warmth, and airflow.

Ivy is a natural climber and a favorite for walls and trellises.
Materials:
•Cedar (or other rot-resistant wood) 2x2, 6 or 8 feet long (use the longer length for softer soil)
•Cedar (or other rot-resistant wood) 1x2s in the following lengths: one 2-foot piece, one 3-foot piece, one 4-foot piece, and two 5-foot pieces
•One 5-inch galvanized or stainless steel bolt, with nut and two washers
•Nine 1½-inch wood screws (or nine 2¼-inch
•thin bolts, each with two washers and nut)
•Drill
•Screwdriver
•Pliers
Note: Before you begin, it is helpful if you cut the bottom of the 2x2 at an angle, or, better yet, angle it on all four sides because it will be pounded into the ground. Also, if you’d like the “arms” of the trellis (the two 5-foot pieces of 1x2) to be closer together, cut the crosspieces shorter than 2, 3, and 4 feet; to make them spread wider, cut the crosspieces longer.
Step 1: Drill a hole of the same diameter as the 5-inch bolt all the way through the 2x2, about 3 feet up from the bottom. Drill another hole of the same size in one end of both 5-foot pieces of 1x2, about 1½ feet up from the bottom.
Step 2: Place both 5-foot pieces of 1x2 on top of the 2x2, lining up the holes in all three. Put the 5-inch bolt through all three pieces, making sure there is a washer on both sides of the wood. Attach the nut to the bolt, but don’t fully tighten it yet.
Step 3: Lay the wood down on the ground and splay the 1x2 pieces out at angles from the center post.
Step 4: Lay the three shorter pieces (crosspieces) of wood on top of the splayed 1x2s at even spacing, adjusting as you lay it out. Start with the 2-foot piece on the bottom, near the fork where all three pieces meet. The 3-foot piece will go in the middle, and the 4-foot piece will be the highest.
Step 5: Once you are happy with the placement
of the crosspieces, drill either a pilot hole at each
intersection and screw in a wood screw (this method
is faster), or drill a hole all the way through the overlapping pieces and attach a bolt (this method is stronger).
Step 6: Tighten the main bolt at the base (and the smaller bolts, if using them).
Step 7: Stick your trellis into the soil just behind where you will grow a climbing plant. For added sturdiness, use a mallet to pound the center post in from the top.
When you are happy with the placement of your trellis, grow a climbing plant and watch it reach up and stretch along its arms.
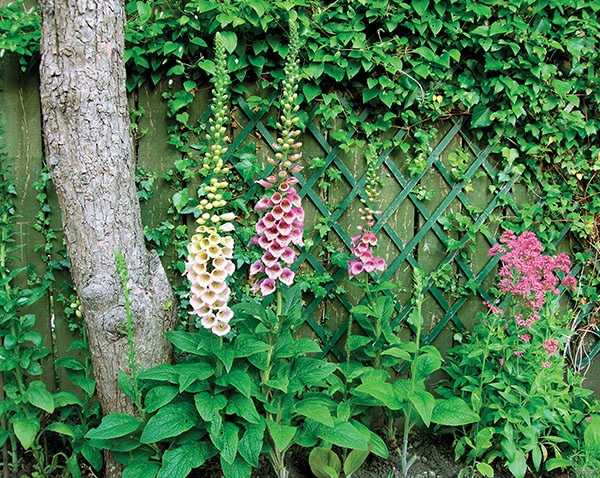
Trellises along the fence provide a living backdrop for this garden.
Plants with an Upward Growth Habit
EDIBLES
•Beans
•Cucumbers
•Espalier tree (fruit that grows
•on a trellis)
•Grapes
•Kiwi vines
•Melons
•Peas
•Raspberries
•Tomatoes
EASY CLIMBING ORNAMENTALS
•Cardinal climber
•Climbing hydrangea
•Honeysuckle
•Morning glory
•Sweet pea
•Trumpet vine
Other Materials
You can use other types of materials for trellising, depending on your imagination and what sort of plants you’re growing. For example:
•Thin pipes or tubing, such as galvanized (will rust, which can be pretty) or copper (will oxidize)
•Strong fence panels, such as livestock fencing (comes in panels with gaps of various widths) or regular fencing (savaged or found at hardware stores and cut to size)
•Concrete reinforcing wire, available in panels at hardware stores or salvaged (has 4-inch or 6-inch openings)
•Old-style bed or cot frames, which are metal rectangles with holes along the sides that can be used to attach support strings (they can often be salvaged)
•Bamboo pieces, tied together with twine or wire into a square or rectangular pattern