Project 10: Irrigation Systems
Why would you want to do this? To save time, to make sure that you’re meeting your plants’ watering needs, or to water your plants at the times that are best for them but not ideal for you (such as early on weekend mornings in the summer).
Why wouldn’t you want to do this? You don’t have that many plants, or you are in a groove with hand-watering and don’t mind doing it.
Is there an easier way? Getting advice makes the process easier. Before you get started, talk to the employees at your local hardware store to get their input on the best way to implement an irrigation system for your particular setup.
Skills needed: Irrigation plumbing of this sort is quite easy and designed to be installed by the homeowner.
Learn more about it: Find more info online: Irrigation Direct (www.irrigationdirect.com), click on “Expert Advice”; Castle International Resources (www.hydrosource.com), after clicking on “Library,” look at the article titled “The Chapin Bucket Irrigation Kit”; and “Do It Yourself Bucket Drip Irrigation” (www.csupomona.edu/~jskoga/dripirrigation), an article by science librarian James S. Koga of California State Polytechnic University, Pomona.
Although hand-watering is the best way to keep tabs on your garden and plants, it isn’t always possible to water your plants as often as they need it. There are alternatives to hand-watering that don’t require a plumber or expensive in-ground ditch-digging.
When I first started my garden, I had no water access (that I could find, but that’s another story). I was gung ho on rain barrels and proudly announced that I would be watering my half-acre garden with the water that the rain barrels (downhill from the garden, at the house) collected. Carrying watering cans 300 feet each way got old pretty fast. Attempting to pull a full rain barrel uphill in a cart was sheer idiocy that I recognized as soon as I, yes, tried it. That year’s garden was a little thirsty. The water from the six rain barrels I installed at the garden shed lasted a few weeks during the summer, but the watering-can method was tedious. A very long hose from the barrels was great—as long as the end of the hose stayed lower than the barrels. If I raised it up above my knees, the flow of water stopped. So much for my sustainable-water harvesting! I broke down and had a dedicated valve tapped off of our house’s main line. I still dream of digging a well, but that cost versus the current cost of municipal water doesn’t balance out.
Although I have many glowing childhood memories of watching my father hand-dig deep trenches for his in-ground sprinkler system, I have always been too fond of my back to emulate him. Instead, I use an above-ground method that I shut off and drain each winter; it isn’t very pretty, but I’ve never regretted it. I’ve made a number of changes and adjustments as needed over the years, and it’s an easy thing to do.
Before explaining the steps of this project, here are brief explanations of some of the materials that you’ll find in the list that follows. There are a few basics you’ll need for any system.
•A female end to connect the entire system to the faucet.
•A screen washer to put into the female connector at the faucet.
•A backflow preventer, which generally is legally required. Some of the faucet-mounted varieties squirt, so watch out!
•A timer. Timers can range from simple dials to elaborate programmable models, complete with rain gauges and seasonal adjustments. Get the simplest one you think you’ll need. If you’re forgetful, get one that turns on and off to water your plants at preset times for as long as you want. If your watering routine is an ingrained habit, get a basic timer that you can turn on and off manually at watering times.
•Pipe. Use ABS (black) pipe. Aquapex isn’t UV-tolerant, and it needs specialized tools and fittings. PVC pipe is rigid, degrades from sun exposure, and gets brittle and splinters when old. ABS is flexible and easy to work with (especially if you warm it in the sun or with a hairdryer), and it works with many types of connections and attachments.
Top to bottom: ABS pipe in three different diameters, two types of hose clamps, T connector, and various spray heads/emitters.
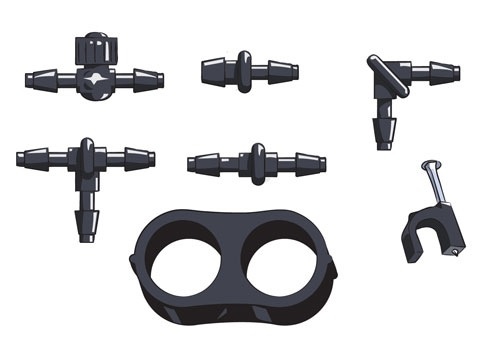
Top (left to right): inline valve, plug for patching a hole, and elbow connector; middle (left to right): T connector, connector for straight runs, and nail-in tubing staple; BOTTOM: figure-8 for sealing end of pipe.
When selecting pipe sizes, think about the relationship between flow rate and pressure. The greater the distance covered by the pipe, the lower the water pressure will be. You can compensate for this by choosing pipes of different diameters to maintain, or even increase, the water pressure. If you are covering a large distance or using a lot of emitters, start with larger diameter pipe at the faucet or spigot to maximize your flow, and then use smaller-diameter pipe near the emitters. I have a 1-inch pipe coming off my main spigot and running the full length of the garden. I tapped 3⁄4-inch pipes along the length of the main pipe for the various zones I am watering. Each 3⁄4-inch pipe runs the length of its zone, and 1⁄2-inch pipes run from the 3⁄4-inch pipes to each separate bed. Within the beds, I use 1⁄4-inch pipes (coming off the 1⁄2-inch pipes) with emitters. This system serves to maintain water pressure throughout the garden despite the wide distribution area and multiple “openings” in the pipes. You may not need such an elaborate setup, but it’s a good example.
•Connectors. T and elbow joints will allow you to get the pipe from the faucet to the area that needs watering, as well as to place lengths of pipe above (or next to, or whatever configuration you need) the plants.
•Emitters. Emitters are the prima donnas of an irrigation system; they are the attachments that deliver the water to your plants. You’ll be amazed at how many different types there are.
A drip emitter on an overhead length of pipe.

“Soaker hoses” (with holes that emit water) can work with pressurized systems and are most effective on level ground.
This pressure-watering system from a hose bibb or faucet is intended for the small-yard gardener, but it is equally applicable to any deck or patio area with pots or planters that need watering. I suggest that, before proceeding with the following steps, you take your materials list to the hardware store to familiarize yourself with the options for each of the items you’ll need. Helpful hint: Use your cell phone or a digital camera to take photos of the types of items that may apply to your situation. If you need to buy materials during the course of your project, take photos of your garden layout and system to the store with you. I’ve done this and have referred to the photos countless times.
Materials:
•Water spigot
•Female end
•Screen washer
•Backflow preventer
•Water timer
•ABS pipe
•Connectors (i.e., T and elbow joints)
•Emitters
•Garden clipper or heavy-duty scissors
•Pressure gauge
•Pressure reducer (if necessary)
Step 1: Locate/decide on the hose bibb or spigot that you’ll be using as the main water source.
Step 2: Measure the distance that a length of ABS pipe will travel from that faucet to your garden area. Use as direct a line as you can, but try to make it an unobtrusive path so that you’re not always stepping on the hose or tripping over it.
Step 3: Study the area that you want to water, taking note of the plants or pots, their sizes, and their water needs, to decide what type of and how many emitters you’ll need. If many of your plants can handle overhead watering and are in an area that can get wet, misters or sprayers are easy because you need fewer of them. However, some plants can grow mold or fungus from having wet leaves, so you may want soil-level water, which means more emitters but less water wasted.
Step 4: Determine the water pressure from your chosen faucet. Knowing your water pressure will help you decide which emitters to get and how long each watering session should be to deliver the right amount of water to your growing area. Try to borrow a pressure gauge from a neighbor or friendly plumber, or you can buy one (mine was around $6). Some utility companies can tell you the pressure of your house water at the gauge; this may or may not be the pressure at the spigot, but it’s a place to start.
Step 5: The fun part: take a trip to the hardware store to gather your materials.
Step 6: The second fun part, in my opinion: go home and set everything up. Cut the ABS pipe with regular garden clippers or heavy-duty scissors (such as poultry shears) and attach the connectors to run the pipe to your garden area. Remember to use the larger diameter pipe closer to the faucet end, decreasing the size, if need be, as you get closer to the plants themselves.
Step 7: Before attaching the emitters to the pipes, run water through the system once to clear out any dirt or debris that may be in the line. Emitters are often pressure-compensating, and even little specks of dirt or sand can affect the flow. Because the flow is light and sometimes tricky to see and gauge, you may not know that you have a problem until the plant begins to show signs of stress or dies.
Step 8: Follow the instructions that come with your emitters to attach them to the pipes near the plants.
Step 9: When the entire system is assembled, turn it on and let it run for a few minutes. Look carefully at each joint to make sure that there aren’t any leaks. Look at the places where water is supposed to be coming out to make sure that it is. Troubleshoot as needed.
Step 10: Once everything looks good, set your timer and pat yourself on the back.
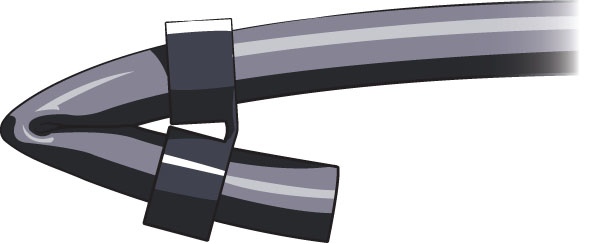
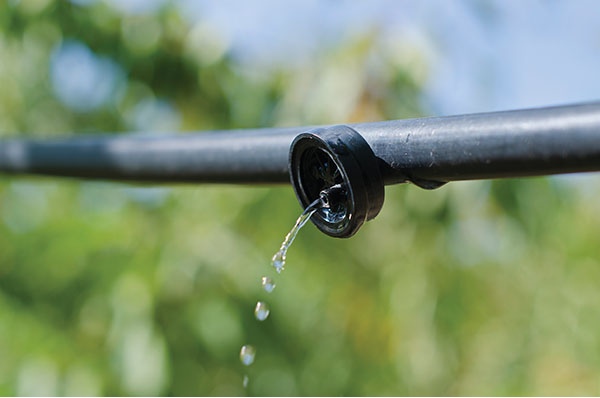
A figure-8 clamp is used to close off the pipe at the end of a run to maintain pressure.
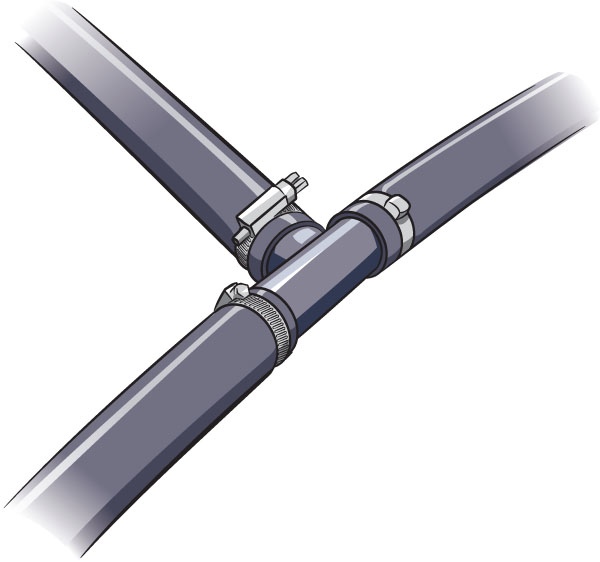
A T connector connects three pieces of pipe and is secured in place by a hose clamp at each joint.
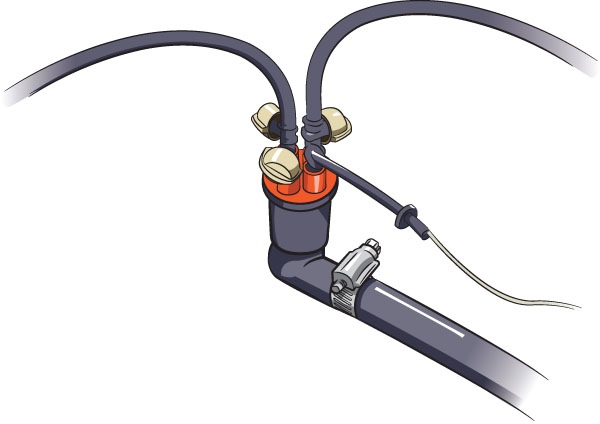
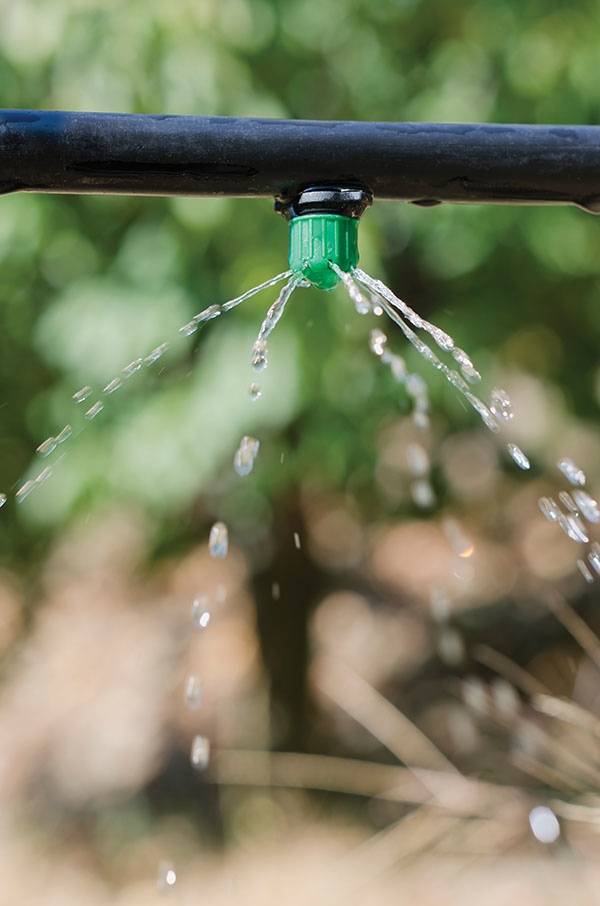
An example of a head with multiple outlets (four, in this case) to which you can attach emitters or sprayers to run to individual plants or sections of the garden.
Get creative! An overhead sprayer is attached to the ABS pipe with an elbow joint and zip-tied to a support to hang above the garden.
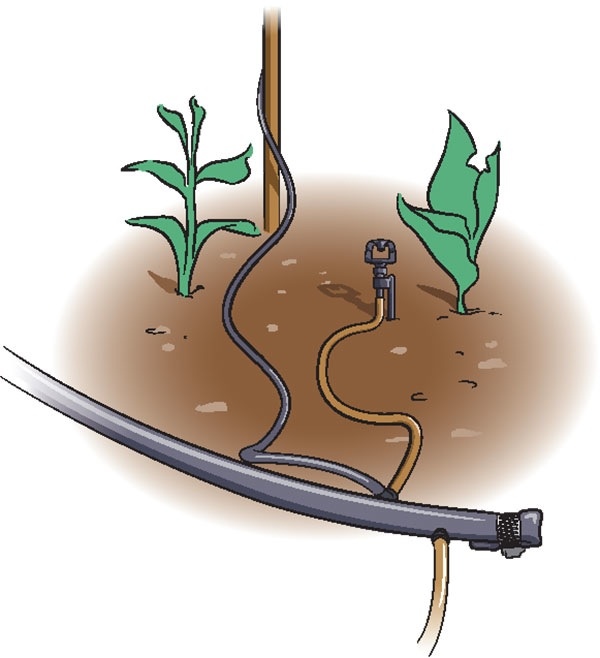
An example from the author’s garden: one pipe comes off the main line to an upright spray head, another snakes up a pole to fill a birdbath, and a third runs to a different section of the bed.
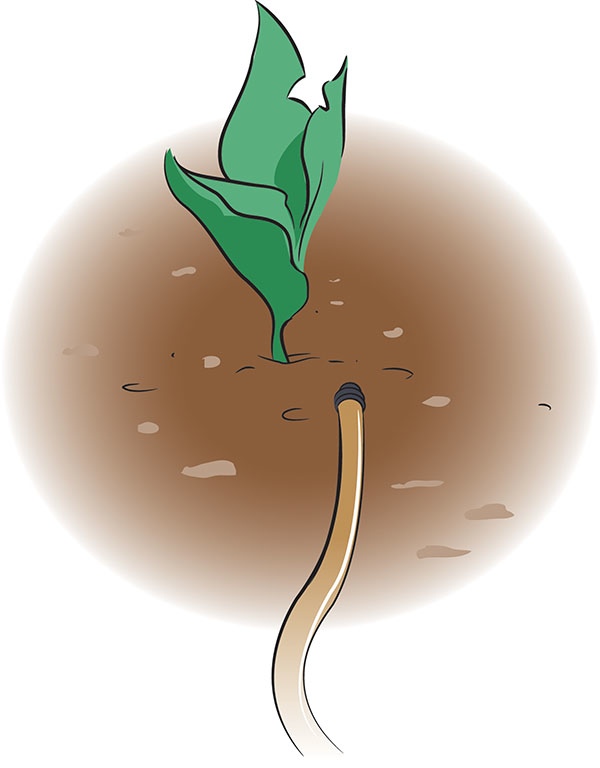
A length of pipe with a simple emitter runs to the base of a potted plant.
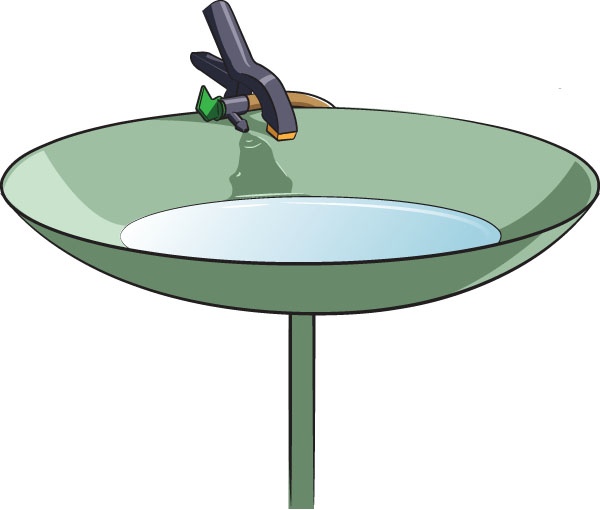
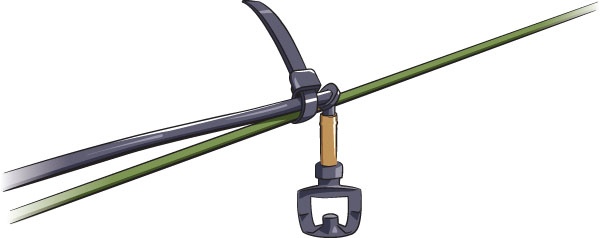
In another example of creative use of her irrigation system, the author clamped a hose with a drip flag emitter to the edge of a birdbath to ensure that the birds would always have water.