Project 12: Self-Watering Planters
Why would you want to do this? It works well indoors or outdoors, it will save you time watering, and it might save a plant’s life if you forget to water.
Why wouldn’t you want to do this? You don’t want standing water of any sort, or you prefer to water your plants by hand.
How does this differ from the store-bought version? A homemade version may not initially look as nice as a manufactured version, but you can get creative and make your planter as fancy as you’d like.
Cost comparison: The equipment for this project costs less than half of what a prefabricated self-watering planter would cost.
Skills needed: Basic construction skills.
Learn more about it: McGee & Stuckey’s Bountiful Container (Workman, 2002) by Rose Marie Nichols McGee and Maggie Stuckey; The Vegetable Gardener’s Container Bible (Storey, 2011) by Edward C. Smith; Grow Great Grub (Clarkson Potter, 2010) by Gayla Trail.
One drawback to small-scale or container gardening is how fast the planters can dry out. Bear in mind that if you go away on weekends during the summer, all of the good work you put into your patio garden can vanish in just a few short days. Self-watering planters serve as plant-sitters while you are away from home.
I have a tendency to forget to water my potted plants, so I swear by automated watering systems. Many decks or balconies don’t have the spigot or pressurized water source needed for automated watering, and in these cases, self-watering containers are a godsend. This project shows you how to build a quick and easy self-watering container in a size that fits your space. It can go anywhere, indoors or out, because the bottom container holds all of the water. Once you know how to make it, you’ll start noticing tons of containers in various sizes and styles (it’s amazing how many things can be stacked) that you can turn into planters. Warning: this project can become addictive.
Materials:
•Two stackable plastic containers (size depends on how large of a planter you want)
•¾-inch or 1-inch PVC pipe (in a length that matches the height of the stack of containers)
•Mesh basket
•Drill with ¼-inch bit
•Utility knife
•Soil
Step 1: Decide which bin will be inside the other, and mark circles on the base of the inner bin for the mesh basket and PVC pipe near the corner. The holes should be slightly smaller than the diameters of the pipe and basket, respectively, so that the pipe and basket sit snugly in their holes.
Mark the outer container where the inner container sits.
Step 2: Cut the bottom of the PVC pipe at an angle.
Step 3: Cut out the circles in the inner container.
Step 4: Flip the inner container over and drill small holes all over the bottom for drainage.
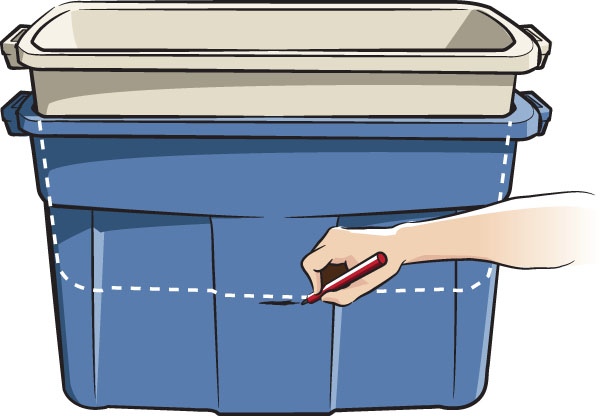
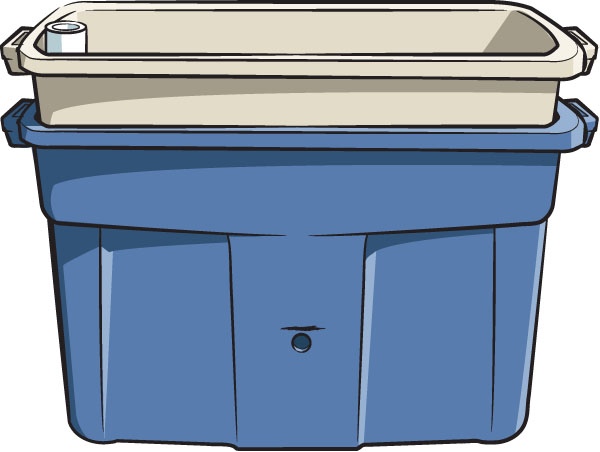
Step 5: Stack the containers and, on the outside of the outer container, mark the level of the bottom of the inner container.
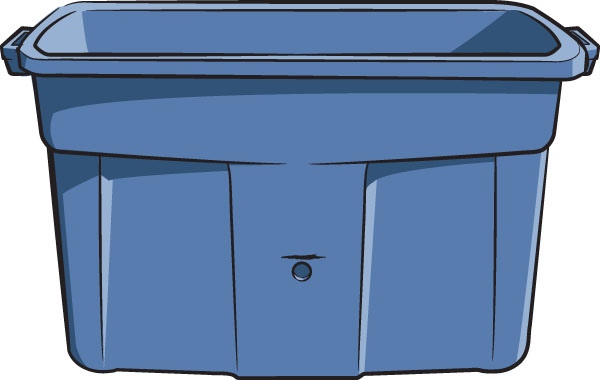
Step 6: Unstack the containers and cut a hole at the mark you made; this is an overflow hole to prevent your soil medium from sitting and soaking in standing water.
Mark the outer container where the inner container sits.
Step 7: Stack the two containers and then put the PVC pipe and the strainer into their respective holes in the inner container.
The PVC pipe should extend above the top of the inner container.
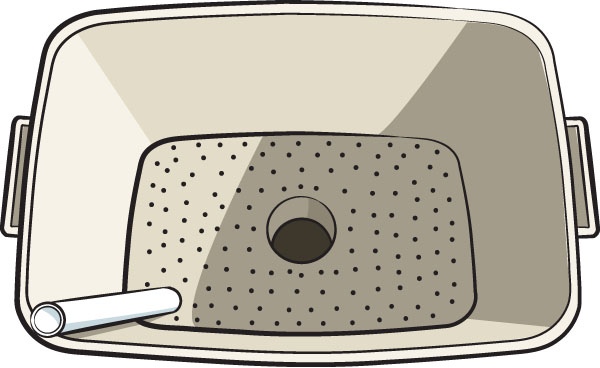
Top view of Step 7; the strainer will sit in the large center hole.
Step 8: Holding the PVC pipe vertically, fill the upper container with soil, tamping it gently. Make sure that the strainer stays in place and is filled with soil.
Step 9: Plant the container and water. Water from the top initially to make sure there is good soil-to-root contact. Once the plants are established, water into the pipe until water comes out of the overflow hole or until you can feel the water level with a finger tucked into the overflow hole. Check the water level weekly to keep the supply high enough for the plants’ roots to wick up.
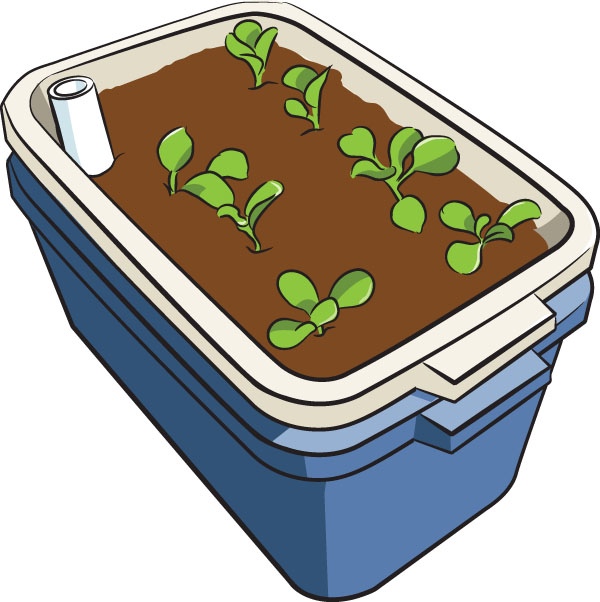
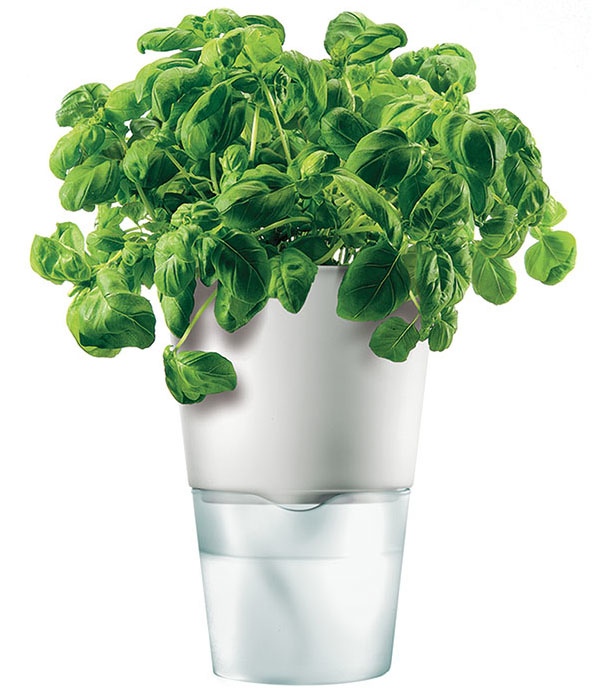
The finished planter, filled with soil and with plants growing inside.