Terms To Know:
Broiler: A male chicken specifically bred to grow rapidly in a short amount of time. In two months, it can weigh between 2.5 to 4.5 pounds when eviscerated.
Broody: Hens sitting on a clutch of eggs in a nest. A broody hen will stop laying eggs and will seldom leave the nest until the eggs hatch.
Candling: The process of shining a bright light through an egg to determine if there is a developing embryo inside.
Capon: Male chickens about 4 months to 8 months old that have had their reproductive organs removed. They weigh about 4 to 7 pounds.
Clutch: A collection of eggs in a nest.
Comb: The fleshy growth atop a chicken’s head. This is usually larger in the males.
Crop: An enlargement of the chicken’s esophagus where food is held prior to passing into the gizzard.
Down stage: The first few weeks of life when the chick is covered in down.
Egg bound: When the female’s reproductive tract is blocked and the egg cannot pass from the body.
Evisceration: To remove the internal organs of a chicken being butchered.
Flighty: The tendency of some breeds of chickens to be excitable and nervous.
Molt: An annual process in which the chicken loses its feathers and replaces them with new feathers.
Roaster: An older chicken about 3 months to 5 months old, weighing about 5 to 7 pounds and yielding more meat per pound than a broiler or fryer.
Wattles: The fleshy tissue under the throat of some chicken breeds.
Chickens are arguably the most farm-friendly livestock the entire family can enjoy. The start-up costs and overall expenses of a small flock of chickens are the lowest of all livestock species and the quickest to turn around from newly hatched chick to market-ready. Whether you have a trio of hens to provide your family with fresh eggs or a barn full of broilers for meat, the chicken is a fun, profitable first step to starting your journey into farming.
The modern chicken has its roots in the jungle of Southeast Asia. Though Charles Darwin thought all chickens descended from the red jungle fowl, it is now known that the gray jungle fowl also contributed to the gene pool of the domestic chicken. From the breeding of these two wild fowl, we now have hundreds of breeds, types, and strains of chickens. Scientists are not in agreement as to when the chicken was first domesticated. Thailand may hold the distinction of first domesticating the chicken, but many believe there may have been multiple areas in Southeast Asia and India where wild jungle fowl were captured and kept for egg production. The earliest archeological evidence of domestication has been found in China dating back to the 5400 BC. The red jungle fowl gave us the white-skinned chicken, while the gray jungle fowl gave us a yellow-skinned chicken. Carotenoids — a natural, fat-soluble pigment found in the chickens’ feed — actually form the yellow pigment in their skin. An enzyme coded by genes breaks down the carotenoids and releases vitamin A. Chickens with this gene that eat high levels of carotenoids develop yellow skin and legs.
The scientific name for the domestic chicken is Gallus domesticus. They come in different types: show or ornamental breeds, bantams (small, mature chicken), layers, meat-type, and dual-purpose. Which type you chose for your farm depends upon your ultimate purpose for raising chickens. The show, ornamental, and bantams are primarily raised for breeding and showing at fairs and competitions. Layers are specially bred to be prolific egg layers but are skimpy meat producers. Meat-type birds have been bred to gain weight quickly on the least amount of feed, but the hens cannot be expected to produce a large quantity of eggs. However, the eggs from a meat-type hen are perfectly fine to eat. The dual-purpose breeds are multi-purposed, combining the qualities of a meat-type and layer bird. However, they do not gain weight as quickly as meat-type birds, nor do they lay eggs as heavily as the layer breeds. Many small-scale farmers rely on these dual-purpose chickens to supply their family and customers needs.
Until commercial-sized chicken farms took over chicken production in the 1940s, most chickens were dual-purpose types and laid brown eggs. Commercial farms then started breeding layers for white eggs and meat-production birds. The dual-purpose breeds found in the United States are primarily of the American class: Barred Plymouth Rocks, White Plymouth Rocks, Rhode Island Reds, New Hampshire, and Wyandotte. Commercial layers are primarily the result of a cross between the White Leghorn and Rhode Island Red chickens. Commercial broilers are crosses between the Cornish and White Rock breeds. A small-scale chicken raiser usually will enjoy raising a dual-purpose breed.
Before you decide to raise chickens, there are a few points to take into consideration. You will need to decide what the primary purpose your chickens will serve. Do you want a fresh supply of eggs for your family? If so, keep in mind an average hen will lay 260 eggs a year — averaging five per week — for one to two years. Do you want to raise eggs to sell to the public? Then you will need to do some market research on your potential customer’s needs and the demand for farm fresh eggs in your area. To find out if there is a demand for eggs, begin by approaching your friends, acquaintances, or neighbors to see if they are interested in purchasing eggs on a consistent basis. If you want to expand beyond selling a few dozen eggs a week, a local farmers’ market or the local grocery store may also be interested in purchasing your eggs.
As an estimate, six hens should adequately supply enough eggs for eating and baking for a family of four. Egg production will drop a little in the winter months, as egg production is related to the length of daylight. A chicken relies upon a certain amount of daily light (approximately 14 hours) to stimulate its reproductive system. If you want to try to keep egg production up during the winter months, keep the hens in an insulated building with a light burning during the evening to add a few extra hours of light.
Do you primarily want meat? A broiler will be able to be butchered at around 6 to 8 weeks old, yielding 4 to 5 pounds of chicken. Will you have the freezer space to store your butchered chickens? Do you plan on performing the butchering process yourself, or is there a nearby butcher shop that will butcher small batches of chickens? These few questions will just be the beginning of the questions to be answered when deciding to establish a flock of chicken, even on the small scale. By reading the rest of this chapter, doing your own research, and evaluating your needs, you will be able to decide if chicken raising is for you and start this fun project with reasonable expectations.
Chicken Breeds
There are hundreds of breeds of chickens to choose from to start your flock. When you are choosing which breed to raise, keep in mind your primary purpose for raising chickens. If your plans include breeding the chickens, chose a pure breed over a hybrid breed. A hybrid breed is a cross between pure breeds, which usually results in a slightly more hardy and vigorous bird. Chicks resulting from hybrid chickens usually will not be like their parents in terms of expected egg or meat yields. They also will not look like either parent.
To get you started on choosing your breed, here is a small sampling of the more common breeds raised in small flocks in the United States. If you want a variety of chickens, you can have success with raising multiple species of chickens, provided they are raised together as newly hatched chicks. Sometimes, the chickens will appear to forage and roost near chickens of their same breed. This is mostly due to similarity in size and temperament.
Ancona: Originated near Ancona, Italy. This breed is black with white-tipped feathers. They are a smaller type of chicken that lay small, white eggs, generally around five per week. This breed can be flighty. This trait combined with their darker color helps them to avoid predators.
Andalusian: This breed had its start in Spain and was further developed in the United States and England. The Andalusian lays white eggs. Colors seen in the breed are blue (which is the required color to show this breed of chickens), black, white, or black and white. The adult blue chickens will have slate blue feathers with a narrow ridge of dark blue. This breed is an active forager, keeping feed costs down during warm weather when the chicken can remain outside. However, the bird is so active that it can run very fast, making capturing quite the event.
Australorp: The Australorp is a black chicken, which is a prolific brown egg layer. It was developed in Australia using Black Orpington birds. It is a good dual-purpose breed. This breed is considerably calmer than other breeds and is a heavy bird with roosters weighing around 8 pounds when mature.
Cochin: This Chinese ornamental breed is a favorite for poultry shows. They have feathered feet and come in a variety of colors. It is a very heavy breed, with roosters weighing up to 11 pounds. The hen only lays medium-sized, brown eggs for a short period of time, but makes an excellent mother. She will even become a foster mother to chicks of other breeds.
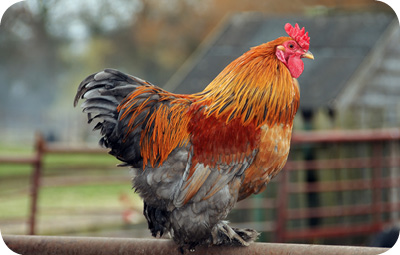
Blue Partridge Cochin
Cornish: The Cornish chicken has contributed the most to the development of the broiler industry. It is a heavy meat bird developed in England. They are poor egg layers, laying only one egg a week. Color varieties are white, laced red, and dark. Cornish chickens are crossed with Plymouth Rocks to give a commercial strain (Cornish-Rock) of meat-production bird. Because of a fast growth rate, they have been known to develop crippling leg deformities and cardiac problems.
Delaware: This breed, colored white with black points, was developed in the 1940s in the United States. It is a heavy, dual-purpose chicken laying extra-large, brown eggs. It is also an excellent meat bird, with the males weighing close to 9 pounds at maturity. The Delaware is a great forager and has a calm disposition.
Leghorn: The Leghorn has contributed to the development of most egg-laying strains of chickens. The white Leghorn lays a lot of large, white eggs. The other varieties are not as prolific at laying eggs but still lay sizable numbers. They are very light birds, only weighing around four pounds when mature. They are very shy around humans and are flighty. They are good foragers.
American Brown Leghorn
New Hampshire Red: This is a dual-purpose breed, which makes a good meat bird. It also lays brown eggs and has beautiful red-brown feathers. The males weigh around 9 pounds when mature. The hens will grow broody, and they make good mothers. They are active foragers and are aggressive.
Orpington: The Orpington is a heavy, dual-purpose breed developed in England. The roosters can weigh 10 pounds when mature. The color varieties are black, blue, buff, and white. They have heavy feathering, which makes them a good choice for harsher winter climates. Their eggs are brown. This breed is very gentle and calm, which makes it a good choice for families with small children who want to be active in raising chickens. The hen can go broody if the eggs are allowed to collect in a nest.
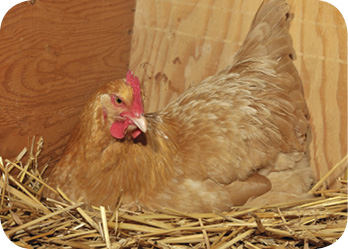
Buff Orpington Hen
Plymouth Rock: This dual-purpose breed was developed in the 19th century in the United States. The barred variety is the most popular, having a black and white feathering pattern. The White Plymouth Rock contributes to commercial broiler strains. They are excellent egg layers, with large, brown eggs. The breed is generally fairly docile, but some birds can become aggressive. Mature roosters generally weigh 9 ½ pounds.
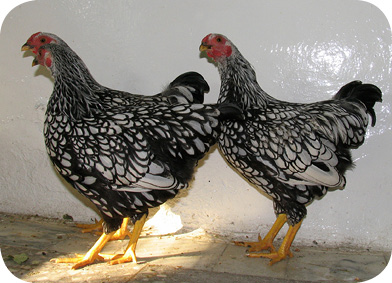
Plymouth Rock Hens
Rhode Island Red: The Rhode Island Red is a dual-purpose breed. They lay very large brown eggs and are a heavy meat bird. This chicken is a good forager and is fairly docile. A mature Rhode Island Red rooster weighs 8 ½ pounds when mature. The hen can lay up to 300 eggs per year.
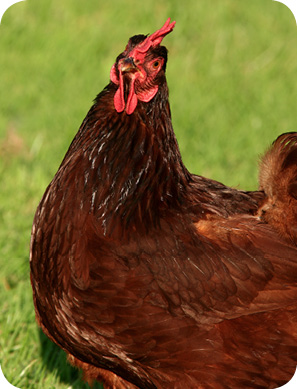
Rhode Island Red
Silkie Bantam: This beautiful ornamental breed originated in China in the 1200s. It comes in many colors and has feathers, which look similar to human hair. They are calm, sweet birds that lay small to medium sized, white to brown eggs. The Silkie Bantam has blue earlobes, bones, and flesh, which are caused by melanin, a pigment normally found only in the skin. The Silkie is also unique from other chickens in that it has five toes on each foot as opposed to the four found on most breeds. Hens only lay about three eggs a week, but they will sit on eggs of other chickens or even on other bird species eggs.

Silkie Rooster
Sussex: A good dual-purpose breed developed in England. They are good egg-layers with large, light brown eggs. The feather coloring can be speckled, light, or red. The male weighs around 9 pounds when mature. They are excellent foragers and have a calm temperament. Hens lay around 250 eggs per year and can become broody.
Wyandotte: The Wyandotte is a good dual-purpose breed. They are great egg layers, laying large, brown eggs. This breed comes in many colors and feathering patterns. They are a docile, talkative breed of chicken and are a popular show breed. Wyandotte chickens are good foragers, and an adult male will weigh 8 ½ pounds when mature.

Golden Laced Wyandotte
Preparing For Your Baby Chicks
Once you have decided to raise chickens, you will need to plan for your new arrivals. Chickens can be raised in almost any building, provided it is draft-free and predator-proof. Chicks still in the down stage cannot adequately insulate themselves against wind, while fully feathered chickens can fluff their feathers, creating air pockets to protect against wind and colder weather.
Predators are a big problem with all ages of chickens. Chicks need to stay inside a shelter both day and night for temperature regulation and safety. Raccoons, cats, weasels, dogs, foxes, coyotes, skunks, and prey birds all enjoy a chicken dinner. Older chickens can venture outside, provided they have an enclosed shelter to escape predators. Most savvy chicken owners will always lock their chickens in a secure shelter overnight.
Chicks, like any newborn animal, will need some special care to ensure they get off on the right foot to minimize losses. While all chickens should have fresh food and water, a chick is unable to regulate body heat while covered in down, so they need a constant source of external heat. Their immune systems are also less capable of fighting off disease, so extra attention should be paid to keeping their environment clean and reasonably sanitary.
You will want to start with purchasing your chicks from a reputable source whose top priority is hatching healthy chicks. Mail-order companies or feed stores are fine, provided they can tell you the source of their chicks. You will want to make sure the chicks were hatched in a reputable hatchery, not in a backyard with questionable sanitation standards. Hatcheries specializing in poultry are the main suppliers to feed stores or mail-order companies. Usually you can order directly from the hatchery, provided you purchase a minimum number of chickens. Another added feature to investigate is whether the hatchery participates in the National Poultry Improvement Plan (NPIP) and if the breeding flock is yearly tested and certified disease-free. The NPIP is a voluntary program between federal and state governments and the poultry industry to prevent the spread of poultry diseases.
After deciding on the breed(s) of chickens you want, you will next want to decide if you want to purchase cockerels (young males), pullets (young females), or a straight run (mix of both sexes). If you plan on butchering your chickens for meat, you will want all cockerels. Males will put on weight faster and will be heavier than females; how much weight varies depending on breed. If your plans include a laying flock, you will want to purchase pullets. You do not need a rooster in order to get eggs. A straight–run group will generally cost a little less per chick then a group segregated by sex. Most hatcheries will guarantee you will get around a 95 percent sexed group (the percent of chickens’ which sex has been accurately determined), so do not be too surprised to find one of your pullets is actually a rooster when they mature.
The mail-order company will tell you when your chickens will be shipped. They will generally require you to order a minimum number of chicks to provide enough body heat for shipping, usually 25 or more chicks. Also, shipping is done primarily in spring and early summer to take advantage of the more temperate weather. Be sure to have someone available to immediately unpack the chickens and put them in their pen when they arrive at your doorstep.
If you decide to purchase your chicks from a feed store, be sure to examine the condition of their pen. If the pen, water, and feed are dirty or if there are any dead chicks in the pen, do not purchase your chickens from that store. The chicks’ health might already be compromised from a poor start in life. It is also important to check the vent (anus) of the chicks. If there is any fecal build-up, the chicks might be harboring a disease.
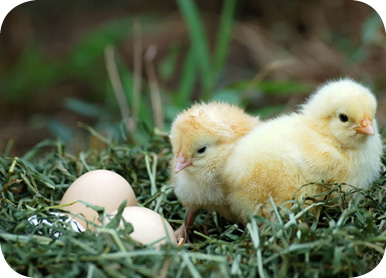
Setting up the pen
Prior to bringing the chicks home, you should have the pen set up and ready. You will need the following equipment before the chicks arrive:
• Heat lamp
• Electricity source
• Heat bulb
• Waterer
• Feeder
• Means to enclose the chicks near the water, feed, and light
• Shavings or sawdust for bedding
Heat lamps and bulbs can be purchased at farm supply stores or hardware stores. Waterers should be 1 gallon or less and should be slightly elevated after the first few days to prevent build-up of shavings and manure from the chick’s natural tendency to scratch and kick bedding into the water or feed trough. Likewise, feeders should be raised slightly after a few days. You should provide one waterer per 25 chicks, and 1 inch of feeder space per chick.
For the first few weeks, the chickens can be raised in a large stock tank or similar container. The main priority is that the container is cleaned, bleached, and dried before the chicks arrive. A mild bleach solution (1 teaspoon per gallon of water) or vinegar can be used to disinfect the pen, waterers, and feeders. Letting the equipment dry in the sun ensures all disease-causing germs are killed.
Spread a layer of bedding in the bottom of your container, then hang your heat lamp. Make sure that the heat lamp will not be in contact with any combustible materials and that it is securely fastened. You will need to adjust the heat lamp based upon chick behavior, so ensure that the lamp can be easily moved. Start out with hanging the lamp so the bottom is 12 inches from the bedding. A basic aluminum shade lamp found at any hardware store provides an affordable and safe heat source.
Fill the waterers with fresh water. You can add a pinch of vitamin and electrolyte solution to the water for the first week to give your chicks a good start. Fill the feeder up with chick starter, which can be purchased at farm stores or a local grain elevator. This pre-blended feed is carefully formulated to provide the chicks with a balanced blend of grain, protein, energy, vitamins, and minerals. The medicated chick starters will have a coccidiostat, a drug added to help control coccidiosis. Nonmedicated chick starter will work as well, provided you are diligent about daily cleaning of waterers and feeders and do not overstock the pen with chickens. There is no medication that can take the place of cleanliness and good husbandry.
When your chicks arrive, take each one out of the box and dip its beak in the water. This will ensure that the chicks get a drink of water and that they will know where the water source is located. Then, release the chicks under the heat lamp. After all chicks have been released, observe them frequently over the course of the day to make sure they are all able to eat and drink. If they huddle under the lamp, the lamp should be lowered to provide more heat. If they are scattered far away from the lamp, they are probably too warm, and the lamp should be raised a few inches. This is a good general rule for most young animals.
A covering of chicken wire or other woven wire over the container — even if your building is predator-proof — will give you extra assurance that nothing will sneak into the pen and kill your investment. If you have a shallow container, it will also help contain the chicks as they get older and are testing out their ability to jump and flutter.
Incubating Eggs
If you would rather hatch your own chicks, a fun family project is to incubate eggs, either purchased or laid by the family hen. To begin, you will need an incubator, a hygrometer for measuring humidity inside the incubator, and a regular thermometer. It takes 21 days for a chick to hatch and requires close monitoring during these three weeks.
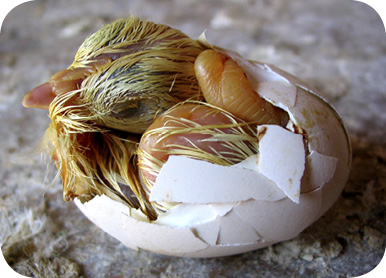
Before your eggs arrive, the incubator should warm up for one week. Read the instructions that come with the incubator very carefully as each manufacturer will have some specific requirements on their product. Incubators generally come in two types: a still-air incubator or a fan-forced incubator. Air temperature in the still-air incubator should read 101.5°F at the top of the eggs; a fan-forced incubator temperature should read 99.5°F. A fan-forced incubator will use a fan to evenly distribute heat throughout the incubator. A fan-forced incubator will cost more, but for small batches of eggs, a still-air incubator will give an adequate hatch. Prices for incubators range from $60 to more than $400.
In addition to temperature, the humidity inside the incubator is important to maintain. For the first 18 days of incubation, the humidity should range between 60 to 65 percent. For the remaining three days, the humidity should be increased to between 80 to 85 percent. It cannot be stressed enough to carefully monitor the temperature and humidity during the incubation period. Chicks will not hatch or will be unhealthy in an improperly maintained incubator.
If you purchase eggs, you will need to “settle” the eggs for a day to allow the air-cell inside to return to a normal size. Those swiped from a broody hen can be directly placed inside the incubator. To settle the eggs, store them with the more pointed side down at 55 to 60°F. After settling, or if they have been taken from a hen, distribute the eggs evenly throughout the incubator. You will need to turn the eggs twice a day for the first 18 days to prevent the chick from sticking to the side of the egg. After the 18th day, stop turning to let the chick orientate itself inside the shell. Increase the humidity level inside the incubator and fight the urge to open the incubator door. Opening the door will drop the temperature and humidity, and it will take a few hours for the incubator to return to the proper levels of heat and humidity, which could cause problems with the hatch.
Once the chicks start to break their shells, do not attempt to help them out of the shell. They need to do this on their own to develop the strength they need to survive the new world. If a chick cannot come out of its shell on its own, it will probably not be able to survive. Leave unhatched eggs in the incubator for two to three days after the first chick hatches. After that, remove the eggs and discard — these chicks have died. If your chicks hatch very wet and “mushy,” the humidity inside the incubator was too high. Remove the moisture from the incubator if the chicks fail to fluff up their down. Once the down is fluffed, and when they are running around the incubator, transfer them to the prepared brooder area. The chicks should be ready for transfer in a few hours after hatching.
Feeding and Equipment
At around 4 to 5 weeks of age, your chicks will be fully feathered out and will be large enough to move out of the brooding pen. The requirements for a chicken coop remain the same as one for chicks: safe and secure from predators, dry, and protected from heavy winds. A shed or an unused part of a building can be used to keep the chickens. Keep them confined to their new home for a few days; then, they can be let outside during the daylight hours. They will come home to roost, so to speak, when evening approaches, and they should be locked in for the night.
As the chicks grow, they will have certain requirements for floor space, feeder space, and waterer space. The minimum amount of space for a broiler of lightweight layer is 1 square foot. Heavier or larger birds will require twice that amount. Most small-scale chicken raisers will not have a problem meeting the minimum floor space requirement since the space requirement is so small. More floor space will mean less chance that disease will spread.
All birds should be able to eat and drink at the same time. This typically means you should allow 2 to 3 inches of space for each bird if you use trough feeders or waterers. If you use circular waterers or feeders, 1 to 2 inches per bird will be adequate. Trough feeders or waterers are long and rectangular-shaped plastic or metal pans. Circular feeders and waterers have a round base onto which a tall, cylinder-shaped holding pan is attached to the base. The water or feed then gradually flows into the base where the chickens feed.
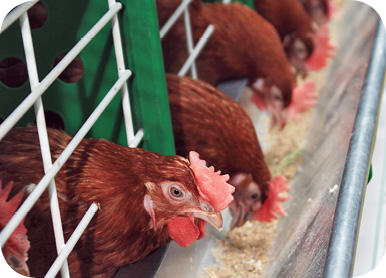
Chickens also have some special lighting needs, but the artificial light does not to be elaborate or bright. In fact, too bright of a light might lead to pecking. Broilers can be placed under 24 hours of light (incandescent 40 watt bulbs) to encourage feeding; however, doing so might waste electricity, and pushing broilers for growth might lead to early death and leg deformities. A good compromise might be to provide broilers with 18 hours of light a day. At around 10 weeks of age, chickens raised as layers should be placed on short light periods of fewer than 12 hours a day. If you purchased your chicks in the spring or early summer, natural lighting will accomplish this lighting requirement. This will help them to mature properly and have optimal lifetime egg production.
Baby chicks should be fed a quality, commercially prepared starter diet. They do not need any supplemental feed at this time. In fact, giving them vegetable scraps or grass might keep them from consuming adequate quantities of starter, slowing their growth or causing death. At 6 weeks of age, the chicks should be switched to a grower ration, which is lower in protein than the starter ration. When your hens reach laying age (around 4 to 6 months old) they should be switched to a layer ration, which has high calcium content to promote good egg formation. Laying hens should also have crushed oyster shells to make sure they consume adequate amounts of calcium for proper eggshell development. They can also be provided grit (small pieces of mineral) to help digest food properly. Do not forget to provide the most important nutrient: water. Water should be available at all times and should be placed into clean waterers. The waterers should be checked on a daily basis and cleaned as soon as they become soiled with litter or feces.
Health Concerns
Behavioral problems
Pecking and cannibalism are major problems in chickens. The term “hen pecked” comes from chickens’ social need for a pecking order — or social class — formed within the flock. The rest of the flock will defer to the top bird, giving him or her access to food, water, and space first. A flock of chickens will establish a social hierarchy and will coordinate flock activities such as drinking, eating, dust bathing, and roosting. Every chicken knows its rank in the order, and the rank seldom changes unless an illness or death occurs. Commercial growers will trim newborn chicks’ beak to cut down on pecking and cannibalism. However, beak trimming will not allow your chickens to forage effectively. As long as you are not restrictively confining your hens to tiny, commercial-type pens, pecking and cannibalism should not be a problem.
Chickens have good eyesight and can see colored objects in bright sunlight. This will lead them to use their sensitive beaks to explore for new food. If their beaks become soiled or if they eat a mushy food, they will wipe their beaks off on the ground. Their beaks can be compared to our hands because they use the beaks to explore and carry things. An intact beak allows the chicken to fully explore their world.
If you have a particularly aggressive bird, it can be placed in a separate pen but within sight of the rest of the flock for a few days to help it calm down. It can then be reintroduced to the flock, but be sure to monitor its behavior. Placing extra feed and water sources in the pen will also cut down on competition for these resources. If one bird has been de-feathered by the other birds, there are ointments that can be placed on her feathers to deter pecking. Finally, there are plastic devices that can be placed on the beak of particularly aggressive birds, which will allow them to eat and drink but not peck.
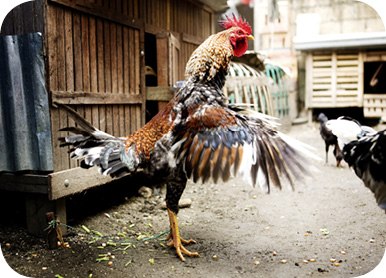
Taming a mean rooster
Mean roosters have turned many people off from raising chickens. With their well-developed spurs, rooters can inflict serious wounds when they see you as a threat to their flock dominance. Each time you enter the coop, you will have to remind your rooster that you are the top dog of the flock by following the steps given in this section.
An alpha rooster usually dominates the pecking order of a flock by getting first dibs at food, water, and hens. The hens also have an alpha hen that is the boss. Unlike the roosters, hen social order is harder to see, but it is there. The alpha rooster asserts his dominance constantly. If another chicken attempts to eat first or another rooster tries to mate a hen, the alpha male will rush over and administer a good peck or even pummel the out-of-bounds interloper with beak, claws, and wings.
Your job is to make sure you are not the victim of such an attack. Starting when the chickens are small, take a few minutes each day to observe their behavior. When the chicks start to fight (or spar), break them apart by gently pushing them back with your fingers. Each fight you see, do the same thing. This will let the flock know that you are in charge. As they get older, you will still have to reinforce your dominance. It is fine to pick up a rooster and pet him. But a rooster should not be eager to approach you. If he does, he will think that he is the top chicken, not you. It will not hurt to take an occasional swat at him if he seems too comfortable with you.
Do not let the rooster eat before the hens. Doing so will give him the cue that he is dominant in the flock when, in reality, you should be the dominant member (in his mind) of the flock. In essence, you are top rooster and need to allow the hens to eat before him, the less-dominant rooster. If he tries to come to the feeder first, push him away so the hens eat first. After the hens are eating, it is fine if the rooster begins to eat. If a rooster tries to breed a hen in your presence, push him off and chase him away. It is the same concept as eating; he has to wait until you leave to be able to breed the hens.
The main thing to remember when it comes to roosters is that you have to be on guard at all times. If these techniques do not work, or if you are unable to be consistent in asserting your dominance, it might be safer for the rooster to be destined for the soup bowl.
Nutritional deficiencies
Nutritional deficiencies are two problems with chickens, especially while they are still growing. Rickets (vitamin D deficiency) and vitamin A deficiency are the primary nutritional disorders in chickens. Vitamin A deficiency will result in poor weight gain, poor feather formation, and death. Adult chickens deficient in vitamin A will have nasal and eye discharges, and decreased egg production. Most feeds will have plenty of vitamin A, provided the feed is fresh and has not been sitting on the shelf for a long period of time. Fresh vegetation will also provide your chickens with plenty of vitamin A.
Deficiencies of calcium and phosphorus will cause rickets (poor bone growth and formation) in chickens. In older hens, a similar deficiency will cause osteoporosis. Heavy-laying caged hens are more likely to suffer from osteoporosis, making their bones fragile and prone to easy breakage. This is caused by loss of calcium from the bones to form eggs shells. A lack of exercise also contributes to osteoporosis. A properly fortified feed, along with exercise and access to free range to plants, can help prevent rickets and osteoporosis.
Parasitic infections
Parasitic infections can plague your chickens, especially if they have access to dirt. Lice, coccidian, roundworms, and hairworms are the main parasites affecting chickens. Check your chickens daily to assess their overall health. Things to observe include feather loss, weight loss, unthrifty appearance, sitting huddled away from the flock, and decreased egg production. Heavily infected chickens can be more prone to developing other diseases that can quickly lead to death.
Most chickens raised with access to dirt flooring will harbor a few internal parasites. These generally will not cause symptoms or problems and are not easily transmitted to humans. Chickens get parasites by eating parasite eggs found on food, dirt, or water. Insects, earthworms or snails — all tasty treats to foraging chickens — also carry the parasites or eggs in their body. Coccidian, roundworms, and hairworms are common intestinal worms of chickens. To control parasites in chickens, there are some specific things you can do:
• Do not overcrowd your shed or outside pens.
• Try to keep wild birds away from your chickens.
• Use insecticides, if necessary, to control insects in sheds.
• Change bedding frequently and keep it dry.
• Remove droppings to keep chickens from pecking at them.
• Keep your chickens on a quality feed formulated with plenty of vitamins.
• If you suspect internal parasites, have your local veterinarian identify the species so you can properly medicate the birds.
Infectious diseases
Contagious diseases such as fowl cholera, fowl pox, colibacillosis, mycoplasmosis, avian influenza, and Newcastle disease can strike a flock and cause decreased growth, egg production, and death.
Colibacillosis is an infection with Escherichia coli (E. coli). The signs of colibacillosis are variable. Birds can suddenly drop dead with no prior signs of disease. Other chickens have a chronic infection leading to a “poor doing” chicken. The bacteria can infect the blood, intestinal tract, or lung, which can cause diarrhea, labored breathing, and coughing. The best way to prevent colibacillosis is through sanitizing feeders and waterers on at least a weekly basis and keeping the pen and bedding clean. Providing good ventilation in the pen or coop will also help minimize the impact of this disease. Antibiotic treatment may or may not be successful due to the many strains and types of E. coli.
Mycoplasmosis is big problem in poultry. Different strains of this organism can cause lung disease (airsacculitis), sinus disease, or joint infection. Antibiotics can be used to control mycoplasmosis, but like most infectious disease, prevention through good sanitation and ventilation will save you from the heartache of dealing with this difficult-to-treat disease.
Fowl cholera is caused by the bacteria Pasteurella multocida. It is spread to chickens by free-flying birds and other mammals such as dogs, cats, raccoons, rats, mice, and opossums. Many birds in a flock may be affected, causing sudden death, diarrhea, ruffled feathers, and joint problems. Treatment will be aimed at the entire flock through antibiotics in the water. Check with your local veterinarian or extension agent on the best type of medication to use. Prevention through good rodent and wild bird control, as well as good sanitation, will help minimize the chance of an outbreak of fowl cholera in your flock.
Infectious coryza, commonly known as a cold, occurs in adolescent and adult chickens. A chicken with coryza will have swelling of the face, and nasal and eye discharge. Egg production will drop as well. Antibiotics in the water or feed can help control coryza. Prevention is aimed at keeping the organism out of the flock through making sure only healthy chickens are introduced into the flock. Purchase your chicks from a single source, and do not mix young chickens with older chickens. In fact, practicing an “all-in, all-out” management style will prevent many infectious diseases from occurring. This means the only chickens on your farm will be ones that were purchased from the same source at the same time, and new additions will only occur when all the old chickens are gone.
Newcastle disease is a viral disease that affects all bird species. Infected birds spread the virus in their droppings and through droplets from the respiratory tract. It can also be spread through dust contaminated with the virus. Depending on the viral strain, the disease can be mild, moderate, or severe. Young birds are typically affected the worse and may have facial swelling, trouble breathing, or convulsions. Vaccinations have helped to control Newcastle disease in poultry.
Avian influenza can cause a wide range of signs in poultry ranging from a mild disease with few deaths to a highly fatal, rapidly spreading disease. Waterfowl are more resistant to avian influenza than other poultry breeds. In fact, waterfowl can serve as a source of avian influenza to turkeys and chickens, causing serious disease in these two species. The signs of avian influenza are very variable depending upon the strain of virus. Signs include sneezing, coughing, ruffled feathers, depression, diarrhea, swollen head, or sudden death. There is no specific treatment or vaccination. Prevention revolves around keeping wild birds away from domestic poultry flocks.
Putting Your Investment to Work
Breeding
Before you embark on breeding your chickens, take some time to decide what your intentions are. Do you want to have replacement layers and some broilers to feed up? Are you interested in breeding purebred chickens or in breeding one of the less common breeds? Do you hope to sell baby chicks? Breeding chickens and incubating eggs will take some planning on your part to ensure your chicks are healthy and able to survive. Most hatcheries hatch out eggs for sale in the spring and early summer to coincide with favorable weather for raising chicks. This is especially important in the northern latitudes where harsh winter weather makes keeping a brooder area at the proper temperature in unheated and poorly insulated buildings impossible. You should aim for a spring hatch.
You will be hatching out both males and females. If you breed a laying-type chicken, the males will not make the best meat birds. They can be raised for meat, although most likely at a financial loss. Meat-type female birds will not necessary be the best layers, although they can be butchered for meat. Hybrid birds, as opposed to purebred strains, will not necessarily hatch out in the same likeness of the parents. So chose your breed based on your desired outcome. Cockerels reach breeding age at 17 to 19 weeks of age. One rooster can service between six to 12 hens. Hens reach breeding age at 18 to 20 weeks of age. The hens and rooster should be placed in an indoor pen with nest boxes (one box per four hens) so you can collect the eggs twice daily. The collected eggs can be stored in egg cartons at 55–60°F for up to seven days before they are incubated.
Eggs should be gently cleaned of manure and dirt before storage or placing in the incubator. They should be candled five days after being placed in the incubator. A broody hen can also sit on a nest of eggs if you do not have an incubator. She should be left alone to care for the eggs. Provide her with feed and water at all times.
Management of layers
You will need to properly manage your laying flock in order to get a consistent, quality, and clean supply of eggs. As discussed previously, laying hens will need to be fed a steady diet of laying hen feed, which has a higher calcium level than the other types of chicken feed. In addition, crushed oyster shells (which come in convenient 40- to 50-pound sacks) should be placed in a separate feeder from the feed. Keep the feeders and waterers full of feed, oyster shells, and water at all times for your hens.
You will want to make sure you can find the eggs once the hens start laying. This can be accomplished by fencing the flock in so they cannot wander off into the woods or other protected area to start a nest. Some breeds of hens are more broody than others. This means they will lay an egg daily in a hidden nest and try to sit on them to hatch out chicks. They will even do this if there is no rooster to fertilize the eggs.
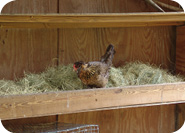
Provide your hens with a nest box so they have a sheltered, shady place to lay their eggs. This need not be fancy or elaborate, but it does need to be maintained and cleaned frequently. Eggs can quickly become soiled by feces or mud, which can also stain the shell, leading to unappealing eggs. There should be one nest box for every four hens in your flock. This will help to keep the eggs clean and to minimize egg breakage. Depending on the type you purchase, the boxes should have a deep layer of litter to cushion the eggs and to absorb any waste material. Nest boxes should be placed inside a building. Rats, skunks, raccoons, and snakes will eat eggs, so the building should be predator-proof, especially at night. Hens will learn to come back to the pen to lay eggs, so they can be let out of the pen during the day to forage and exercise.
Eggs should be picked twice daily. Most chickens will lay their eggs before 10 a.m. If the temperature is below freezing, check for eggs frequently, as they will freeze. By picking eggs frequently, you will also help to minimize breakage. Hens will frequently peck at broken eggs and sometimes can develop an appetite for eggs, breaking intact eggs just to eat them. Once you have collected the eggs, they will need to be processed. The eggs should be washed as soon as possible after they have been picked. Wash water should be a little warmer than the eggs; lukewarm water will be sufficient. If the water is colder than the eggs, dirt and bacteria can be drawn into the egg through pores in the shell. Using warmer water will make the contents inside the egg swell and push the dirt away from the pores. A mild detergent can also be used to wash eggs. Use running water to clean the eggs and do not allow them to sit in water to minimize any bacterial cross contamination between the eggs.
Eggs should then been dried and cooled after washing. To properly store, they should be placed in eggs cartons with the pointy end down and the carton should be placed inside a refrigerator. Properly cleaned and stored eggs can remain safe to eat for four weeks or longer.
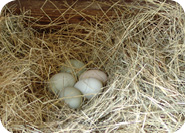
Candling eggs
Eggs are candled in order to see if the eggs are fertilized or not. Despite daily gathering of eggs, occasionally you may miss one for a few days, and an embryo may develop if you have a rooster running with your hens. If you plan on selling your eggs, you should candle them to make sure your customers do not crack open an egg with a chick growing inside. Eggs are also candled if you are incubating fertilized eggs to determine if the chick is growing or if it has died inside the shell.
Surprisingly, an actual candle does not have to be used to candle eggs. To candle the eggs, you will need a darkened room and a bright, direct light source. A bright flashlight or a lamp with a bright bulb can be used. You can also purchase a commercial candler through poultry supply companies. Hold the large end of the egg up to the light and slowly turn it. You should be able to see the air sac, the yolk, and the pores through the eggshell. Dark or brown eggs will make it a little harder to see through the shell. In a fertilized egg, there will be a spot — a thin red ring or blood vessels — around the yolk. If the egg has been incubated about a week, you will be able to see the embryo’s eye, the shadow of its body, and it may even move.
Harvesting Chickens
When your broilers are ready to be butchered (around 8 weeks of age), you will need to prepare your processing area. It does not have to be elaborate, but it needs to be clean, free from insects, and have a water supply. Processing is a three-step procedure consisting of the actual butchering, evisceration, and chilling. The butchering process should be done in a separate room from the last two steps.
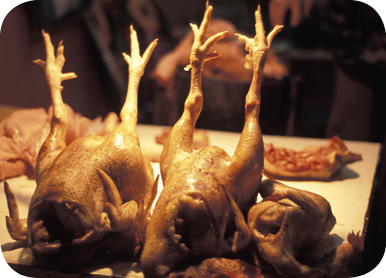
You will need to gather supplies before starting. You will need two large containers, such as clean 5-gallon buckets or even clean metal garbage cans. One will be used for scalding and another will be used for chilling. You will also need two or more large stockpots for boiling water and a sturdy worktable. It is best if the worktable is made from an impervious material to protect it from the water and so it can be bleached before and after use. Other equipment and supplies include sharp knives, two or more deep pans, a cutting board, a permanent marking pen, and freezer bags.
Fill the stockpots with water and bring to a boil prior to butchering. Once you have selected your chickens for butchering, you will need to sever its throat. A sharp axe makes a clean cut but does not allow as much to bleed out as does a sharp knife. Regardless of the method used, you should hold the carcass upside down to allow the blood to drain out. The throat is cut with the sharp knife right below the lower jaw. There are also killing cones or shackles available to help hold the chicken steady during the butchering process. The chicken will flop around for a minute or two after butchering, so do not be alarmed.
Once the chicken is butchered, hold it by the legs and immerse it, head first, in the scalding water for 30 to 60 seconds. The carcass then should be moved around in the water to make sure the water thoroughly penetrates all the feathers. This allows the feather follicles to relax and makes feather removal easier. You may want to wear hand and arm protection to keep the water from scalding your skin. You should then suspend the scalded carcass by the legs with shackles or rope to make picking out its feathers easier. The feathers should be picked as soon as possible after scalding. The feathers can be picked or rubbed off, but whatever process is used, be careful not to tear the skin. Pinfeathers can be removed by using a dull knife and your fingers. Usually, on young broilers, the skin will be free from hairs once the feathers are picked. On older chickens and turkeys, there may be some fine hairs on the skin after the feathers are removed. These can be removed by singeing the carcass using a handheld propane torch. Move the flame quickly over the carcass to avoid burning the skin. Be careful not to burn yourself in the process.
Once the feathers have been removed, it will be time to eviscerate or remove the internal organs from the body. First, the head should be cut off. Find the joint between the head and the first neck vertebra by gently flexing the neck. Use the knife to find where the joint is (there will be a slight depression between the vertebra) and cut through the tissue. Do not try cutting through the bone, or you will dull your knife and possibly cut yourself in the process. Place the chicken belly down on your cutting board or table. Insert the tip of a knife in the skin near the point of the shoulder and slice the skin open all the way to the tip of the neck. Pull the skin loose from the neck and pull the crop, esophagus (gullet), and windpipe (trachea) loose. Cut them off where they meet the body and discard. Remove the feet next. Turn the chicken over so the belly is up, bend the foot back at the hock joint, and cut through this joint to remove the feet. The feet will have bones, so they should be thrown away in the trash. Turn the bird back over and remove the oil gland at the base of the tail. You will notice the opening of the oil gland. Start a cut 1-inch up the body from this opening and cut deep into the vertebra and make a scooping cut to remove the gland.
The abdomen will next be opening. Place the chicken belly up, pull the abdomen skin up near the tail, and cut through the skin and body wall, being careful not to penetrate into the abdominal organs. Extend the cut to the tail near the vent. Cut around the vent and meet your first cut at the top of the vent. Pull the vent and the end of the large intestine out of the abdomen, but do not break the intestine. Let go of the vent and stick your hand inside the abdominal cavity as far as possible. Break the attachments of the intestines to the abdominal wall. Grasp the heart and pull the abdominal organs out, twisting gently as you bring them out. The gizzard, heart, and liver (giblets) can be removed from the abdominal organs and saved for eating. Discard the rest of the organs. Peel the excess fat and the lining from the gizzard. Trim the heart sac and blood vessels from the heart. Carefully trim the gallbladder off the liver. Wash the giblets and place them in pan of cool water.
Next, remove the lungs from the body wall. They are located near the backbone on each side. Stroke two fingers along this area to remove, then discard. The reproductive organs are located near the backbone as well. They should be removed and discarded. Use a running hose or faucet to rinse the carcass inside and outside. Place it in the chill water container. This water should be changed frequently if you are butchering more than two or three birds. You can also place a slowly running hose in the chill water container and let it overflow as you are processing birds.
Once the birds are properly chilled they can be further cut up into parts, or they can be packaged in sturdy freezer bags. Place the giblets inside a small plastic food bag and place this inside the body cavity. Excess water should be drained from the carcass before placing inside the freezer bag. Slip the excess neck skin over the exposed neck bone to keep it from puncturing the bag. Place in freezer to preserve.
