Essentials: Crusts & Toppings
Flaky Classic Piecrust
1¾ cups flour
¼ teaspoon baking powder
½ teaspoon salt
1 tablespoon sugar
½ cup Crisco butter-flavored shortening, refrigerated, OR
1/3 cup shortening plus 3 tablespoons butter, ice cold and cut into small chunks
5½ tablespoons ice water
- Mix all of the above ingredients, except the water, in a stand mixer using the paddle attachment on medium speed swiftly until the crust appears pealike.
- Carefully sprinkle the ice-cold water in the crust 1 tablespoon at a time, using approximately 5½ tablespoons. Mix with a fork until the dough starts to become moistened and just gathers together.
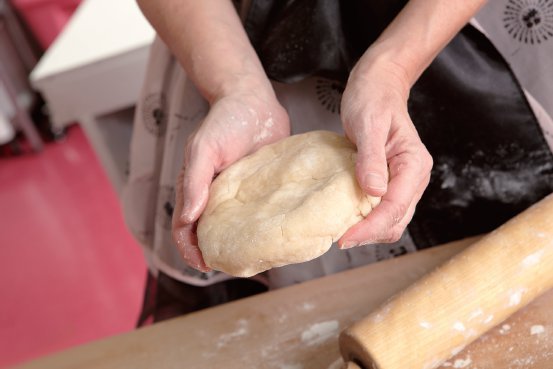
- Pat into a disk, wrap, and refrigerate for at least 30 minutes.
- Roll the crust out on a floured surface and place into a 9-inch pan. Shape and crimp the crust. Crusts don’t have to roll out perfectly; just crimp over any imperfections!
- Freeze.
 Butter makes crusts full of flavor, while shortening gives piecrusts their flakiness.
Always use ice-cold water to make your crusts come together. I use ice water, and I use a tablespoon to sprinkle water in the crust to control the amount—my mother’s hint! You can always add more water, but you can never fix a crust that has too much water in it, so be very careful when putting water in your crust.
I recommend freezing all piecrusts to ensure the best quality!
Sweetie-licious Cream Cheese Crust
¼ cup plus 2 tablespoons butter, softened
3 ounces cream cheese, softened
1¼ cups flour
2 teaspoons sugar
1/8 teaspoon salt
- Mix butter and cream cheese in a stand mixer using the paddle attachment on medium speed until well blended. Add the flour, sugar, and salt; mix just until blended.
- Pat into a disk, wrap, and refrigerate for at least 30 minutes.
- Roll out on a floured surface until the dough is round and 11–12 inches wide. Place into a 9-inch pan. Shape and crimp the crust.
- Freeze.
This crust browns easily, so cover with foil if it becomes too brown!
Sweetie-licious Graham Cracker Crust
1½ cups crushed graham crackers
3 tablespoons sugar
1/8 teaspoon salt
1/3 cup butter, melted
1 egg yolk
1 tablespoon water
- Combine the graham crackers, sugar, and salt in a medium bowl with a fork until mixed completely. Add the melted butter and continue to mix completely.
- Pour into a lightly greased 9-inch pie dish and firmly press the mixture into the bottom and sides, using a ¼-cup measuring cup or tablespoon to form the crust.
- Whisk together egg yolk and water. Brush crust gently with egg yolk and water mixture until lightly covered.
- Bake at 350°F for 8 minutes.
My aunt Margie made many pies with this special graham cracker crust, and my twin sister and I loved to help her crush the crackers!
Sweetie-licious Coconut Graham Cracker Crust
½ cup crushed graham crackers
½ cup coconut
¼ cup sugar
Dash of salt
6 tablespoons butter, melted
- Combine the graham crackers, coconut, sugar, and salt in a medium bowl with a fork until mixed completely. Add the melted butter and continue to mix completely.
- Pour into a lightly greased 9-inch pie dish and firmly press the mixture into the bottom and sides, using a ¼-cup measuring cup or tablespoon to form the crust.
- Bake at 350°F for 10 minutes.
Sweetie-licious Chocolate Graham Cracker Crust
1½ cups crushed chocolate graham crackers
3 tablespoons sugar
1/8 teaspoon salt
1/3 cup butter, melted
1 egg yolk
1 tablespoon water
- Combine the graham crackers, sugar, and salt in a medium bowl with a fork until mixed completely. Add the melted butter and continue to mix completely.
- Pour into a lightly greased 9-inch pie dish and firmly press the mixture into the bottom and sides, using a ¼-cup measuring cup or tablespoon to form the crust.
- Whisk together egg yolk and water. Brush crust gently with egg yolk and water mixture until lightly covered.
- Bake at 350°F for 8 minutes.
Always make more than one piecrust and keep them in the freezer so you can “whip up” a homemade pie in no time at all!

Sweetie-licious Crumb Topping
2/3 cup flour
¼ cup sugar
1/8 teaspoon salt
3 tablespoons butter, softened
Mix all of the ingredients together in a stand mixer using the paddle attachment until the butter is combined and the texture is fine.
You can change up crumb toppings by adding just a few nuts or ¼ cup oatmeal or brown sugar in place of sugar—be creative!
Sweetie-licious Praline Pecans
1 cup pecans, chopped
2 tablespoons butter
2 tablespoons brown sugar
- In a nonstick skillet, combine the pecans, butter, and brown sugar. Cook on low heat until you smell the pecans roasting.
- Remove from the heat, cool on aluminum foil, and set aside.
Not all recipes require a cup of pecans. If you have extra, note that these freeze beautifully, ready to be used in pancakes, muffins, or quick breads, over ice cream, and so on.
Homemade Caramel Sauce
14 ounces sweetened condensed milk
1 cup light corn syrup
1 cup sugar
½ cup brown sugar
¼ cup butter
1 tablespoon vanilla extract
- In a heavy 3-quart saucepan, combine the condensed milk, corn syrup, sugar, brown sugar, and butter.
- Cook over medium heat, stirring constantly, covering all parts of the bottom of the pan with a wire whisk to prevent scorching. Stir until the mixture comes to a boil.
- Reduce the heat to low and continue stirring until the caramel reaches 244°F on a candy thermometer, or a firm ball stage.
- Remove from the heat and add the vanilla. Let the sauce cool and set aside.
Sweetie-licious Whipped Cream
1 pint heavy whipping cream
¼ cup confectioners’ sugar
½ teaspoon vanilla extract
In a medium bowl, mix all of the ingredients using a hand mixer or stand mixer (stand mixer preferred) until thick and creamy.
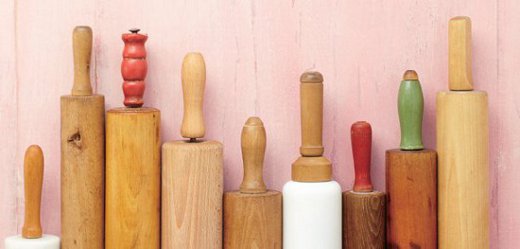
Rolling Love
I love a good rolling pin, especially the old ones that have seen many a piecrust in their day. I have had a dear collection of rolling pins throughout my baking career, most of which are now scattered around my pie shop. Through the years I would pick them up at secondhand stores for a few dollars, mainly because I couldn’t bear to see them forgotten. I love thinking of their former owners. I believe these rolling pins all to be expert pie makers, generally because of the patina of the wood and the worn colors on the handles. Clearly, given their condition, they either tried for years to make a good pie or simply made good pie for years. (I am sure it is the latter.) I am also convinced that these pins were the magic wands of our foremother pie bakers, the ones who knew the truth in a flaky piecrust and the honesty in a velvet pie filling. Much the way a musician needs to be “as one” with his instrument, a pie baker needs to be “as one” with her pin.
My favorite pin is a sentimental choice, as it was my lovely mother’s. She received it for a wedding gift some fifty-eight years ago. She used it for years, pumping out hundreds of delicious and unforgettable pies. Her rolling pin certainly left more than a passing impression on me. Whenever I saw the pin on the kitchen counter as I was growing up, I knew it was time to rejoice, for a pie was to be enjoyed in my near future. When I married twenty-eight years ago, my mother handed down her beloved rolling pin to me. I happily honed my pie-baking skills with my dear rolling pin when I was a new wife, as my children grew, and then at my dreamy pie shop.
I loved rolling pie dough with my heirloom rolling pin. Unfortunately, after fifty-eight years and thousands and thousands of piecrusts, its bearings have finally worn out. My dear pin has clearly earned its time to rest and its special place of honor at home. It sits humbly on my kitchen shelf, admired and respected for its wondrous body of work and its tireless contribution of … changing the world one pie at a time!
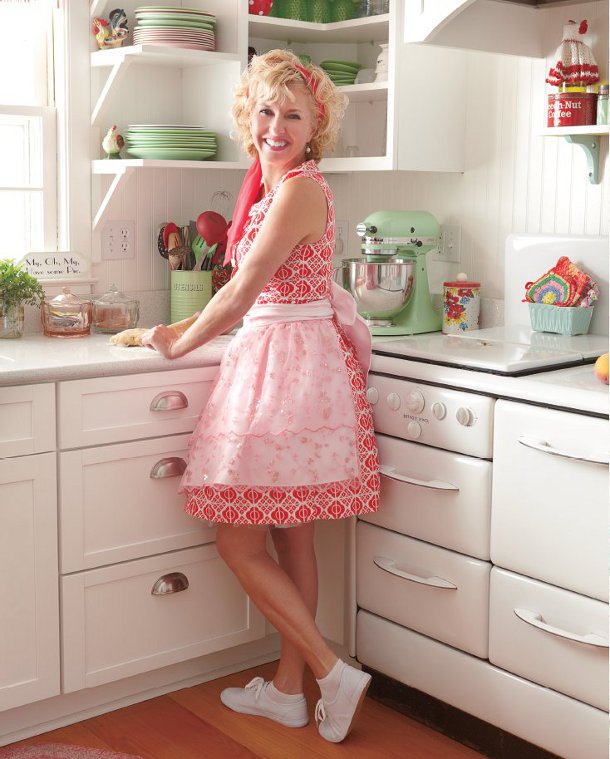
Eat pie, love life.