Stenciling is a traditional decorative technique that perfectly complements many rooms. And it’s easy to learn, too. If you can handle a paintbrush and a tape measure, you can quickly master the techniques for applying an attractive, simple border. And with a little practice, you can tackle complex patterns using multiple stencils and colors—and even create your own designs.
The key tools are a special stenciling brush (Photo 2) and the stencil and paint. A wide variety of each are available at craft and art supply stores. You can also find stencil patterns at bookstores or online, or even buy stencil blanks and cut your own with an X-Acto knife. The stencil shown here, a pattern called Ginkgo Frieze, is available online. Match the brush size to the area being filled within the stencil. A 1/2-in., medium-size brush, shown here, is a good, all-purpose size. You can use almost any paint—artist acrylics, wall paints or the special stenciling paints sold at craft and art supply stores. Artist acrylic paint is shown here.
Position your stencil on the wall at the desired height and mark the alignment holes or top edge. Then snap a light, horizontal chalk line around the room at that height. Make sure that whatever color chalk you use wipes off easily. Or use faint pencil marks, which can be easily removed or covered later.
The key to a good layout is to avoid awkward pattern breaks at doors, windows and corners. To work out the best spacing, measure the stencil pattern and mark the actual repetitions on the wall. Vary the spacing slightly as needed to make the pattern fall in a pleasing way. Or if your stencil has multiple figures, you can alter the spacing between them. Start your layout at the most prominent part of the room and make compromises in less visible areas. Draw vertical lines at the pattern center points to make positioning easier.
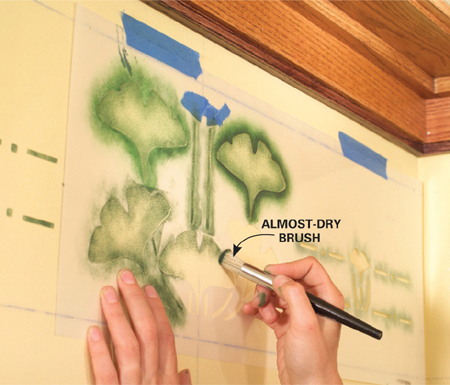
Tape the stencil pattern on the alignment marks (Photo 1) and put a small quantity of paint on a paper plate. Push the stenciling brush into the paint just enough to coat the tips of the bristles, then pat off the excess on a dry cloth or newspaper, making sure the paint spreads to all the bristles (Photo 2). The brush should be almost dry—remember, it’s easier to add paint than it is to take it away.
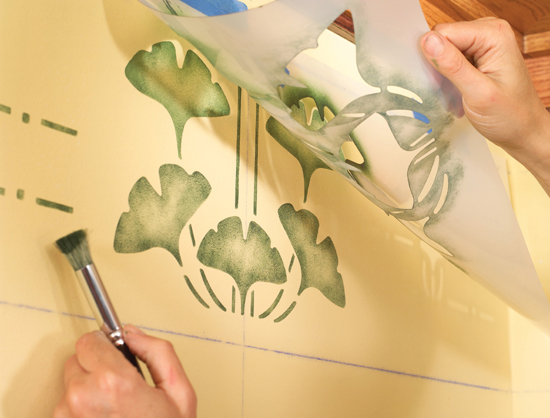
Lightly dab on the paint (Photo 3). Hold the stencil pattern with your free hand to keep it still and flat. Don’t worry about getting paint on the stencil, but avoid wiping or stabbing too hard around the edges. You can cover the cutout completely or work for shading effects. Cover nearby cutouts with masking tape so you don’t accidentally get paint in them (Photo 5).
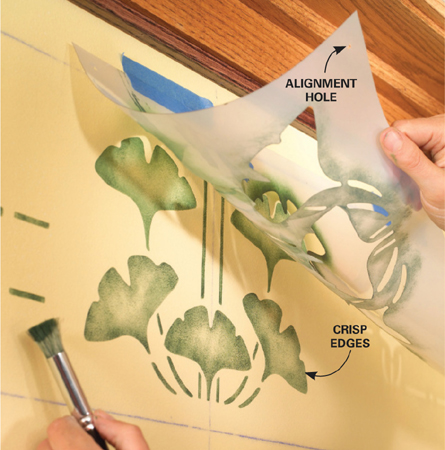
Mistakes are easy to correct. You can lift the stencil (Photo 4) and wipe off any paint that’s smeared under the edge with a damp paper towel, or touch it up later with wall paint. If you wipe some of the stenciled area away, just lay the stencil down again and touch up.
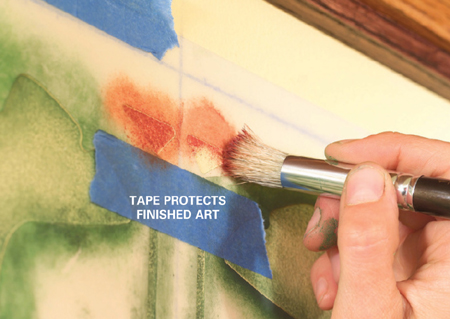
For two colors, mask off the cutout where the second color will go, stencil on the first color all the way around the room, then go back and add the second color, following your original alignment marks (Photo 5). Other colors and even additional stencil patterns can be added in this manner.