
WHAT IT TAKES
Time: 1 day
Skill level: Beginner
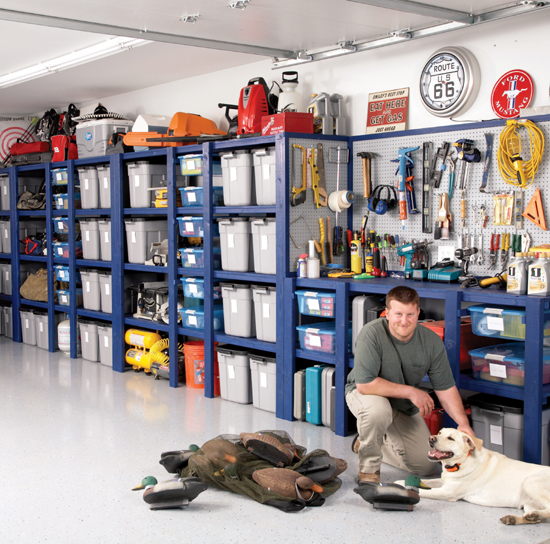
Here’s a quick, easy-on-the-wallet solution: simple shelves that can hold plastic storage bins. You can build the whole project in less than a day, for about $300 for 26 ft. of shelving (the bins were extra).
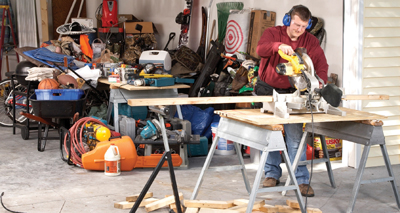
This is what the garage looked like before the storage system—look familiar?
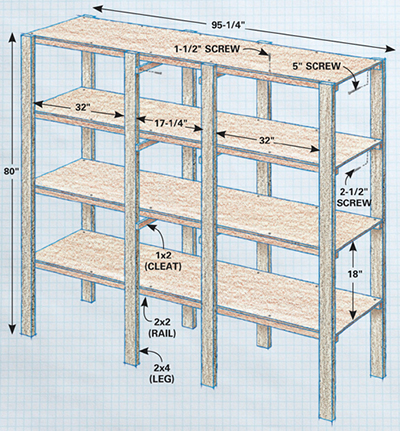
Materials List
(To build one shelf unit 95-1/4 in. long x 80 in. high)
• Two 8' 1x2s
• Eight 8' 2x2s
• Eight 7' 2x4s
• Two 4' x 8' x 3/4 " BC plywood sheets
• Masking tape and construction screws (1-1/2", 2-1/2" and 5" )
Tips
• Each storage unit is basically two frames tied together with plywood shelves. Buy your bins first so you can customize the height and depth of each shelf space. Remember to leave enough clearance space in front of your shelving units to open your car doors.
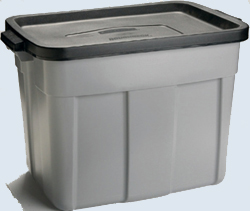
• Small bins are great for storing screws, glue and painting supplies in the middle bays of each unit. The best bins for hanging are those with snap-lock lids. They allow you to hang heavier loads without worrying that the lid will come off.
• The fussiest measurements are those for the center bay of smaller bins. If your width measurements are off by a quarter-inch, the bins won’t sit squarely between the cleats or will be too tight to slide easily.
• If your garage floor sometimes gets wet, nail plastic feet to the bottom of the legs. (A set of four nail-on plastic feet costs about $3 at home centers.)
• You can paint the wood to give it a classy look or leave it bare. Painting it before you put it together is a lot easier than painting it once it’s assembled.
I.D. bins the smart way
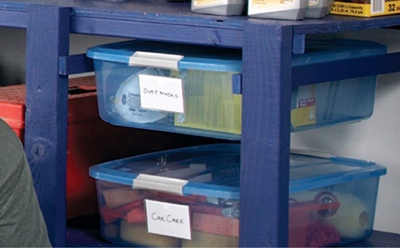
Think about how you’d like to identify the contents of each storage bin. Some people use adhesive labels or write with markers directly on the bins. The best system lets you make changes easily. We like the adhesive storage pouches that come with cardboard inserts (or you can just use index cards). Changing the label is as easy as slipping a new card into the pouch. Check office supply stores or search online.
Timeline
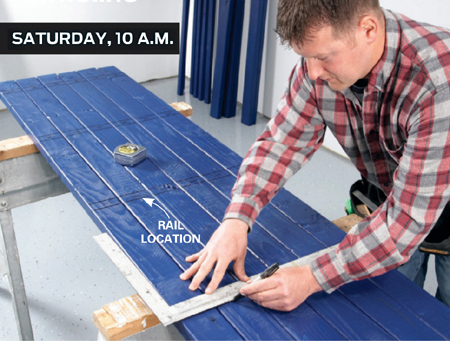
2
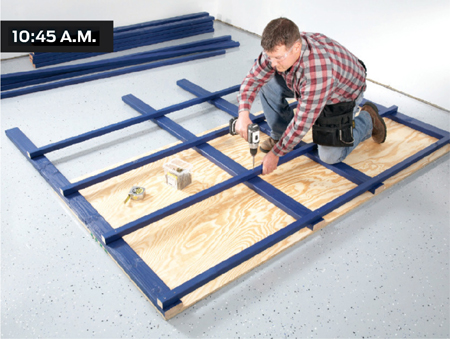
Assemble the frames. Working on top of a sheet of plywood helps keep each frame squared up. Use the edges of the plywood to line up and adjust things as you screw the frame together. It also really helps to pick the straightest lumber possible when you’re shopping.
3
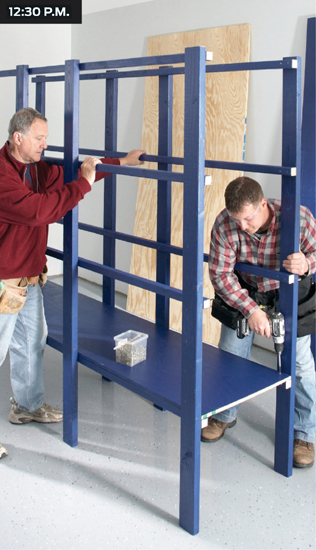
Screw on the shelves. Installing the shelves in each frame is a lot easier if you have a helper to hold the frames. If you’re working alone, lean one of the frames against the wall and hold up the other frame while you screw the first shelf into place.
4
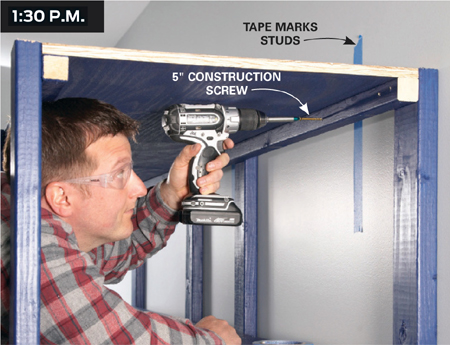
Fasten the shelves to the wall. Screw each unit to the wall through the top rail using self-tapping lag screws (GRK is one brand) spaced every second or third stud. This shelf unit is really sturdy. But make it ultra-secure by screwing the units together through the front legs. Shim the legs if your floor is sloped or uneven.
5
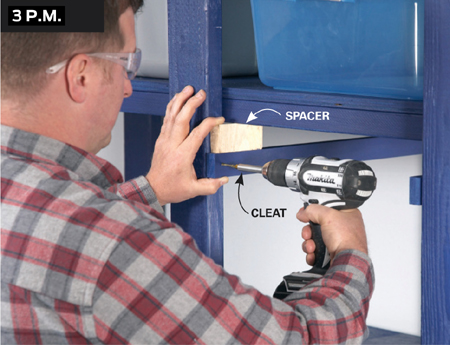
Install cleats for slide-out bins. To avoid stacking the small bins on top of one another, hang the top bins from cleats. Installing the cleats goes really fast if you start your screws in each cleat first and then use a spacer to mark the cleat’s location as you screw it on.