
WHAT IT TAKES
Time: 1 hour
Skill level: Beginner
You probably use one or two knives more than all of your other cutlery combined. So it makes sense to keep your favorite knives handy in a small rack that doesn’t take up much counter space.
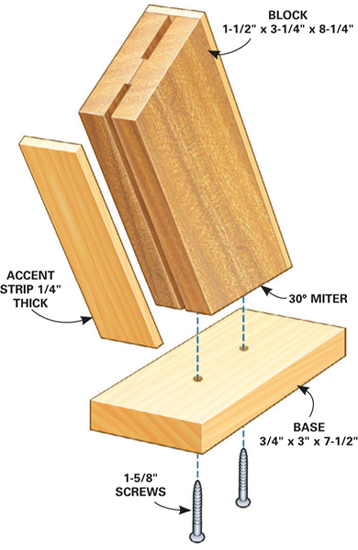
To build this knife rack, glue two 9-in.-long 1x4s together. Run this glued-up block across a table saw twice to even up the edges. Then measure the blade widths of your knives and set the table saw’s blade height 1/8 in. higher than the knife blade widths. Cut slots down the middle of the block (Photo 1). Next, glue 1/4-in.-thick strips to both edges of the block, covering the slots. You can cut the strips from larger stock or buy 1/4-in.-thick material.
Cut one end of the block at 30 degrees (Photo 2). Mount the block on the base with a fast-setting glue such as super glue (Photo 3). Use a gel rather than the liquid. Carefully position the screws so they don’t enter the knife slots.
Cost: $15–$25, if made from walnut and maple as shown. Less for other common wood species.
Materials: 2 ft. of walnut 1x4, 2 ft. of maple 1x4, wood glue, fast-setting glue, 1-5/8-in. screws, one can of spray lacquer.