"The dance of battle is always played to the same impatient rhythm. What begins in a surge of violent motion is always reduced to the perfectly still.”
~ Sun Tzu
Ground Fighting
The next chapter looks at things you can do after you have your opponent on the ground. To the casual observer, ground fighting can look like a clumsy mess of mass and muscle. But to the expert ground fighter, the process of maneuvering, pinning, and submitting an opponent is at least as complex tactically as any stand up fight.
On the ground there are essentially four places that you can find yourself:
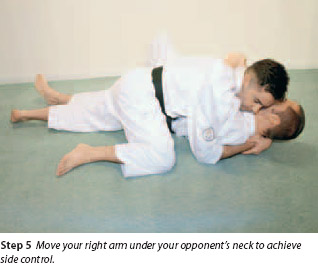
To the side: This is a good position from which to apply a submission hold. Techniques that are used from this position are called side control techniques.
At your opponent's feet: From this position your opponent will be in a guard position, using his feet to keep you away. You need to get past his guard to a side or mount position.
On top of your opponent: This is a mount position. From here you can strike your opponent or apply a submission.
Behind your opponent: This is generally considered the best position to be in. From here your opponent cannot do much to hurt you, but you can apply a chokehold.
On your back: Either your opponent is on top of you in a mount position, or you are in a guard position. From here you will want to improve your position and get your opponent onto his back.
| SUMMARY OF LOCKS AND HOLDS | |
| Side four-corner hold | A side control technique that can pin an opponent to the ground |
| Scarf hold | A side control technique that can pin an opponent to the ground |
| Shoulder hold | A side control technique that can pin or strangle an opponent |
| Chest hold | A side control technique that can be used as a chokehold |
| Guard | A defensive posture used when you are on your back |
| Mount | A dominant position used when you are on top of an opponent |
| Back mount | A dominant position with your opponent facing away from you |
| Escaping the high mount | A technique to improve your position |
| Passing the guard | Getting past an opponent's defenses to apply a submission technique |
SIDE FOUR-CORNER HOLD
In judo, this side control technique is called yoko shiho gatame. In a judo contest, this can be used to simply pin an opponent. In other situations, it is more common to transition to a mount position or to a submission hold such as a scarf hold or an arm bar. It is a useful position to assume because it allows you time to regain your breath while using your body weight to restrict your opponent's breathing. This allows you to recover while tiring your opponent out before you transition into a submission move.
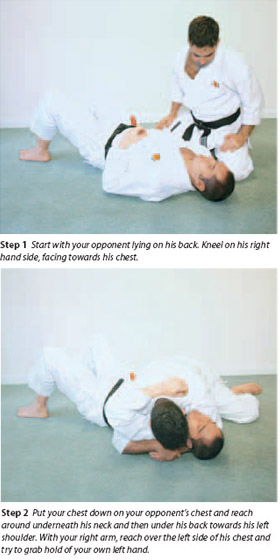
CHEST HOLD
In judo, this side control technique is called mune gatame.
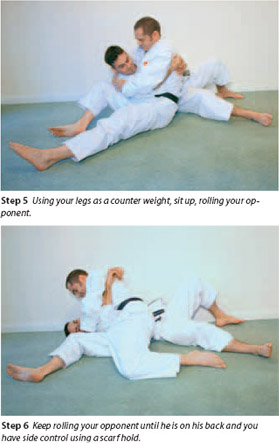
SCARF HOLD
In judo, this side control technique is called kesa gatame. It is called the scarf hold because you wrap your arm around your opponent's neck like a scarf. You can use this move to tire your opponent by putting your weight on his chest making it difficult for him to breathe.
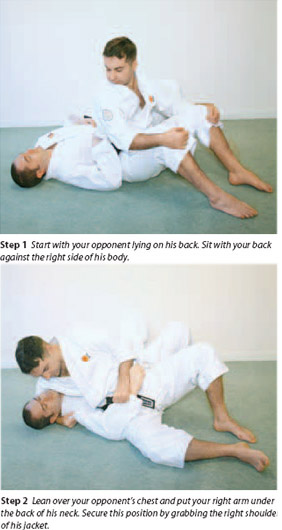
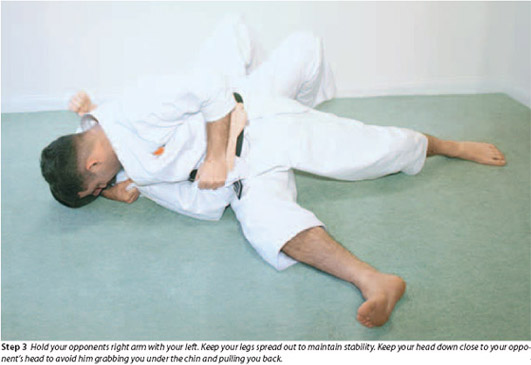
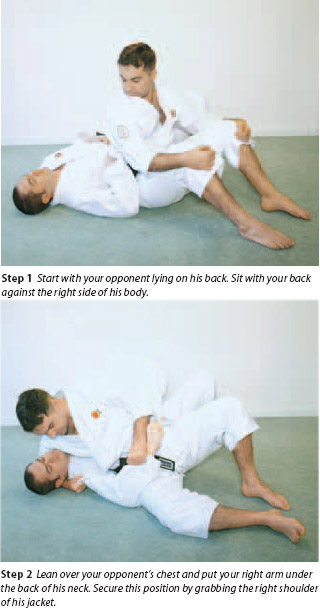
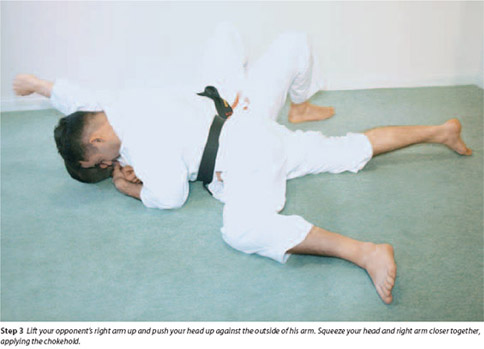
SHOULDER HOLD
The shoulder hold is a side control technique similar to the scarf hold but traps an arm alongside your opponent's neck. Like the scarf hold, this can be used as a pin but it can also be used as a chokehold, squeezing your opponent's arm against his own neck. In judo this technique is called kata gatame.
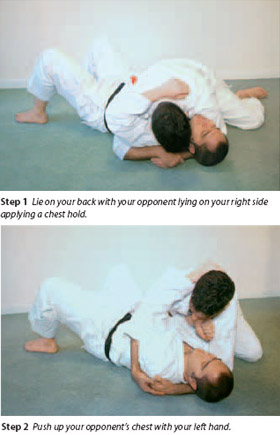
ESCAPING THE CHEST HOLD
Once the chest hold is fully applied it is almost impossible to escape. However, you can escape from the chest hold if you get the opportunity to work your hand through into the center under your opponent. From there you can push your opponent up and work on reversing the hold.

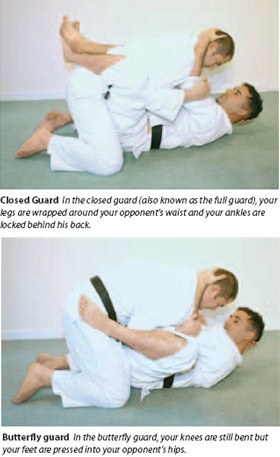
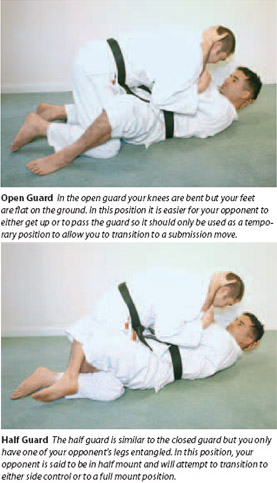
GUARD
This is a position on the ground from which the person on the bottom can utilize a number of submission techniques including arm bars and chokes. In judo, this is called do-osae, which means "trunk hold." There are a few variations on the guard position.

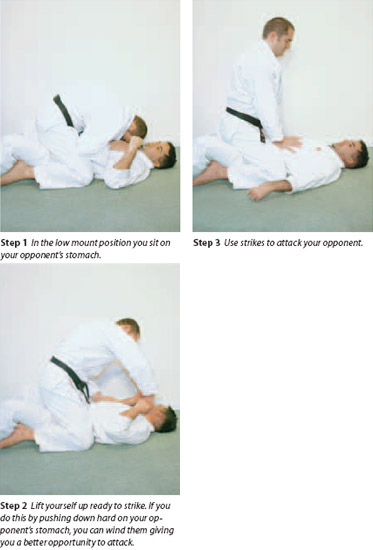
MOUNT
In the mount position, you sit on your opponent's chest. From this position, you can use arm locks and chokes but against an experienced opponent this is surprisingly difficult. You can lift yourself up and then strike while your opponent is unable to retaliate in kind, because he is unable to put his weight behind any strikes. In MMA, this is called “ground and pound”.
Training Tips

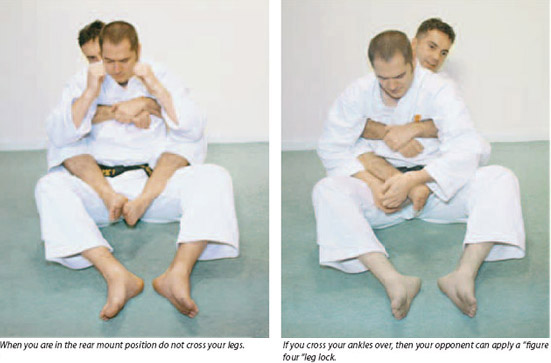
BACK MOUNT
In the back mount (also known as the rear mount), you are behind your opponent, with your arms around your opponent's neck or torso and your legs hooking through over your opponent's thighs. From this position, you can apply chokes and arm bars while also being able to attack with punches or elbow strikes.
If done correctly, it is very difficult for an opponent to escape from the back mount. No matter how your opponent moves, you will still be on his back and able to attack him.
Training Tips
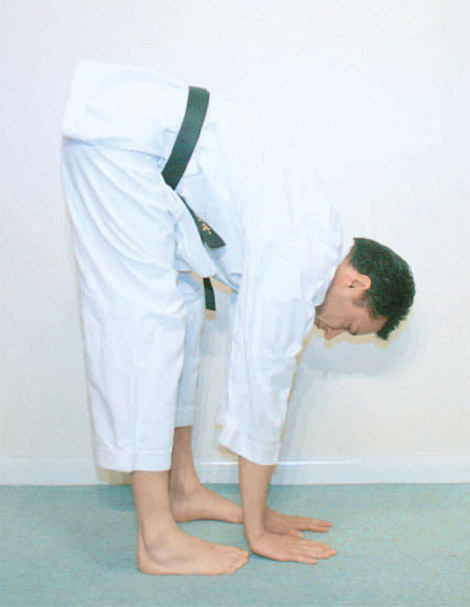
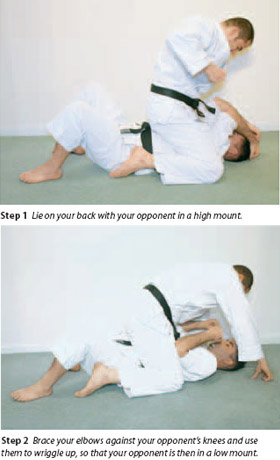
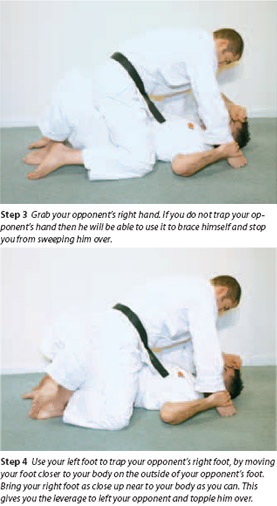
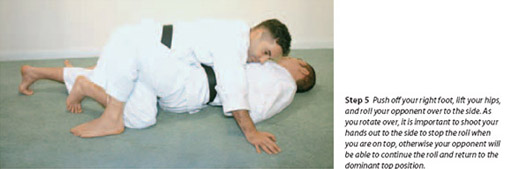
ESCAPING A HIGH MOUNT
While your opponent is on top of you, he is in a dominant position and can rain down strikes on you. It is therefore very important to be able to escape from this position. One way to do this is to use a sweep that topples your opponent and reverses the position, allowing you to take the dominant position.
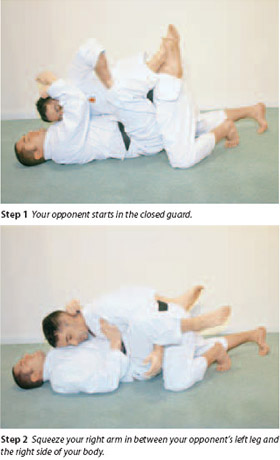
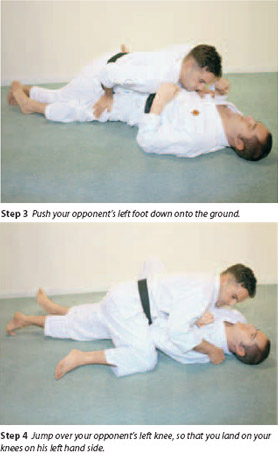
PASSING THE GUARD
If your opponent is a guard position and you want to proceed to a side control position or mount position, you will have to do what is known as "passing the guard."
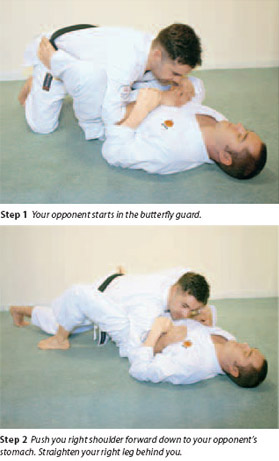
If your opponent is in the closed guard, then passing the guard is a bit harder, especially if he is holding on very tightly.