Yo-Yo Garden Foot Warmer
FINISHED QUILT SIZE: 18˝ × 50˝

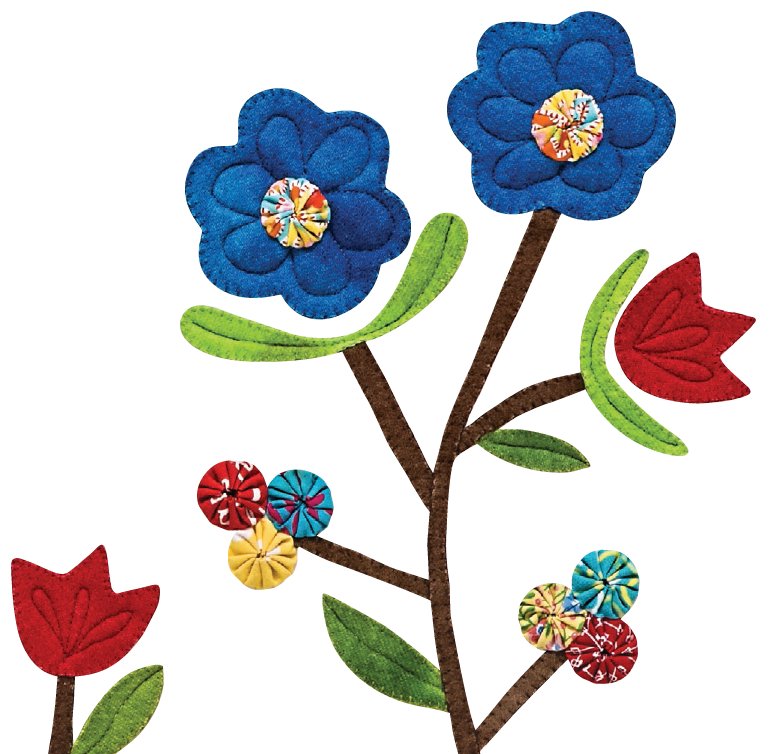
Linda took stems of flowers out of Blue Basket and planted them in this quilt to be placed at the foot of her bed. Look closely and you’ll find the flowers made from yo-yos.
Materials
•Light tone-on-tone cotton background fabrics: A variety to total approximately 1 yard
•Appliqué fabrics: A variety of large scraps of felted wool for the stems, leaves, and flowers
•Cotton prints: 51 scraps 4˝ × 4˝ square to make yo-yos
•Red cotton border and binding fabric: 1 yard
•Backing and sleeve: 1¾ yards
•Batting: 26˝ × 58˝
Additional supplies
•Self-adhesive laminating sheets: 9 sheets
•Fusible web: 9 sheets of SoftFuse OR 1 yard of 18˝-wide fusible
•Clear vinyl: ½ yard of 54˝ wide OR 1½ yards of 16˝–18˝ wide
•Appliqué threads: Aurifil wool in colors to match or complement the fabrics
•Sewing thread: 2-ply or 3-ply regular cotton thread to tack the yo-yos to the block
•Quick Yo-Yo Maker (Small) from Clover (optional): This tool is very helpful in making 1¼˝ (30 mm) yo-yos.
Cutting
WOF = width of fabric
Light tone-on-tone block background fabrics
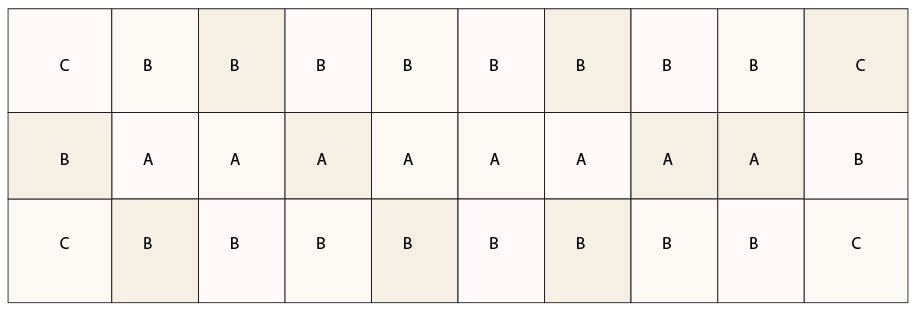
A’s: Cut 8 squares 5½˝ × 5½˝.
B’s: Cut 18 rectangles 5½˝ × 6½˝.
C’s: Cut 4 squares 6½˝ × 6½˝.
Red border fabric
Cut 2 strips 1½˝ × WOF for the top border.
Cut 2 strips 2½˝ × WOF for the bottom border.
Binding
Cut 1 square 23˝ × 23˝ to make a 2½˝-wide continuous bias strip 150˝ long for the binding (see Continuous Bias Binding).
Alternate Option
If you prefer to use only one background fabric, cut or piece a rectangle 17˝ × 52˝.

Quilt Assembly
Refer to General Appliqué Instructions as needed. Seam allowances are ¼˝.
1.Make templates for the quilt using the Blue Basket patterns.
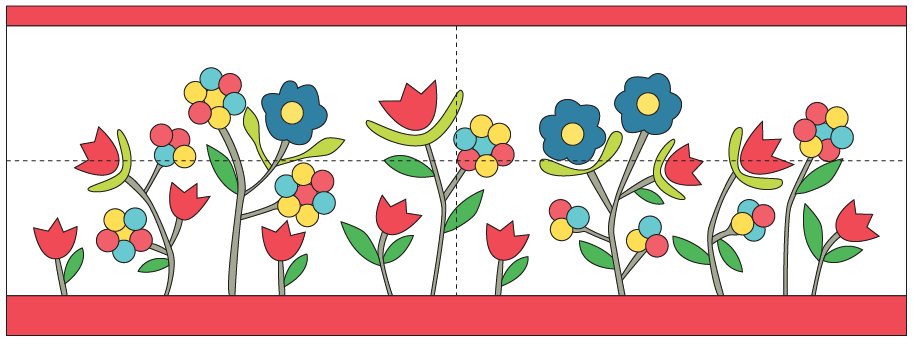
Notes: The shape numbers in the appliqué placement diagram (below) are the same as those in Blue Basket. The stem labeled 3R indicates that template 3 has been turned upside down to create a mirror image (or reverse image) of the shape.
2.Draw a 15˝ × 50˝ rectangle on a long piece of paper or several smaller sheets of paper taped together to make a large sheet. Draw horizontal and vertical centerlines on the rectangle. Refer to the appliqué placement diagram (below) and place the templates on the paper. Use a 1¼˝ circle to represent the yo-yos. They nest and, in some cases, overlap to form flowers.
3.Trace around the templates to make a pattern.
4.Make an overlay for the quilt from the pattern.

Appliqué placement
5.Place the A, B, and C background fabrics on your design wall. Play with their placement until you are happy with the way the background looks.

Background piecing
6.Sew together the background pieces into 3 horizontal rows. Press the seam allowances in the top and bottom rows to the right. Press the seam allowances in the center row to the left. Sew together the rows.
7.Press the background in half horizontally. (The vertical center will be marked by a sewn seamline.) Place the background on your design wall.
8.If you have the yo-yo maker from Clover, follow the instructions on the package and make 51 yo-yos. If you do not have a yo-yo maker, refer to Making Yo-Yos. Use the 3˝ circle template from that chapter.
9.Refer to Preparing to Stitch to choose fabrics, fuse the fusible web to all the felted wool appliqués, and cut them out.
10.Place the appliqué pieces and yo-yos on the background on your design wall. Use the overlay to place the appliqué pieces in the proper position, or place them by eye. Play with color and fabric choices until you are happy with the way the block looks.
11.Fuse and appliqué the felted wool shapes onto the block. Select your appliqué stitch from Stitches for Appliquéing with Felted Wool.
12.Stitch the yo-yos to the quilt top. The yo-yos will appear to be plumper if you stitch them more loosely to the block. However, if you think the quilt will be subjected to wear and tear, stitch them more securely to the block.
13.When the appliqué is complete, press the quilt top on the wrong side. Place the quilt top on a soft towel to prevent smashing the yo-yos. Trim the quilt top to 15½˝ × 50½˝.
14.Trim away the selvages at the ends of all the border strips. Sew together the top border strips end to end. Do the same for the bottom border strips.
15.Measure the quilt horizontally through the center and trim the border strips to fit.
16.Sew the top and bottom borders to the quilt. Press seam allowances toward the borders.
17.Layer and baste the quilt. Quilt by hand or machine, and bind. Refer to Finishing Techniques.

Quilt assembly