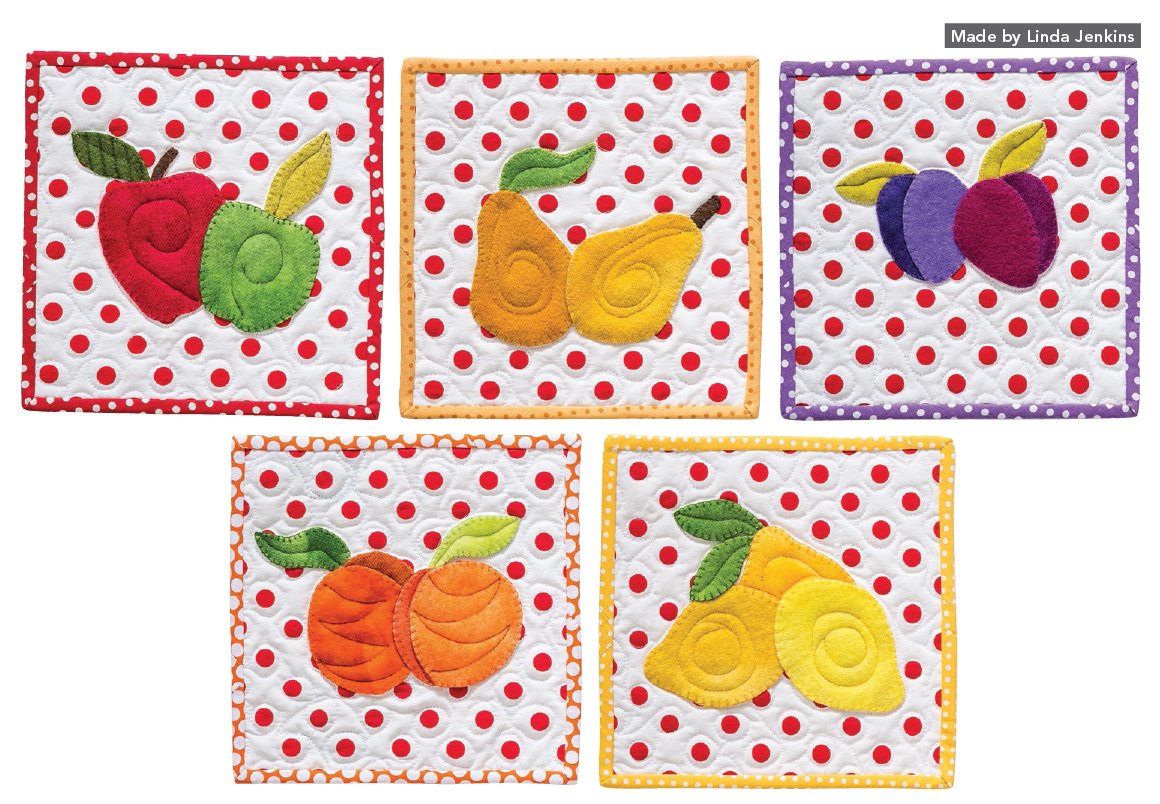
Kitchen Quilts
FINISHED QUILT SIZE: 8˝ × 8˝

You can pick your favorite fruits from Fruitful Market Basket and scatter them on small quilts, place mats, table runners, pillows, and more. Linda made these cute quilts to hang in her kitchen.
Materials
•Cotton or linen block background fabric for all blocks: ⅔ yard
•Appliqué fabrics: A variety of scraps of felted wool for the fruit
•Binding: ⅛ yard each of 5 fabrics to make 5 straight-grain bindings (see Customize the Binding, below right)
•Backing and sleeve: 1 fat quarter per quilt
•Batting: 5 squares 12˝ × 12˝
Additional supplies
•Self-adhesive laminating sheets: 4 sheets
•Fusible web: 4 sheets of SoftFuse OR ½ yard of 18˝-wide fusible
•Clear vinyl: ¼ yard of 54˝ wide OR ⅔ yard of 16˝–18˝ wide
•Appliqué threads: Aurifil wool in colors to match or complement the fabrics
Cutting
WOF = width of fabric
Block background fabric
Cut 5 squares 10˝ × 10˝.
Binding
Cut 1 strip 2½˝ × WOF from each of 5 fabrics to make a straight-grain binding strip for each quilt. See Straight-Grain Binding from Strips.
Customize the Binding
These quilts are especially cute when bound with different fabrics. You can make straight-grain binding from a 2½˝ × width of fabric strip to bind each quilt—this is the method described in this project.
You can also make one binding to use on all five quilts. If you do that, it makes sense to make bias binding from a square. If you want to do that, you will need ⅞ yard, to make binding from a 26˝ × 26˝ square.
One last option is to use scraps of binding left over from other projects.

Quilt Assembly
Refer to General Appliqué Instructions as needed.
1.Make templates for the fruit shapes using the Fruitful Market Basket patterns.
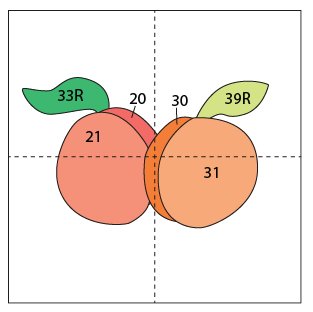
Note: The shape numbers in the diagrams are the same as those in Fruitful Market Basket. If a shape number is followed by an R, that means that the template has been turned upside down to create a mirror image (or reverse image) of the shape.
2.Draw an 8˝ × 8˝ square on a piece of paper. Draw horizontal and vertical centerlines on the square. Refer to the appliqué placement diagrams (on this page) and place the templates on the paper. Trace around the templates to make a pattern. Repeat for each fruit quilt.
3.Make an overlay for each quilt from the patterns.
4.Press the backgrounds in half horizontally and vertically. Place them on your design wall.
5.Refer to Preparing to Stitch to choose fabrics, fuse the fusible web to all the felted wool appliqués, and cut them out.
6.Place the appliqué pieces on the backgrounds on your design wall. Use the overlays to place the appliqué pieces in the proper position, or place them by eye. Play with color and fabric choices until you are happy with the way the block looks.
7.Fuse and appliqué the blocks. Select your appliqué stitch from Stitches for Appliquéing with Felted Wool.
8.When the appliqué is complete, press the blocks on the wrong side, and trim them to 8½˝ × 8½˝.
9.Layer and baste each quilt. Quilt by hand or machine, and bind. Refer to Finishing Techniques.
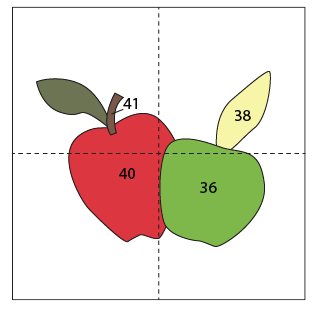
Apples appliqué placement
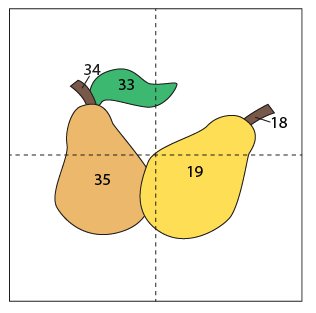
Pears appliqué placement
Plums appliqué placement
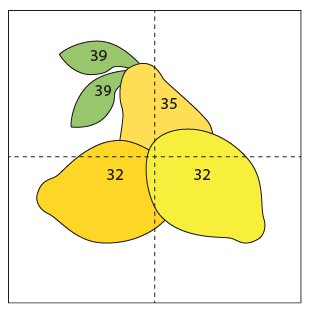
Peaches appliqué placement
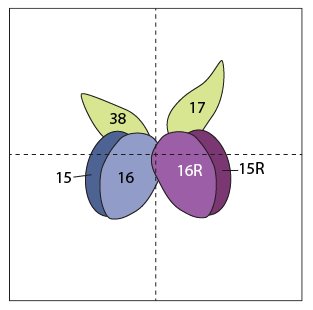
Pear and lemons appliqué placement