Just like how we can nest a tag within a tag, we can also nest lists within a list. Let’s take a look at how this is done in HTML code:
1<!DOCTYPE html>
2<html>
3<head>
4<title>Nested lists</title>
5</head>
6<body>
7<ol>
8<li>My Cars
9<ul>
10<li>Ferrari Enzo</li>
11<li>Porsche 911</li>
12</ul>
13</li>
14<li>My Motorcycles
15<ul>
16<li>Honda CBR</li>
17<li>Kawasaki Ninja</li>
18</ul>
19</li>
20</ol>
21 <ul>
22 <li>"Favorite Pets"
23 <ol>
24 <li>Dog</li>
25 <li>Cat</li>
26 <li>Chameleon</li>
27 </ol>
28 </li>
29 <li>"Favorite Drinks"
30 <ol>
31 <li>Soda</li>
32 <li>Iced Tea</li>
33 <li>Coffee</li>
34 </ol>
35 </li>
36 </ul>
37</body>
38</html>
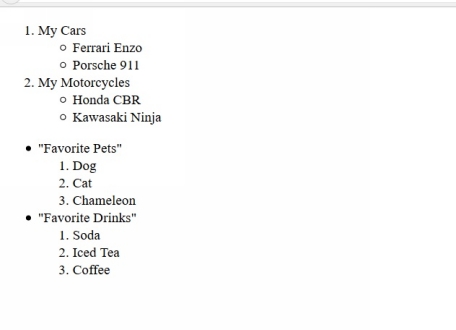
38 lines of code can be a little bit daunting for first timers who are reading this book. So to gain a better understanding of nesting lists in HTML, let’s see how our code is rendered in a browser:
As you may have noticed already, nesting lists are no different than nesting any other element in HTML. All you need to do is declare the parent element first, and then put any other element you want to nest inside that parent element; and so forth.
In our example, we start our ordered list in line 7 with the <ol> tag. The first item in our ordered list is “My Cars”, and the second item is “My Motorcycles”.
Next, we inserted an unordered list under the first item (My Cars) in our ordered list. We did that by enclosing our whole unordered list element in between the <li> and </li> tags of our first ordered list element. This is clearly evident in lines 8 through 13 in our example HTML code above.
The same nesting process was done with the unordered list in our example. Lines 21 through 36 of our example code clearly exhibit how an ordered list is nested within the first and second items of your unordered list. Take notice of each of the nested tag’s indentation from their parent tags. You can clearly see that indentation greatly improves code readability.