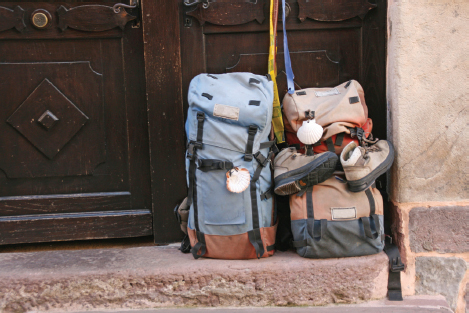
PACKING
There is an old axiom about travel from a 1949 Reader’s Digest that says “Take half as many clothes and twice as much money as you think you’ll need for any vacation.” While cliché, this advice still rings true and travelers continue to struggle with the concept of traveling light. I’ve seen backpackers with bags so heavy they can barely stand. You don’t want to be this person, trust me. This chapter will talk about everything you need to know about packing—from finding the perfect backpack to helping choose the right pair of socks.
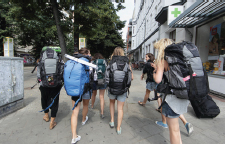
Ask any veteran traveler and they’ll all endorse traveling light. First, it allows you to travel more freely and easily. You might not realize it now, but you’re going to encounter crowded public transportation (usually with lots of stairs), bustling cobblestone streets, small trains/planes, narrow hallways and staircases, tiny hostels, and other difficult travel situations that make traveling with a lot of stuff extremely difficult and stressful. When you travel light, all those obstacles suddenly become less daunting.
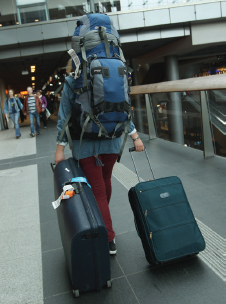
A great example of not packing light.
The ultimate goal for packing light is being able to fit all your stuff into a single carry-on piece of luggage—this generally translates to a 45 lbs to 50 lbs backpack. First, it will save you any checked bag fees that many airlines now impose. Next, you never have to worry about the airlines losing your luggage—which is a huge nightmare if you move locations often. If you can’t limit yourself to a carry-on sized backpack, I highly suggest at least staying under 60 lbs.
You should also consider keeping the weight of your fully packed backpack under 22lbs (10kg). If you exceed this, you run the risk of exceeding the carry-on weight limit for many budget airlines. Even if you don’t plan on taking planes, I still suggest keeping your weight around 20lbs for general comfort.
STAYING FASHIONABLE WHILE ON THE ROAD
I know that a lot of travelers become obsessed with trying to dress like the locals. Relax. It’s going to be okay. First, you have to accept the fact that you’re never going to be as fashionable as a fashion-conscious local—especially when you’re living out of a backpack. Unlike you, they’re not spending hours on their feet as they explore the city. If they were, they too would trade their uncomfortable dress shoes and nice clothes for something more sensible.
On the other hand, thanks to the globalization of fashion, Americans and Europeans are pretty much purchasing their clothes at the same chain retailers, so what you see being worn on the streets of London and Paris is pretty similar to what you’ll see on the streets of New York and Chicago. Just like in the United States, you’ll find H&M, Zara, Mango, Gap, Levis, American Apparel, and Nike stores in just about any major European city. If you want some more inspiration about European style, check out the website of the famous French department store Galeries Lafayette (galerieslafayette.com). It’s all in French and the clothes are fairly upscale but a lot of the fashion is geared to the hip twenty-something crowd.
The main point is that you shouldn’t freak out too much about fashion because we all kind of dress alike already—the differences are subtle. However, there are a few general guidelines that will help you not look like a complete tourist.
Avoid athletic apparel. Americans have a love affair with wearing athletic clothing in all situations. Wearing gym shorts and athletic tops will automatically make you stick out as an American tourist.
No sweatpants. This is Europe—not your 8 a.m. History 101 class. Avoid sweats. Not only do they look sloppy, but they’re also too bulky to travel with anyway.
No running shoes. There is a strong stereotype about Americans and their love of white athletic shoes. If you’re worried about fitting in, then you’ll want to leave the running shoes at home. However, a pair of fashionable casual sneakers is perfectly acceptable. Nike, Puma, New Balance, and Adidas all have options that are fashionable and functional. On the other hand, don’t sacrifice comfort for fashion because your life will be miserable if you don’t treat your feet well while traveling.
It’s all about the fit. People assume Europeans look great because they have closets full of designer clothes but this isn’t completely true. They may have a few higher-end items but they shop at H&M, Zara, Mango, Gap, Topshop, and other multinational shops just like the rest of us. The secret is that they purchase clothes that fit well—and if the fit isn’t quite right, then they’ll get their clothes tailored.
Keep it simple. Europeans keep their wardrobes simple and classic. They choose timeless pieces that don’t scream for attention. Then they’ll add a bright accessory (scarf, shoes, jewelry, etc.) to bring the outfit together. You really can’t go wrong with wearing all black and gray.
Flip-flops are for the beach. Sandals are perfectly fine but you should only wear flip-flops to the beach.
Baseball caps. You will see a few Europeans wearing baseball caps but they are mainly teenagers trying to imitate American hip-hop culture.
Avoid hiking clothes. Go to any hiking and camping store and you’ll find a lot of high-tech performance clothing designed for outdoor activities. These clothes are durable, lightweight, and quick drying; however, they are ugly and look completely out of place in an urban environment. Although, if you’re more concerned about function then this style of clothing might suit you well.
There is some good news. Companies are finally starting to take notice that travelers want fashionable clothing made of these durable performance fabrics. This apparel niche is still in its infancy so the options are limited and the prices are high.
How to Minimize Clothing
The bulk of what’s in your bag will be clothing, so if you want to lose the weight you need to minimize and be smart about what you pack. Below are some guidelines to help you pack light.
Mix and match for versatility. The key to being fashionable and packing light is choosing items that are versatile. You’ll only bring a few different pieces, but you’ll mix and match different items to create multiple outfits.
Everything you bring should look good when paired with any other article of clothing you have. For example, you should be able to blindly pull any top and bottom from your bag and they should look good together. If you can’t do this, then you should probably reconsider what you’ve chosen.
Dark solid colors or simple patterns. Dark colors and simple patterns do a good job at hiding stains and they’re easiest to coordinate. Plus, most Europeans tend to wear darker colors, so you have the added benefit of blending in better with the locals.
Bring low maintenance clothing. Make sure the items you bring don’t have special washing instructions since you’ll be washing your clothes at laundromats. Furthermore, your clothes are going to go through a lot more abuse than normal while you travel so ensure the fabrics you choose are sturdy enough to withstand some punishment.
Forget the “single use” items. That super cute dress or nice slacks you’ll only wear once should be left behind. Instead, bring items that can be worn in multiple situations. A good guideline is that if you aren’t going to wear it at least three or four times, then you shouldn’t bring it.
Add accessories. A nice scarf, fancy belt, or another fun accessory is a simple way to add a little variety to your outfit.
Bring a smaller backpack. You can only bring as much as your bag can hold, so force yourself to bring less by buying a smaller backpack.
Shop as you travel. The shopping in Europe is amazing so you can always buy more clothing as you travel.
There is no difference between packing for three weeks or three months. The length of your trip really doesn’t have a big impact on how much you pack because you’ll do a load of laundry every week or two.
Clothing Packing Guide for Women
Shirt/blouse. Pack a combination of short and long sleeve tops. Make sure to check the average weather for when you’re traveling since it will dictate which type of top to bring. Long sleeve shirts are more versatile since the sleeves can be rolled up if it gets warm.
Light sweater/cardigan. Even summer nights can get a little chilly in parts of Europe so it’s nice to bring a sweater or cardigan. Layer with a button-up shirt for extra warmth or to create a new outfit.
Dress. Look for a lightweight dress that can be worn casually during the day and can be dressed up for going out at night.
T-shirts and tank tops. T-shirts or tank tops are great for hot days, undershirts, sleeping, and wearing around the hostel.
Dark skinny/straight leg jeans. Jeans are universal and everyone in Europe wears them. Dark jeans are perfect because they look great during the day and they can be easily dressed up for going out at night. Slimmer jeans are always fashionable and are a safe bet.
Trousers. A pair of lightweight cotton trousers is a nice option since they still look classy and they’re a bit more breathable than jeans for those hot days.
Skirts. Skirts are great because they’re fashionable, comfortable, and take up very little space in your bag. In the cooler months, they can be paired with thicker tights.
Shorts. Shorts work well in the summer and they can be paired with leggings if it’s cool outside. Don’t forget to bring a pair of comfortable casual shorts for sleeping or wearing around the hostel.
Leggings. Leggings can be layered with shorts and skirts. Plus, they are comfortable on those long travel days.
Swimwear. If you go to the beach then you’ll need something to wear.
Clothing Packing Guide for Men
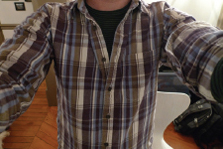
Button-up shirt. Long sleeve button-up shirts are the most versatile option when it comes to shirts. You can roll up the sleeves when it’s warm or keep them rolled down for added warmth. Plus, they look nicer than a standard t-shirt. I only pack casual button-up shirts because it’s rare to find yourself in situation where formal attire is required.
Sweater. Lightweight sweaters are nice for dressing up or for cool nights. For maximum versatility, make your sweaters and button-up shirts coordinate because you can wear them together. If you’re traveling in the middle of summer, it might be wise to save space by not bringing a sweater.
T-shirts. While button-up shirts are more versatile, I still pack a few trusty t-shirts. They are good for around the hostel, sleeping, wearing under other shirts, and for sightseeing around town on hot days. Lightweight merino wool t-shirts are my favorite because they’re breathable and you can wear them a few times without washing because they naturally repel odor. However, they are expensive so they’re more of a luxury than a necessity.
Jeans. In my opinion, a pair of well-fitting dark jeans are the best pants for traveling in Europe. Dark jeans match everything, they’re comfortable, and they’re easy to dress up for a night out. Plus, denim is extremely durable and they can be worn for weeks at a time without needing to be washed.
Some hardcore travelers don’t wear jeans because they are fairly heavy and take forever to dry. While it’s true, I still think the benefits of jeans heavily outweigh the disadvantages.
Chinos. A pair of well-fitting neutral/dark color chinos is a good option that can be either casual or dressy.
Shorts. In general, men in Europe don’t wear shorts, but it is becoming more commonplace. If you choose to bring shorts, stay away from the baggy cargo shorts and choose a more fitted style. You may want a pair of lightweight athletic shorts for wearing around the hostel but wearing them in public will single you out as a tourist.
Swimwear. If you go to the beach then you’ll need something to wear. A pair of athletic shorts can always double for a swimsuit.
The one thing you shouldn’t skimp on is the comfort of your feet. Ask any experienced traveler and they’ll tell you the importance of quality socks. I know, socks aren’t exactly exciting but they truly do make a difference in your comfort.
The best socks are made from fine merino wool and its benefits are numerous. Many of you probably have bad memories of itchy wool, but quality merino wool is soft and comfortable. In addition to adding extra cushioning, wool naturally wicks moisture away from your skin—which keeps your feet dry and blister free. Wool is also naturally odor resistant, so you’ll be able to wear a pair of socks a few times before having to wash them (I alternate pairs each day so I don’t wear one pair two days in a row). Lightweight wool will air-dry fairly quickly, but heavyweight wool will take a bit longer. And wool isn’t just for winter. Lightweight wool is great during the summer and it will actually help keep your feet cool and dry. The major downside is the price, but my socks have lasted a few years—so think of it as an investment.
If you want to save a little money, there is also the option of synthetic (nylon, spandex, polyester, polypropylene, acrylic, etc.) socks. Synthetic materials have many of the same benefits as wool, but they don’t perform quite as well. Synthetic will probably dry quicker than wool, but the material does have a nasty reputation of smelling. Some companies treat the fabric with an antibacterial coating, but it still doesn’t perform as well as wool.
The one fabric you want to avoid is cotton. While it is the cheapest option, it is also the worst. Unlike wool and synthetic material that wick moisture away from your skin, cotton absorbs moisture and traps it against your skin. This will cause your feet to be chilly and clammy in the cold and soggy in the heat. The moisture will also lead to blisters and unpleasant odors. Trust me, you don’t want to be known around the hostel as the person with the terrible smelling feet.
As mentioned previously, socks come in multiple weights and cuts. During the summer, you’ll want to stick with lightweight socks, but you could go to a mid-weight pair if you want a little extra cushion for long walks. In the spring and fall, I generally stick with a mid-weight pair. If it gets cold, you can always wear one thin and one medium pair for extra warmth. Finally, in the winter, I prefer heavyweight or mid-weight socks.
No matter what style of socks you purchase it is imperative that they fit well. They should be snug and there should be no movement when you walk, because bunching and rubbing will quickly lead to blisters.
When it comes to socks, my favorite brands are SmartWool, Icebreaker, Wigwam, and Darn Tough (lifetime warranty). These brands all make socks that are 100% wool or a wool/synthetic blend—which means they’re generally the most expensive at about $12 to $20/pair. Quality synthetic socks will generally cost $8 to $12/pair.
If you’re traveling extra light you just need two pairs, but most travelers will want four or five pairs. Do a quick wash in the sink every few days and you’ll be all set.
Underwear

Wash your underwear at night and they’re dry by morning.
Another area I don’t skimp on when I travel is underwear. Just like with socks, many seasoned travelers avoid cotton. Luckily, there is a new breed of high-performance synthetic underwear that is made for travel and athletic activity. The benefits of quality performance underwear are:
Quick drying. High-tech synthetic material dries extremely quickly so you can wash your underwear at night and they’ll air-dry completely in just a few hours. This means you can bring fewer pairs—which will save you space in your bag. For reference, a pair of cotton underwear can take more than twenty-four hours to air-dry (and even more in high humidity climates).
Breathability. Normal cotton underwear is fairly breathable but it still holds in sweat. This leads to that swampy feeling we’ve all experienced. Travel underwear allows more air circulation and it also wicks sweat away from your body. These high-tech fabrics keep you to cool and dry in all conditions. This is a huge benefit for travelers.
Breathability is also just as important during the winter. Remember, you still sweat when it’s cold. That sweat will chill you down—even when you are bundled up. High-tech materials will wick the sweat away from your skin and it will help keep you warm and dry.
Odor control. Many of these fabrics have natural anti-odor properties or a special antimicrobial coating. Those benefits speak for themselves.
Lightweight. Travel underwear is made of extremely lightweight material, which means less weight in your bag.
Great at home. Even though they’re made for travel, these underwear are so comfortable that they’re great for wearing long after your travels are over (which helps justify their price). I know many people who have replaced nearly their entire underwear collection with travel underwear.
The most popular underwear among travelers is the ExOfficio Give-N-Go series of travel underwear. They are super breathable, comfortable, and only take a few hours to air-dry. They offer multiple cuts and colors for both men and women. The biggest downside is the price. Women’s styles are generally around $15/pair and men’s cost about $20/pair. However, you can usually find them on sale if you spend a little time searching online.
Under Armour is another favorite brand of high-performance underwear among travelers and they are priced similarly to ExOfficio. Other athletic companies manufacture similar performance underwear.
If you don’t like the feeling of synthetic fibers, merino wool is a great choice. However, be warned because they are not cheap so expect to pay $35 to $50 per pair. If you choose to go this route, the best reviewed brands are Icebreaker, SmartWool, and Minus33.
Footwear
Ohh shoes . . . why must they be so difficult? This is probably the area where people really struggle. Without a doubt, the number-one priority should be comfort. You’re going to spend ten-plus hours each day on your feet and you will be miserable if your feet hurt. That means you’ll have to sacrifice a bit in the fashion department, but it’s totally worth it. However, that doesn’t mean you have to completely forgo all semblances of fashion—but you will have to search a bit.
The solution that many inexperienced travelers choose is to bring multiple pairs of shoes for multiple situations. This is a mistake. Shoes are bulky, heavy, and they take up a lot of precious space. I recommend sticking with a maximum of two pairs. You can maybe get away with three pairs if one is super lightweight and doesn’t take up much space. Alternatively, I know plenty of people who travel with a single pair.
You may consider bringing a quality pair of insoles for added comfort and support.
WOMEN’S SHOES
Women have it a little tougher than guys when it comes to choosing which shoes to pack—especially when it comes to fashion. As always, comfort should be top priority.
For your main everyday pair, I suggest a pair of fashionable, yet supportive sneakers. These are what you’ll wear as you sightsee. Additionally, a comfortable pair of flats is also a nice option for a second pair of shoes, because they don’t take up much space and they can be either dressed up for going out at night or they can be worn more casually. Sandals are another popular lightweight choice for summer travel, but you’ll want a pair that offers some support.
If you’re mainly concerned about comfort and practicality, then all-terrain waterproof hiking shoes are an excellent choice. These are especially a great option in rainy or snowy conditions so you don’t have to worry about wet feet.
But what about that sexy pair of high heels? Honestly, I’d leave them at home. If you do bring a pair, wear them sparingly and make sure they are comfortable enough to walk in. As you’re well aware, heels can easily cause blisters, which will continue to haunt you long after that night out. I know plenty of fellow travelers who’ve chucked their heels after a few weeks of travel.
MEN’S SHOES
Guys have it fairly easy when it comes to shoes. The first option is athletic running shoes. You will stand out as a tourist but you’ll keep comfortable. If you’re interested in blending in a bit more, then I recommend bringing a pair of fashionable sneakers, because they’re both comfortable and stylish enough for a night out. Nike, Adidas, Puma, and most other major shoe companies make plenty of options. If you want to step it up a bit, there are plenty of comfortable casual leather shoes that work well in many situations.
Another popular option for backpackers is all-terrain hiking shoes. While not very stylish, they are extra supportive and they perform great in rainy or snowy conditions. This is probably the best option if you want to ensure the comfort of your feet. However, I generally don’t recommend hiking boots because they’re too bulky and they’re overkill for city travel.
I wouldn’t pack dress shoes either because you’ll get little use out of them. As a budget backpacker, you probably won’t be dining in any fancy restaurants and a nice pair of sneakers will be fine in all but the most exclusive nightclubs.
Finally, be sure to bring a cheap pair of rubber sandals if you stay in the hostels. You’ll want them for the showers. Trust me.
Waterproof/water-resistant jacket. The winter, spring, and fall tend to be fairly rainy in much of Europe, so a rain jacket is a nice thing to have. You don’t need a raincoat in much of Europe during the summer so I would opt for an umbrella.
There are generally two rain jackets categories—hardshells and softshells. Hardshell jackets are completely waterproof and they’re lighter than their softshell counterpoint. The main drawback to a hardshell is its lack of breathability. This means that interior moisture (i.e., sweat) can’t escape and it will leave you feeling clammy and balmy. Some high-end hardshell jackets do have greater breathability but they’re expensive.
Softshell jackets are technically only water-resistant (some are virtually waterproof) but they are highly breathable. The fabric is also flexible so it is more comfortable to wear. Additionally, softshells normally provide more warmth and look more casual—so they’re the best option for travel.
Fleece jacket. Fleece is a great material because it provides a lot of warmth without being bulky. A fleece can be worn as an outer layer or it can be layered under a rain jacket or winter coat to provide extra warmth.

You never know when it’s going to rain.

You gotta get a cool pair of shades.
Scarf. Both European men and women wear scarves, so they’re a great way to look like a local and they add a little extra style to your wardrobe. You can always buy a few as you travel, as they also make great souvenirs.
Sunglasses. Sunglasses are not only practical, but they’re also a way to make a fashion statement. After living in Europe, I noticed that Ray-Ban Wayfarer style sunglasses were a top choice of the truly fashionable.

Europe is a big continent and the weather will vary greatly by region. That’s why it’s important to be prepared for multiple types of weather. For example, January in Madrid sees multiple days in the upper fifties but in Berlin the temperature usually stays below freezing. Thanks to the jet stream, cities on the western coat of Europe tend to be fairly mild but rainy. Winter travel can get pretty miserable if you don’t dress properly. This guide will teach you everything you need to know for staying warm and comfortable.
GUIDE TO LAYERING CLOTHING
Traveling during the winter can be a little tough especially since you don’t have a lot of space for clothing. In most situations, the best way to stay warm isn’t with heavy winter coats or bulky sweaters. The secret is layering multiple articles of clothing. This drastically reduces bulk and it saves space in your backpack.
The idea behind layering is simple. Basically, you wear multiple thin layers and you add or subtract layers depending on the weather conditions. It isn’t rocket science but it is very effective when used correctly.
Base layer
My merino wool base layer keeps me warm without adding bulk.
The base layer is very important. In addition to providing warmth, it wicks away moisture and sweat from your skin (yes, you sweat in the cold) and transfers it into the next layer of clothing where it evaporates more quickly. Base layers need to be worn tight against the skin. They are available in a few different materials:
Merino wool. Merino wool is the ideal base layer material. It transfers moisture and retains heat well. Higher-end merino wool doesn’t itch, but it can get expensive. Merino wool is naturally odor resistant, so you can wear it a few days without worrying about getting funky.
Synthetics. Synthetic materials transfer moisture well and they are a good option for many winter travelers—especially since they are less expensive than merino wool. The main downside to synthetic material is its tendency to absorb body odor so they might start smelling pretty bad after a single wearing.
Silk. Silk isn’t too popular anymore but it does a good job. Silk can be difficult to care for, so many people prefer the more robust synthetic material or merino wool. It is also fairy expensive.
Cotton. Cotton is popular, but should be avoided. Cotton absorbs a lot of moisture but doesn’t wick it away—it just holds damp material next to your skin. This is the complete opposite of what you want in a base layer and it will actually make you colder.
Mid layer
The mid layer is the everyday items that you’d normally wear. Depending on the temperature, it can be a t-shirt, button-up shirt, light sweater, etc. This provides a little extra warmth and can be worn alone if the weather is warm enough.
Insulating layer
The real warmth comes from the insulating layer. Depending on the conditions, your insulating layer may also be your “outer layer.” You can wear multiple thin insulating layers to adjust to the temperature. If you get too hot, it is easy to remove layers until you are comfortable (and vice versa). Insulating layers should be a little loose to allow for better insulation. The most popular insulating layer fabrics are:
• Fleece. Fleece is as warm as wool but it’s lighter and less bulky. It also has the ability to hold in warmth even if it gets damp. A fleece jacket is also versatile because it can be worn as an outer layer on a warmer day or a mid layer on a cold day.
• Wool. Wool is a great choice. It has been keeping people warm for thousands of years and it will still keep you warm even if it gets damp.
• Synthetic (Thinsulate). It’s not as effective as wool/fleece but it is cheap, lightweight, and does a fairly good job at retaining warmth.
• Down fill. Down filled “puffy” jackets provide a ton of warmth while being incredibly lightweight. Another nice benefit is its ability to be compressed into a ball the size of a shoe, which makes it amazing for ultra-light travel. The main downside is that it loses all its insulating properties when wet so you’ll need an umbrella or an additional waterproof layer if it rains.
Shell layer
The shell layer keeps away the elements (wind, snow, rain, etc.). The shell layer is usually in the form of a jacket and it should block the wind and be waterproof. Ideally, the shell layer lets interior moisture escape (look for jackets that are “breathable”), while not letting wind and water pass through from the outside. There are a multitude of jackets that fit these criteria, but there are no jackets that can be totally waterproof and extremely breathable—there will always be some kind of trade off.
Normally I say that a heavy winter coat is too bulky and often unneeded if you’re backpacking during the winter. However, if you plan on visiting extremely cold climates, you might consider bringing a heavyweight winter coat. You’re going to spend a lot of time outdoors so you might as well be comfortable.

Spending eight hours a day in sub-freezing weather calls for a heavy coat. And a hat. And a scarf.
Socks. The importance of quality socks has already been covered but they are crucial in the winter. Pack a few pairs and bring an extra pair while sightseeing in case your feet get wet.
Hat. A good hat makes a huge difference when you’re traveling during the winter. Wool and fleece are the best materials.
Gloves. You probably don’t need bulky ski gloves but a nice pair of gloves does wonders on a cold day. I suggest thinner gloves or those “mitten-glove combo” things so you can still use your camera without having to take your gloves off.
Scarf. I found that wearing a scarf really helped keep me warm. There are a million styles/materials, so I just suggest getting one that feels and looks good.
Waterproof shoes/boots. European winters are generally more rainy than snowy so you may consider getting a pair of waterproof hiker-style shoes. Boots are bulky and heavy but they are nice in the parts of Europe that experience deep snow or slushy city streets. Granted, neither boots nor shoes will be stylish, but wet feet will quickly ruin your day.
Useful Travel Accessories
Below are some helpful travel accessories that will come in handy while you are traveling. You don’t need to bring everything on this list but I tried to only list the most useful items.
Daypack for daily sightseeing. A small bag or purse is great for miscellaneous things (camera, souvenirs, rain jacket, guide books, etc.). I recommend getting a daypack that isn’t too large because a big bag will make your back hurt after wearing it for a few hours.
Fast drying travel towel. A quick drying towel is a must if you’re staying somewhere that doesn’t provide towels (e.g., hostels or maybe couchsurfing). These towels absorb a large amount of liquid and they can air-dry in a few hours. Travel towels are usually much smaller than a normal towel, so I suggest buying a large or XL size—especially if you have long hair.
Small keychain flashlight. It is always a good idea to have a flashlight when you travel. They’re essential if you’re staying in hostels because it prevents you from waking everyone in the room when you need to find something during the night. They are also nice for navigating dark streets, illuminating your luggage, or in case of a power outage. I love the Streamlight 73001 Nano Light Miniature Keychain LED Flashlight because it is super small (it fits on a keychain) but it provides a ton of light.
Earplugs and eye mask. An eye mask is nice if you take a lot of planes or trains, or if you stay in hostels (some jerk will turn the lights on at 3 a.m.). Additionally, you’ll be glad you brought earplugs if you stay in hostels because you’ll eventually share a room with someone who snores.
Journal or notebook. I always carry a small notebook when I travel. They’re great for jotting down helpful information (directions, phone numbers, addresses, restaurants, etc.) or keeping track of your spending. Sometimes I’ll journal about what I did that day or just write about my thoughts—these honestly make some of the best souvenirs. Hardcovers are more durable and hold up well during the journey. I tend to always choose the classic Moleskine brand of notebooks but Field Notes and Rhodia notebooks are also fine choices. Don’t forget to take a few pens.
Travel sleep sheet. I’d like to think that the sheets in my hotel or hostel bed are clean . . . but I know that won’t always be the case. If you don’t want to take a chance then consider bringing a sleep sheet—which is basically your own personal sheet to protect you from any gross hostel sheets. The cheapest option is a cotton sleep sheet but they can be a bit bulky. Silk sleep sacks are more expensive but they’re much lighter, less bulky, and they feel great to sleep in.
Water bottle. It is important to keep hydrated as you travel. A basic water bottle is perfectly fine, but you’ll save a lot of space by using a soft-sided bottle that can be rolled up when empty.
Sink stopper. When you wash your underwear and socks in the sink you’ll need a travel sink stopper.
Travel laundry soap. Woolite makes small packets of laundry soap that are perfect for doing laundry in the sink. The packets are nice because you don’t need to lug around a bottle of detergent.
Flexible travel clothesline. A rubber-braided clothesline is a nice way to air-dry anything you need to wash. The braided clotheslines are ideal because they don’t require any clothespins—you just stick the clothes through the braids.
Stain remover. Tide To Go Stain Remover Pens are great for getting stains out of clothes. I used one more than I thought I would have. Alternatively, individually wrapped Shout Wipes also work really well and don’t take up a lot of space in your bag.
Padlock. If you’re staying in a hostel then you’ll need a lock so you can secure your stuff in the lockers.
Retractile cable lock. Retractable cable locks are nice for securing your bag to your bunk or a luggage rack. I mainly used mine on long train rides to secure my bag to the luggage rack. They are not super heavy duty but they will deter a thief from running by and snatching your bag.
Duct tape. You never know when you’ll need to patch something. A neat trick is to wrap the tape around a pencil—which eliminates the need to bring a full roll.
Swiss-Army knife/multi-tool. Assuming you’ll check luggage or will always take the train, a Swiss-Army knife is a handy tool to have while you travel. If you want something more robust then look at a multi-tool device.
Travel alarm clock. An alarm clock (or a phone with an alarm function) is essential because you don’t want to oversleep for those early morning flights and trains.
Digital luggage scale. A digital luggage scale is great for avoiding those costly overweight luggage fees.
Photocopies of important documents. Make copies (physical and electronic) of your passport and other important documents. I also recommend emailing them to yourself so you can access them from any computer with Internet access.
Resealable plastic bags (multiple sizes). Plastic bags are a great way to store your dirty or wet socks/underwear so they don’t get mixed with your clean clothes. It is important to store any liquids in sealable plastic bags in case of leaks. In fact, double bag them. You don’t want to be one of the many travelers who discover shampoo covering all your clothes. For a bit of extra protection, I recommend putting your important travel documents/passport in a plastic bag. The large three-gallon bags are nice for storing shoes so you don’t get your clothes dirty.
Money belt. A money belt is worn under your clothes and it is a safe way to hide cash, credit cards, and other valuable items from pickpockets. Personally, I don’t really like money belts because I find them uncomfortable, but a lot of people always wear one—it comes down to personal preference.
Collapsible umbrella. A quality packable umbrella is handy to have when traveling.
Plastic travel utensils. A great way to save some money is to buy meals from the grocery store but not all shops provide utensils.
Toothbrush cover. I like a clean toothbrush . . . call me crazy. You can find cheap covers but I like the Steripod Clip-on toothbrush sanitizer. It sanitizes the brush using voodoo science. Yeah, science!
Lint roller. Your clothes will pick up a lot of dust and lint—especially in hostels. A lint roller is an easy way to help keep your clothes looking presentable.
Guide books and phrase books. I always do a little research about the cities I’m visiting before I go. A small phrase book is nice if you want to learn a bit of the local language.
Corkscrew/bottle opener. You shouldn’t have any trouble finding a corkscrew in Europe, but pick one up before you leave if you can’t wait to drink. Also, bring a bottle opener because most beer bottles aren’t twist off.
Try to minimize the amount of toiletries you bring because they add a ton of weight. Remember, you can buy pretty much anything once you arrive in Europe.
Shampoo/conditioner/bodywash. Pour liquids into those small travel-sized bottles. GoToob travel bottles are some of the best.
Non-aerosol dry shampoo. Dry shampoo is amazing for getting your hair ready when you don’t have time for a shower.
Toothpaste and toothbrush. I made the mistake of buying a travel toothbrush on my first trip abroad—it sucked. Now I use a normal toothbrush and a toothbrush cover. I did find that dental floss was much more expensive in Europe, so buy some at home.
Shaving stuff. Razors are more expensive in Europe so bring your own. You can buy shaving cream anywhere.
Deodorant. I’ve found that deodorant in Europe doesn’t seem to work as well—maybe it was all in my head.
Lip balm with sunscreen. Nivea makes a lot of great lip balm that’s sold all over Europe. But if there is brand you really like, you might want to bring it with you.
Contact lens/solution/glasses. Contact solution is actually a pain to buy and is normally only sold in pharmacies. Plus it isn’t cheap. I’d recommend bringing your own if you can or at least enough to get you through a few days.
Makeup. It is best to bring only the basics when it comes to makeup because it is easy to go overboard. Below are some basic ideas, but you can decide on what is important to you.
You can wear minimal makeup but look polished by wearing a strong lipstick. You can also use lipstick as a blush so it is a good way to cut the amount of makeup you bring. BB Cream is a great “all-in-one” product. It’s a moisturizer, contains sunscreen, provides light coverage as a basic foundation, and it evens skin tone. Mascara should be changed every three months so this is a great excuse to buy a new bottle. Cream blush is nice because you don’t need any brushes.
Condoms. Some souvenirs are no fun, so it is better to be safe than sorry. I’d buy them before you go.
Fabric freshener. Your clothes will probably smell a bit funky after a while . . . so travel-sized fabric spray is a good way to stay a little fresher.
Travel-sized toilet paper. You never know when you’ll need a bit of toilet paper, so it is good to carry some travel toilet paper as you travel.
Wet wipes/baby wipes. Individually wrapped wet wipes are a lifesaver when you actually need them—and you’ll probably need them.
Hand sanitizer. You’ll be touching so much dirty stuff all day and you don’t want to get sick as you’re traveling.
Body powder. It’s common to experience chaffing after a lot of walking—especially when it is really hot. There is a product called Anti Monkey Butt that is great for those hot days or Gold Bond powder is another good option.
Foot cream. Take care of your feet because you’ll be walking a lot. O’Keeffe’s Healthy Feet Cream is fairly cheap and it will keep your feet from becoming rough and cracked.
Cologne/perfume. I like to travel with a bit of cologne or perfume. Don’t bring a full bottle because that would add a lot of weight. I suggest picking up a few sample vials—they’ll usually give you free ones at department stores or you can buy them online if you’re looking for something specific.
First-Aid And Medicine
Only pack minimal first-aid supplies because you can get everything easily in Europe.
Prescription drugs. Ensure your prescription medicine is in its original box and that you have a copy of the prescription. Some countries will check your medicine when you pass immigration, but I’ve never been asked. Make sure you have enough medicine to cover your entire trip because it could be difficult getting your medicine abroad.
Pain medicine. In many parts of Europe, you can only buy medicine (even basic stuff like aspirin) from a pharmacy. This isn’t really a huge problem, but some pharmacies have limited hours (many closed on Sunday) and the prices are usually fairly high, so you might as well have a few pills on you before you arrive.
Bandages. They’re nice to have readily available and they’re easy to carry. Throw a few in your bag for cuts and blisters.
Motion sickness pills. If you suffer from motion sickness, I’d pack a few motion sickness pills before you leave.
Pepto tablets. Traveling can take a toll on your stomach. Pepto-Bismol tablets are super easy to carry in your bag and they can be a lifesaver. Plus, tablets are much easier to pack than the liquid.
Small pack of tissues. These are helpful for when you look at your credit card bill at the end of your trip.
Guide to Using Electronics in Europe
There is no doubt that electronics play a huge part in our lives, so it is no surprise that electronics have become an essential part of travel. Between smartphones, digital cameras, laptops, e-books, video cameras, blow-dryers, and hair straighteners, the choice of what electronics to pack can get overwhelming. This section will not only explain what electronics are available, but also how to make sure they survive the trip overseas.
EUROPEAN ELECTRICITY BASICS
North America and Europe electronics run on different voltages. North America uses 110 volts and Europe uses 220 volts. How does this affect you? Basically, in most cases you don’t have to worry about it because higher-end electronics (laptops, digital cameras, mp3 players, etc.) have built-in voltage adapters so they can handle the voltage differences without any issue. However, low-tech electronics like hair-dryers, curling irons, hair straighteners, etc. don’t have a built-in voltage adapter, so they will fry if you plug them into a European outlet because Europe’s electrical sockets pump out twice as much voltage.
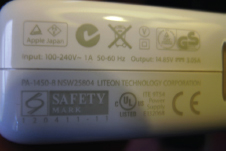
This device is rated for 100-240V so it’s safe to use in Europe.
Your electronics will display the voltage in which your device operates. It will normally be printed near the plug or on the power brick. High-end electronics will usually say something like IMPUT: 100—240V. This means they run on a voltage between 100V and 240V. If the device just says 120V then it won’t be compatible.
If your electronic device is only rated for 120V then you have two options—either you can buy a special voltage converter that converts 220V to 110V or you can buy a device that is “dual voltage.” The problem with voltage adaptors is that they’re bulky, heavy, and they don’t always work so there is a chance your devices could still get fried. I wouldn’t bother with them.
I would either purchase a dual voltage device (hair-dryer, straightener, etc.) or buy a new device once you get to Europe—that way you’ll know it works.

Additionally, North America and Europe use different plug configurations (the UK has their own too). You will need a plug adapter to be able to plug your electronics into European electrical outlets. These adapters will NOT have any impact on voltage—they simply convert the plug style. Plug adaptors are fairly cheap, so it’s smart to bring a few since you’ll probably be traveling with multiple electronic devices.
INTERNET AND WI-FI
Free Wi-Fi is fairly easy to find throughout Europe but you’ll find the most options in medium and large cities. Free Wi-Fi is fairly standard in hostels and in a large number of cafés. You’ll also find free Wi-Fi at McDonald’s and Starbucks (but some require you to purchase something). Most major cities have an Apple Store so you can always stop there to use the Internet on their computers or to connect to their Wi-Fi.
Internet cafés are also scattered throughout most cities but they’re starting to disappear, so it might take a little searching. In addition to accessing the Internet, cyber cafés usually have printing capabilities that you may require if you book tickets to museums or transportation online.
LAPTOPS AND TABLETS
The ultimate travel computer is undoubtedly a tablet—they’ve completely changed the way people travel. They’re ultraportable, lightweight, and easily packable. They’re also good for reading electronic guidebooks, reviewing city maps, basic photo editing, watching movies, and a huge catalog of travel apps is available.
If you need a little more functionality than a tablet can provide, then you’ll want to consider a laptop. However, laptops do add a lot of extra weight and you’ll constantly worry about protecting it from damage. For that reason, I recommend traveling without a laptop if possible. If you do feel like you need to bring one, I highly suggest getting the smallest and lightest one you can afford.
SMARTPHONES, DATA PLANS, AND MOBILE PHONES
Most people already have a smartphone so it’s natural you’ll want to bring it abroad because they can truly enhance your travels. If you want to solely use it with Wi-Fi, be certain to turn off all data and mobile service. You will rack up a huge bill if you use your home mobile and/or data plan overseas.
The easiest way to get data is by signing up for an international data plan from your mobile phone provider. You’ll still pay quite a bit for data—around $20 for 100MB of data. For reference, you can burn though 100MB of data by streaming about twenty minutes worth of Youtube videos so it really isn’t very much. However, if you use Wi-Fi 99% of the time and only access your data when absolutely necessary, this option may work for you.
If you want to use data regularly, then the cheapest option would be purchasing a data plan in Europe. To do this, you’ll most likely need to “unlock” your phone so it can accept SIM cards from other companies. The problem is that most phones sold in the United States are “locked” to your mobile provider so it won’t work if you install a SIM card from another mobile company. It’s basically a way for mobile companies to keep you from switching carriers. Contact your carrier to see if they’ll unlock it but each carrier has their own policies regarding when they’ll unlock a phone.
If your carrier isn’t being helpful there are other ways to unlock your phone yourself. Plenty of online services will unlock your phone for free or a small fee but you’ll have to search for those yourself.
Once your phone is unlocked, you’re all ready to go—all you need is a new SIM card and you’re ready to start using your phone. Pre-paid SIM cards can be purchased from any mobile phone retailer and shops are numerous throughout Europe. Some countries require that you show a passport and provide an address in that country (just use your hostel/rental apartment address). The prices for pre-paid data won’t be super cheap so you should still monitor your usage and use Wi-Fi when possible.
Another annoying thing you should be aware of are roaming fees between countries. For example, if you use a French SIM card in Germany you’ll get charged an inflated rate. The European Union has passed a law that prohibits this practice within the EU but it won’t go into effect until December 2015.
Also, many people don’t realize that the GPS function in your phone works without needing to use a data or mobile plan. City Maps 2Go and MapsWithMe are the two best offline city map apps.
Some apps allow you to download city maps via Wi-Fi and then use the GPS to pinpoint your location on the map.
Finally, if you just want a basic mobile phone while traveling, you can easily purchase a simple pay-as-you-go phone for around $20 and it usually comes preloaded with $10 worth of credit. These phones can be found at any mobile phone shop.
OTHER ESSENTIAL TRAVEL ELECTRONICS
Outlet plug adapters. You’ll need a few plug adapters for your electronics (UK and European mainland have different plugs).
Travel power strip. We travel with more electronics every year, so power outlets are becoming a hot commodity in hostels and hotels. Don’t be surprised to only find one or two power outlets in a hostel room for ten people. A travel power strip is almost essential these days—just ensure you get one with a European plug or bring an extra plug adapter.
Dual voltage travel hair-dryer and straighteners. Standard North American hair-dryers, straighteners, and curling irons won’t work in Europe. If you plug one into a European outlet, it will fry since European voltage is twice as much as in the United States or Canada. The safest option is to simply purchase new devices once you’re abroad. If you’d rather purchase them before you leave, look for devices labeled as “dual voltage.”
E-reader. If you’re an avid reader, it’s much easier to carry around an e-reader than a handful of books. Additionally, most guidebook publishers now offer their books in electronic format.
Headphones. It’s nice to listen to tunes as you travel. There are a lot of downloadable audio guides for cities and museums—which is a great way to learn more about the places you’re visiting. I prefer the earbud style headphones because they’re super easy to pack away.
I love having music with me when I travel. It really helps pass the time during long train/plane rides. I recommend the iPod Touch because it allows you to take advantage of all the apps, too.
Guide to Choosing a Digital Camera for Travel
Picking the right digital camera can be tricky because you want one that fits your travel style and your budget. My digital camera is one of the most essential items I bring while traveling. Luckily, digital camera technology is so good and there are so many great cameras to choose from . . . sometimes too many. This section will explain all you need to know about choosing the perfect camera for you.
IMPORTANT FEATURES TO CONSIDER IN A DIGITAL CAMERA
Size. There is an old saying that goes “the best camera is the one that’s with you.” That’s why I always recommend bringing a compact camera, because the bigger the camera the less likely you’ll want to carry it. I know many people who’ve brought bulky cameras that take amazing photos, but after a few days they leave it back in the hostel because they’re tired of lugging it around for eight hours a day.

Today’s compact cameras are so advanced that you no longer need a large high-tech camera to take topnotch photographs. Naturally, if you want the ultimate control over your photos or you’re a hardcore photography buff, you’ll still probably bring along your DSLR but you may consider a second small camera for day-to-day photography.
Megapixels. Many people assume that more megapixels means better photo quality. This simply isn’t true. Even budget cameras come with 10-plus megapixels (which is more than what most people need). Anything higher than 8MP should be fine for the average traveler. The real quality comes from a nice lens and sensor quality.
Fast lens. Lens aperture is measured in f/numbers, such as f/2.0 or f/3.5. You want as low a number as possible. Basically, the lower the number, the better it will perform in low-light situations.
Zoom. Having the ability to zoom is a nice feature. When looking at the camera’s zoom capabilities, always look for the optical zoom measurement. The optical zoom uses physical glass to enlarge the image. Ignore the “digital” zoom because they just uses software to enlarge the image but it results in poor-quality pixelated images.
Lens quality. A high-quality lens is one of the things that separate low-quality cameras from high-quality cameras. The best way to find out about the lens quality is by reading reviews.
HD video. High-end cameras can easily take movie-quality video but even cheaper point-and-shoot cameras can give some fairly amazing video.
Wi-Fi and GPS. These features aren’t necessary but they’re kind of cool to have. GPS is cool because it imbeds the exact location of every photo you take. Then you can sync it up to Google Maps to see where you were when you took the photo. Wi-Fi is also handy because it lets you upload your photos to your computer without having to take out the memory card. Some cameras can sync with your smartphone and from there you can upload your photos to the Web.
CHOOSING THE TYPE OF DIGITAL CAMERA FOR YOUR TRAVEL STYLE
There are three major digital camera categories—point and shoot, DSLR, and micro four-thirds. I’ve also included a fourth category of smartphone digital cameras since so many people already travel with them. In this section, I will talk about the advantages and disadvantages of each camera category.
Point-and-shoot
A point-and-shoot digital camera is a great choice for lightweight travelers and this is the type of camera I recommend bringing. Thanks to advancements in photo technology, it’s entirely possibly to get excellent quality photographs from a camera that can easily fit in your pocket. A decent camera starts around $150 and, for around $300, you will start finding some seriously impressive options.
One of the main benefits of a small camera is the fact that you can easily take it with you wherever you go. Don’t underestimate this. It is also easy to stow away in your luggage, and it’s easy to protect so you don’t have to worry about damaging it as much.
Today’s cameras are so good that even untrained travelers can take excellent quality photographs. The high-end point-and-shoot cameras give the user more control of his or her photos and it is very possible to get professional quality pictures.
One of the main drawbacks of a point and shoot is its low-light performance. Low-end cameras produce grainy and pixelated images when the lighting is poor. However, high-end models will perform quite well so all hope is not lost.
The other drawback that plagues all point-and-shoot cameras is the lag that occurs between the time you press the shutter button and the when the camera actually takes the photo. In general, it’s worse on budget cameras and a point-and-shoot camera will have lag.
Digital slr (dslr)
Digital SLR cameras are often known as “professional” cameras. A serious photographer will have maximum control over the camera to get the best shot possible. If you know what you’re doing, you can get some amazing quality photos—especially if you start getting into using different lenses to match your shooting needs. Depending on the lens, a DSLR will also give you better zoom capabilities. A DSLR performs much better in low-light situations so you’ll get much better indoor and night photos. Additionally, the shutter lag is virtually nonexistent, so you can capture action much easier.
The biggest drawback of a DSLR is the size. They are a huge hassle to carry around all time—especially for hours at a time. I know plenty of people who ended up leaving the camera behind because of the inconvenience of lugging it around. Additionally, DSLRs are hard to protect when you’re on the move all the time, so you need a nice camera bag—which adds even more bulk.
Don’t forget to learn how the camera functions because many people purchase a fancy new camera for their trip but then have no idea how to actually use it. Spend a few weeks getting to know how all the functions work to ensure you get the best photos possible.
Micro four-thirds
Micro four-thirds cameras (sometimes called mirrorless cameras) are great because they’re about the same size as a point-and-shoot but they produce image quality very similar to DSLRs. They also give the possibility to add different lenses if you’re looking for even more control of your shots. Users moving up from a traditional point-and-shoot will also like the minimal shutter lag.
One big drawback to this style of camera is the price. At the low end, they run about $700 and the price can easily double or triple, but an entry-level DSLR is closer to $350. However, as the technology continues to improve, the prices will continue to become more reasonable and I predict that this style of camera will be the perfect high-quality travel camera.
Smartphone cameras
Smartphone cameras are getting so good that they’re killing base level point-and-shoot cameras. Their image quality will never be as good as mid- and high-end point-and-shoot cameras but the quality is still impressive. Additionally, they’re impossible to beat when it comes to convenience and snapping photos on the go. Plus, it’s super easy to share photos online the moment you take them. Modern smartphones take decent low-light images, but don’t expect anything too amazing.
Photography buffs will want to stick to an actual camera but, at the rate the smartphone cameras are improving, I can see how many travelers could ditch their traditional camera altogether—especially if all your photos are going to only be viewed online. And, if nothing else, smartphone cameras have proven themselves to be excellent supplementary cameras.
IMPORTANT DIGITAL CAMERA ACCESSORIES
Memory cards. Don’t forget to bring enough memory cards. You absolutely don’t want to limit the amount of photographs you take because of limited memory card space. Plus, they’re very cheap these days so there is no excuse not to bring a few. On my first trip, I didn’t bring enough memory cards, so I had to constantly look for Internet cafés to upload my photos to an online storage account. I wasted a lot of time and money doing that.
External hard drive or online backup. It’s smart to always backup your photos. I’ve seen too many people lose all their photos because of corrupt or lost memory cards. A portable hard drive is the simplest option, but with online storage you don’t need to worry about corrupt files or losing your hard drive. However, uploading large amounts of data can take a long time—especially if you don’t have access to fast/reliable Internet.
Extra batteries. Extra batteries are essential for long days of sightseeing because you don’t have to worry about running out of power. You can buy cheap third-party batteries online that work nearly as well as batteries from the manufacturer but for a fraction of the price.
Choosing the Best Luggage for Your Travel Style

A backpack isn’t the only luggage option for traveling around Europe. Some people prefer using rolling luggage. Each option can be viable and this section will give the pros and cons of both options.
TRAVELING WITH A BACKPACK
Benefits of using a backpack
Hands-free travel. Having full use of your hands makes navigating European streets and public transportation much easier.
Easily navigate stairs and streets. Traversing cobblestone roads and myriad stairs are made easy with a backpack. Don’t expect to find escalators and elevators in all European public transportation. I’ve seen numerous people in the Paris Metro trying to lug a huge suitcase up its multiple flights of stairs. It isn’t fun.
Comfort. A backpack can actually be pretty comfortable—assuming it fits well and isn’t over-packed.
Ease of movement. Walking through crowds and tight spaces is much easier with a backpack.
Easy to store. Hostels usually have personal lockers and a backpack will fit in those fine. Most of the time, a suitcase is too large so you’ll need some other way to secure your stuff.
Drawbacks to using a backpack
Airline travel. Between the baggage handlers and the conveyor belts used to route luggage, the airlines aren’t exactly known for being gentle on backpacks. Most backpacks have a lot of straps that can get caught on the conveyor belts and sometimes they get ripped off (not fun). I aim to always carry on my backpack to avoid these issues. However, many newer travel backpacks have zip-away shoulder straps that make the bags safe for being checked.
Over-packers. Many travelers tend to pack a lot . . . like way too much. I always try to promote traveling light, but if you find yourself needing to travel with your entire wardrobe, you might want to save your back and just use a suitcase.
Cost. A quality backpack isn’t cheap (although there are some nice budget friendly options).
Some people don’t like them. Some people just don’t like having anything on their backs.
TRAVELING WITH ROLLING LUGGAGE
While most budget and younger travelers choose to travel with a backpack, there are still plenty of people who prefer wheeled luggage.
Benefits of wheeled luggage
Not having to carry a bag. Obviously, with wheeled luggage you don’t need to lug your stuff around on your back.
Ease of packing/organization. Packing a suitcase is pretty straightforward and it is pretty easy to get to your stuff.
Airline safe. Suitcases are meant to travel well in checked luggage (assuming a baggage handler isn’t having a bad day).
Able to pack more. You don’t have to be as concerned with weight when you use a wheeled suitcase since you won’t be carrying it.
Drawbacks to using wheeled luggage

Public transportation isn’t always luggage friendly.
Damn dirty stairs. Stairs are the enemy of wheeled suitcases. Wheeled bags are designed to be wheeled around but they are difficult to carry. I’ve helped people carry their huge suitcases up four flights of stairs . . . it is terrible.
Broken wheels. European streets can put a beating on those wheels. Once a wheel breaks, you might as well get a new suitcase.
Crowds. Rolling a suitcase around in a crowd can cause a lot of frustration.
Trains. The majority of luggage space on a train is above the seat so be sure you can lift your bag above your head. Most trains do have luggage storage areas but they fill up quickly and you won’t be able to keep an eye on your bags as easily.
Streets. Rolling a suitcase over cobblestone is about as fun as it sounds.
Harder to store in hostels. If you’re staying in a hostel, be aware that most lockers are too small for standard luggage. There might be other places to store your bag but they probably won’t be as safe as a personal locker.
Hands full. You’ll always have to keep one hand on your bag, which will hinder your mobility.
Added weight. Wheeled luggage is considerably heavier than a backpack so keep that in mind if you plan to carry.
OTHER LUGGAGE OPTIONS
Another possible luggage option is a convertible wheeled backpack that has both backpack straps and wheels—which allows you to choose how to haul around your bag. Unfortunately, these bags are much heavier than standard backpacks because of the extra frame and wheels. Additionally, they are usually more expensive. Most people who bring this type of bag end up wheeling it around everywhere, so it probably makes sense to save money by sticking with a normal wheeled bag.
How to Choose a Travel Backpack

The most popular choice of luggage for budget travel around Europe is a backpack—hence why it’s called “backpacking Europe.” Choosing the right backpack can be confusing and time intensive, but it pays to take your time when choosing your pack. A proper-fitting backpack allows you to travel swiftly and easily, but a poor-fitting pack is like an anchor. This section will explain the different types of backpacks available and how to choose the perfect one for you.
There are three main styles of travel backpacks—top-loading, front-loading, and convertible. Each style has its advantages and disadvantages. I tend to recommend front-loading backpacks for most people visiting Europe, but any option would be fine. Take a look at what follows to see which best fits your travel requirements.
Front-loading (aka panel loading)
Front-loading backpacks were designed for travel—as opposed to outdoor trekking. This style of backpack opens up like a traditional suitcase. Basically, they are a cross between a suitcase and a backpack.

Front-loading backpacks zip open for easy access.
Advantages
Easy access to all your stuff. You can simply unzip the zipper and get to whatever you need quickly. No need to totally unpack your bag when you need to get to something.
Extra pockets. Most bags of this style include a lot of extra pockets on the outside of the bag. This is nice because you will have easy access to the items that you use often.
Easy to organize. Packing cubes work very well with this style of backpack, so it makes organizing your stuff so much simpler.
Fewer straps. Panel-loading backpacks don’t have as many straps as most top-loading backpacks. This means you won’t have to worry about getting them caught on things. This is especially important if you fly a lot since the straps get caught on airport conveyer belts.
Disadvantages
Zippers can break. The zipper is one of the weakest points. Higher quality backpacks use heavy-duty zippers that can withstand more abuse, but zipper breakage is still a concern.
Zippers are less waterproof. Water can get in through the zipper. Most high-quality bags now come with waterproof zippers or you can buy a waterproof rain cover.
Poorer fit. Some people complain that these packs are too wide and less comfortable than top-loading backpacks.
Less advanced suspension system. Front-loading backpacks tend to have a less advanced suspension system. This means that the bag will become more uncomfortable on longer treks. However, some of the more advanced (i.e. more expensive) front-loading backpacks do have advanced support systems.
Top-loading
Top-loading backpacks are designed for mountain/backcountry hikers but many travelers also use them. This style of backpack has a single opening at the top that is closed by a drawstring and covered by a protective flap. These packs are designed to be worn for extended periods of time so they are more comfortable.
Advantages
No zippers for main compartment. You can hold a lot of stuff in your backpack without worrying about breaking a zipper.
More waterproof. There is less chance of water getting into the bag because there are no zippers.
Lighter. Top-loading packs tend to be a lighter weight to meet the demands of long-distance hikers.
Better fit. These bags are slimmer and fit closer to the body so they feel more natural.
Good suspension system. The suspension system is more advanced in top-loading bags because they were designed for long treks by serious backpackers, so you can comfortably wear the bag for an extended amount of time.
Disadvantages
Difficult to pack/unpack. Since everything is loaded from the top, it’s difficult to access stuff on the bottom of your bag. You basically have to take out everything to access anything that isn’t on top. This can be somewhat alleviated if you pack your bag in a specific manner, but it is still a hassle.
Lots of straps. All the straps can get caught and ripped off in the conveyor belts at the airport. Make sure all the straps are tied away.
Less secure. The top of the pack is closed via a drawstring so it is a bit easier to gain access than compared to the front-loading which can have its zippers locked.
Convertible
The convertible backpack is essentially a suitcase with backpack straps that can be zipped away. There is a lot of crossover between convertible and panel-loading packs but the convertible packs tend to have a little less structure. Convertible-style backpacks are a great choice for travelers who like a suitcase but want the option to wear it as a backpack.
Advantages
Packable. These bags are easy to pack/unpack and keep organized.
More stylish. Convertible-style bags are sleeker and more stylish so they blend better into urban environments. Hiking-style backpacks stick out like sore thumbs in a city so you’ll look more like a local with this type of bag.
Shoulder strap. There have been many times when I wished I could easily throw my bag over my shoulder and this type of bag is perfect for that.
Disadvantages
Suspension system. Generally, the backpack straps are not as advanced as what you’d find in a traditional hiking backpack so they’re not as comfortable—especially if your bag is heavy. Some may have minimal or no padding on the shoulder straps. This style of pack may also lack a waist strap.
HOW TO CHOOSE THE CORRECT BACKPACK SIZE
Packing too much stuff is one of the biggest mistakes that rookie travelers make, and it all starts with buying a huge backpack. A large bag enables you to carry unnecessary stuff but a smaller bag forces you to pack light. I’ve seen people with backpacks so large and heavy that they need a friend to help them stand.
Remember that you’re going to be carrying this bag around for long periods of time. You will be miserable if you can’t even handle your own backpack. You’ll be throwing your bag up in overhead bins on planes and trains. You’ll be walking through narrow train aisles and busy streets. An overbearing bag will quickly become a huge burden and it will negatively impact your trip.
Backpacks are measured in either liters or cubic inches. Most bags range from about 35L (2,140 cubic inches) to more than 100L (6,000+ cubic inches). However, I recommend choosing a backpack that’s around 50L (about 3,000 cubic inches). Personally, I wouldn’t go over 65L. You can always go smaller, but packing becomes a little trickier once you go under 35L. Although, I know plenty of ultra-light travelers who’ve traveled for months with a very small backpack, so it is possible.
The size of your backpack doesn’t necessarily need to correlate with the length of your trip. You’ll basically carry the same amount of gear for a two-week trip, as you will for a four-month trip. The only difference is the amount of times you’ll do laundry.
If you want to avoid checking your bag while flying, I wouldn’t get a bag over 50L (3,000 cubic inches). I have a 50L bag and it barely fit most budget carrier’s guidelines (it may have even been a smidge too large but I forced it to fit their baggage template). In addition to skipping the baggage claim, you’ll never have to worry about the airlines losing your luggage—which can be absolutely disastrous on a backpacking trip.
IMPORTANT FEATURES
Listed here are some of the features you should look for when choosing a travel backpack. It’s not surprising that the more features a backpack has, the more it will cost, so if you’re on a tight budget you’ll have to make a few sacrifices.
Internal frame. Most travel backpacks have an internal frame made of metal or a lightweight composite material that gives the bag structure. Bags that don’t have an internal frame will be less comfortable.
Quality materials and construction. Your backpack isn’t going to take a huge amount of punishment but it still needs to be tough enough to withstand airports and being thrown around a bit.
Comfortable shoulder straps. Quality shoulder straps will make your journey much more comfortable and your shoulders will thank you. Look for padding thick enough not to cut into your shoulders. Also make sure the shoulder straps don’t pinch your neck because that means the bag doesn’t fit correctly.
Adjustable shoulder straps. The most comfortable backpacks have shoulder straps that can be adjusted in multiple places. Additionally, load lifter straps and sternum straps offer further adjustment to ensure a comfortable fit.
Stowable shoulder straps. The ability to stow away the shoulder straps behind a zipped panel is a great feature if you plan on checking your bag while flying. This prevents the straps from getting ripped off or damaged from the airline’ s conveyor belts.
Padded hip belt. A padded hip belt is very important because it distributes much of your backpack’s weight onto your hips—which relieves a lot of back and shoulder pain. This is an area where many cheaper bags cut corners.
Lightweight. Be cautious about the weight of the empty backpack. Some heavy backpacks can weight 7-plus lbs alone so once you start adding clothing, the weight will skyrocket. An extra pound or two truly makes a difference. Luckily, backpacks are becoming lighter every year, but you’re always going to pay a premium for the lightest weight bags. Ideally, you’ll want a bag that is 3 to 5lbs.
Quality zippers. I prefer backpacks with waterproof zippers. The zippers should also have a little area for a small lock.
Outside pockets. While not a total deal breaker, a few outside pockets are really handy for storing stuff that you need to access quickly.
Back ventilation. Backpacks sit right up against your back and the limited airflow causes a nice sweaty back. Some packs offer a ventilation bubble (or chimney) by using mesh to allow air circulation. This is more of a luxury than a requirement.
Color. Most bags come in bright colors, but I prefer darker colors. This is just personal preference. Some people say that bright colors make you stand out more, but anyone hauling around a large backpack is going to stand out—regardless of color.
Cost. Quality backpacks start around $100 and go past $300—although there are plenty of quality options under $150. If price is a concern, ask your friends if they have one you can borrow, check eBay for used backpacks, or check discount online retailers that sell last year’s models.
HOW TO FIND A CORRECT FITTING BACKPACK
It is essential that your backpack fits properly, because a poor-fitting pack will quickly become uncomfortable. Once you find a backpack you like, visit the manufacturer’s website to see their sizing information—most will give you a detailed fitting guide.
Get fitted in person. Ideally, you should try on backpacks in person. However, this isn’t always possible since local stores may not carry a wide selection of backpacks. If this is the case, you should buy online from a website that has free return shipping.
Get the proper size backpack. Backpack sizes are based off your torso measurement—not your height. Some backpacks are adjustable and some come in multiple sizes. Hip belts are adjustable so they should fit most people, but some brands offer different sizes for people who have a hard time getting a standard belt to fit.
Packs for women. Many brands are starting to offer packs designed especially for women. I know Osprey and Deuter both make women-specific models.
Try on multiple packs. Each pack is designed differently, so you should try on as many as you can.
Weigh down the pack. A quality outdoors store will have weights (sandbags) to help simulate carrying a load in your pack. It is important to try out a weighted pack so you can really know what it feels like.
Packing Aids and Organization
Living out of a backpack or suitcase can be frustrating—especially when you move locations every few days. Constantly packing and repacking everything is not only annoying, but it also leads to wrinkled clothing. Fortunately, there are methods to make it a little less painless. In this section, you’ll find advice on how to correctly pack your backpack so you can find everything you need as easily as possible.
PACKING CUBES AND PACKING FOLDERS
The biggest annoyance of living out of a backpack is gaining access to the contents of your bag. Having to pull everything out of your backpack to reach something at the bottom of your pack is one of those things every traveler hates. That’s why organization is essential. I’ve found that packing cubes and packing folders are a great way to keep all your stuff as organized as possible.

Packing cubes help keep clothes organized.
A packing cube is simply a small lightweight mesh cube/container that you pack your clothes in. There are different sized cubes and you generally pack clothing groups in separate cubes. For example, pack all your socks and underwear in one cube and t-shirts in another. This makes it easy to know exactly where to find whatever it is you’re looking for.
To get the most out of packing cubes, you need to learn how to roll your clothes. This is really simple and it will cut down on wrinkling. For tops, place them face down, fold arms back so it looks like a long rectangle, fold lengthwise, and roll up. This same technique can be done on skirts, underwear, and other garments. I prefer to pack pants, button-up shirts, and sweaters with packing folders because they do a better job of preventing wrinkles.
ORGANIZE YOUR TOILETRIES
A toiletry bag is essential for keeping all your toiletries contained. Bring a toiletry bag that can be hung up because you’ll rarely have much sink space in tiny European bathrooms. You also want a bag that is easily portable because hostel showers will be located a good distance away from your room.
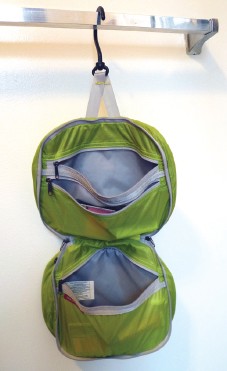
Don’t expect to have any counterspace for your toiletries.
Your goal should be to pack light so you shouldn’t have a ton of toiletries. I suggest buying a few travel-sized bottles for your liquids/gels because they take up much less space than full-size bottles. Plus, carrying a full bottle of shampoo/bodywash/etc. is going to add a lot of unnecessary weight to your bag.
MORE PACKING AIDS
Plastic bags come in handy for storing dirty or damp clothing. Store your extra pair of shoes in a plastic bag to help keep your clothes clean. I bring various sizes of plastic bags (quart-size, gallon-sized and a few “shopping” bags). Some people use plastic compression bags, but I find them to be more trouble than they’re worth. Plus, they encourage people to pack more than they need. However, cloth compression sacks are great for carrying dirty clothes and they make a nice bag for laundry day.
Minimalist Travel
If you want to take traveling light to the next level, you should consider minimalist travel. The goal of minimalist travel is more than packing light—it’s a philosophy. It’s about the freedom of only bringing the bare minimum while you travel. This style isn’t for everybody and it takes a lot of self-discipline, but it can be extremely rewarding.
ULTRA-LIGHTWEIGHT BACKPACK
The size of your backpack determines how much gear you can bring so the first step in minimalist travel is finding a small pack. The maximum backpack size should be no larger than 50L but serious minimal travelers choose a backpack that’s around 25L to 45L.
If you want to take it to the next level, you can seek out backpacks that are specially designed to be ultra-lightweight. Osprey, Granite Gear, and GoLite are three brands that manufacture extremely lightweight backpacks that weigh anywhere from 1.5lbs to 2.5lbs. For reference, most standard travel backpacks weight around 3.5lbs to 5lbs. Additionally, most ultra-lightweight packs will be top-loading because they’re designed for outdoor hiking.
MINIMIZE CLOTHING
Minimizing clothing is the biggest challenge of ultra-light travel because you’re forced to pare down your wardrobe to the bare essentials, so you need to find items that work well in multiple situations.
First, you can easily wear a pair of pants for a week without needing to wash them. In fact, you can easily travel with a single pair of pants for an entire trip. If traveling in the summer, consider also packing a pair of lightweight shorts.
For day-to-day sightseeing, a nice solid-color merino wool or synthetic t-shirt will suffice. Wool is great because it naturally resists odors, but synthetic materials don’t perform as well—you’ll just have to wash more often. You don’t need more than two or three shirts. In addition, bring a casual button-up shirt that looks nice enough for going to bars or restaurants but don’t bring anything too dressy.
When it comes to shirts and pants, it is super nice to have fabrics that are durable, lightweight, and quick-drying. Unfortunately, most clothing made from these fabrics are designed for hikers and outdoorsmen—which means they’re kind of ugly and they look out of place in urban environments. However, there is a new breed of fashionable performance clothing starting to hit the market. Three brands making strides in this area are Outlier (outlier.cc), Outerboro (outerboro.cc), and Bluffworks (bluffworks.com). This new fashion-forward performance clothing does tend to be pricy but they’re built to last.
For cool weather, a fleece jacket works well to provide warmth. However, serious minimalists travel with lightweight down jackets. These jackets only weigh a few ounces and they do a great job keeping you warm. Additionally, they can be compressed into the size of a water bottle so it can easily fit into your backpack without taking up much space.
A rain jacket is optional and you probably don’t need one unless you’re spending a lot of time in notoriously rainy climates. Nearly every outdoor company produces lightweight jackets and it’s amazing how light and packable some of them are. For example, the Outdoor Research’s Helium II jacket weighs in at a trivial 6.5oz. Marmut, Montane, Patagonia, Arc’teryx, REI, and a handful of other companies make quality waterproof jackets that weigh in the range of 7oz. to 14oz.
I generally don’t cut back much on underwear and socks since they don’t take up too much space in the first place. Many minimalist travelers swear by their ExOfficio travel underwear and only bring two pairs for their entire trip. I bring three or four pairs but that’s just personal preference. If you’re disciplined about washing socks every night, you can get by with two pair but I bring four or five pairs.
Most minimalists only bring one pair of shoes so make certain they’re comfortable. A pair of travel sandals can also be nice since they don’t take up much space and they’re comfortable in hot weather.
MINIMAL ELECTRONICS
It’s easy to be a minimalist when it comes to electronics, but there are really only two things you need to bring—smartphone/tablet and a camera. If you really want to cut down, you can probably forgo the camera in favor of a smartphone with a nice camera. Personally, I’d still bring a compact camera because the photo quality is much better.
Most electronics can be charged via USB, so bring a travel power strip that has USB ports. This way you can leave the power plugs to your devices at home and charge everything though USB.
TOILETRIES
It’s commonsense, but you really don’t need that many toiletries and anything that you forget you can easily buy on the road. Just bring the basics—toothbrush (with brush cover), toothpaste, deodorant, shampoo, and bodywash. I pack my liquids in a handful of travel-size GoToob containers. If you’re bringing makeup, only pack the essentials. All your toiletries can be packed away in a plastic bag or you can use a toiletry bag—whatever you prefer.
ULTRA-LIGHT ACCESSORIES
Opt for a travel towel instead of a bulky bath towel because it will save a huge amount of space in your bag. Do purchase the large or extra large version because the small and medium sizes are too small to really be useful.
A keychain flashlight will always come in handy. The Streamlight 73001 Nano is a favorite among travelers because it’s super small but incredibly bright.
That’s all you really need to travel. I do encourage you to look through the regular packing list to pick other items you may want to bring but everything else is extra.
