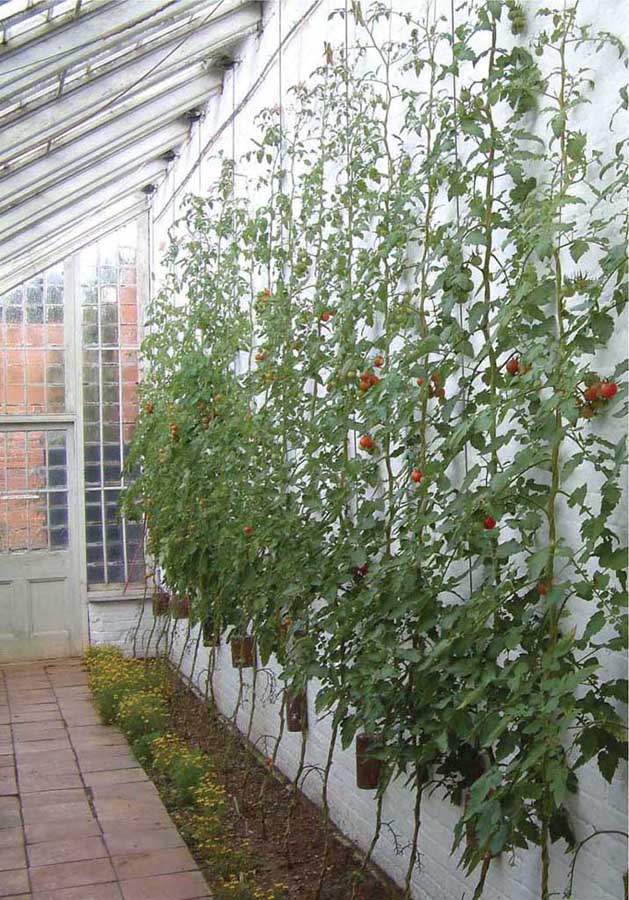
A restored Victorian ‘lean-to’ greenhouse with tomatoes in the border soil against the wall, making the most of the tallest part of the structure and benefiting from the wall retaining heat overnight.
GREENHOUSES
Small greenhouses have a reputation of being difficult to work with, which to an extent is true in that smaller structures are more prone to rapid temperature and humidity fluctuations than larger structures; however, all greenhouses have their limitations, and gardeners just need to be aware of them and to be prepared to work around them. For anyone wishing to invest in a greenhouse, the choice and variety of structure available to the gardener has never been greater; nevertheless, whatever type is being considered, whether it is a costly hand-crafted, traditional-style, wood-framed greenhouse or a budget-priced aluminium-framed structure, there are a couple of key things to remember when making comparisons:
• Greenhouse size is usually quoted in terms of area of ground covered, for example 1.8 x 2.4m (6 x 8ft), but for crops of tomatoes it is also important to consider the height to the eaves. A greenhouse crop of tomatoes will get tall, and if comparing greenhouses with crops of tomatoes in mind, go for the taller structure every time.
• Another feature to consider is ventilation area; as an example, a ventilation opening area equivalent to one sixth of the floor area is thought necessary for commercial green-houses. However, although the provision of opening vents obviously adds to the cost, some smaller budget-priced structures lack sufficient ventilation.
Other than these points the choice of structure is fairly open. ‘Traditional’ wood-framed structures always gain from the aesthetic point of view, and can make an excellent garden feature. The traditionally favoured wood for the frame of the small greenhouse is Western red cedar (from the tree Thuja plicata): it is expensive but rot and maintenance free, and looks superb. It is said that wood-framed structures can stay warmer than metal-framed ones, particularly if on a brick base, but in reality the difference is not appreciable.
Aluminium frames are perhaps more popular for smaller structures, being cheaper than wooden frames (particularly red cedar). Some manufacturers use a green coating on the aluminium, which makes it somewhat easier on the eye and blends into the garden better than shiny aluminium.
When siting a free-standing greenhouse, the site needs to be level; however, a compromise between shelter and shade is usually sought.
Old pictures of Victorian walled gardens often show ‘lean-to’ greenhouses against a wall, with tomatoes being grown in the bed next to the wall and trained up wires. There is a lot of good sense to this, and as well as considering a free-standing greenhouse, if there is potential for a lean-to structure against a suitable wall, this option is well worth looking into. Lean-to structures are excellent for tomatoes: as well as benefiting from extra height, they can stay warmer than freestanding houses because the wall heats up during the day and acts as a kind of storage radiator, releasing the heat overnight. Tomato plants trained against the wall directly benefit from this.
The greenhouse can provide valuable shelter from frost and pests for the growing plants.
Greenhouse Glazing
On safety grounds, 4mm-thick toughened glass seems to be replacing the old standard 3mm horticultural glass, which is a good idea around the domestic environment. If safety glass is broken it shatters rather like a car windscreen, with no razor-edged shards.
The rigid plastic materials acrylic and polycarbonate are also popular from the safety point of view and because of their ability to stop a flying frisbee without damage, but they have other advantages as well: being much lighter in weight than glass they require less support, so larger panels can be used. Acrylic panels can be curved, leading to some manufacturers offering some very interesting curvilinear designs. Furthermore, an important factor for anyone considering heating a greenhouse is that both types of plastic offer a measure of insulation, something that glass does not do at all. Polycarbonate is often manufactured as two- or three-layer panels, and these give a type of ‘double glazing’ insulation effect, which helps the structure retain heat when the sun goes in.
OTHER HOUSING
Polytunnels
Film-plastic houses, sometimes known as ‘poly-tunnels’, do not seem to have gained much popularity as garden structures, possibly because they are purely functional and lack the aesthetic appeal of a greenhouse. In comparison to glass or rigid plastic-glazed structures they are very much cheaper to buy and can be very versatile; however, an allowance has to be made for replacement of the plastic cover every three to five years.
If considering a polytunnel, again think about height: some structures lack height apart from in the very centre, which can be restricting. Designs which have vertical sides and a curved top are better for tomatoes than a straightforward hoop profile, though might cost a bit more. Poly tunnels are known to get very humid and excessively hot in summer due to limited ventilation, but with smaller sizes this is less of an issue as the door provides sufficient ventilation. One well known disadvantage of polytunnels when compared with glasshouses is that they do not exhibit the ‘greenhouse effect’ and retain heat in the same way as a glasshouse.
The ‘Keder’ House
An interesting and quite unique structure is the ‘Keder’ house, which uses a film-plastic covering material resembling bubblewrap – but there the comparison ends, as this material is super tough and resists all attempts to pop the bubbles, even by the most determined child. Because of its structure the covering gives excellent heat-retaining properties due to its capacity for insulation, and also lasts a great deal longer than other film plastics. Originally developed as a commercial greenhouse, a variety of smaller garden-sized structures is available.

The ‘Keder’ house.
TEMPERATURE CONTROL IN THE GREENHOUSE
The extremes of temperature for tomato production are usually taken as 12°C and 30°C. Night temperatures below 12°C cause plants to effectively stand still, and day temperatures above 30°C put them under too much stress.
Early in the season some extra insulation can be employed to try and stop the night temperatures dropping too far. Either film plastic or bubblewrap can be attached to the internal structure to provide a double-glazed effect, but the greater the extent to which this is done, the more light is compromised. It is usual to treat the gable ends and about halfway up the sides, and to create a hanging curtain just inside the door, as this gives a reasonable compromise between insulation and light transmission.
In high summer keeping the temperature down can be a problem; there are various paints that can be applied to the outside of the glass, which reflect much of the light – the treatment is usually done on the roof only, as the main problem occurs when the sun is overhead. A less messy solution is to use shade netting over the roof in either a single or double layer, though it is important that this is fixed to avoid the roof ventilation altogether – even a piece of netting will restrict the airflow. Shade netting can also be used on the inside, which looks neater though may be more troublesome to fix.
It is useful to obtain a piece of netting of a larger mesh size to make a door curtain, so the door can be left fully or partially open for extra midday ventilation. The mesh should be small enough to keep cats and inquisitive birds out, but large enough to allow pollinating insects in.
In today’s environmentally sensitive times heating a greenhouse does take some justification even if the expense is not an issue. Most tomato growers who use artificial heat at all restrict themselves to a bit of heating early in the season at plant-raising time in order to prevent frost damage, and possibly to temper cold nights at the end of the season so that late crops of fruit suffer less splitting and disease damage. About 1.5kw capacity is needed for frost protection in an average-sized garden structure.
Electric Heaters
Where the power source is available, one of the simplest forms of heating suited to keeping the frost off the small greenhouse is the electric-powered warm-air fan heater.
This type of heater is small in size, easily movable and can be suspended to keep it out of the way, and the heat is instantly available. It is important to use a dedicated greenhouse heater designed for the job, and not court danger by improvising with a domestic alternative.
Greenhouse heaters are rated to standard IP21, which means they are safe for use in a damp environment; also dedicated greenhouse heaters are usually fitted with a more accurate thermostat than domestic heaters, which is important in order to keep the electricity bills down. If shopping for a fan heater it is also worth considering one with a ‘cool air’ ventilation option, where the fan can be used without heat: this is useful for shifting condensation first thing in the morning.

An electric greenhouse fan heater. This model uses a capillary expansion thermostat for accuracy.
Paraffin or LPG heaters
In some ways paraffin heaters are the traditional small greenhouse heater, and the choice for situations where electric power is not an option. Obviously these are not as controllable as electric heaters, though some designs do have thermostatic control.
The problem with burning paraffin or LPG in a closed environment such as a greenhouse is the amount of water vapour that is generated. In most small greenhouses there are usually plenty of air leaks even with the door and ventilators shut, but if efforts have been made to insulate the structure with a layer of film plastic or bubblewrap on the inside walls, then the atmosphere can get very humid.
Solar Heating
Maybe in the not-too-distant future more technological help will be at hand, as the price of solar panels comes down; certainly each generation of PV (photovoltaic) panels seems to double in efficiency compared to its predecessor – for example we now have panels that generate electricity in normal daylight rather than only in bright sunlight. A greenhouse that generates some of its own power for heating is a definite possibility.
WATER SUPPLY TO THE GREENHOUSE
It is important to consider where the water supply for the greenhouse will come from. Usually there is an outside tap on the house wall, but the greenhouse is often some distance away, and the novelty of lugging cans of water from the house soon wears off in a prolonged hot spell – obviously greenhouse-grown tomatoes will have a healthy rate of water consumption through the summer. If the greenhouse structure has provision for guttering, then it is well worth installing a water butt (or even two if room permits) to collect the roof water. Water butts need to be installed on firm supports of bricks/paving slabs and should be raised off the ground by about 60cm (2ft) so there is room to get watering cans under the taps. If the mains water supply is some distance away, then in dry weather the water butts can be topped up with a hose as a ‘once a week’ job, as a time saver for routine watering. This also has the advantage of giving the water time to warm up to ambient temperatures in the summer.
USING THE GREENHOUSE SOIL
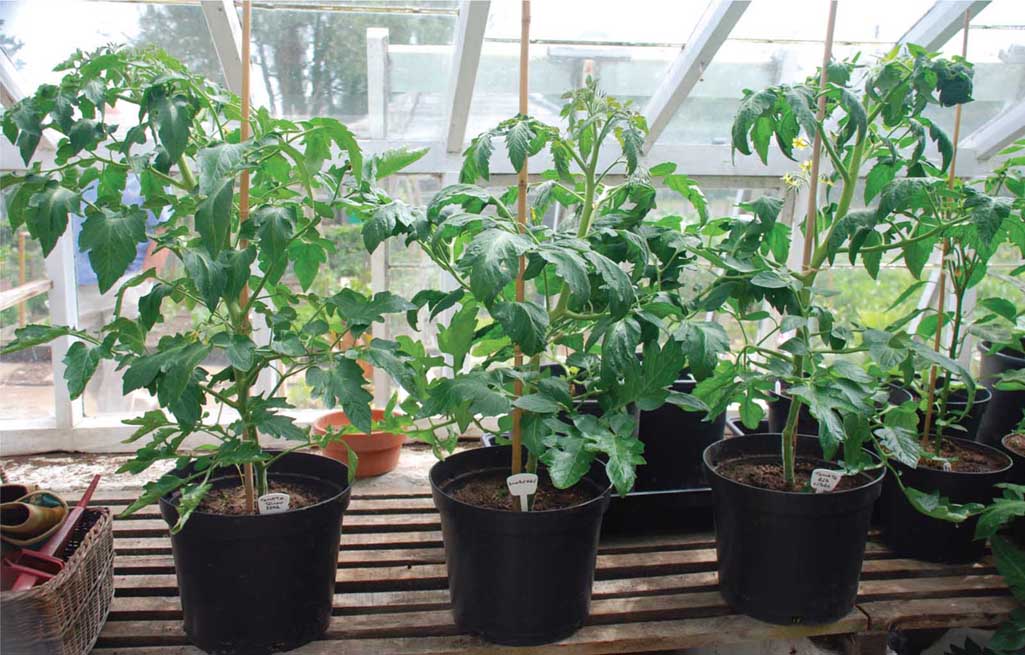
In the not-too-distant past, the suitability of the local soil for the intended crops would have been a deciding factor in the siting of a greenhouse. In the garden a greenhouse is often just put on a base of slabs, and any potential of the soil underneath is ignored. This is reasonable, bearing in mind the site usually needs a bit of levelling, and putting down a solid base is the easiest way of doing it: if the soil is heavy clay, of an extreme pH, or something consisting largely of builders’ rubble, it is often the least trouble to ignore it and grow all plants in containers – but if it is usable, there are considerable advantages in having it available.
Why Use the Soil?
Overall, tomatoes grown in the soil take the least amount of effort to look after:
• The plants manage themselves to a degree, and don’t need a great deal of attention early in the season.
• Little major harm is done if watering and feeding are both a bit erratic, which can be important for anyone working irregular hours.
• Tomatoes in the soil will rarely suffer from water stress, which is all too common in containers and other media.
• Specific nutritional problems such as trace element deficiencies are usually very rare.
• Overall, fewer fertilizers are usually required.
• ‘Grey water’ can be used for irrigation purposes.
• Many are of the opinion that soil-grown tomatoes taste better.
The main problem encountered is long term, and caused by the need to plant tomatoes in approximately the same position each year.
Soil Sickness
From the earliest days of production right up until the late 1960s/early 1970s tomatoes were grown in the greenhouse soil (sometimes known as ‘border soil’, a hangover from the days when all planted areas of walled gardens were called borders regardless of what was grown), and great pains were taken to prepare the soil for this long season, rather hungry crop.
One problem that became apparent was that of ‘soil sickness’, which is a general term to describe the build-up of pests and diseases that can persist in the soil from one crop to the next. Tomatoes are very prone to a number of fungal diseases affecting the roots, and there are also two species of soil-living nematode or eelworm that cause significant root damage: if the soil cannot be given a sufficiently long break between crops for these pests and diseases to die (impractical in the commercial world), then the next planting of tomatoes will suffer badly.
From about 1902 the technique of soil sterilization by steam was developed: this involved injecting steam (generated by the greenhouse heating boilers) into the soil for several hours to sterilize or ‘cook’ it. Sometimes this had to be done annually between crops, and as can be imagined, it was a costly, unpleasant and labour-intensive business, and very unpopular with the workers – on larger nurseries it involved working day and night until the job was finished.
Growers realized that by using some other form of growth medium that was isolated from the soil, then disposing of it at the end of the crop, the major problem of pest and disease carryover, and the need for sterilization with all its cost and inconvenience, could be avoided altogether. This was a major factor in bringing about the change to growing crops in isolated media, and the development of systems that are used by commercial growers today.
Problems with soil sickness can occur in the small greenhouse or even an outdoor area, in that putting any seasonal plant in the same position each year can lead to a build-up of pests and/or diseases specific to that plant, because there isn’t enough time between crops for the pests/diseases to die off. The usual sign of soil sickness with tomatoes is a gradual reduction in yield due to poorer plant performance year on year. Early research in commercial greenhouses indicated that over four years the yield of soil-grown tomatoes can decrease by 27, 39, 50 and 67 per cent if the pathogens are allowed to build up unchecked. In extreme cases it becomes impossible to grow the plant in that situation.
Because it is valuable to be able to use the soil, it is worth considering the options for dealing with soil sickness.
Changing the Soil
Back in Victorian times the problems of soil sickness were known (though the causes were not fully understood), and when it occurred, the problem was dealt with by digging out the greenhouse soil to a depth of 90cm (3ft) or so, barrowing it away and replacing it with good quality garden soil from elsewhere. If this doesn’t sound too much like hard work, and access to other cultivated ground is available, then digging the soil out of a greenhouse border and replacing it with soil from the vegetable patch works well (though don’t use soil from an area where potatoes were grown recently, as they suffer similar ailments to tomatoes). As we now understand that most of the organisms responsible for soil sickness lurk in the top layer of the soil, digging out to the depth of a spade (about 30cm, or 1ft) is perfectly adequate. It’s a good job for a cold winter’s day.
ENARENADO
Tomato growers in the vast polytunnel nurseries in south-eastern Spain get round the dual problem of poor quality local soil and soil sickness by using an imported soil mixture known as ‘Enarenado’. The local rocky, sandy soil is levelled, then a 30cm layer of silty clay soil is spread directly on top, followed by a thin layer (about 2cm) of manure which is lightly cultivated in, and finally the whole mix is topped off with a 10cm layer of sand. The tomato roots concentrate at the interface between the sand layer and the soil/manure mixture, and the sand acts as a mulch, reducing water evaporation from the surface. This gives a ‘best of both worlds’ situation: the relative ease of cropping in soil, and the use of a consistent growth media that can be replaced as necessary.
‘Plunging’ Plants
This is a sort of hybrid planting method: it doesn’t prevent soil sickness altogether, but rather, delays its build-up.
Start the tomatoes off in reasonably large pots of compost, then before they get too big to move, dig holes large enough to accommodate at least half the depth of the pot, and drop the pot in. Over the next few days water the pot as normal, but also run some water around the pot to help settle the soil. The plant roots will soon emerge through the drainage holes and start taking up water from the soil. (Enthusiasts for this method sometimes prepare the pots in advance by drilling a few additional holes around the side.)
Because most of the tomato root is contained in the pot and removed each year, the chances of disease carrying over between one crop and the next are reduced. Remember to give the pots a wash with a domestic bleach solution before using them again the following year.
This method can also be useful for outdoor crops if you have a particularly sunny spot in the garden where you like to grow tomatoes every year, or if the soil is of a clay texture and slow to warm up in the early season.
Using Grafted Plants
Plants grafted on to a disease-resistant rootstock cost considerably more than normal plants, but are a worthwhile precaution in some situations, particularly if the soil is something of an unknown quantity. Growing a single grafted plant alongside ungrafted plants will soon indicate the degree to which the ungrafted plants are being restricted.
Soil Biofumigation
Soil fumigation was extensively practised at one time, using an array of none-too-pleasant chemicals; biofumigation is a relatively new and com pletely different idea, safe to do, and is proving very effective in a number of situations. If the appropriate amount of time can be found, preferably in the early autumn, then this is worth a go.
It may involve terminating the tomato crop a couple of weeks earlier than usual to leave enough of the growing season for the biofumigant crop to reach a reasonable size, but as late fruit can easily be ripened off the plant, little or no yield is lost.
Biofumigation involves growing mustard, chopping up the plants very finely, then incorporating all the plant material into the soil quickly. As the plant material breaks down it releases chemicals (from the glucosinolate compounds that make mustards and some other brassicas hot) that have a suppressing effect on various soil-living pests, including a range of fungal diseases. Normally when this is done on a field scale, machinery is used to chop and incorporate the plant material into the soil, but in the small greenhouse a little improvisation is called for. The procedure is something like this:
• Order the mustard seed well in advance.
• De-leaf the tomato plants, cut the stems at soil level and remove them with all fruit attached; they can be hung up for the remaining fruit to ripen.
• Dig out the roots as completely as possible, clearing up every bit of tomato plant that can be found.
• Lightly cultivate the soil, water well and leave to drain. Broadcast the mustard seed on the surface and lightly rake it in.
The seedlings should emerge very rapidly, as the soil will still be warm. How large the mustard is left to grow is up to the individual; when this is done on a field scale the plants are left to get as large as possible, which means leaving them until the flowering stage, but it is unlikely there will be enough time to allow for this. Then comes the critical bit:
• Chop up the plants as finely as possible – go mad with the garden shears or electric hedge cutter, but do it quickly.
• Incorporate all the plant material into the soil - a small border fork is probably best for the job, as it doesn’t need to go down too deep.
• Rake the surface level, and pat it down with the back of the rake.
• Throw some plastic sheeting over the top (old compost bags opened out are good) and hold the edges down with a few bricks. This seals in the fumes, which can then do their work.
If the greenhouse soil is not needed again until the spring, then it can be left like this all winter. If the soil is needed for, say, an early spring crop of lettuce before the next tomato crop, it should be left for three to four weeks, then given a light cultivation before planting.