
‘Red Pear’, a very old cultivar.
WHEN TO PLANT TOMATOES
Whether cropping in a heated or unheated greenhouse or outdoors, the question ‘When is the best time to plant?’ usually means, ‘How early can I plant and expect to get away with it?’
Gardeners have been pushing their luck on this question for many years; in its advice to war-time gardeners, the then Ministry of Agriculture in the UK sternly warns against planting outdoor tomatoes too early, stating ‘It is foolish to hope that the danger of frost is past until at least the end of May’. Given the weather patterns over the last few years, this may seem excessively cautious, particularly when the garden centres are already carrying stocks of attractive-looking tomato plants in April – but whatever the current state of global warming, and whichever side of the Atlantic you are, the statement in the same document a few lines later is worth heeding: ‘Little is gained and much may be lost by rushing plants out of doors a week or ten days before the weather has warmed up.’
However tempting the weather looks, and whether planting in a greenhouse or outside, a good guide to when it is all right to plant is to measure the soil temperature at rooting depth (about 10cm/4in). Tomato roots are notoriously temperature sensitive and do not appreciate less than 10°C, and are much happier at 14°C. If the soil or growth media is too cold, the tomato plant responds by not growing at all and showing a purple discoloration of the undersides of the younger leaves due to phosphate deficiency induced by the cold – phosphate is not being taken up due to the temperature being too low. Although the situation will right itself once the temperature warms up, the cold period gives the plant an unnecessary check.
EARLY PLANTINGS IN THE UNHEATED GREENHOUSE
Planting early in an unheated greenhouse avoids frost and makes the most of early growth. With soil-grown crops the following procedures should be observed:
Warm the ground before planting: It is possible to assist the soil-warming process early in the season – in the days when most greenhouse tomato crops were soil-grown, heating pipes normally propped up on bricks were lowered on to the soil surface to warm it up prior to planting.
If the greenhouse soil has not been disturbed from the previous season it should first of all be dug and broken down to aerate it; also if soil has been left over winter and is as dry as dust it will need a thorough watering, as bone-dry soil will not warm up effectively.
Polythene sheeting laid on the surface will help the ground absorb heat during the day; black polythene is favoured because of its heat-absorbing properties, but it is also particularly good at re-radiating the heat at night, especially under clear skies. Clear polythene, bubblewrap or horticultural fleece will warm the soil and also encourage the weeds to grow, which is perhaps no bad thing because they can then be hoed off before planting, giving the tomatoes a clean start.
Add some garden compost: Good quality compost made from plant material (particularly leaf mould) is often very dark, almost black in appearance. As well as digging compost into the soil, leave a thin layer on the surface or just lightly rake it in. This will darken the soil and help it absorb heat.
Check the temperature: Purpose-made metal-cased soil thermometers are available, but an easy way to check the soil temperature is to take a small bottle (something like a stubby beer bottle is ideal), fill it with water, and sink it up to its neck into the soil on the intended planting site; given a day or so to stabilize, the water will assume the temperature of the surrounding soil and can easily be checked with a conventional thermometer.
Maintaining the Temperature after Planting
Planting Through a Mulch
Laying some form of sheet material on the soil surface, cutting holes in it and planting through the holes gives several advantages:
• Water is conserved by stopping evaporation from the soil surface (in the greenhouse this helps a little in keeping humidity under control).
• The majority of weed growth is prevented.
• It stops disturbance of the soil surface when watering with a hose or can.
The most convenient material to use for this purpose is some sort of weave, either black ‘ground matting’, usually obtainable off the roll from garden centres, or the strong white material that the one tonne bags used by builders’ merchants to deliver sand and aggregate are made of; these can usually be salvaged from a skip. Whether one is any better than the other as far as the plants are concerned is a moot point, as any benefit will only be found early in the season. The white surface reflects light back into the leaf canopy of the plant, but the black surface would keep the soil warmer.
Fleece Covers
As tomatoes need a minimum air temperature of 10°C for vegetative growth, don’t expect the plants to get away particularly fast from early plantings. To try and keep the temperature up a little overnight and to give some protection against late frosts while the plants are small, fleece covering can be draped over them overnight.
‘Passive’ Solar Heating
Researchers in northern Greece and Turkey have come up with an ingenious method of storing a little of the sun’s energy at minimal cost. Despite plenty of sunshine, both countries suffer problems with early season plantings of tomatoes in their polytunnel greenhouses due to low night temperatures.
The technique that has been developed uses large (30cm/12in diameter) transparent plastic tubes filled with water – some have called them ‘hot water bottles for plants’. These are laid on a layer of black polythene on the soil surface between the rows of plants, the aim being to cover somewhere between 30 and 40 per cent of the floor area with these water tubes. During the sunny daytime the water warms up, then at night this heat is re-radiated, keeping the air and soil temperatures over 1°C warmer than similar houses without tubes.
A way of improvising this technique is to use rows of water-filled 2ltr (3.5-pint) plastic soft drinks bottles or supermarket milk bottles placed on their sides nose to tail in the greenhouse, covering as much of the unplanted floor area as possible. Milk containers have a more angular profile so can be pushed together like paving blocks, whereas 2ltr soft drinks bottles may need wedging with bits of wood to keep them in place.
Do not expect fantastic results when trying this method in the UK: it should be realized that the temperature gain will not be as high as the researchers in Greece and Turkey experienced due to the smaller overall volume of water held by the bottles, and the fewer overall hours of sun in early season UK.
Remove the bottles once night temperatures improve, and use the space between the plants for companion planting or some salad greens or herbs to enjoy with the tomatoes.
A combination of techniques – soil mulches, water tubes and a fleece covering at night – gives a far greater advantage than individual techniques.
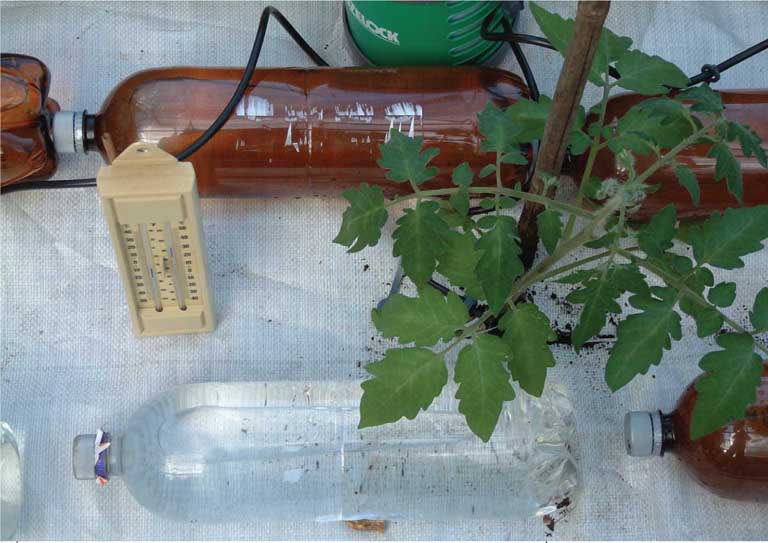
An early planting in the greenhouse soil showing white mulch material, drip irrigation and ‘passive solar heating’ – there is room for a few more bottles.
Establishing a Tomato Crop in an Unheated Structure
The suggested dates are relevant to the south of England; for northern England add twelve days, for Scotland add sixteen days.
Planting date: For an unheated greenhouse or polytunnel, planting can be risked from the first week in April, but it is a worthwhile precaution to have some fleece covers available, and some plastic bottles for passive solar heating.
Plant raising: At least six weeks’ production time should be allowed; if raising the plants on the kitchen windowsill, go for a sowing date around Valentine’s Day.
Greenhouse Preparation
• Wash the glass down on the inside to remove accumulated dust and dirt.
• With soil-grown plants, if no crop has been grown since the previous season’s tomatoes, thoroughly soak the soil over a period of several days and allow to drain.
• Cultivate the soil deeply; tomato roots can go down nearly 1m (40in) given the chance, and the deeper the root system the less chance there will be of any problems with water stress later on.
• Incorporate composts/manures – traditionally a base dressing of fertilizers would be applied at this stage; although the plant will be slow to get away and will not need much nutrition in the first few weeks, it is worth incorporating a small amount of a high phosphate fertilizer, as due to low soil temperatures phosphate will be in short supply.
• Lay the fleece cover on the soil surface to assist in warming the soil – put a max/min thermometer underneath to give an idea of how things are doing.
• Clean the glass outside, particularly the roof – just a soft broom or car-washing brush and soapy water, then a rinse with clean water. Clean out the gutters and check the waterbutt.
• Hoe off any weeds that have emerged while the soil has been warming up, and check the temperature at about 10cm (4in) depth: a constant 10°C is needed.
• If using plastic mulch, install it and mark out the position of the plants.
• If using stakes as plant supports it is more convenient to put them in at this stage. Trying to install a long wooden stake into a greenhouse border can be awkward as there is not much room to swing a hammer; an alternative is to use some short stakes at the early stage, then extend them before the plants get too tall by attaching sturdy bamboo canes held to the stake with a couple of Jubilee clips.
Plant it, Water it, Leave it
• Plants need to be spaced at about 45cm (18in) apart: dig the planting holes and drop the plants in – plant with the first truss facing the path.
• Give each plant a small individual watering to settle the soil around the roots, thereafter leave them alone for a week. The objective at this stage is to get the roots exploring the soil, and don’t worry if there doesn’t seem to be much foliage growth at this stage: this is due to low temperatures and light, not lack of water.
• Install as many ‘hot water bottles’ as you have been able to accumulate around and between the plants.
• Overnight put fleece covers over the plants – it’s worthwhile to do this even if no frost is forecast as it keeps the temperature up a little overnight by stopping heat being re-radiated from the floor. This works best if the fleece doesn’t touch the plant itself, so arrange it as a tent’ effect. Try and get as many of the water bottles on the floor covered by the tent as well. It is important to remove the cover first thing in the morning, as the plants need all the light they can get at this stage.
• When some regular growth is observed, start watering the plants; they will not need much at this stage – every two to three days will probably suffice. Do not be tempted to liquid feed too early: it is important not to overdo the nitrogen, as promoting vegetative growth may cause abortion of flower trusses. With soil-grown crops it is safe to let the plants get to about 1m (40in) tall before starting liquid feeding.
Tomatoes Grown in Straw Bales
Developed in the 1960s, this is an interesting old technique and one of the first methods used in commercial production to bring tomatoes out of the soil (though in the long term the technique proved to be more popular for cucumbers than tomatoes). One of its advantages is that it can get round the cold root problem in the early season by generating some warmth of its own.
The basic idea involved setting out straw bales in rows, isolated from the soil by sheets of plastic, and soaking them over a period of several days with a strong solution of nitrogen fertilizers. This caused the straw to start to compost, resulting in it slumping, becoming a little more dense and increasing in water-holding capacity – and very conveniently the composting process generates heat.
The process was monitored by checking the temperature of the bales, and once the composting process started to slow down (indicated by the temperature starting to fall) the rows of bales were topped with a layer of potting compost into which the plants were placed. Rapid establishment and very vigorous vegetative growth followed as the plants made the most of the warm root environment and the nitrogen. At the end of the crop the straw would have largely decomposed and could easily be disposed of.

Purple coloration on the leaf undersides: this is indicative of phosphate deficiency brought about by low root temperatures, a common problem with early plantings.
The technique went out of favour in the commercial world as it had a number of shortcomings. The amount of nitrogen released in the composting process was both unreliable and uncontrollable, which made growth difficult to manage, but the big risk which became more apparent as agricultural production intensified was that of damage from herbicide residues; tomatoes are notoriously sensitive to even tiny traces of the types of herbicides used on cereal crops, and there was always a high chance that some herbicide residue might remain in the straw.
Be Sure of your Straw
Assessed in retrospect, this method had quite a number of things in its favour; certainly to modern thinking on sustainability, the use of a waste product as a substrate, which at the end of the crop has decomposed to a useful garden compost, sounds like the way to go. However, those considering giving this technique a try should bear in mind they are taking something of a risk with the possibility of herbicide residues; ideally straw sourced from a grower of organic cereals should be used for safety.
OUTDOOR TOMATOES
Though outdoor crops cannot be planted as early in the season as greenhouse crops, in certain situations it is possible to gain an advantage and basically cheat. In the southern part of England in areas that are not obvious ‘frost pockets’ the incidence of killing frosts after late April occurs approximately one year in twenty, so in the South it is worth pushing your luck with some early plantings (say, the first week of May) if some form of natural shelter is available.
For plants in pots or growbags, any sheltered situation, particularly with a south or south-east facing wall or fence, can be exploited; plants against a wall gain much advantage from its physical shelter and a much warmer microclimate due to the wall absorbing heat during the day. Also any amount of roof overhang helps keep the rain off the foliage, important in avoiding late blight.
With crops in a relatively open situation such as on an allotment, much can be done with the provision of temporary shelter early in the season. The emphasis here is on temporary, as later in the year it is better to have the plants open to airflow so that the foliage dries quickly from dew or rainfall. Once again, late blight is the problem.
With outdoor crops grown in the soil, the soil temperature should again be the deciding factor on how early it is worth taking a risk on planting.
A row of plants, whether determinate or indeterminate types, can be sheltered for the first few weeks of their life with a low tunnel structure clad with either fleece or clear polythene sheeting. (Given a choice, fleece is the better option for tomatoes as it allows air exchange and stops con ditions underneath from becoming too humid.) If this is the intention, then the site can be prepared and the structure erected several weeks early to help warm the soil. As the plants grow larger the cover can be removed, or if the condition of the cover is past its best, simply cut down the centre of it to allow the plants to push through.
LOW TUNNEL STRUCTURES
Low tunnel structures took over from the old glass ‘barn’ or ‘Chase’ cloches as ways of advancing the growth and maturity of plants. Various types are available, usually as kits containing hoops and a cover. If shopping around, look for the types that have the tallest hoops as these are the most suitable for tomatoes.
For those who enjoy improvising, these structures are easy to make; the supporting hoops are usually made of wire, but long whippy hazel branches or lengths of alkathene water pipe will make taller, stronger hoops. Covering materials can be polythene film or fleece, usually available from larger garden centres, cut to length from a roll.
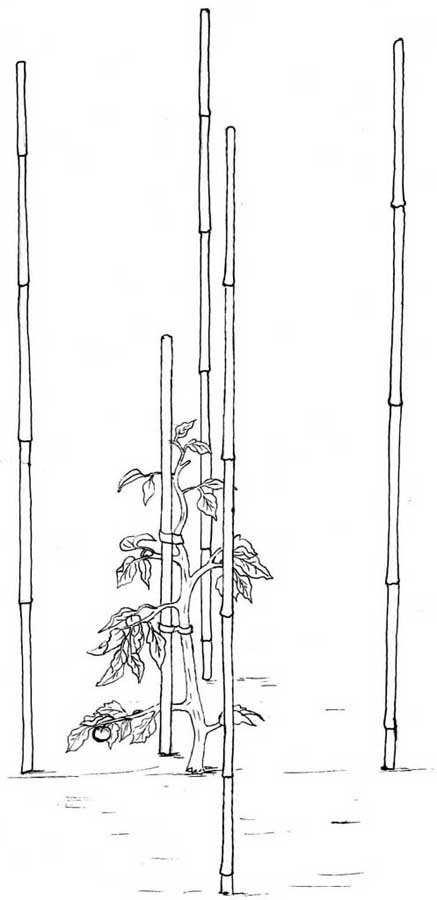
For individual plants, individual shelters can be made by arranging four canes around the plant, forming the corners of a square. Using these it is possible to ‘wall the plant in’ on all sides, the main effect of which is to reduce wind speed, so the plant stays slightly warmer as a result. The quickest way of doing this is to use either a clear plastic rubbish bag with the base opened out (if this is not done, rainwater will gather in a puddle on the top and weigh it down), or a netting bag such as is used to pack brassicas and onions; either can just be slipped over the canes and pulled down to ground level. Other possibilities are short lengths of bubblewrap or fleece, which need to be arranged around the canes and then joined by stapling.

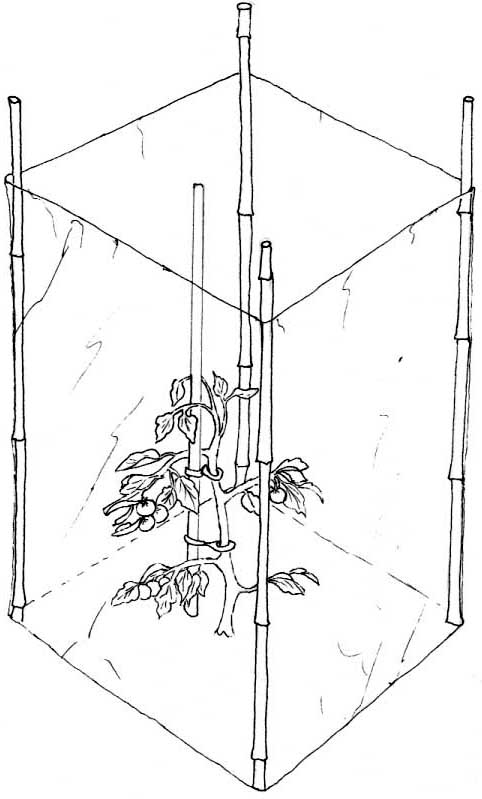
Protection for individual plants outdoors using a clear plastic rubbish bag with the base removed.
ESTABLISHING TOMATOES IN CONTAINERS
Growbags
Emerging in the early 1970s, the forerunner of what we recognize as a ‘growbag’ – sometimes also called ‘peat module’ or ‘bolster’ – was initially used for commercial tomato production. These were developed and became very popular in Guernsey where greenhouse soils had grown tomatoes for so many years that disease problems were particularly bad.
The compost-filled ‘Grobag’ (spelled thus without the letter w’) first appeared on the market in 1973 by courtesy of the Fisons company; the Grobag was a minor revolution for the home production of a number of crops, especially tomatoes, although it did take a bit of getting used to.
Some gardeners have mixed results with tomatoes in growbags, particularly later in the season when the need for water and feed is high. Like all plants growing with a restricted root volume, careful management is needed. On hot days a tall tomato plant carrying fruit will easily use 1.5ltr (about 3 pints) of water per day, so assuming three plants per growbag, an average water requirement of about 5ltr (over a gallon) per bag per day in midsummer is to be expected. It should be remembered that growbags originally came from commercial tomato production where automated drip irrigation is routinely used, and they work best with this type of system.
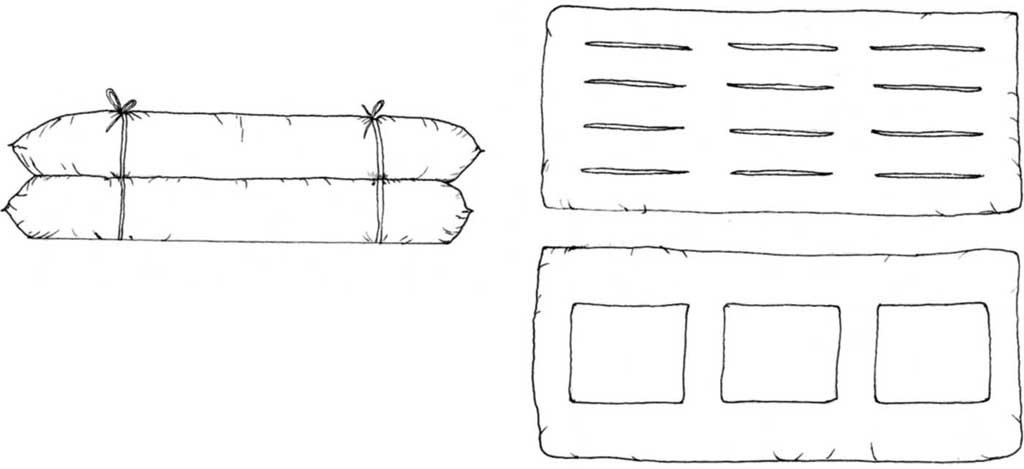
Making a double growbag.
Peat or Alternative?
In recent years a range of bags containing peat-free or peat alternative media has appeared alongside the standard peat-based bags. Which do tomatoes prefer? Both types can give equally good or poor results, and success is largely down to management, tomato plants being tolerant of a wide range of growth media.
Preparing and Planting Growbags
Before planting, always prepare the bag by dropping it on its edges a few times – though not from too high or it is likely to burst – as the compost in the bag will have become compacted while standing on a pallet in the garden centre, and this loosens it up. When this has been done, pat the surface of the bag level and make sure the compost is evenly distributed along its length.
If using indeterminate plants, use three plants per standard bag as maximum; in many cases with the bigger, more vigorous F1 hybrids two is better and more manageable. With bush or determinate types, three plants is fine. Most standard growbags are 30ltr compost capacity, which if planted with three strong-growing indeterminate tomatoes can be difficult to manage through high summer, particularly if hand watering. There is a range of larger growbags of some 50ltr capacity, which hold a lot more water, and are a good idea if time only allows watering once a day. Un fortunately they seem to be more expensive on a ‘per litre of compost’ basis than the standard bags.
An alternative idea is to make a double growbag of 60ltr capacity: obtain two standard 30ltrsized bags, cut out three sections of plastic in the top of one, place the other alongside it upside down, and slit the plastic in inch wide strips in the areas corresponding to the cut-outs. Quickly flip the second bag over on top of the first, and no compost should be lost. A couple of strings around both bags will hold them together until the plants root through from the top to the bottom bag, by which time they will be well and truly joined together.
There seem to be two schools of thought regarding the planting of tomatoes into growbags: the first is to use small plants, take them out of their pots, create some holes in the growbag and drop the plants in so the whole compost ball is buried. The second is to plant on it, as opposed to in it. Initially grow the tomato plants in larger-than-usual pots – say, 14cm (5.5in) rather than 9cm (3.5in) – stand these on top of the bags and cut circles out of the plastic using the pot as a guide, then just press the pots into the compost to a depth of 3cm (1in) or so, making sure all the drainage holes are covered. The plants then root out into the bag via the drainage holes in the pot.
If prepared properly, the second method can make hand watering easier, as the water can be applied to the tops of the pots.

Planting on a growbag, rather than in it: the plant retains its pot, and roots spread via the drainage holes.
Plant Support
Ideally plants in growbags are best supported from above, using strings attached to a suitably solid overhead support. Failing this, canes can be used, but the bags are not deep enough to offer support, in which case frames are available into which the growbag and three supporting canes will fit. If the bag is placed on a soil surface then bamboo canes can be pushed through the base of the bag and into the ground for support, but beware of doing this if the reason for using growbags is because the soil is suspect, as the plants may take the opportunity to root through into the soil.
A home-made support can be easily con structed from a scrap wooden pallet: cut the pallet in half, screw short wooden stakes to the strengthening blocks in the corners and centre, then attach canes to these with Jubilee clips or wire.
Pots
Pots are perhaps the most versatile container for tomato plants; they can be ornamental as well as functional, they allow a choice of compost, and watering/feeding is usually easier than with growbags. The choice of container and the type of compost used is entirely up to the grower, and only limited by budget.
Terracotta pots always look good, and give the added benefit of stability when the plants get tall. Remember that unglazed terracotta pots lose water from the porous clay, so will need more frequent attention than glazed pots or plastic pots of a similar size.
Plastic pots containing a peat-based compost can become unstable with tall plants, and will need some extra securing late in the season. If the site is at all breezy, then consider putting a 50mm (2in) layer of gravel in the bottom of the pot to add some weight, and/or use a John Innes potting compost (which is considerably heavier than the peat-based mixes but more expensive), or possibly a 50:50 mix of John Innes and a peat-based compost.

Growbag stands made from pallets sawn in half with canes attached.
It is possible to do a combination planting in a large pot, with an indeterminate plant in the centre supported by a cane, and two to three small determinate plants around the edge; alternatively include some basil and/or Tagetes for companion planting.
When planting a tomato into a pot, it can be useful to take advantage of the extra depth offered and place the plant deeper, so that a few inches of stem are buried – tomatoes easily produce roots anywhere along the stem, and this will give the plant an improved root system.
Some sort of mulch or covering for the top of the pot is useful – if watering with a can the surface of the pot is constantly disturbed, so the plant roots never get to occupy the full volume of compost.
Hanging Baskets
There are many miniature cultivars which are intended for container production, particularly in a hanging basket, and they are ornamental as well as functional – but just one word of warning: even the miniature cultivars can be surprisingly heavy with a full load of fruit, so make sure the supporting bracket is up to the job.
Traditional moss-lined wire hanging baskets always look good, but lose water from all surfaces – it is better not to overload them with plants, or watering will become a three-times-a-day chore. To help with the watering problem, consider one of the newer compost products, which contain water-retaining agents. Alternatively ‘Swell gel’ can be added to a standard compost. This remarkable – though unfortunately quite expensive – material absorbs something like 200 times its own weight in water, and needs to be thoroughly mixed in at the time the basket is planted.

If a mulch is used on top of pots it stops the top layer of compost being disturbed when watering with a hose or can, so allowing the plant to root into the entire volume of compost.
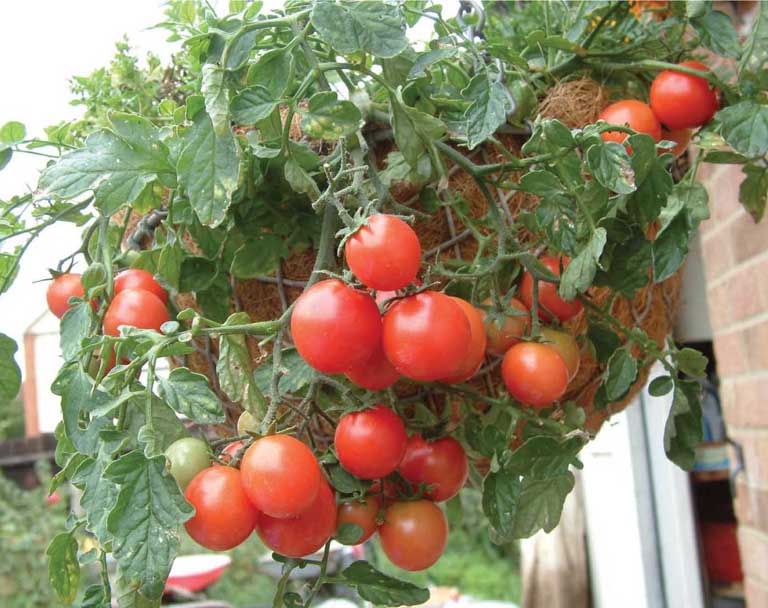
Bush tomato ‘Whippersnapper’ in a hanging basket.

Preparing the box with a layer of gravel.
A variation on the ring-culture technique, also useful when going on holiday.

The coarse, water-absorbing roots produced in the gravel layer.
Ring Culture Revisited
The technique of ring culture was developed for greenhouse crops, though it can be adapted for outdoors. It involved raising plants in compost using bottomless pots (or rings), which were then stood on a bed of some sort of aggregate – washed and weathered ash and clinker from a coke fire being a popular medium at the time. This medium was contained in a shallow trough, often just a simple wooden frame lined with a sheet of polythene.
The idea was that the bed of aggregate was kept well watered and the compost ‘rings’ received an occasional dose of liquid feed. This encouraged the development of two different root systems by the plant, the feeding roots that stayed in the compost, and the large water-absorbing roots that explored the aggregate. A big advantage to this system is that the bed of aggregate can hold a good reserve of water, so the plants do not go through the wetting/drying cycles associated with other forms of container growing. This is obviously useful for irregular watering; however, there is an opinion that ring-cultured tomatoes lack the intensity of taste that can be achieved by other methods because the plants are grown in a wet as opposed to a dry regime.
It is quite a cheap technique to adopt: little is used in the way of compost, and the aggregate can be recycled year to year providing it is given a thorough hosing down at the end of the season to remove bits of tomato root, then preferably left outside overwinter to let the rain and frost get to it. There are many variations on the basic technique – boiler ash and clinker are not as common as they once were, but plenty of other aggregates can be used successfully – pea gravel and 10mm gravel, or a mixture of gravel and coarse grit works well and is inexpensive.
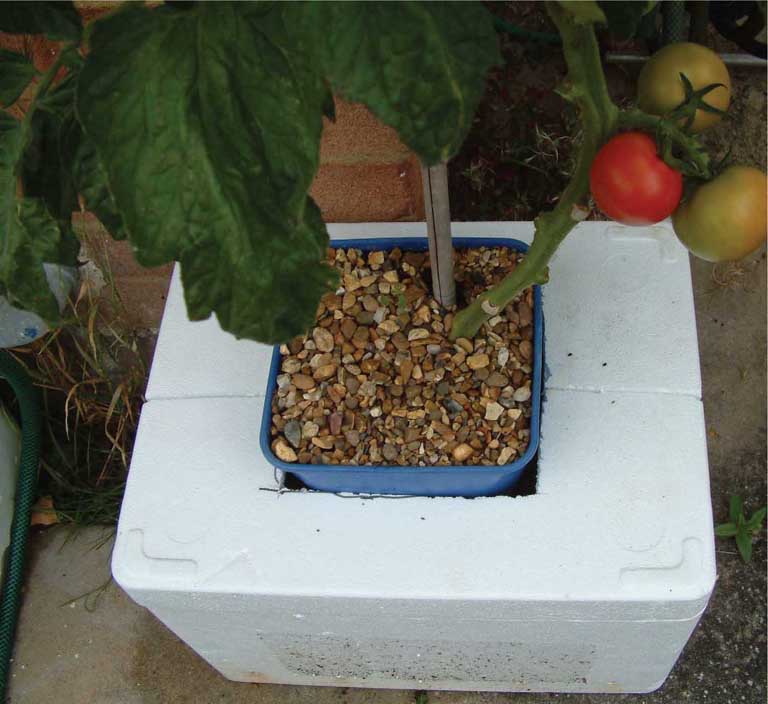
A Gravel Box
The gravel box is a variation on the ring culture idea, and uses the type of lidded Styrofoam boxes that are used to pack broccoli in ice, and can be scrounged from street markets. It can be employed in two ways: either long term for production along the lines of the ring culture method, or short term to plunge pots to decrease the frequency of watering needed (while the owner is on holiday, for example). The boxes do not take up appreciably more room than pots, and are nicely self-contained.
Make a row of drainage holes through the side of the box 50mm (2in) or so from the base, and put in a layer of 10mm-sized gravel (available in 25kg bags from a builder’s merchant: one bag is plenty for two to three boxes) up to the level of the drainage holes. Put the box in its final position before adding the gravel, as it will be heavy and awkward to move afterwards.
ROCKWOOL
Introduced to the UK in the early 1970s, this material soon became the most popular substrate for tomato production, a position it still occupies to this day. Rockwool (or ‘stonewool’ to the Dutch) is made from a type of basalt rock, which is heated to melting point (around 600°C) and spun into fibres, which are then made into an array of slabs, blocks and cubes. In appearance it looks similar to loft insulation material. Because it is specifically manufactured for the job, rockwool can be made to a specific density to give ideal water-/air-holding characteristics for a healthy root system, and as all plants experience the same root environment, crop uniformity is improved.
Cut the lid to accommodate the size of pot used (it is sometimes easier to cut the lid in half first of all, then trim to the shape of the pot), and make a second small hole in the lid to allow for watering.
Plunge the pot into the gravel, making sure the drainage holes are covered, arrange the lid, and then water the gravel until water comes out of the drainage holes.
It will take a few days for the plant to establish and start sending out roots into the gravel, then it can be managed as a ring culture plant, receiving liquid feed in the pot at intervals, and the gravel topped up with water as needed.
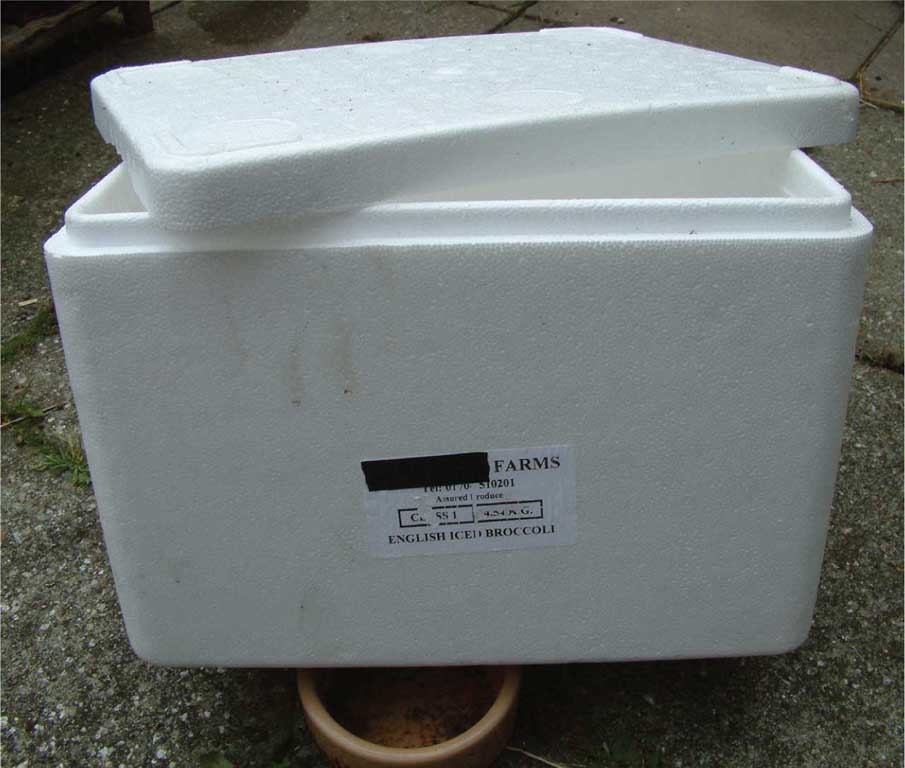
Styrofoam box used for packing broccoli.
Tomatoes in Hydroponics
Hydroponic production (sometimes also known as soil-less culture) describes a technique whereby all the mineral nutrition the plant needs (all the major, minor and trace nutrients) arrive dissolved in the irrigation water, and the medium in which the plant grows plays no part in the nutrition process. This allowed for cheap, chemically inert materials such as sand and gravel to be used to grow the plants in, and with no need for soil, crops could be grown in many new areas provided water was available.
The idea behind hydroponic production is not particularly new, with pioneering work dating back to 1929, but practical commercial applications of it were not immediately forthcoming. The first commercial hydroponic systems emerged in the late 1940s, but even these did not immediately catch on, because compared to other methods hydroponic crop production is more complex to undertake and demands more careful management.
Applications of hydroponic techniques are many and varied; in the commercial world most tomatoes are grown in small volumes of an inert mineral medium known as a substrate, rockwool being the most popular, with the hydroponic feed being delivered down small drip tubes. For the amateur grower the scope of hydroponics is very wide indeed and encourages those who enjoy experimenting, as many other types of media can be used successfully.

Hydroponic feed solutions are usually provided as a two-part concentrate, only combined in a diluted state.
Why Do It?
In general terms, hydroponic growing methods have a lot going for them. Obviously there is no need for soil, so there is very little restriction to where systems can be set up, plants can be grown in very limited spaces, and it’s very economical on inputs in that very little gets wasted; but the main reason that amateur growers adopt hydroponic systems is that they find them interesting.
Some who grow by hydroponics enjoy the technical side of the process and like to experiment, building their own systems and mixing their own feeds, but for those who don’t, there are many ‘hobby’ hydroponic systems now available as self-contained kits which do a great job of fitting plants into the minimum amount of space. Similarly, ready-mixed feed concentrates formulated to either hard or soft water are readily available, which simplifies one of the more exacting and technical aspects of the process.
The drawbacks are that it takes a while to get used to working with a hydroponic system, there is obviously a financial outlay for the equipment and an electricity supply is needed, also the neighbours will usually assume you are growing cannabis; however, once these are all resolved, a fully planted ‘hydroponicum’ is a fascinating thing.
Propagating Plants for Hydroponic Systems
For best results, plants intended for hydroponic systems should be propagated in a similar medium to which they will be grown, as plants grown conventionally in pots of compost often have difficulty adapting to an inert growth media. The favoured media for producing young plants are vermiculite and small cubes or plugs of rockwool. Horticultural vermiculite (don’t use the grade that is sold for insulation purposes) is usually used as a covering for seed trays after sowing, but it can be used in place of compost to fill small pots for plant raising.
If growing tomatoes in this way, it often helps to germinate the seeds first of all (on a few folds of kitchen towel), then transfer them carefully to pots of vermiculite or rockwool plugs just as the root is starting to emerge.
The main difference between using these media and propagation in compost is that the young plants will need very dilute liquid feed right from the start, as there are no nutrients in the vermiculite or rockwool. Before the seeds are transferred, the media will require soaking in the nutrient solution.
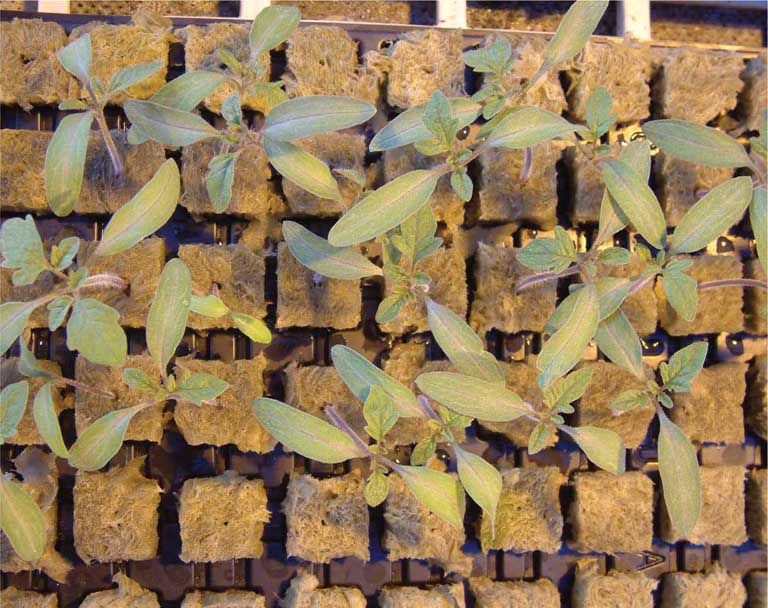
Tomato seedlings propagated in rockwool.