Chapter 8
The Spine
When your back is aching, it’s hard to concentrate or to bring full enthusiasm and energy to whatever your day entails. A few minutes spent with the balls under your back can make the difference between a day that you endure and a day that you enjoy. The techniques described here supplement the basic technique presented in chapter 7, with two balls on the sides of the spine. Use these to treat spot areas of tension and pain, or to integrate your whole spine so that it moves fluidly. It will be sure to change your state of mind and your posture for the better! One student reported, “My spine feels more enlivened than it has ever felt in my entire life!” with a big smile on her face.
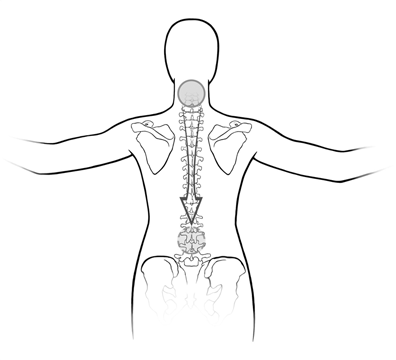
1. The Spine with Three Balls
This technique is gentle, with the pressure spread among three balls of equal size. It’s a good one to do for a quick recharge when you’re under stress, or you’ve been sitting for a long time.
Balls: Three hollow 3˝ or 4˝ balls, either soft or firm according to your preference
Body position: Lying on your back with your legs stretched out or knees bent, arms comfortably by your side. Have a folded towel or small cushion handy in case you need it under your head in the beginning.
Starting position of the balls: Under your upper ribs, arranged in a triangle with the single ball on your spine, and the other two below that one, on each side of the spine. Leave about an inch between balls to allow them to move. Place the folded towel under your head and neck if you need support there.
Action: Take a few minutes to relax onto the balls and settle your energy and your breath. Observe any sensations in your back, ribs, and chest. Then begin to move your spine and ribs very slowly to one side. Take time to feel each small gradation of movement. Then return to center and pause to breathe. Slowly move to the other side, moving only that part of your spine and ribs that touch the balls. Do as many repetitions from side to side as you wish.
Progression: Move the balls down an inch or two on your back, either with your hands or by letting them roll as you shift your body in the direction of your head. Repeat the movements at this new spot. Continue down your entire spine, one spot at a time, until you feel the top of your pelvis in contact with the balls. At any point you can remove the two balls that are side by side, or the single ball above them, in order to feel more pressure from the balls.
Be attentive to your breath, especially when working in the midback, near the diaphragm. Avoid overusing your abdominal muscles, although they will be involved.
Duration: 10–15 minutes
Contraindications: Recent disk herniation or spinal surgery. For scoliosis and spinal stenosis, use your own discretion.
Notes: Remind yourself to take deep breaths often. Because this technique releases tension in the ribs, your breath will change.
Anatomy: Intercostals, deep intervertebral muscles, diaphragm, erector spinae, quadratus lumborum

The Spine with Three Balls
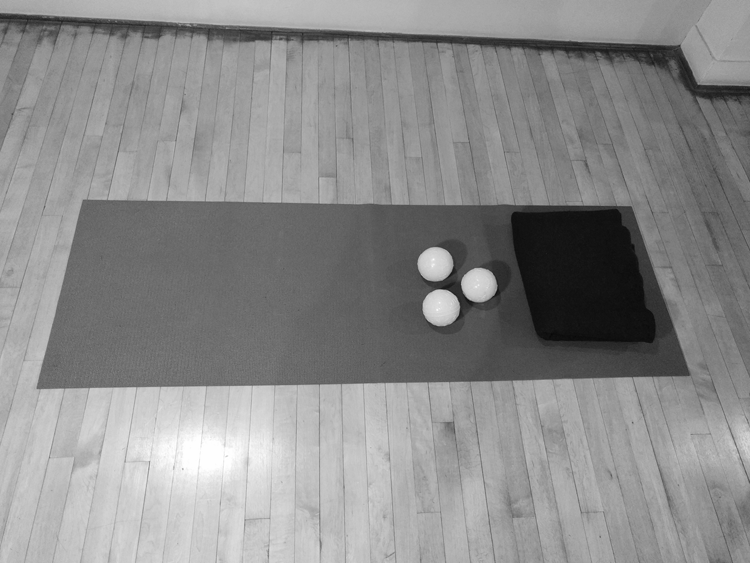
Ball Position for the Spine with Three Balls
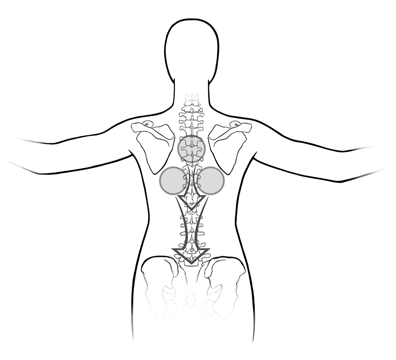
Ball Placement for the Spine with Three Balls
2. The Spine with Two Balls Vertically
In this technique, both balls are directly on the spine. It’s a good one for anyone with kyphosis (rounding of the spine) as it encourages spinal extension but in a gentle way because the pressure is spread between two balls. Use it to open up particular areas of your back that are stuck in a forward bend, as in a slouch or dowager’s hump. In this case, be sure to support your head with a folded towel or blanket as needed.
Balls: Two hollow 4˝ balls of equal size and texture. If you are quite stiff, start with soft balls and progress to firmer ones when you’re ready.
Body position: Lying on your back. Knees can be bent or straight, arms to the sides or overhead. You may want to support your head with a folded towel or blanket. If the pressure on your spine is too intense, choose softer or smaller balls.
Starting position of the balls: Under the upper back, between the shoulder blades, in a vertical line on the spine
Action: Begin by breathing and releasing your body weight into the floor. See if you can avoid bracing yourself against the pressure from the balls; let your spine arch. Once you have settled, begin to move your spine very slowly to one side, breathing continuously. Feel the change in pressure and contact points as you move. Then move back to center and pause to take another breath. Move to the other side, feeling all sensations that accompany the movement. Then continue to move from side to side several more times.
Progression: Move the balls down an inch or two on your back, either with your hands or by letting them roll as you shift your body in the direction of your head. Repeat the movements at this new spot. Continue down your entire spine, working with one area at a time.
Duration: 10–15 minutes
Contraindications: Recent disk herniation or spinal surgery. For scoliosis and spinal stenosis, try this technique for a session or two, and then evaluate the result.
Notes: Choose balls that give you enough pressure to encourage release but that are not hard enough to cause pain.
Anatomy: Intervertebral segments, including disks, ligaments, fascia, muscles, and tendons, especially interspinales
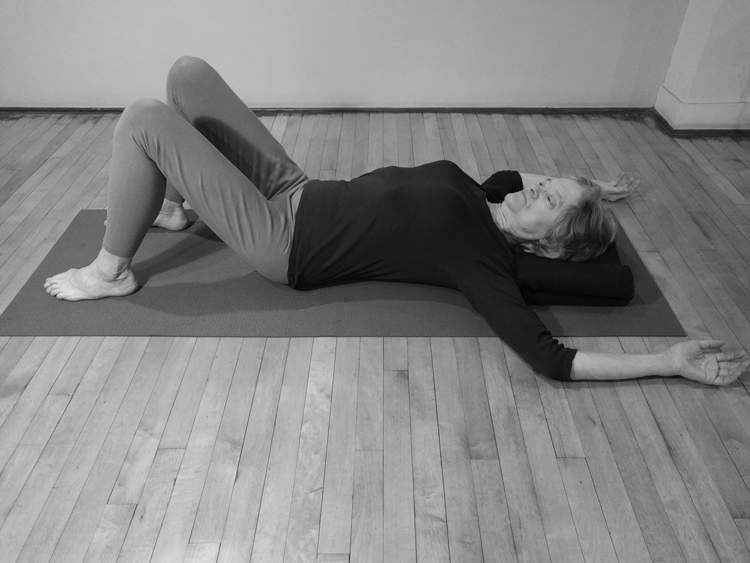
The Spine with Two Balls Vertically

Ball Position for the Spine with Two Balls Vertically
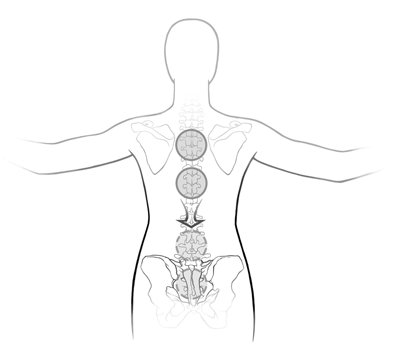
Ball Placement for the Spine with Two Balls Vertically
3. The Spine with One Ball
Now you’ll be using just one ball directly on the spine, so choose carefully according to your preference for pressure. I use this technique as a follow-up to the other spine techniques, to consolidate gains in mobility and segmental freedom.
Ball: One hollow ball, 4˝, 5˝, or 6˝, or the football-shaped ball
Body position: On your back, with knees bent or straight, arms anywhere they’re comfortable, support under your head if needed
Starting position of the ball: Under the upper thoracic spine
Action: Give yourself time to settle, adjusting the placement of the ball as needed and possibly putting support under your head for the first few spots. Then move that part of your spine very slowly to one side, shifting your torso laterally. Linger on that side for a moment, and then slowly return to center. Then move slowly to the other side in the same way. Repeat this sequence as many times as you wish.
Progression: Roll your body over the ball to progress to the next spot, about 2˝ farther down your spine. Stay there and move from side to side several times, slowly and smoothly. If the movement becomes jerky, pause and slow down, thinking of the movement as easeful exploration rather than as a task to be completed. Continue down your spine, ending with the ball under your sacrum.
Duration: 15–20 minutes
Contraindications: Recent disk herniation or spinal surgery. For scoliosis and spinal stenosis, try this technique for a session or two, and then evaluate the result.
Notes: Choose balls that give you enough pressure to encourage release but that are not hard enough to cause pain.
Anatomy: Intervertebral segments, including disks, ligaments, fascia, muscles, and tendons, especially interspinales
The Spine with One Ball
Ball Position for the Spine with One Ball
Ball Placement for the Spine with One Ball
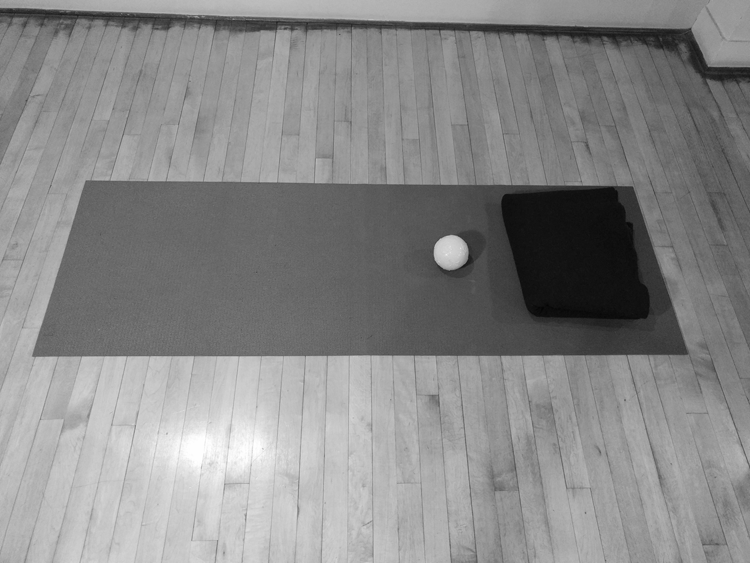
4. The Spine with Two Large Balls, Legs Supported (as in Setu Bandhasana, Bridge Pose, with legs up)
Again, the balls are directly on the spine, but this time we use the large 5˝ balls, which give the feeling of floating. If you want a few minutes of bliss before meditation or sleep, or to recharge after exertion, this is a good one.
Balls: Two large 5˝ hollow balls
Body position: Lying on your back, near a bed, chair, or couch that can support your legs
Starting position of the balls: One under your sacrum, the other under your lower thoracic spine
Action: Once you are settled, make very small and slow movements from side to side.
Progression: The balls can stay in the starting position, or you can make small adjustments to reach nearby spots.
Duration: 10 minutes
Contraindications: Recent spinal or abdominal surgery, vertigo, high blood pressure
Notes: Warning: You may fall asleep!
Anatomy: Sacrum, lumbar and thoracic spinal segments, small intervertebral muscles, lumbar fascia
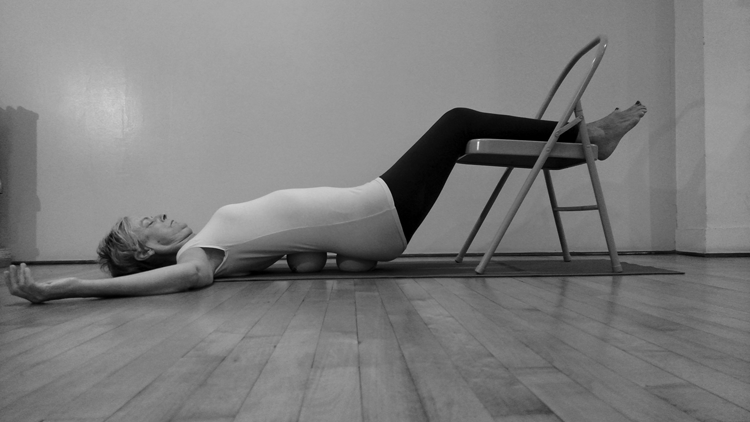
The Spine with Two Large Balls, Legs Supported
These techniques for the spine are especially good for improving posture. It’s common—especially with long hours in front of a computer—for the upper back to become rounded in kyphosis (“hunchback”). Not only can this cause muscular pain and difficulties with breathing, but it is a significant risk factor for osteoporotic fractures. My students have reported that their posture improved by working directly on the spine, and they’ve been better able to strengthen the back with the new awareness that this work brings. Susan, a retired teacher, says this: “I had tremendous tension in my upper back that was causing terrible pain in my neck and shoulders. Doctors wanted to give me a nerve block, but I wanted to try other things first. The ballwork has increased my awareness—I can actually feel the parts of my spine so much more clearly—and my range of motion is so much better. I use the balls regularly to keep the tension from building up again. My upper back and ribs were completely stiff before, and now I can move them and feel them. It is a huge change and very empowering.”
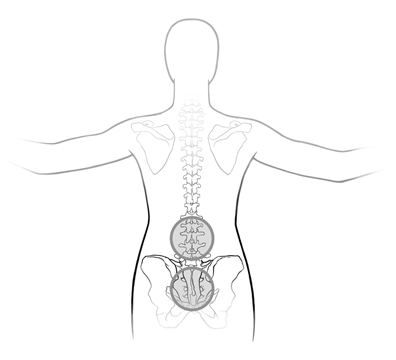
Ball Placement for the Spine with Two Large Balls, Legs Supported