Chapter 10
The Abdomen, Ribs, and Breathing
Although this area of the body may be sensitive, it is worthwhile working on because the results can yield tremendous opening in your spine and your breathing. It’s an area of emotional holding and self-protection, so proceed at your own pace. Release here can increase your sense of groundedness and calm, connecting you to your center.
1. The Abdomen, Diaphragm, and Iliopsoas
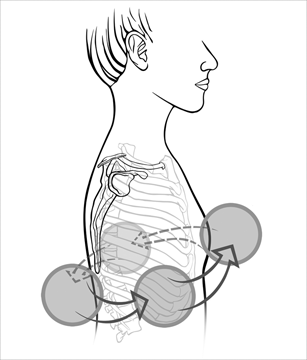
The title of this technique hints that these three muscular structures are very closely connected. The rectus abdominis, a superficial muscle, flexes the spine and can become short with excessive sitting or any exercise that involves spinal flexion, such as crunches or bicycling. When this muscle is shortened and tight, the diaphragm does not have the freedom to move down as we take a breath in. The iliopsoas attaches to the same part of the spine as the crura (tendons) of the diaphragm, making a functional link between hip flexion (walking or sitting) and breathing. Thus we work on them at the same time with the balls.
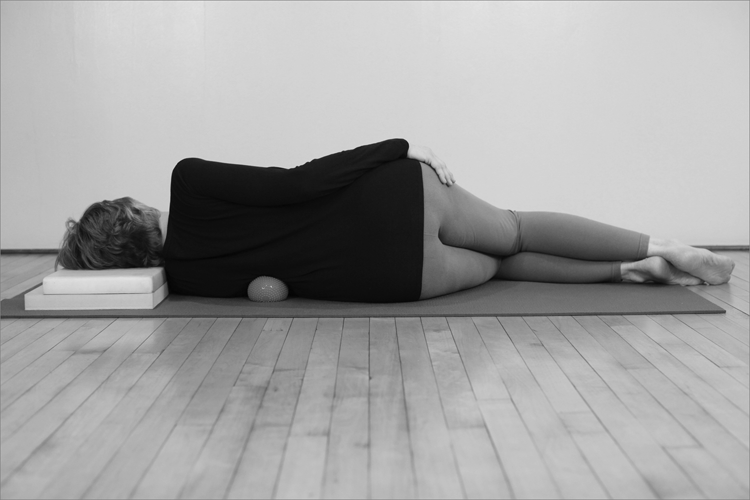
Balls: Two 4˝ or 5˝ hollow balls, optionally one football-shaped ball
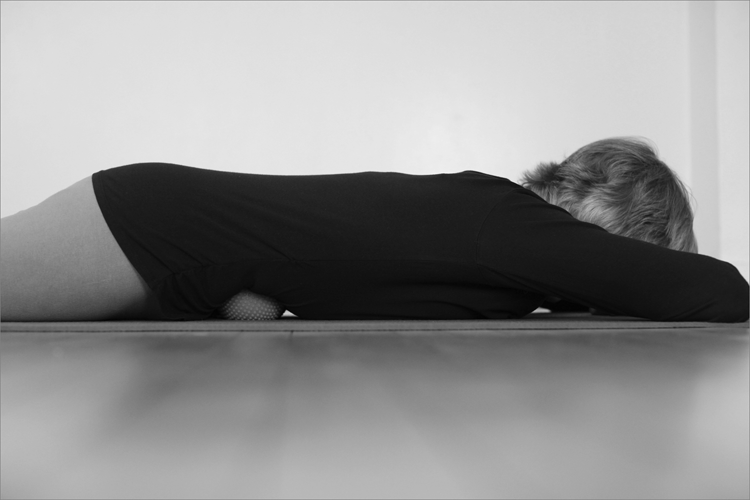
Body position: Lie face down, with padding for your forehead if needed. If this is uncomfortable for any reason, you can work on these areas while standing near a wall.
Starting position of the balls: Begin with the balls under the fronts of your hips for a few minutes to settle. This addresses the lower end of the iliopsoas and gives space in the abdomen for the breath; it’s an accessible way to begin.
Action: Once you have settled, begin to move your hips slowly to one side, then back to center, and then to the other side. Avoid pressing into the balls, but simply allow your body weight to provide the pressure.
Progression: When you are ready, move the balls up above your hip sockets, onto your lower abdomen. Work there for a few minutes, gently shifting from side to side.
Then remove one ball, and begin to slowly roll the remaining ball across your abdomen, staying longer in areas that feel tight. Follow a zigzag pathway to find all the different areas of the abdomen that you can reach with the ball. Move your body over the ball, and occasionally reposition the ball with your hand.
When the ball is near the anterior superior iliac spine (ASIS), you can perhaps feel the psoas as it joins the iliacus muscle.
When the ball is near the lower ribs, you will be as close as possible to the diaphragm muscle. Find places to work all along the lower edge of the ribs.
Duration: 10–15 minutes
Contraindications: Digestive problems, pregnancy, abdominal surgery. Those with irritable bowel syndrome can try a short amount of time on the balls and evaluate the results.
Notes: Try supporting your torso up on your forearms, in a “sphinx” position. This might provide more access to the upper abdomen, more freedom to breathe, and more weight while working on the lower abdomen.
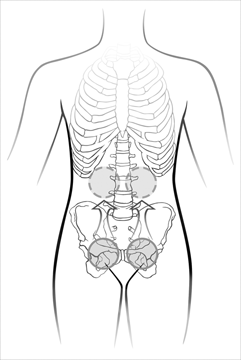
The pathway of the large intestine goes up from the lower pelvis on the right side, then across the abdomen, then down on the left side. To help relieve constipation, follow that pathway with the ball.
The football-shaped ball works well with this abdomen technique.
Anatomy: Rectus abdominis, iliopsoas, iliacus, abdominal obliques, digestive and reproductive organs
The Abdomen, Diaphragm, and Iliopsoas
Ball Placement for the Abdomen, Diaphragm, and Iliopsoas
Martha is a dance teacher who has had tightness in her iliopsoas muscle for her whole career. “When I practice, I can feel my breath deepen and the tension in my body begin to release. For at least twenty years I have been a regular practitioner of this work, and practice at least twice a week. I love the freedom that the work provides. I travel with the balls and, despite a long trip or an unfamiliar bed, the ballwork is there like an old reliable friend to help ease any discomfort—or just to simply deepen the breath in an effort to let go after a long day.”
2. The Side Waist / Obliques
In addition to keeping good strength in the abdominals, we also benefit from maintaining length in the waistline area (meaning everything between the ribs and the pelvis), which is supported by the abdominal oblique muscles. We have two sets of abdominal oblique muscles (external and internal) wrapping around the waistline and connecting to the ribs, the fascia of the navel area, the fascia of the lumbar spine, and the pelvic rim. Their tone supports the lumbar spine and the abdominal organs, but excessive tightness here can hamper breathing, digestion, and lumbar mobility. Those who sit for many hours a day are prone to collapse and shortening in this area, and ballwork can reestablish spaciousness in this often forgotten part of the body.
Ball: One 4˝ or 5˝ ball, which can be soft, medium, or firm as you wish
Body position: Lying on your side, with adequate support for your head
Starting position of the ball: On the side waist, ideally free of the lower ribs and pelvic bones
Action: After an initial adjustment time to get used to the position and the pressure of the ball, do small movements forward and back. You can also turn slightly toward the floor, and then upward, to access different spots on the abdominal muscles.
Repeat on the other side.
Progression: If you have room to move the ball either up or down, you can find more areas to work with.
Duration: 5–10 minutes per side
Contraindications: Recent meal, recent abdominal surgery, intestinal irritability
Notes: Be sure to arrange the rest of your body comfortably with support for your head and possibly for your upper leg.
Anatomy: Digestive organs, internal oblique, external oblique, transversus abdominis, edge of quadratus lumborum
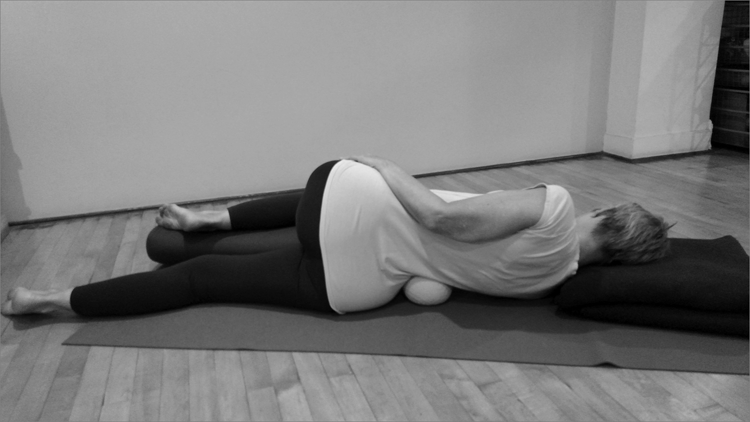
The Side Waist / Obliques
3. Around the Ribs
Our ribs move constantly as we breathe—but how free are they for this movement? How easy is it for you to take a deep, satisfying breath? Do your ribs feel heavy and stiff, or light and mobile? It’s amazing how quickly breathing difficulties can escalate into mental stress, and vice versa. The nervous system responds very quickly to changes in our breathing patterns. Shortness of breath is not a healthy condition, and yet we often don’t notice it, or we may even assume it’s our normal state. The ribs and lungs can lose their resiliency from inactivity, emotional strain, fatigue, excessive coughing, or other respiratory illness. Ballwork for the ribs brings welcome relief.
Ball: One fairly soft 4˝ ball
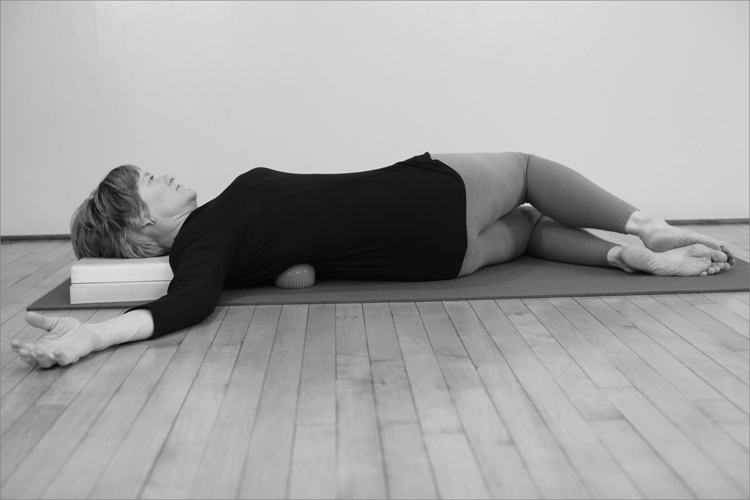
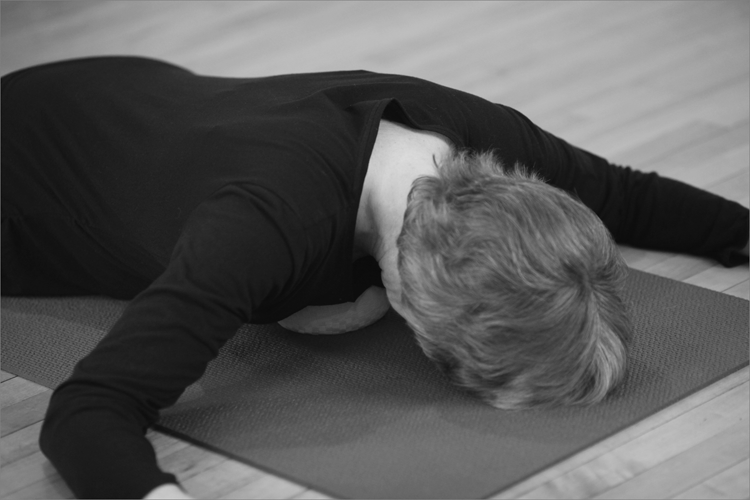
Body position: Lying on your side, with adequate support for your head
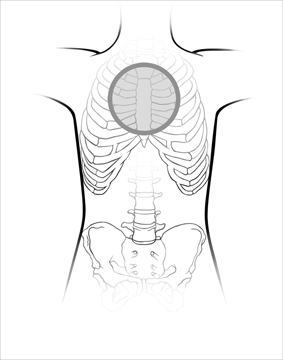
Starting position of the ball: On the spine, just below your shoulder blades
Action: After settling and breathing for a few minutes, begin to make very small movements in any direction. Move slowly, and explore both small side-to-side movements as well as small up-and-down movements. Each small, slow movement will reveal different sensations in your ribs and lungs, so take your time to feel the subtleties.
Progression: Progress around the entire rib cage, with these locations as stopping places: the right back side of the ribs, the right side of the ribs, and the right front side of the ribs. When you get to the center of the front, avoid the xiphoid process (the bottom of the sternum bone) but find a spot either above it on the sternum, or below it on the rectus abdominis muscle. Then continue around onto the left front ribs, the left side ribs, and the left back ribs. Finally, return to your starting place on the spine. When you remove the ball and lie flat, notice your breathing and overall state of being. You can also try some simple rib movements, such as the Cat-Cow movement of curving, arching, and circling the ribs and spine while on your hands and knees.
Duration: 15 minutes
Contraindications: Fractured rib, extreme respiratory distress, pleural infection or effusion
Notes: Rearrange your arms and legs in any way that’s comfortable as you slowly progress around the ribs.
Anatomy: Intercostals, diaphragm, lungs, visceral and lung pleura and fascia
Around the Ribs
Around the Ribs, Side Lying
Ball Placement for Around the Ribs
4. The Sternum
Tension and constriction in the area of the sternum (breast bone) can result from breathing difficulties, emotional strain, shoulder strain, or rib subluxation. This technique will encourage easier movement in the sternum and its connection to the ribs. I recommend combining this technique with the balls on the upper spine and on the pectoralis muscle, which attaches to the sternum. (See the Front Chest with Two Balls, p 108.)
Ball: One medium-soft 4˝, 5˝, or 6˝ ball or the football-shaped ball
Body position: Lying face down, with a small folded towel to support your forehead if you wish. An alternate position is standing against a wall.
Starting position of the ball: Against the middle of the sternum
Action: Spend a few minutes relaxing onto the ball, letting your upper back and chest drape around it. Determine if the ball is the right size and texture for you. Breathe mindfully, feeling the movement of the breath in your ribs and sternum. Then begin to move your sternum very carefully and slowly in any direction. You might start with a side-to-side movement, and then also try an up-and-down movement. While extending your chest forward, you can lift your head or use your arms for support if this feels good.
Progression: Move the ball higher on your sternum and do the same slow movement exploration. Then move the ball lower on the sternum, but not at the very bottom, because the xiphoid process is more delicate than the rest of the sternum. When you are finished, lie for a few minutes face down, then roll over onto your back and feel your breath, your spine, and anything else that might have changed.
Duration: 5–10 minutes
Contraindications: Sharp pain from rib subluxation (as opposed to a dull ache)
Notes: This technique can be quite intense or quite mild, so proceed at your own pace.
Anatomy: Sternum bone, ribs, intercostals, lungs, surrounding fascia
The Sternum
Ball Placement for the Sternum
Judy, a health researcher, suffered a fall that caused sharp, stabbing pains in her ribs. After checking that there was no fracture, she started using the balls very carefully to explore what was happening in her soft tissue. She used a very soft 4˝ ball for a few minutes at a time, slowly coaxing the fascia and muscles to accept the pressure and become more adaptable. She worked around the rib cage little by little and was amazed at how quickly her pain subsided.