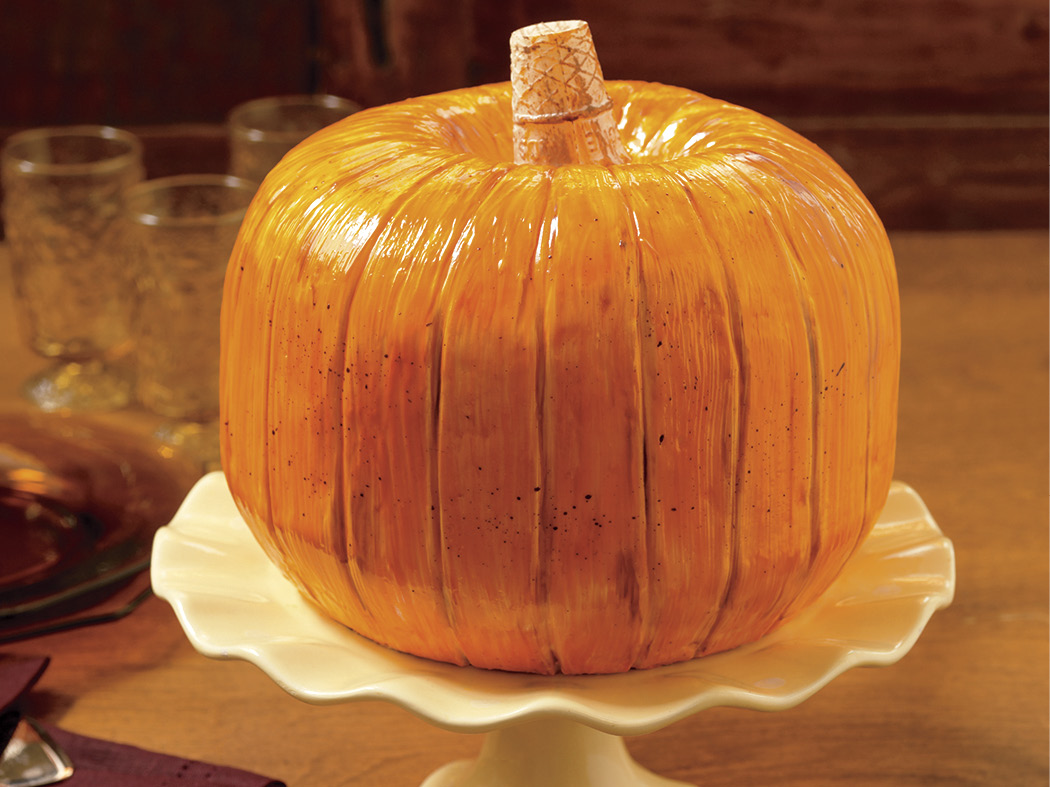
Pumpkin Cake
Surprise Inside!
Makes 24 servings
Adding red and yellow food coloring and cocoa powder to vodka or vanilla extract creates richly colored glazes that can be layered and detailed to look just like a pumpkin.
- 2 recipes Perfect Cake Mix (see recipe) made with devil’s food cake mix, baked in three 8-inch round pans for 30 to 35 minutes
- 3 cans (16 ounces each) plus 1 cup vanilla frosting
- 3 tablespoons vodka or vanilla extract
- Red and yellow food coloring (McCormick)
- 1 teaspoon unsweetened cocoa powder
- 2 mini wafer cones (Joy Kids Cones)
1 Line a cookie sheet with wax paper. Trim the top of 2 of the cakes level (see On the Level). Transfer all 3 cakes to the cookie sheet and place in the freezer for 30 minutes to chill.
2 Place 1 trimmed cake on a work surface. Insert 2 sets of toothpicks around the side of the cake to mark the cake into 3 equal layers. Using the toothpicks as a guide, cut the cake horizontally into 3 layers with a long serrated knife. Repeat with the other trimmed cake.
3 Place the untrimmed cake on the work surface. Starting from the bottom of the cake, use toothpicks to mark 2 layers the same thickness as the other cut layers (the top layer will be thicker and slightly domed). Cut the layers with the serrated knife, using the toothpicks as a guide. Reserve the domed cake for the top of the pumpkin.
4 Transfer 1 of the cake layers to a cardboard cut to fit (see Getting on Base). Spread ⅓ cup of the vanilla frosting on top of the cake and smooth. Place another layer on top, pressing on the cake to level, and spread ⅓ cup of the vanilla frosting on top. Repeat with the remaining 6 layers of the same thickness. Place the thicker layer, domed side up, on top to make 9 layers. Do not frost the dome. Place the cake in the freezer until set, about 30 minutes.

5 Place the chilled cake on the work surface. To create the pumpkin shape, use a cookie cutter or a toothpick to score a 2½-inch circle in the center of the top of the cake. Using a small knife or fork, scoop out cake from inside the marked circle to create a 2½-inch-deep cone shape. Trim 2 inches from both the top and the bottom edges of the cake to round them (see photo). Spread a thin crumb coating of vanilla frosting (see Got Crumbs?) on the top and sides of the cake, filling any gaps, and smooth. Return the cake to the freezer to chill, about 15 minutes.
6 Spread the remaining vanilla frosting over the chilled cake in vertical strokes, and smooth. To create the pumpkin ribs, press a wooden skewer against the side of the cake, vertically, making indentations every 1½ inches. Return the cake to the freezer to set, about 30 minutes.
7 Tint 2 tablespoons plus 1 teaspoon of the vodka orange with the red and yellow food coloring. Using a small pastry brush and vertical strokes, paint the entire cake with a coat of the orange vodka mixture (see Flavor Painting), smoothing the rib indentations and any frosting flaws as you paint. Darken the remaining orange vodka mixture with additional red food coloring and paint darker strokes, vertically, to create a variegated, glazed skin.
8 Dissolve the cocoa powder in the remaining 2 teaspoons vodka. Use a small craft brush dipped in the cocoa vodka mixture to paint the indentations for the ribs and to shade a few areas on the skin. Dip the tip of a firm pastry brush into the cocoa vodka mixture, hold it near the pumpkin, and run a wooden skewer or fork over the bristles to lightly spritz the cake, dipping again when necessary, to apply a pattern of brown spots.
9 For the stem, brush the sides of the wafer cones with the remaining cocoa vodka mixture. Stack the cones on top of each other. Arrange the stem, open end down, in the center of the cake.
