STEP FOURTEEN
PRACTICAL USES
OF CYLINDERS
IN DRAWING
DIVIDING THE CIRCLE
DRAWING OBJECTS IN PERSPECTIVE
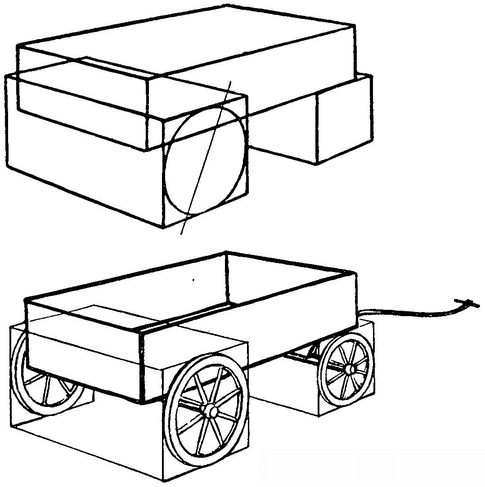
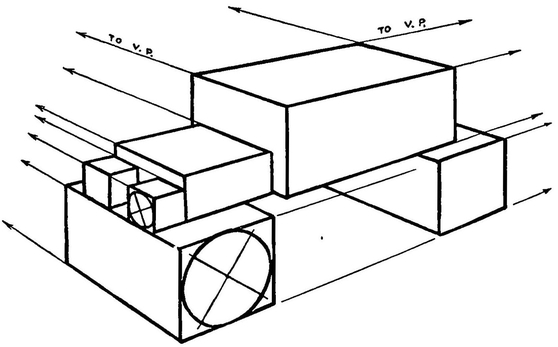
A wagon in the form of blocks
Notice that the ellipse of the wheel tilts like this.
The ellipse is not upright like this.
The long axis of the ellipse is tilted to form a T with the axle of the wagon.
DRAWING AN OLD-FASHIONED AUTOMOBILE
We will now draw an old-fashioned automobile.
The general outline is made up of different-shaped blocks drawn in perspective relationship.

Notice how the ellipses formed by the wheels have their long axes lying in one direction while those of the lights lie in an entirely different direction. Notice that in both cases the long axis forms a T with the center line of the cylinder.
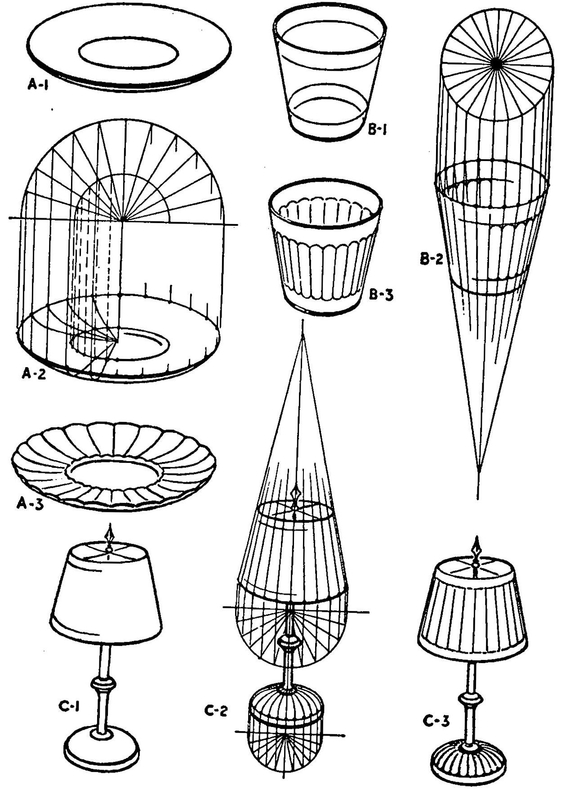
PRACTICAL USES OF CYLINDERS
We discover in drawing that a great many familiar objects are cylinders. Our cooking utensils, chinaware, lamps, vases, bottles, canned goods, automobiles, and pencils all express some use of the cylinder.
The following page shows a few examples of cylinders used in different ways.
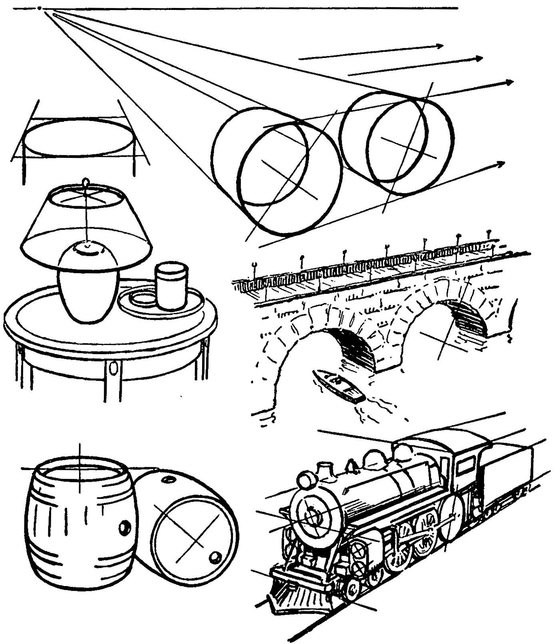
The bridge is made from the two cylinders above.
The boiler of the locomotive, the cylinder-heads, and wheels are made by drawing cylinders.
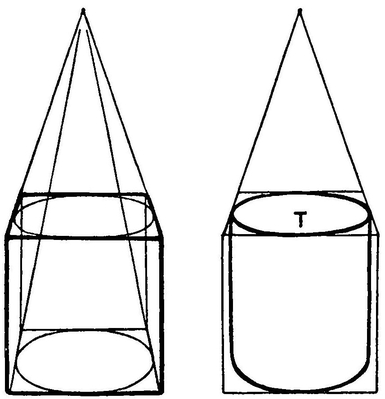
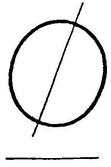
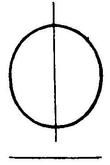
When sketching an upright cylinder it is best to consider it as if it were in a square box with the vanishing point directly opposite (like the railroad tracks). Both sides of the cylinder should be upright and parallel.

When the box is drawn in two-point perspective the cylinder within it remains in the same position as in the one-point sketch. The long axis always forms a T with the upright line of the cylinder.

DIVIDING THE CIRCLE
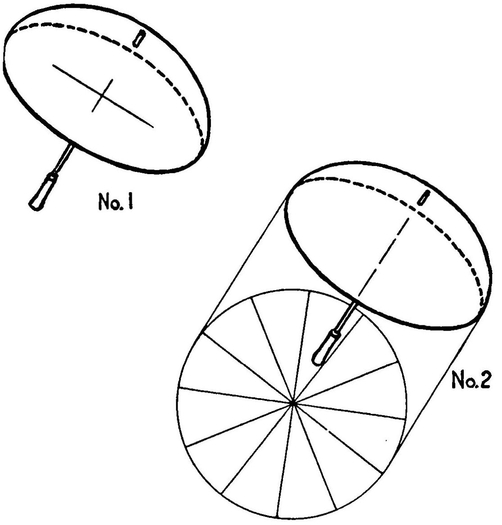
No. 1 is an umbrella without ribs. Now to give it ribs.
Extend the lines parallel to the handle of the umbrella (No. 2) starting from the farthest ends of the ellipse. Fill the space between these two lines with a circle. Divide the circle into equal spaces. The dividing lines represent the ribs of the umbrella—top view.
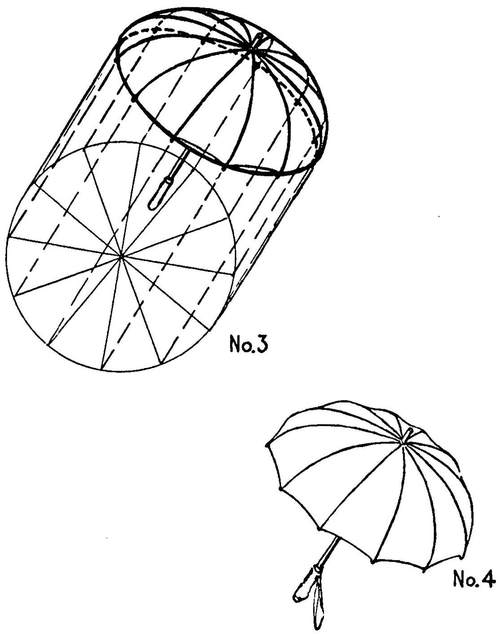
Draw parallel lines from the ends of these lines (No. 3) to the edge of the umbrella. This shows where the ribs start. Draw them around the curved surface of the umbrella so that they cross where the handle protrudes.
No. 4 shows the finished umbrella.
Use this same method to locate the spokes of a wheel, the fluting of a column, the design on a dish. There are some examples on the next page.
REMEMBER
Bricks and mailing tubes have a great deal of importance. They are to be found in most perspective drawings.
The top of an upright cylinders is drawn in the same way regardless of the direction in which the cylinder is turned.
PROBLEMS
Make a sketch of a drain pipe standing on end. Lying on its side.
Make a sketch of a two-wheeled auto trailer.
Make a sketch of a railway tank-car.
Arrange a group of the following objects and sketch them: a round bottle, a spool of thread, a cup and a saucer, a candle in a candlestick.
Make a drawing of an ear of corn with even rows of kernels.
Draw a Doric column.