We have started the store gateway and registry services. Now, we can go to our invoice and notification application folders and run them locally:
> cd invoice
> ./gradlew
This will start the service on port 8081.
Open another Terminal and run the following command:
> cd notification
> docker-compose -f src/main/docker/mongodb.yml up -d
> ./gradlew
This will start the MongoDB server with Docker and run the microservice on port 8082:

Upon starting the application, it will also try to connect to JHipster Registry and register itself. Watch out for the preceding message once your server has started to make sure that it is connected to JHipster Registry.
Alternatively, you can test this via your gateway application. Log in to your gateway application and navigate to Administration | Gateway:
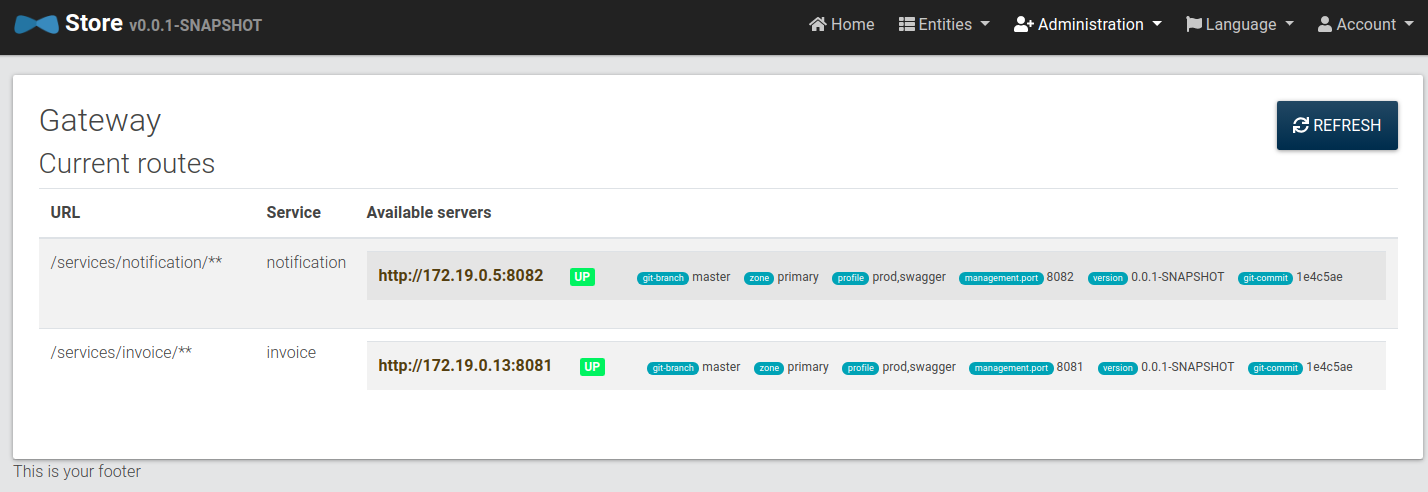
Here, you can see the two microservice applications (INVOICE and NOTIFICATION) that have been booted up. These are available at their respective URLs.
You can also check the JHipster Registry home page to see the registered instances:

Similarly, all the other pages in JHipster Registry will start to show invoice or notification as one of the instances. Using this, we can get their health, configuration, logs, and metrics direct from JHipster Registry:
├── app.jdl
├── invoice
├── notification
└── store
If you have followed along with this book, the preceding code will be the directory structure you will have in the e-commerce-app folder.